BRAugust and a Monowire Bra Design Challenge

BRAugust is a month long photo a-day Instagram challenge hosted by Ying of Tailormade and is a great place for sharing makes and ideas. My favourite posts were the monowire bras of @EvielaLuve and @Miniguinea so I challenged myself to design a bra using a monowire. I am just so pleased with the result.

IMG_6997.jpg

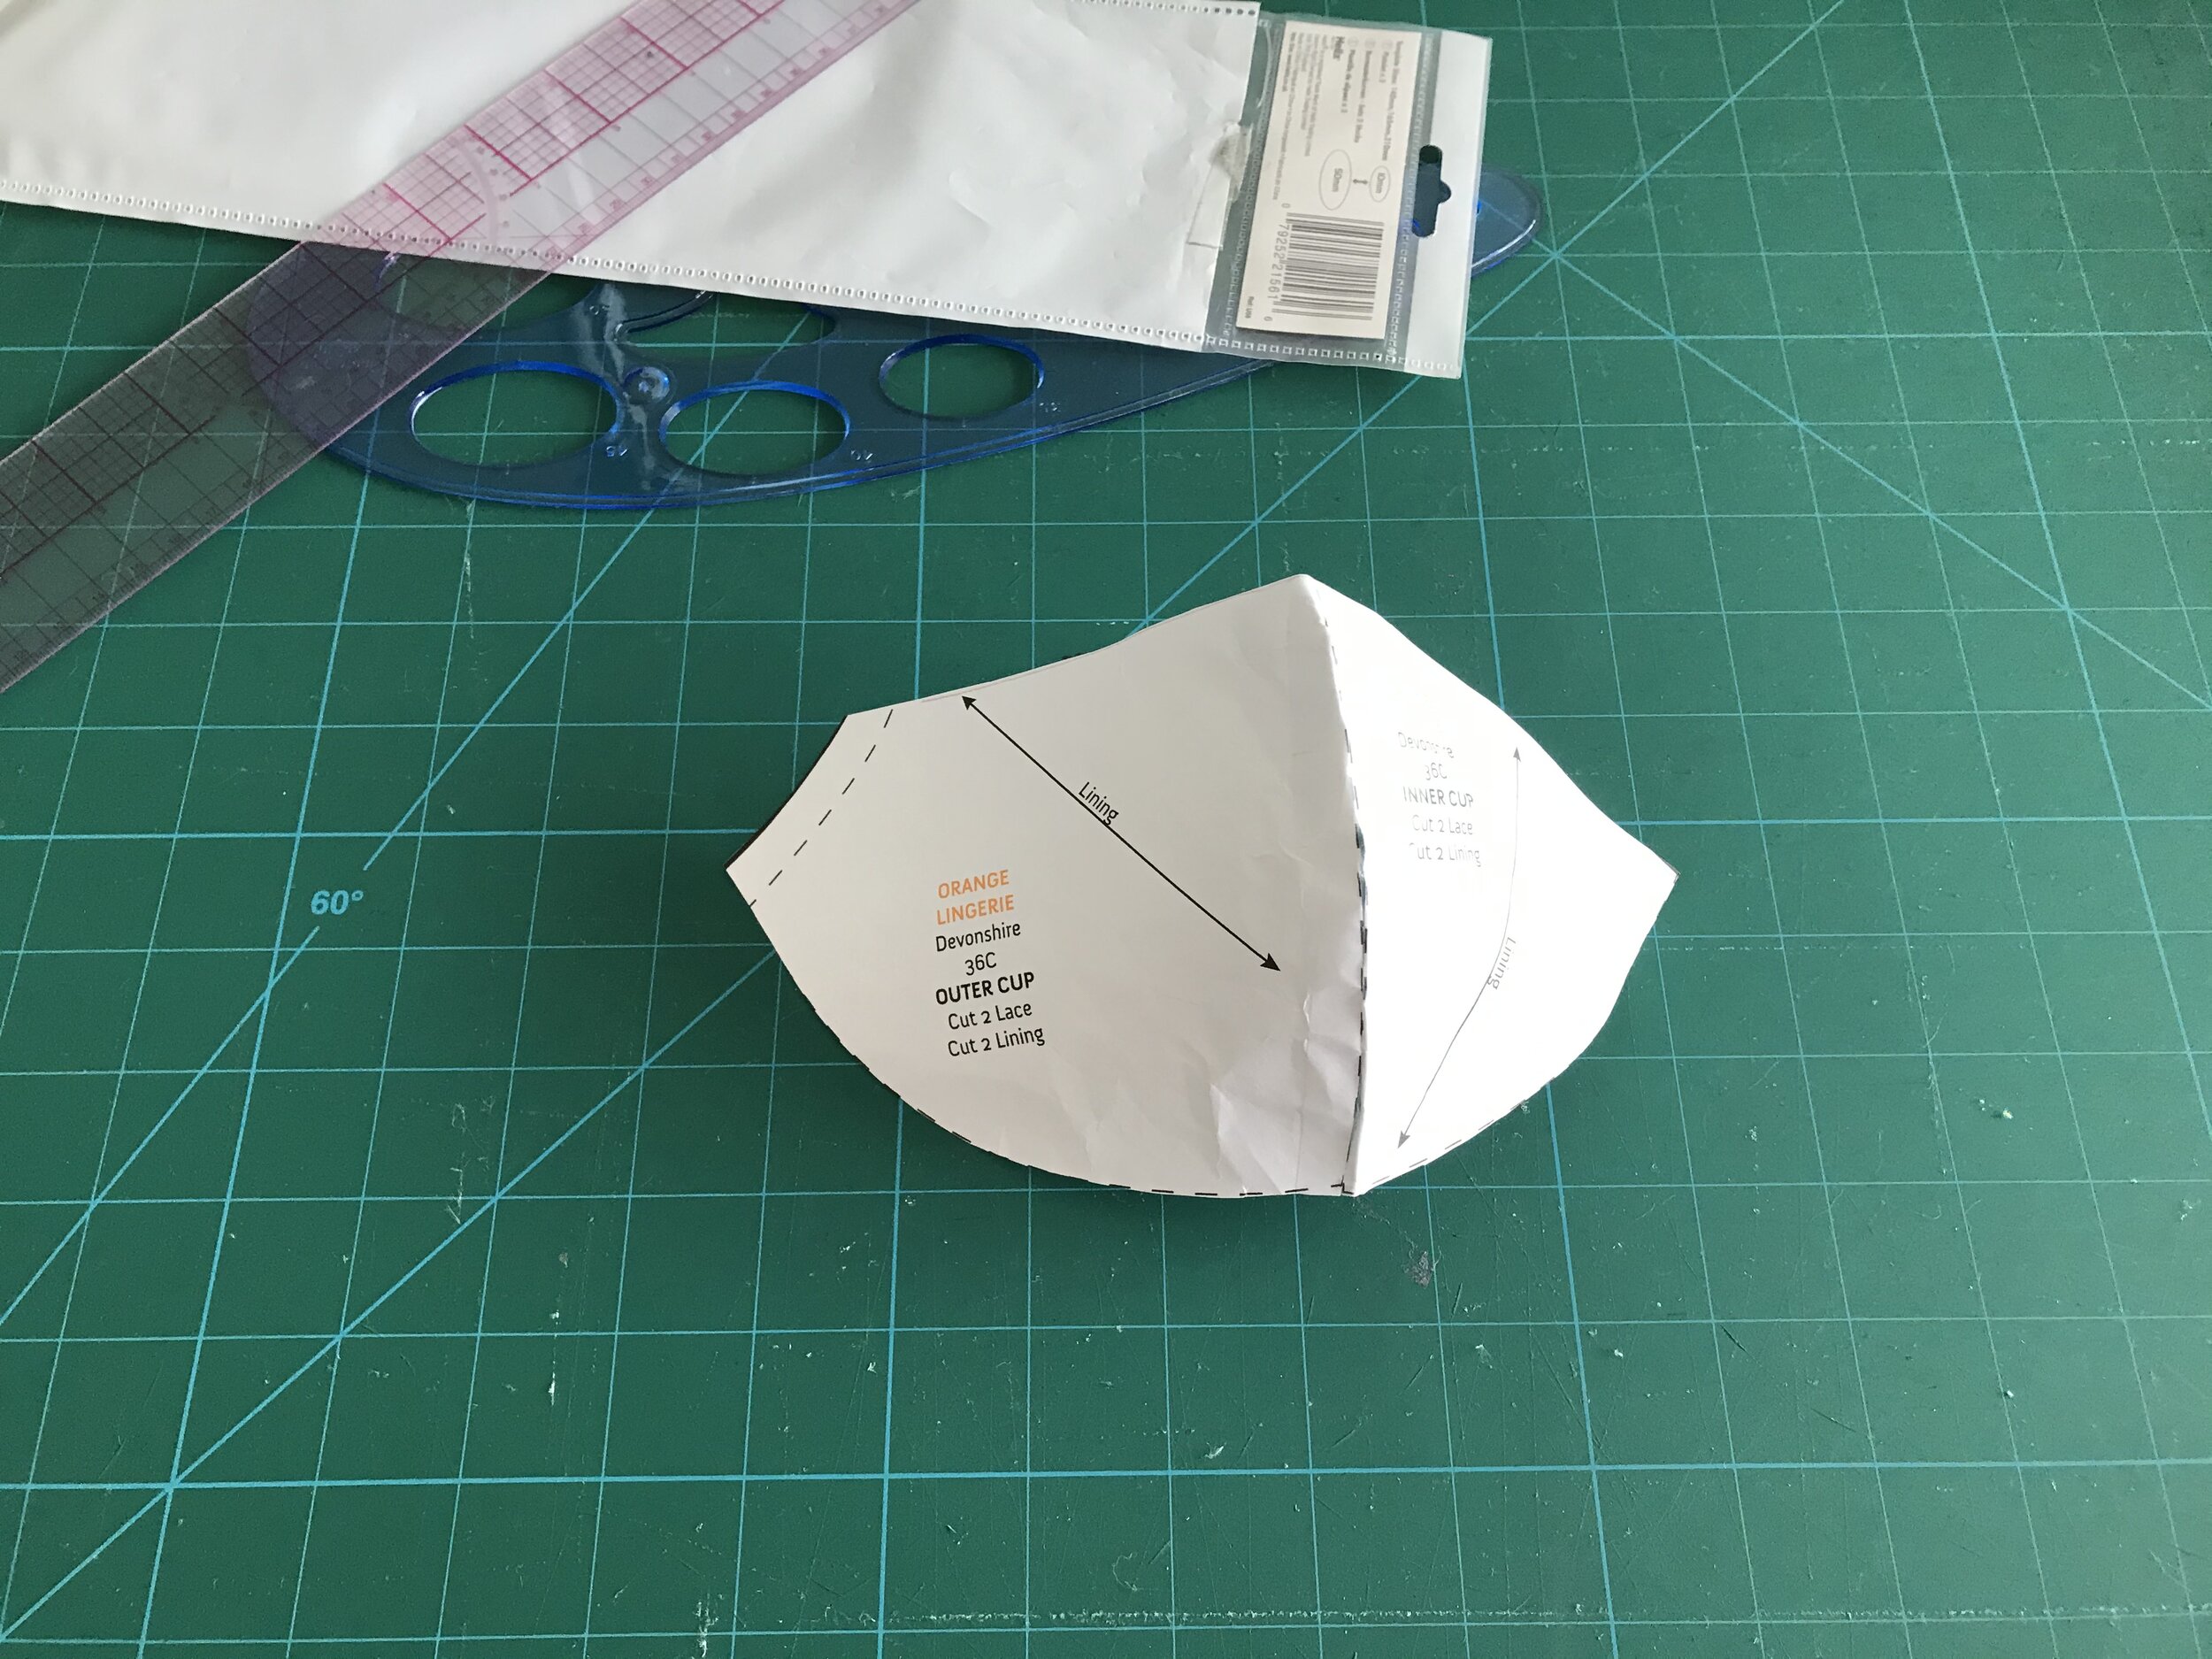
I had made the Madalynne Simplicity 8711 which uses a monowire in a floating bridge and luckily I had ordered an extra monowire and I thought the floating bridge pattern piece would be a great place to start. I loved the idea of the plunge neckline but thought I would need more support at the centre front. Then I remembered the Hari Ito Rafale bra I had made. This is a partial band double layered cup pattern which uses extra long wires for an open centre front. How to combine the two?

IMG_6977.jpg

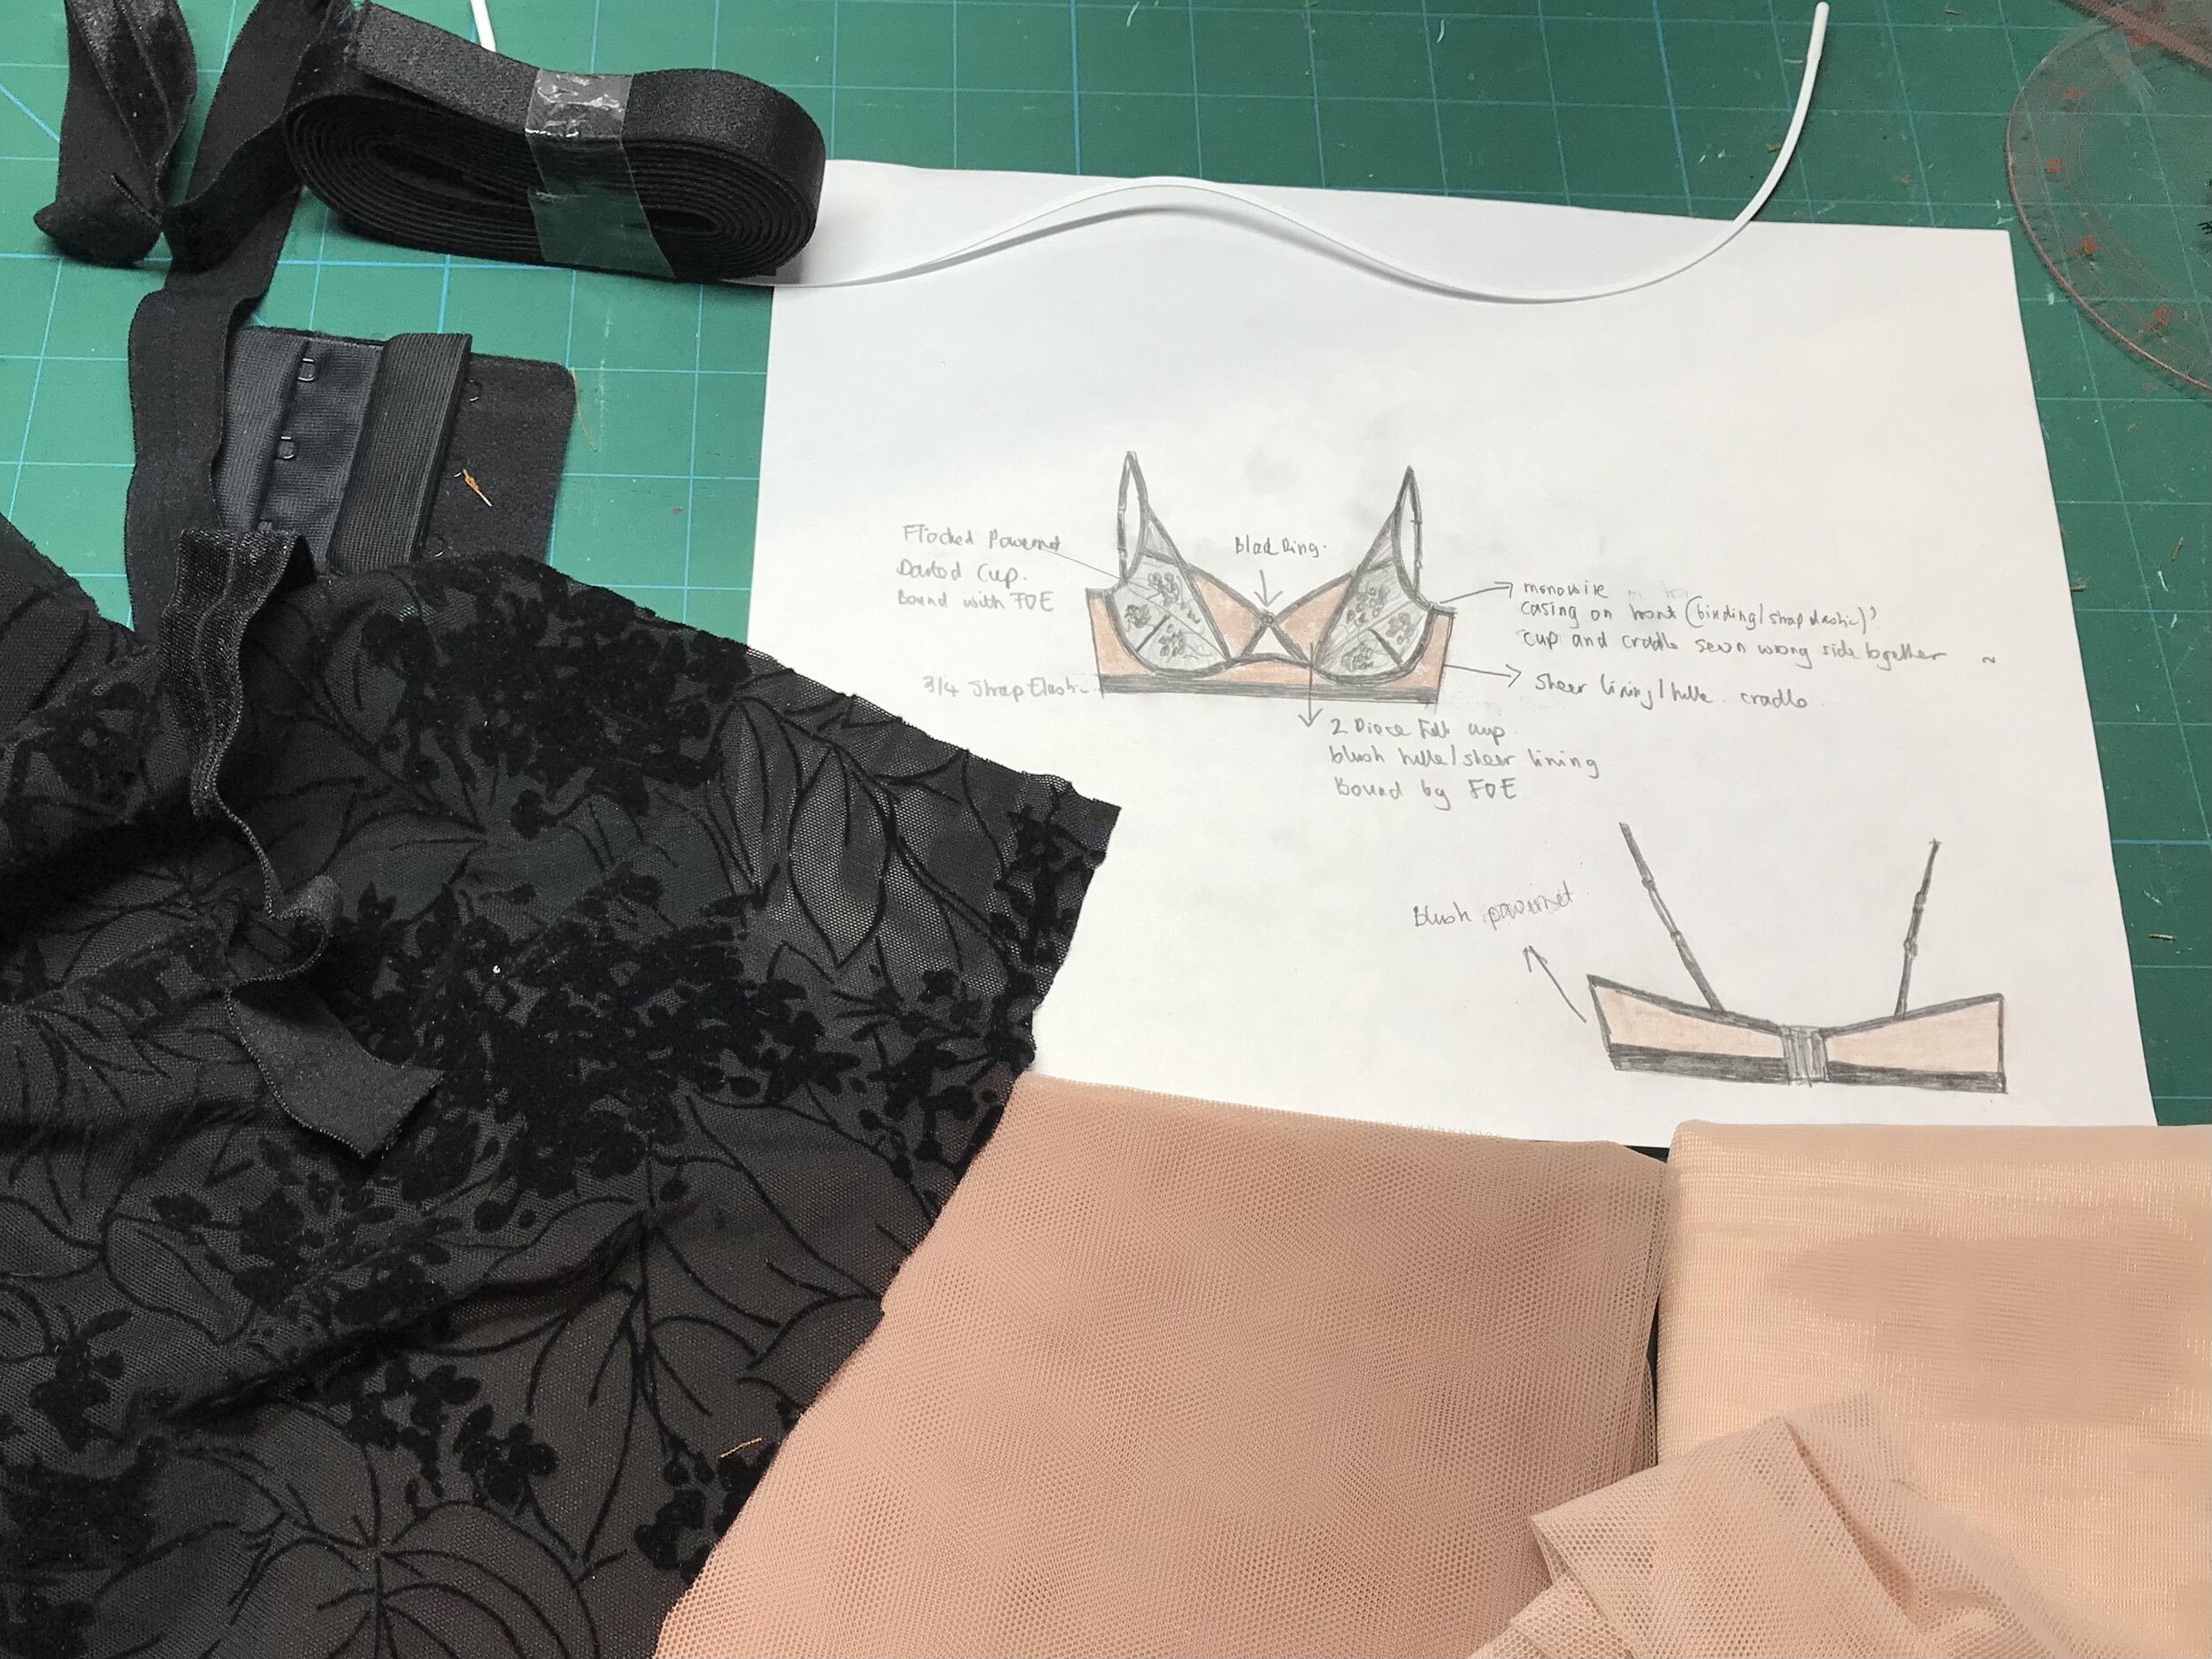
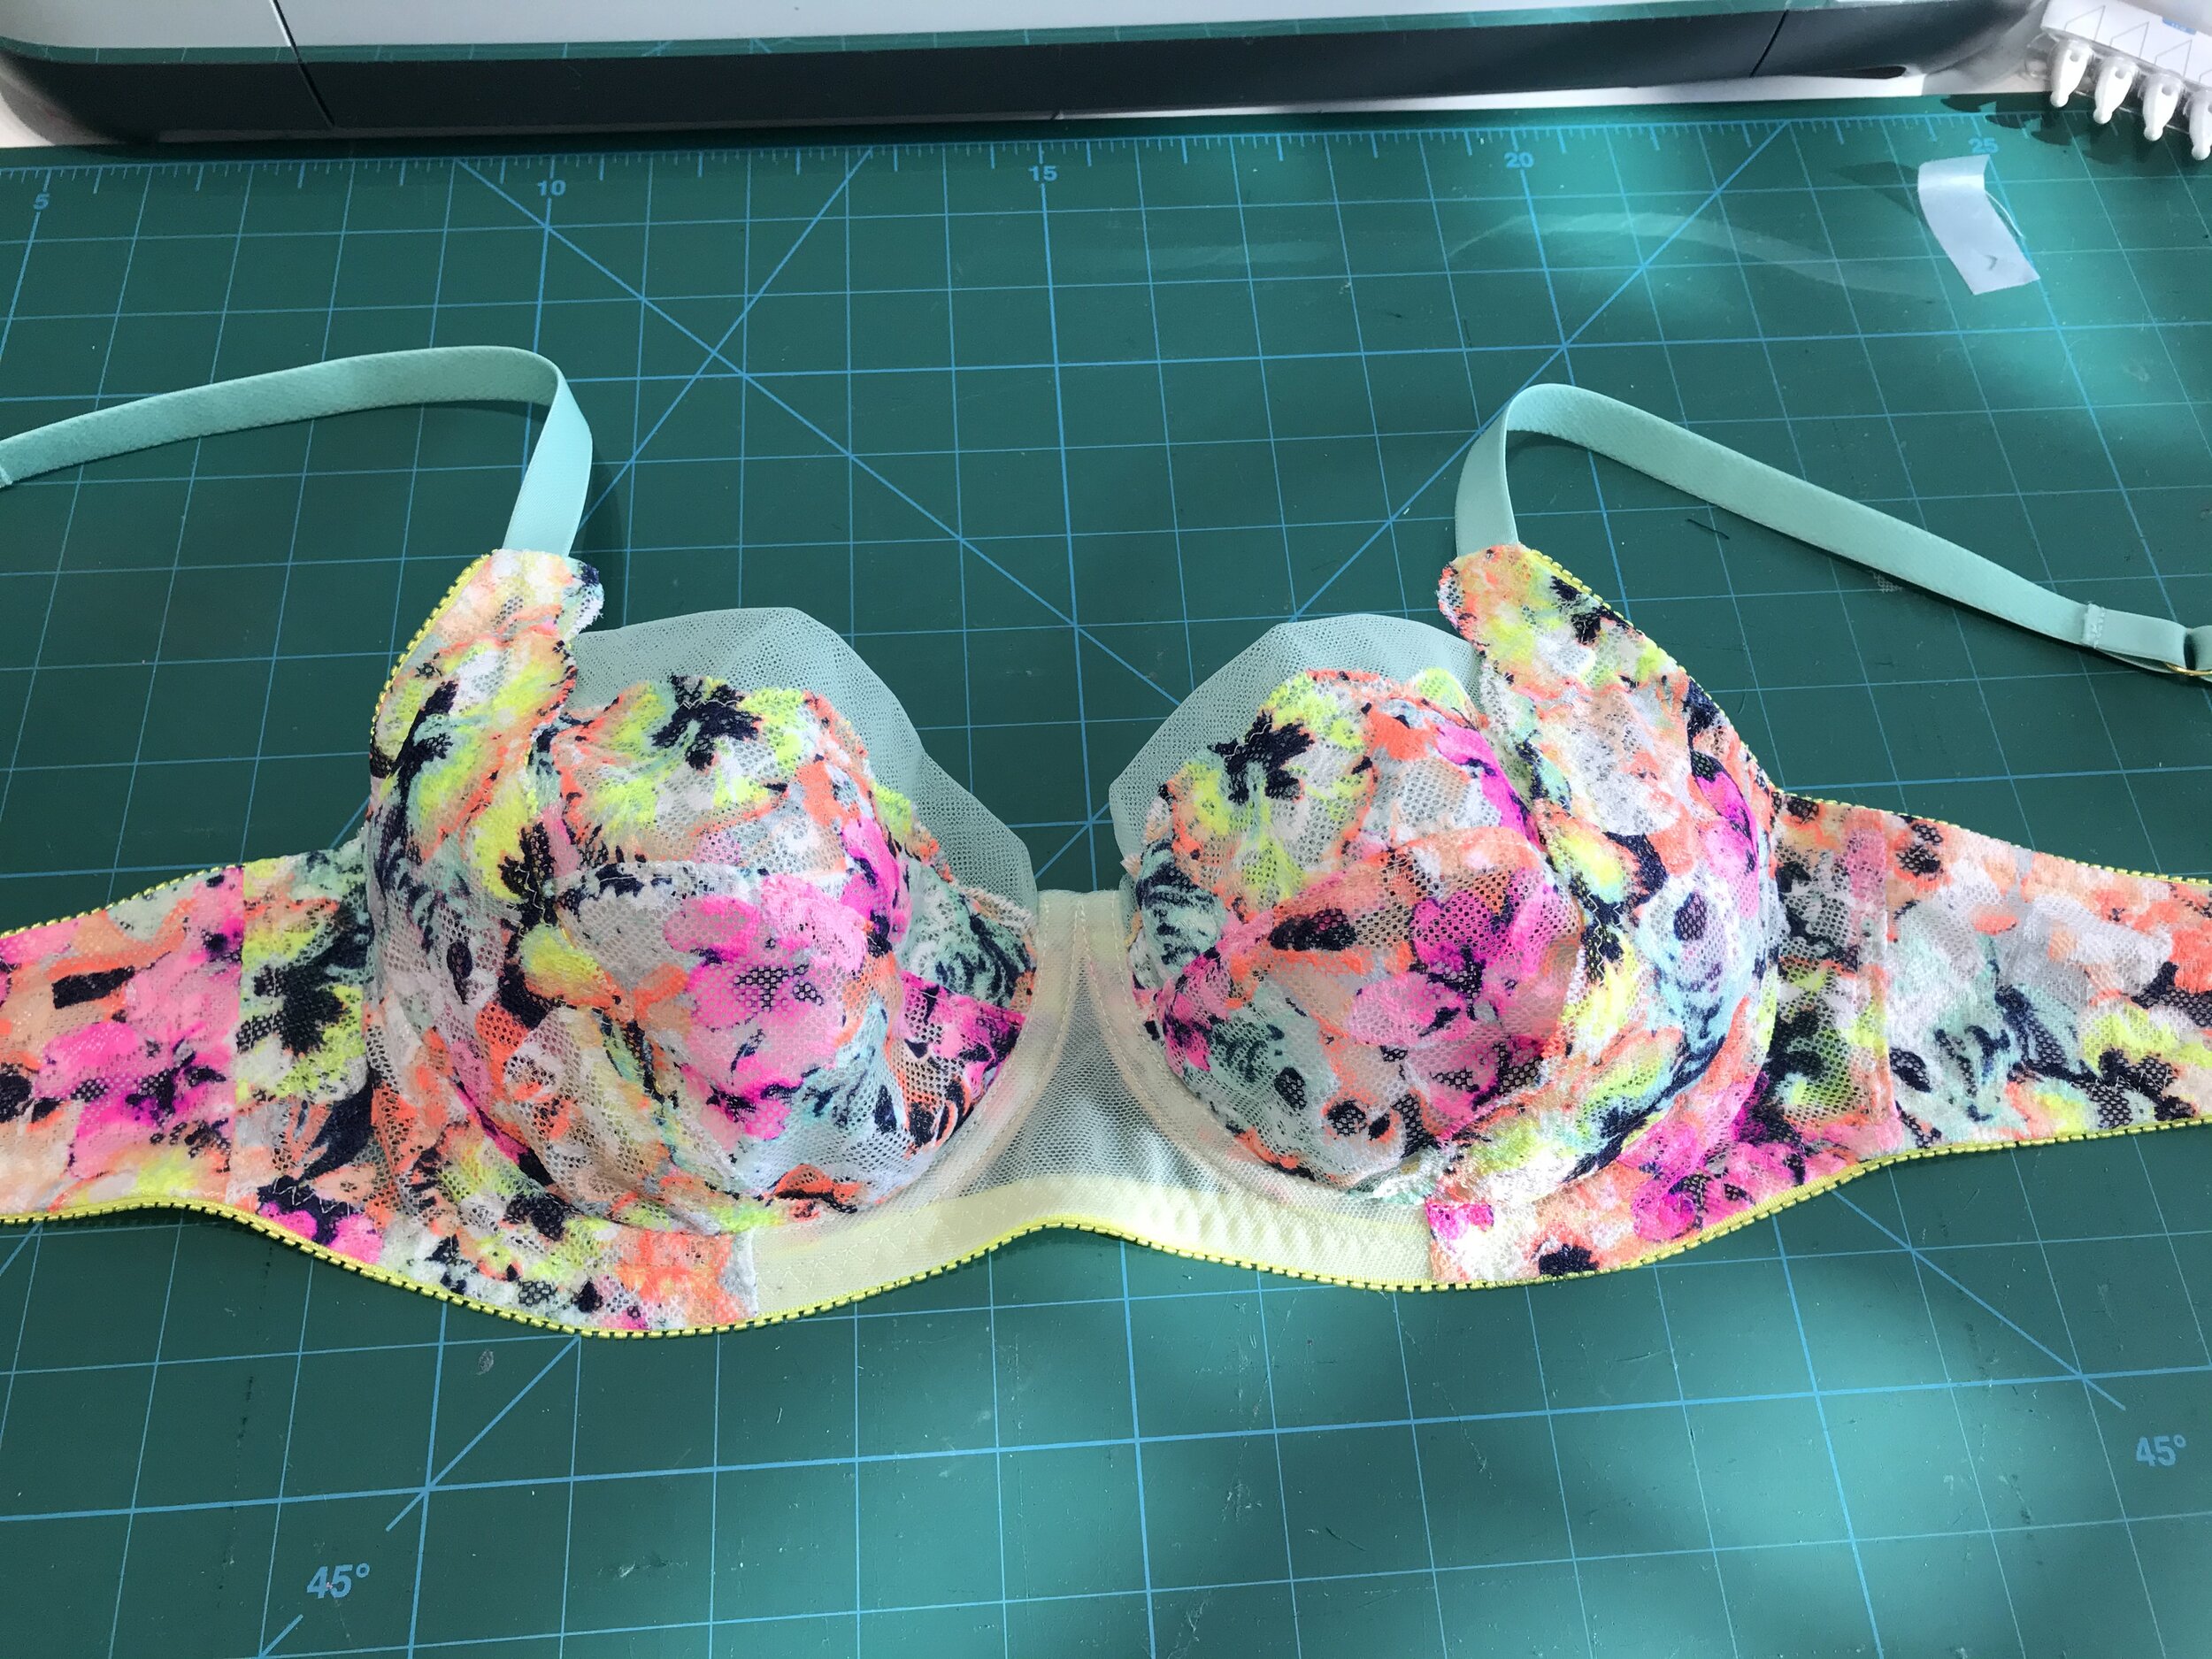
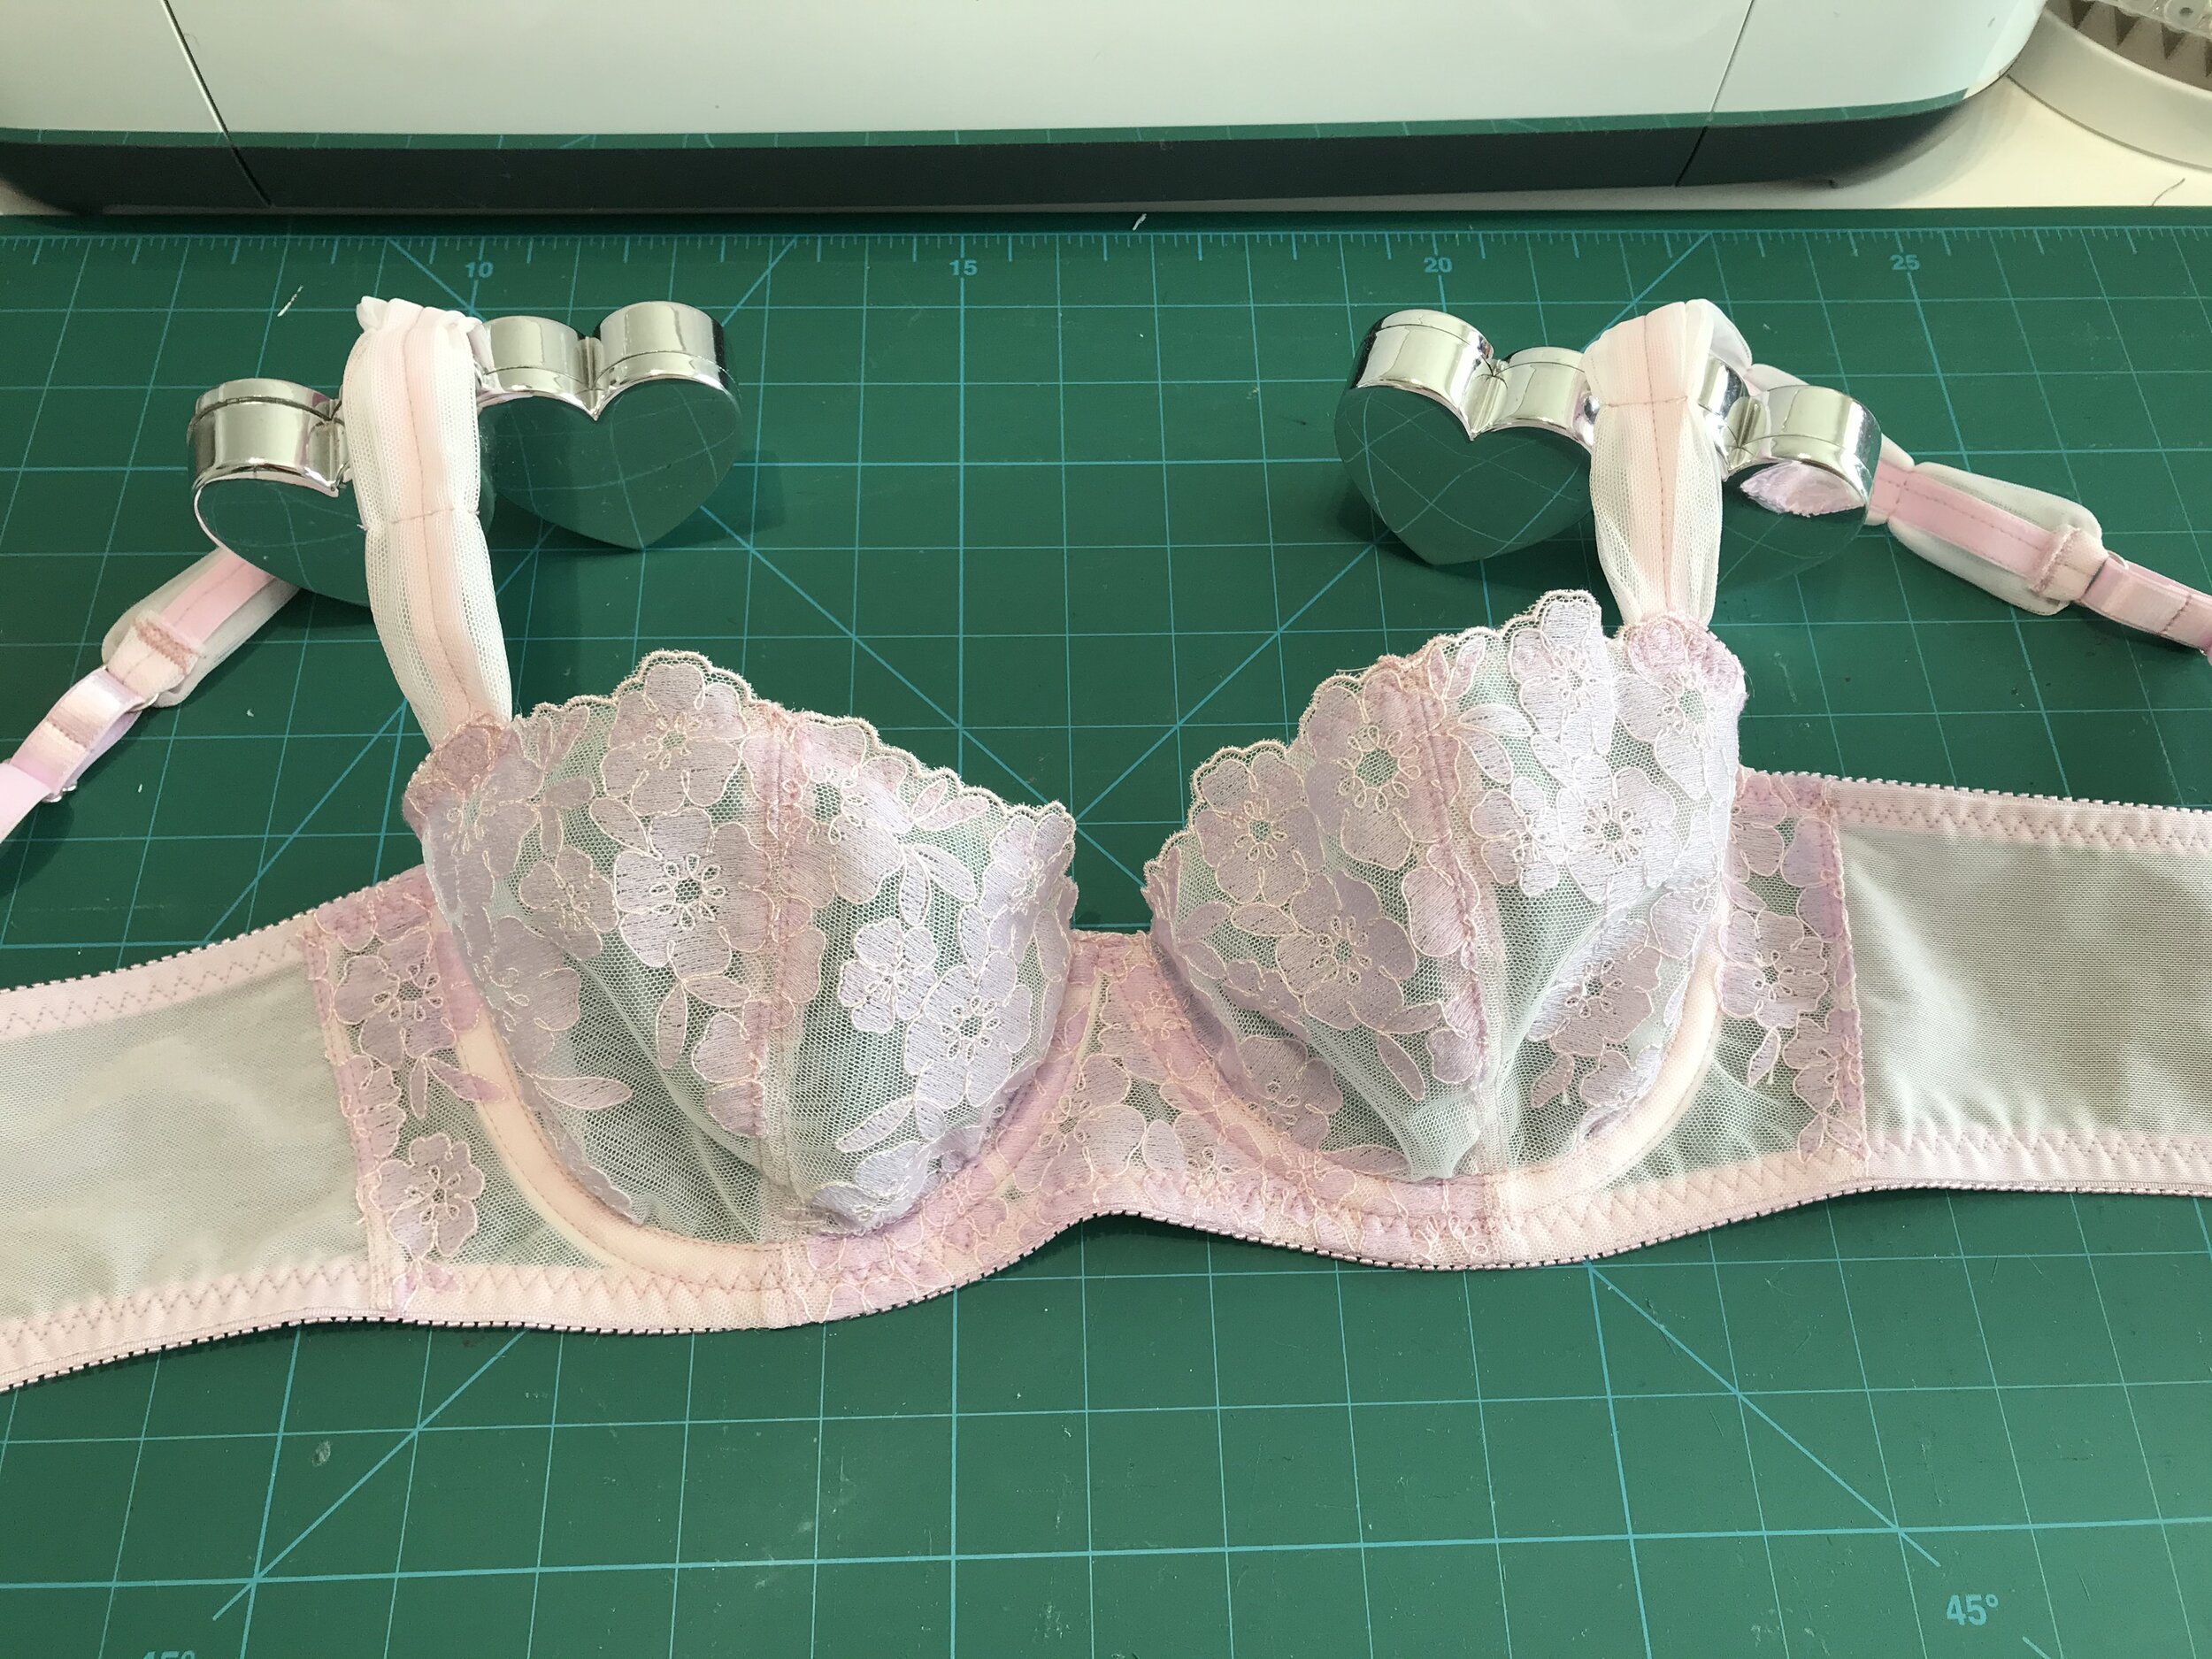
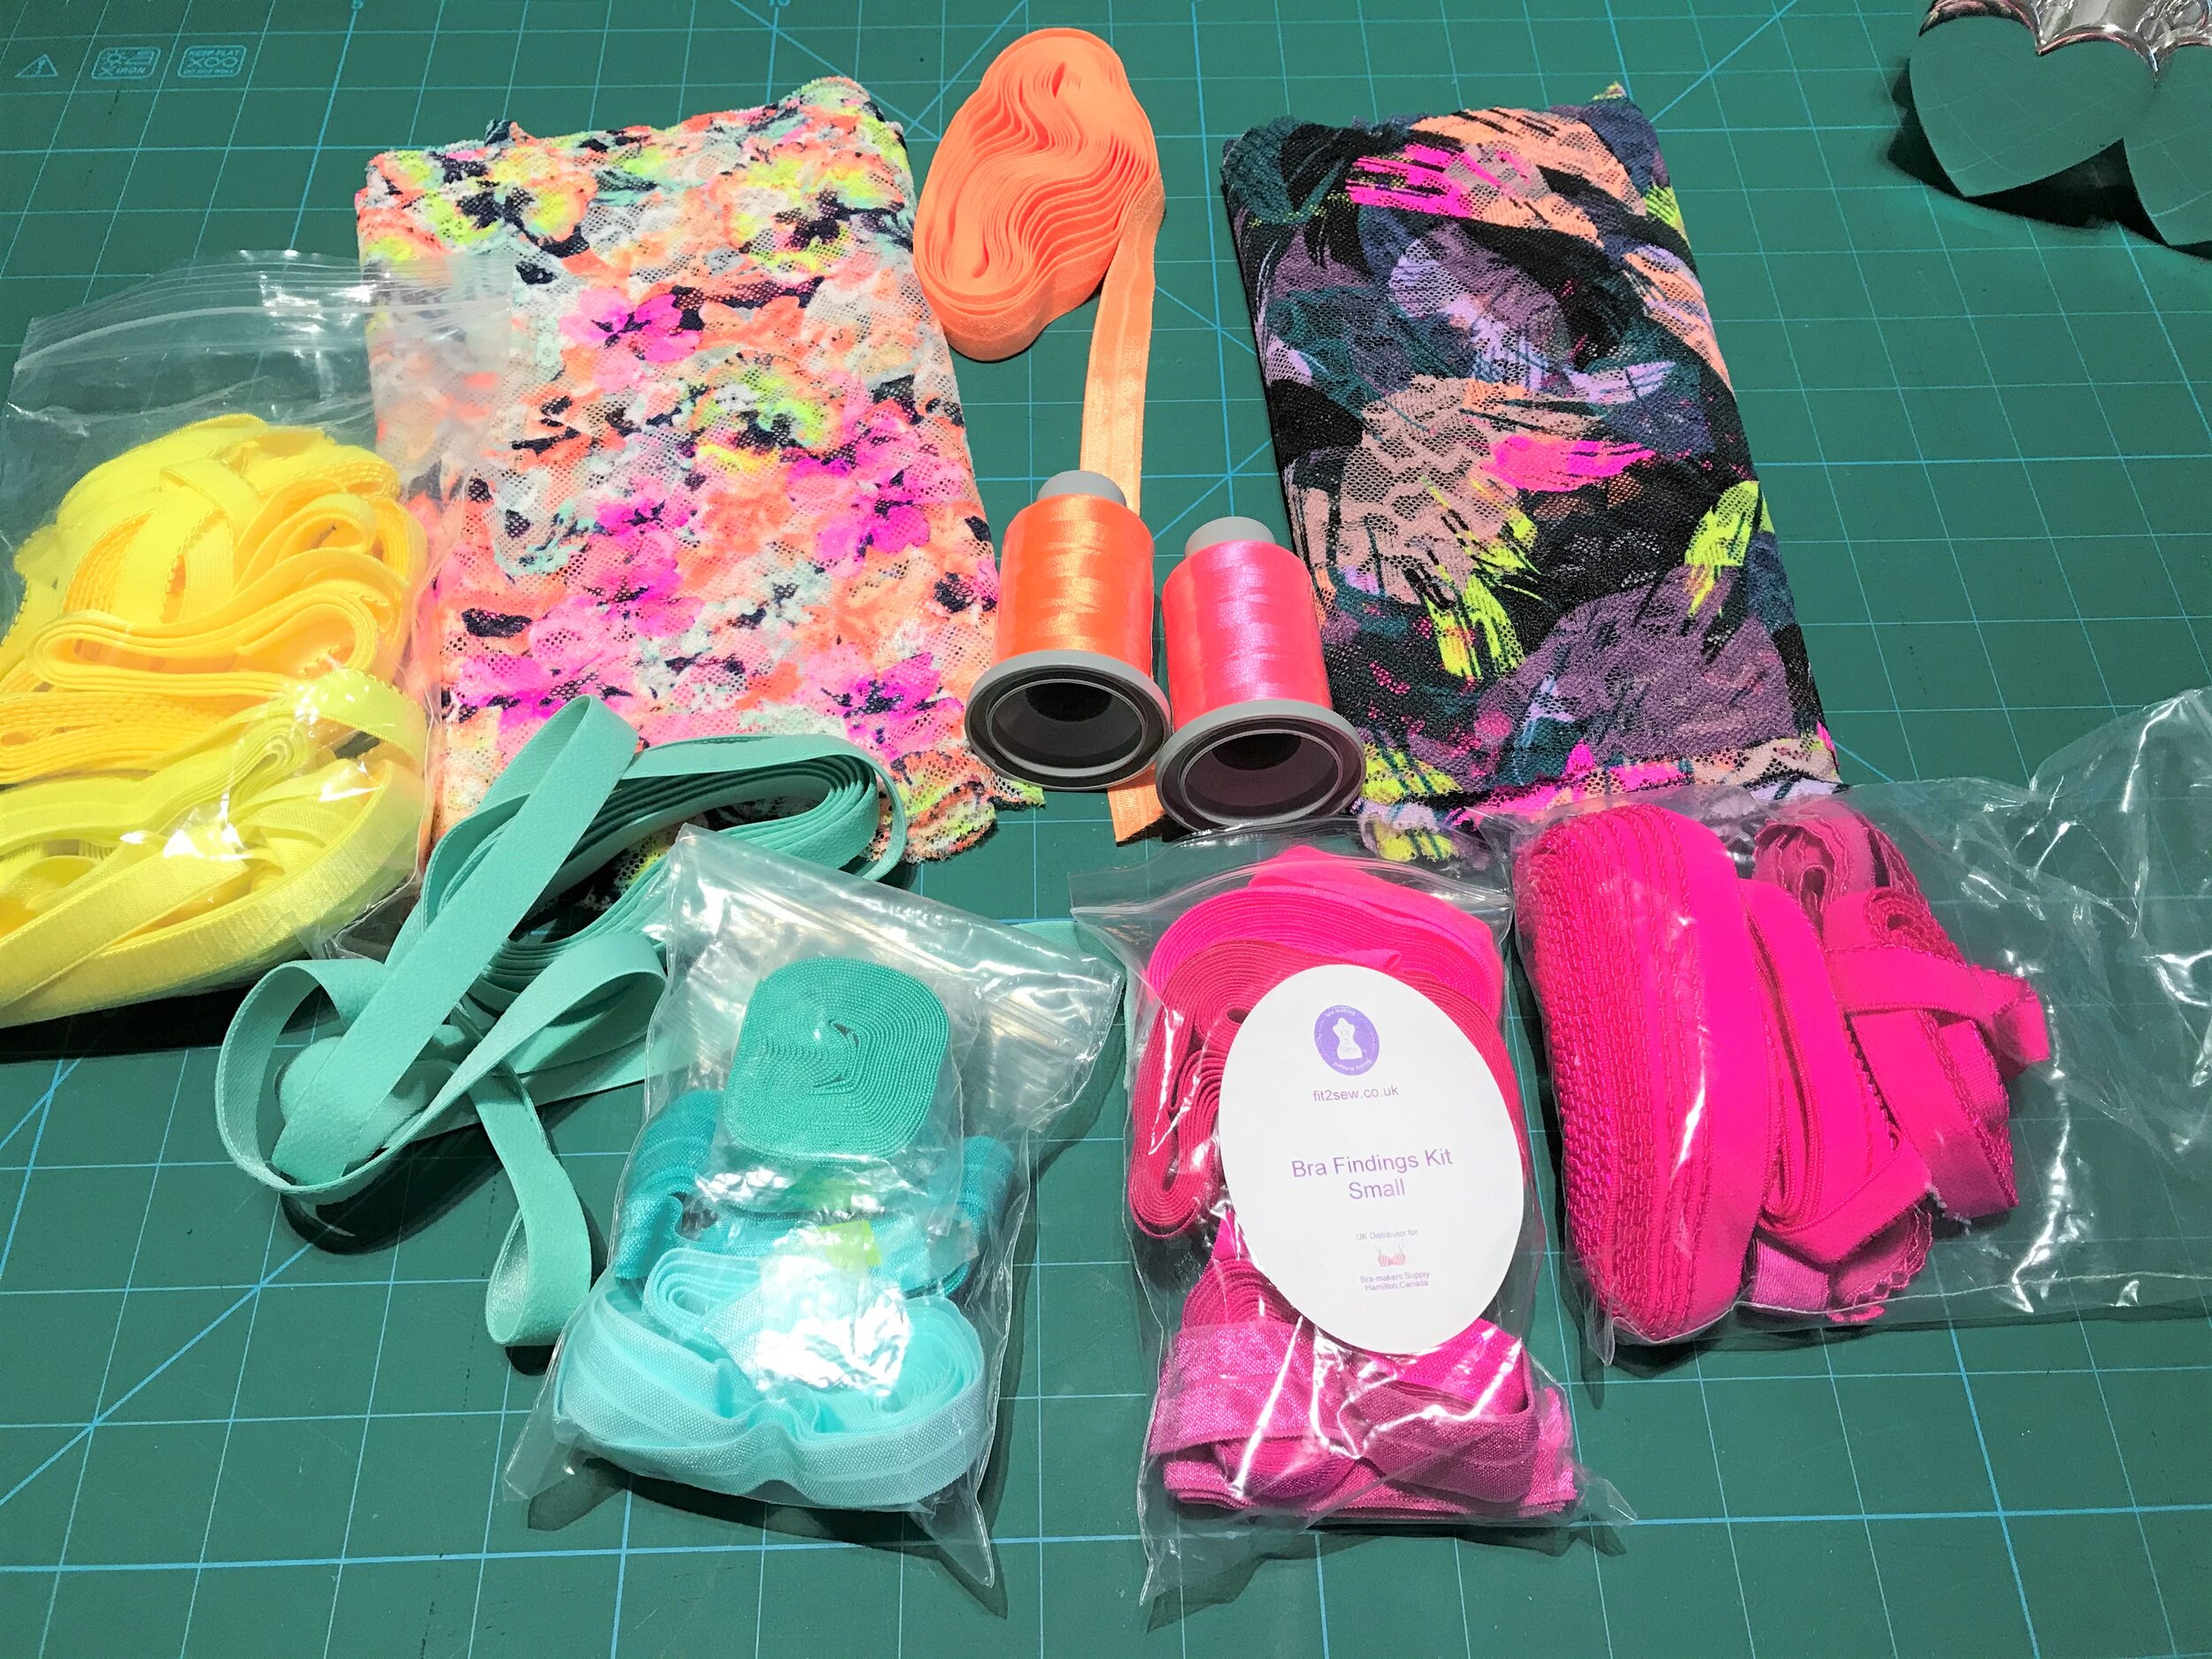
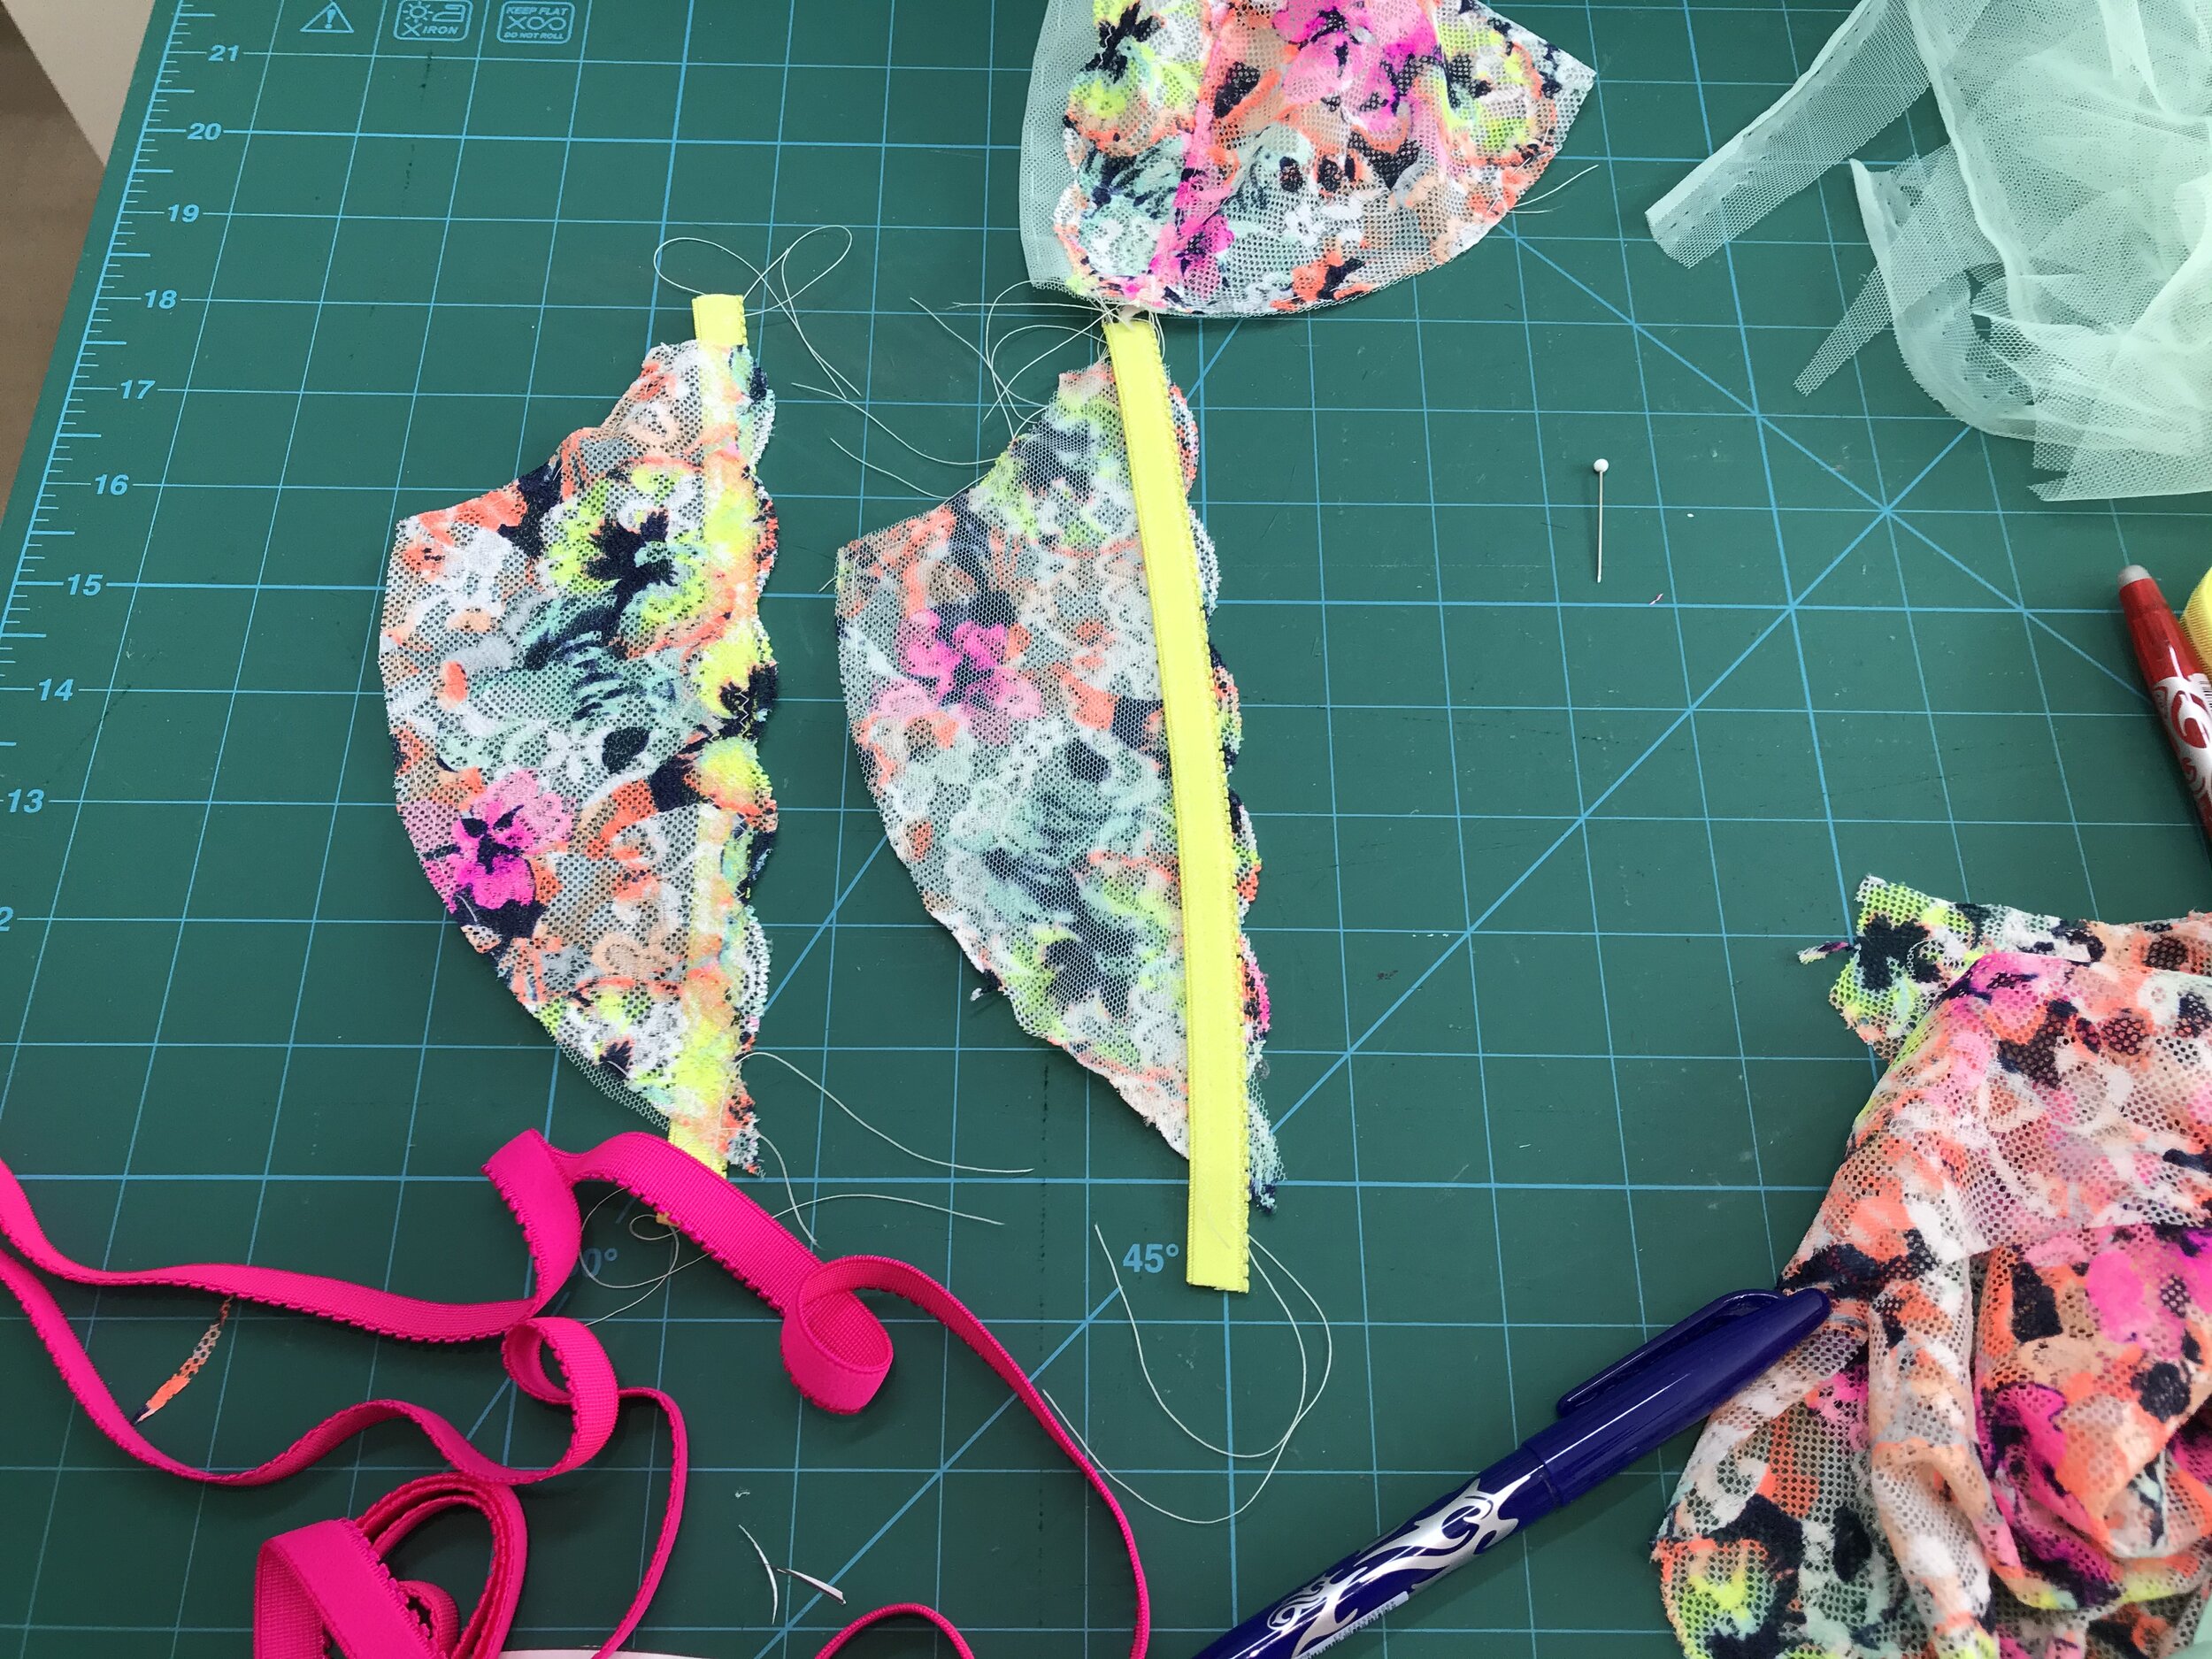
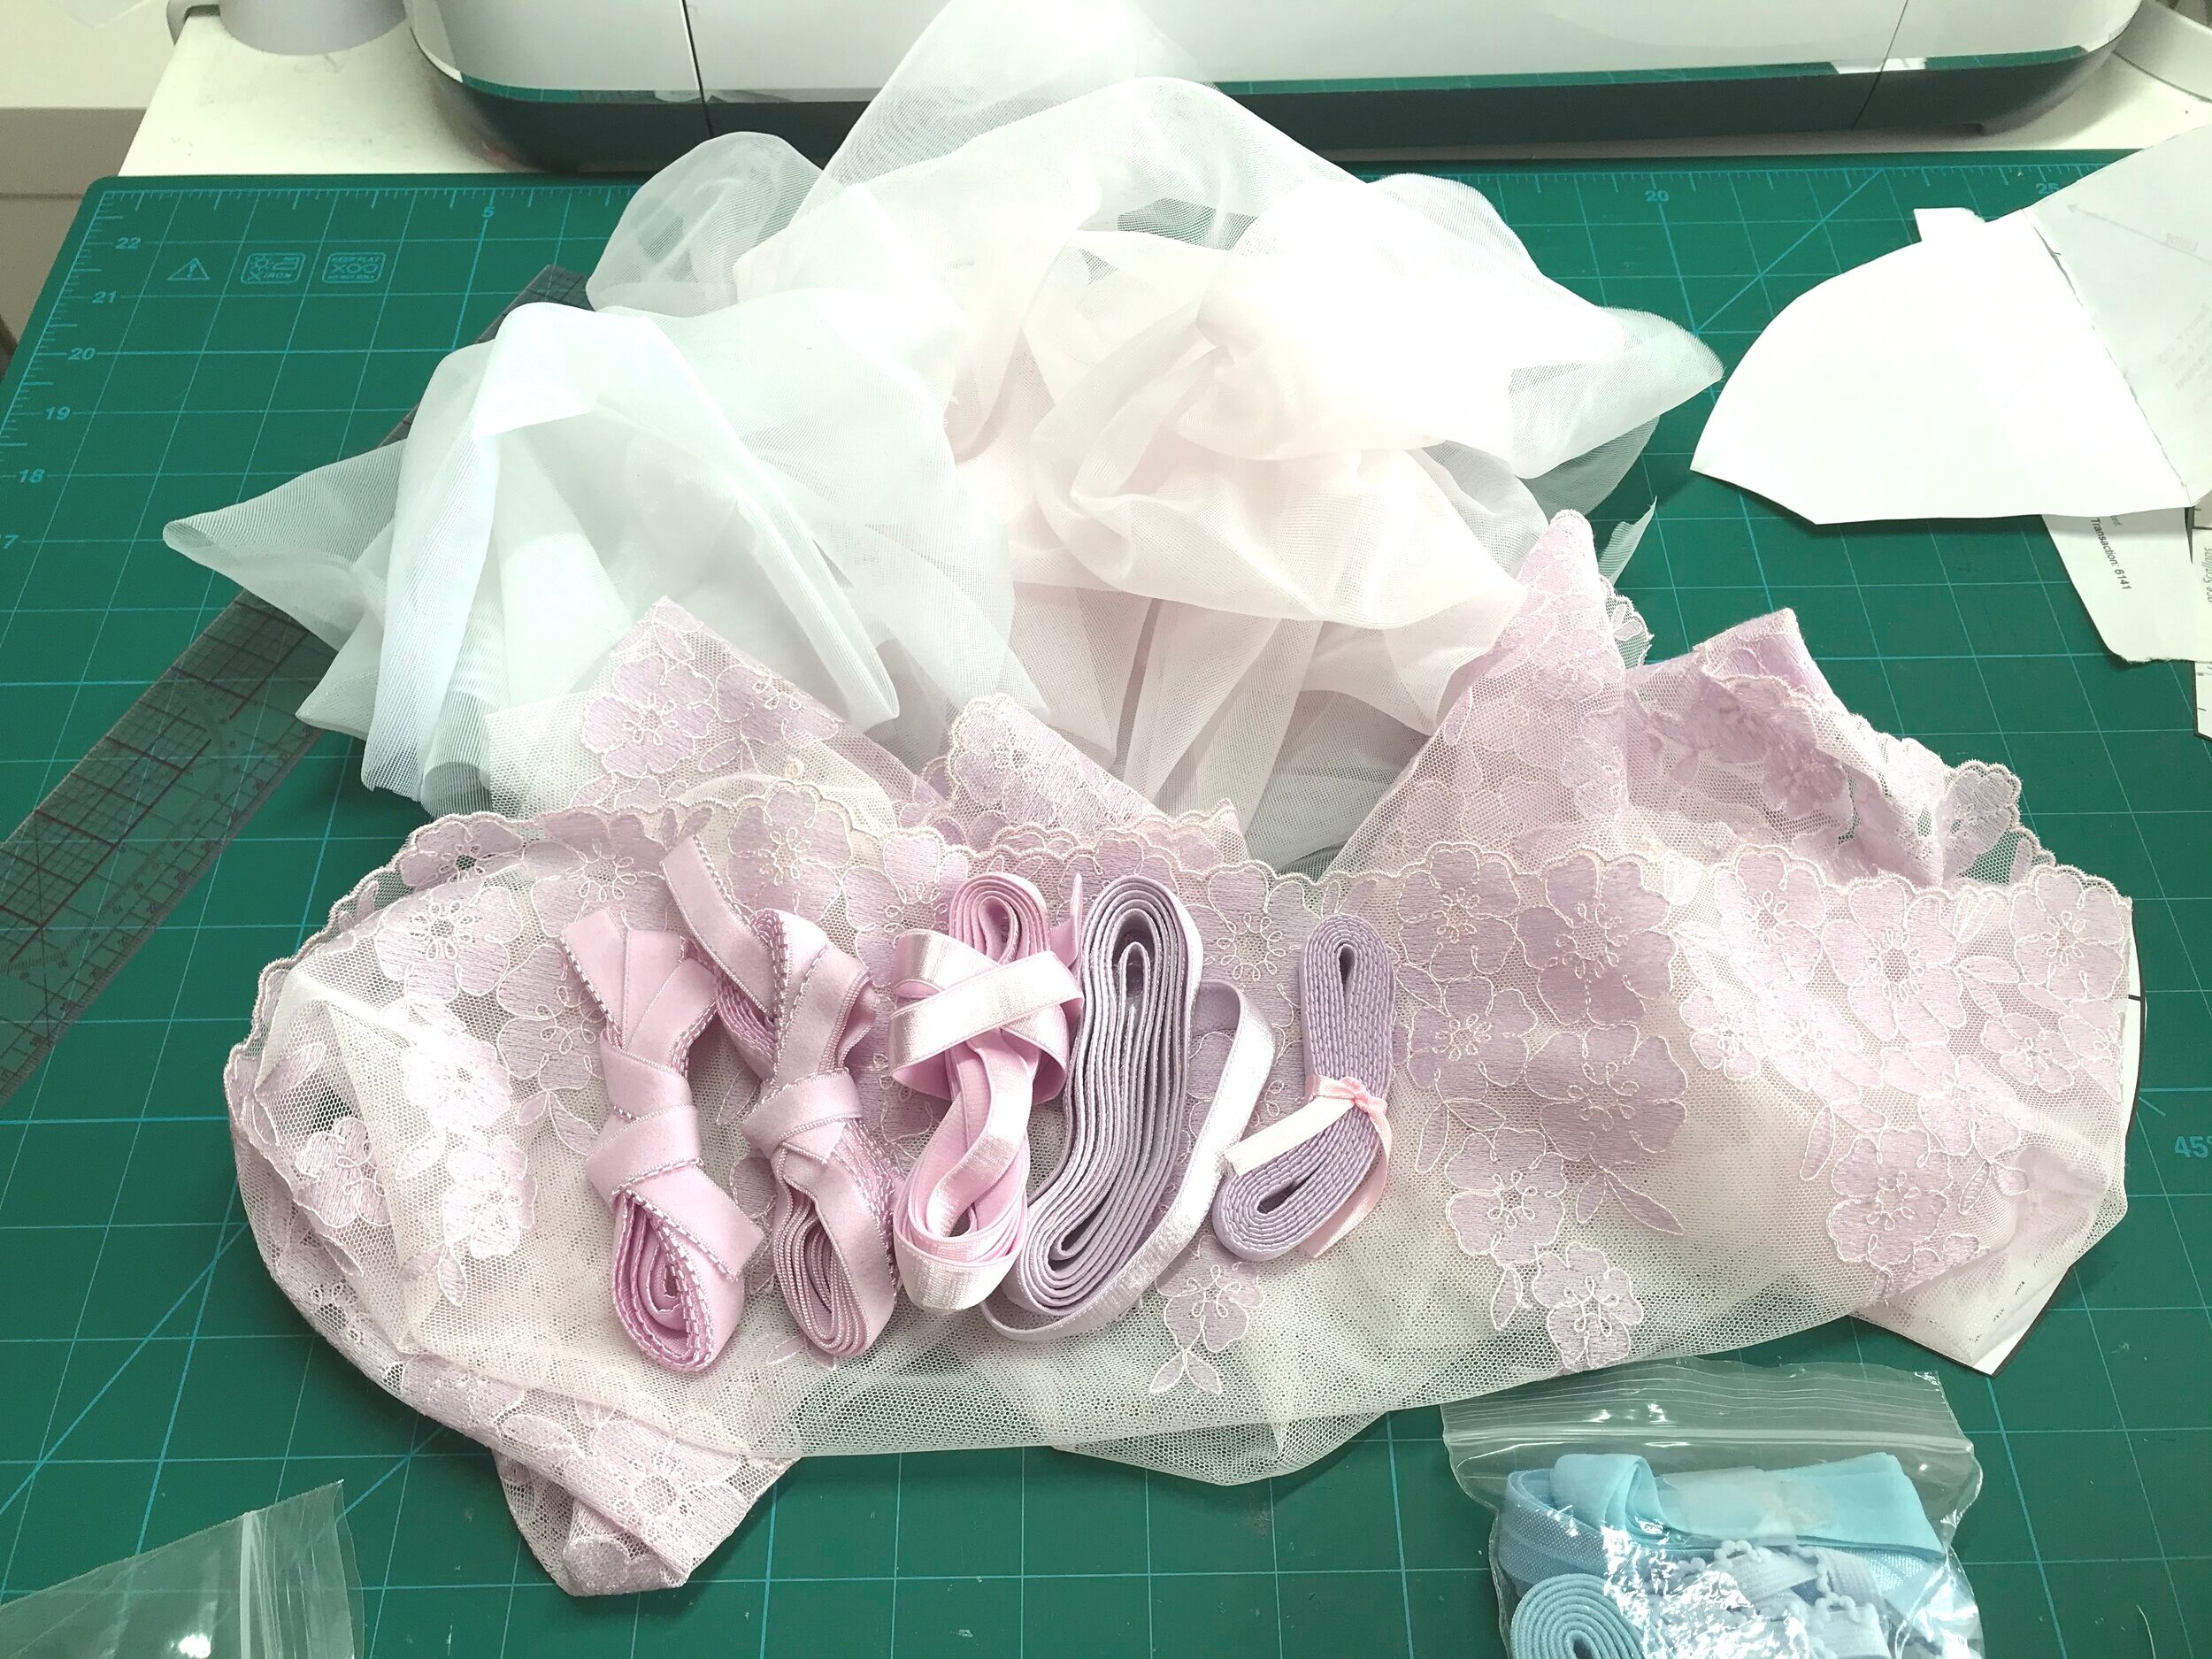
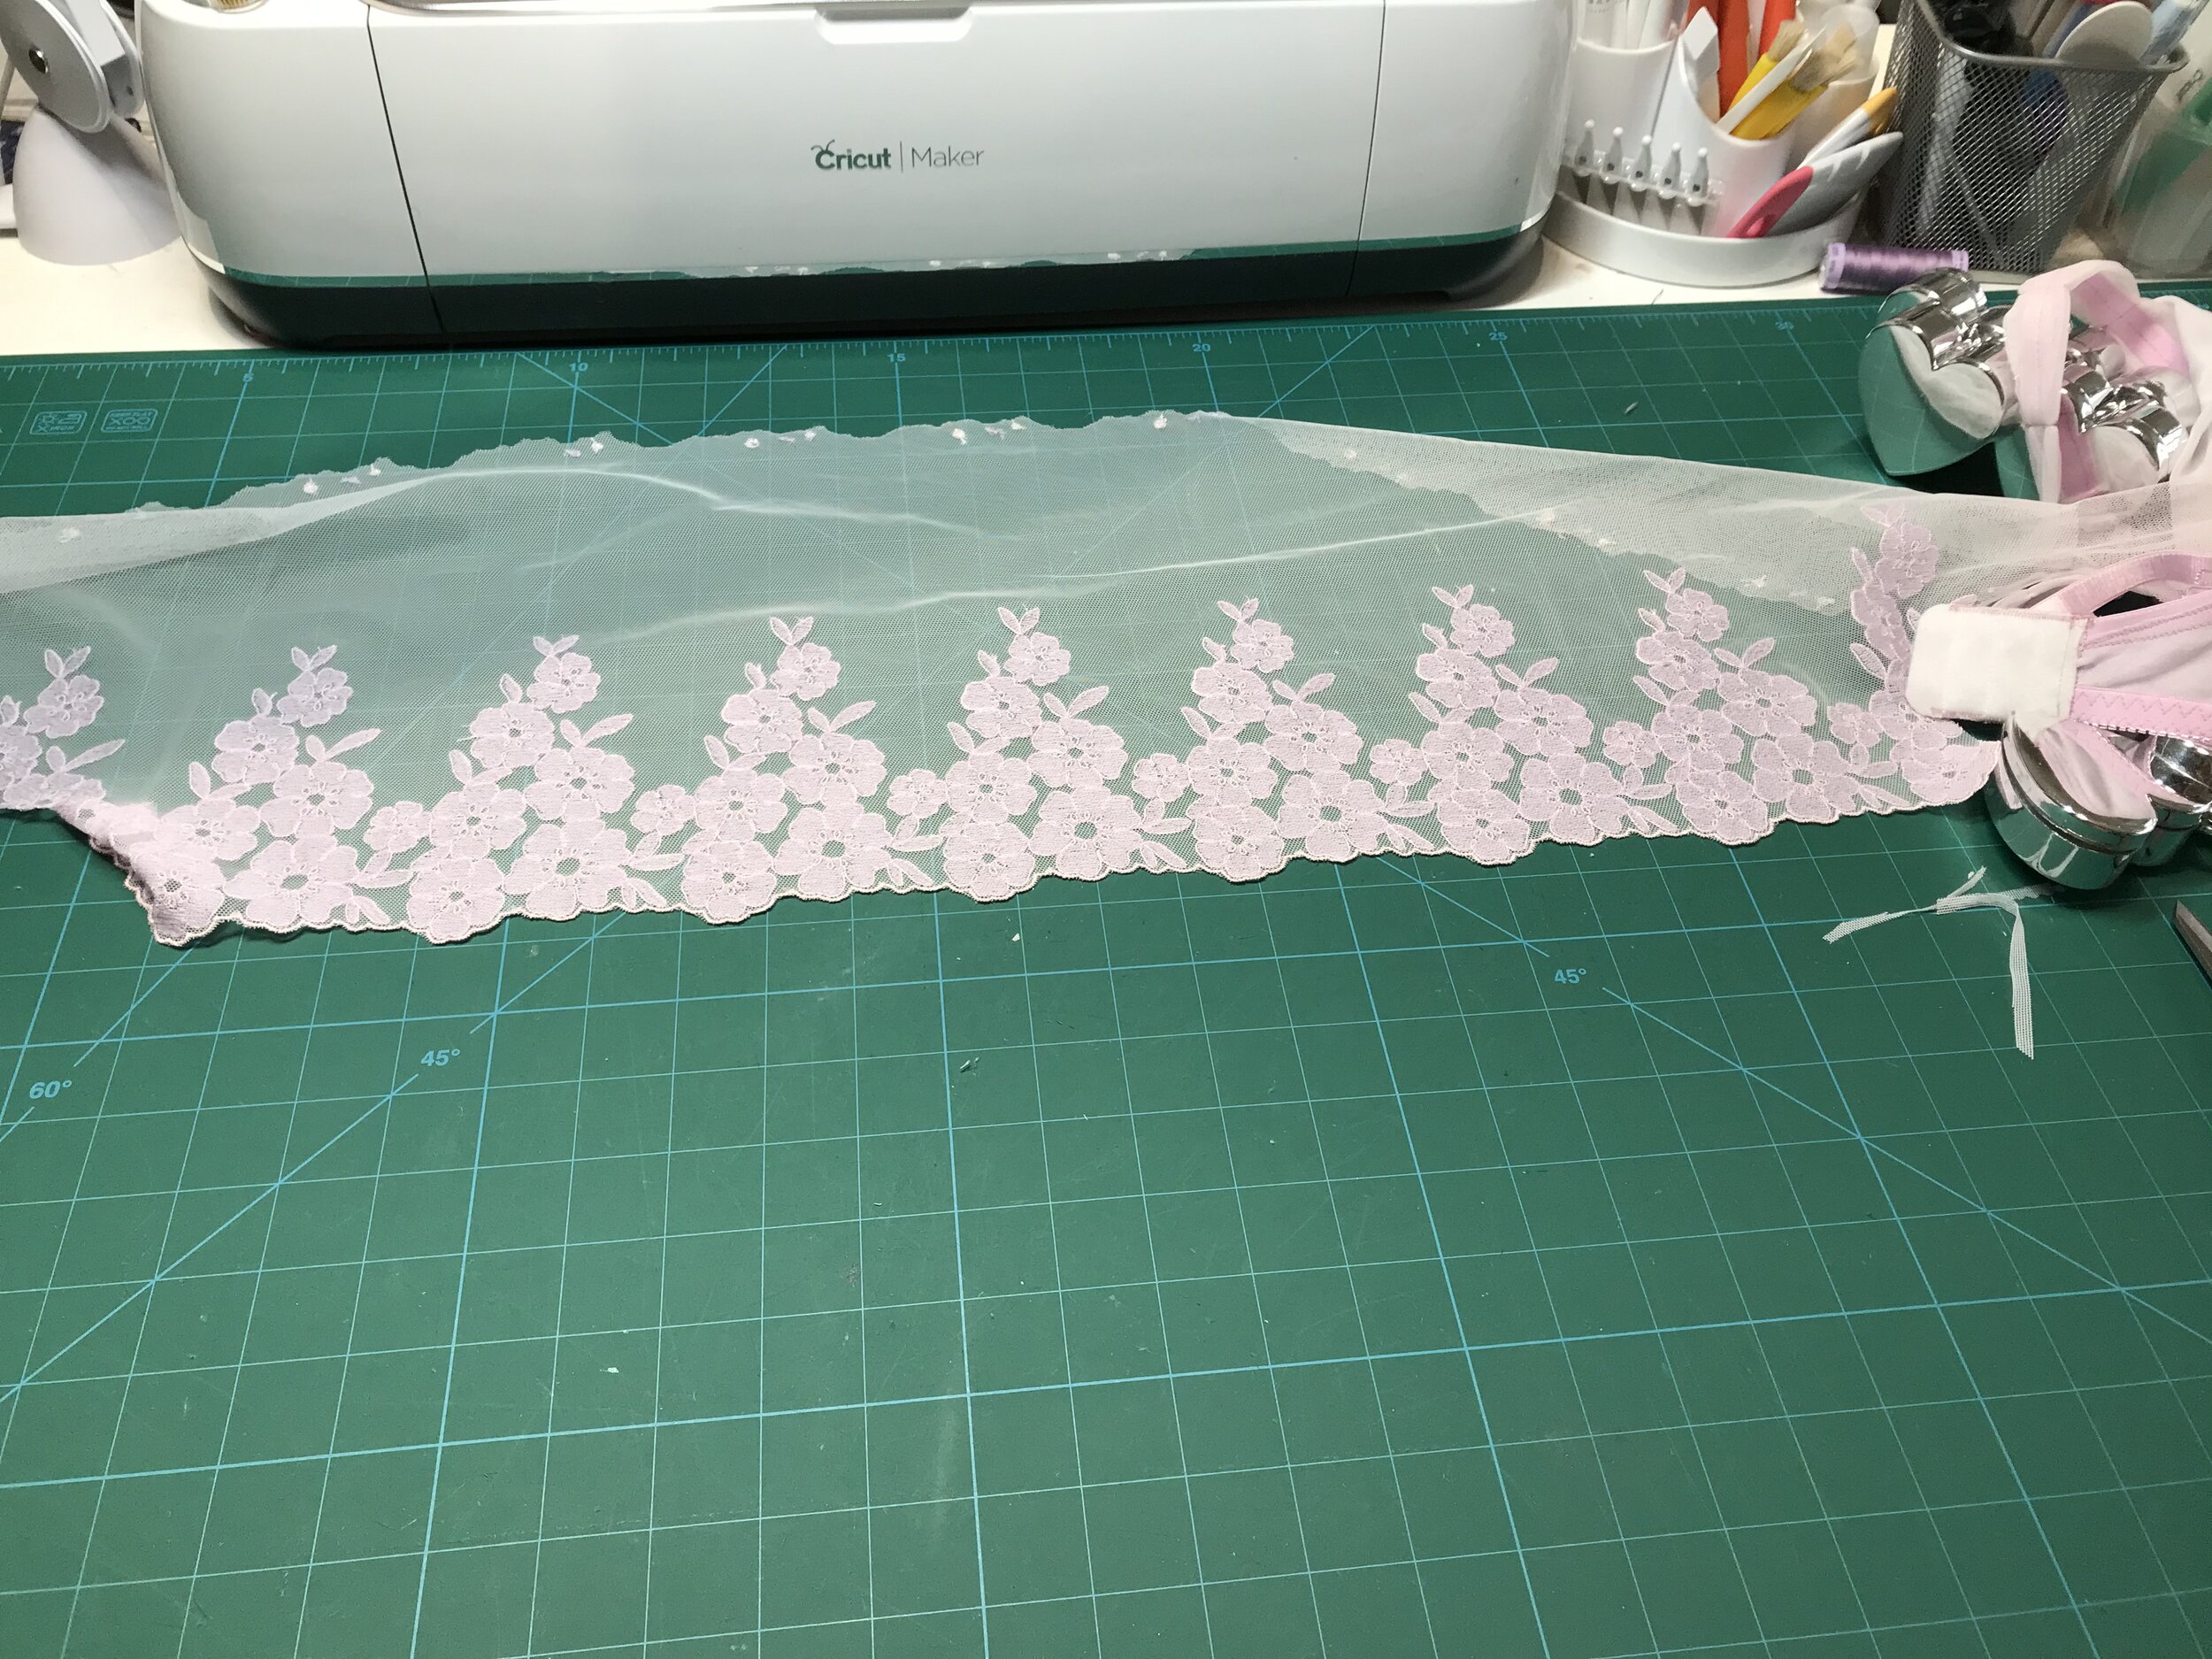
The outer cup of the Rafale is mesh but I found that this stretched out too much on the one I had made previously. The alternative was powernet but I didn’t think this would give the soft round shape I was after so I thought of using the flocked powernet from Sewme which had been in my stash for a while waiting for the right project. I wanted the inner cup, frame and band to be the same colour and the Dusty Mauve tulle and powernet from Tailormade looked perfect. Time to sketch a design.

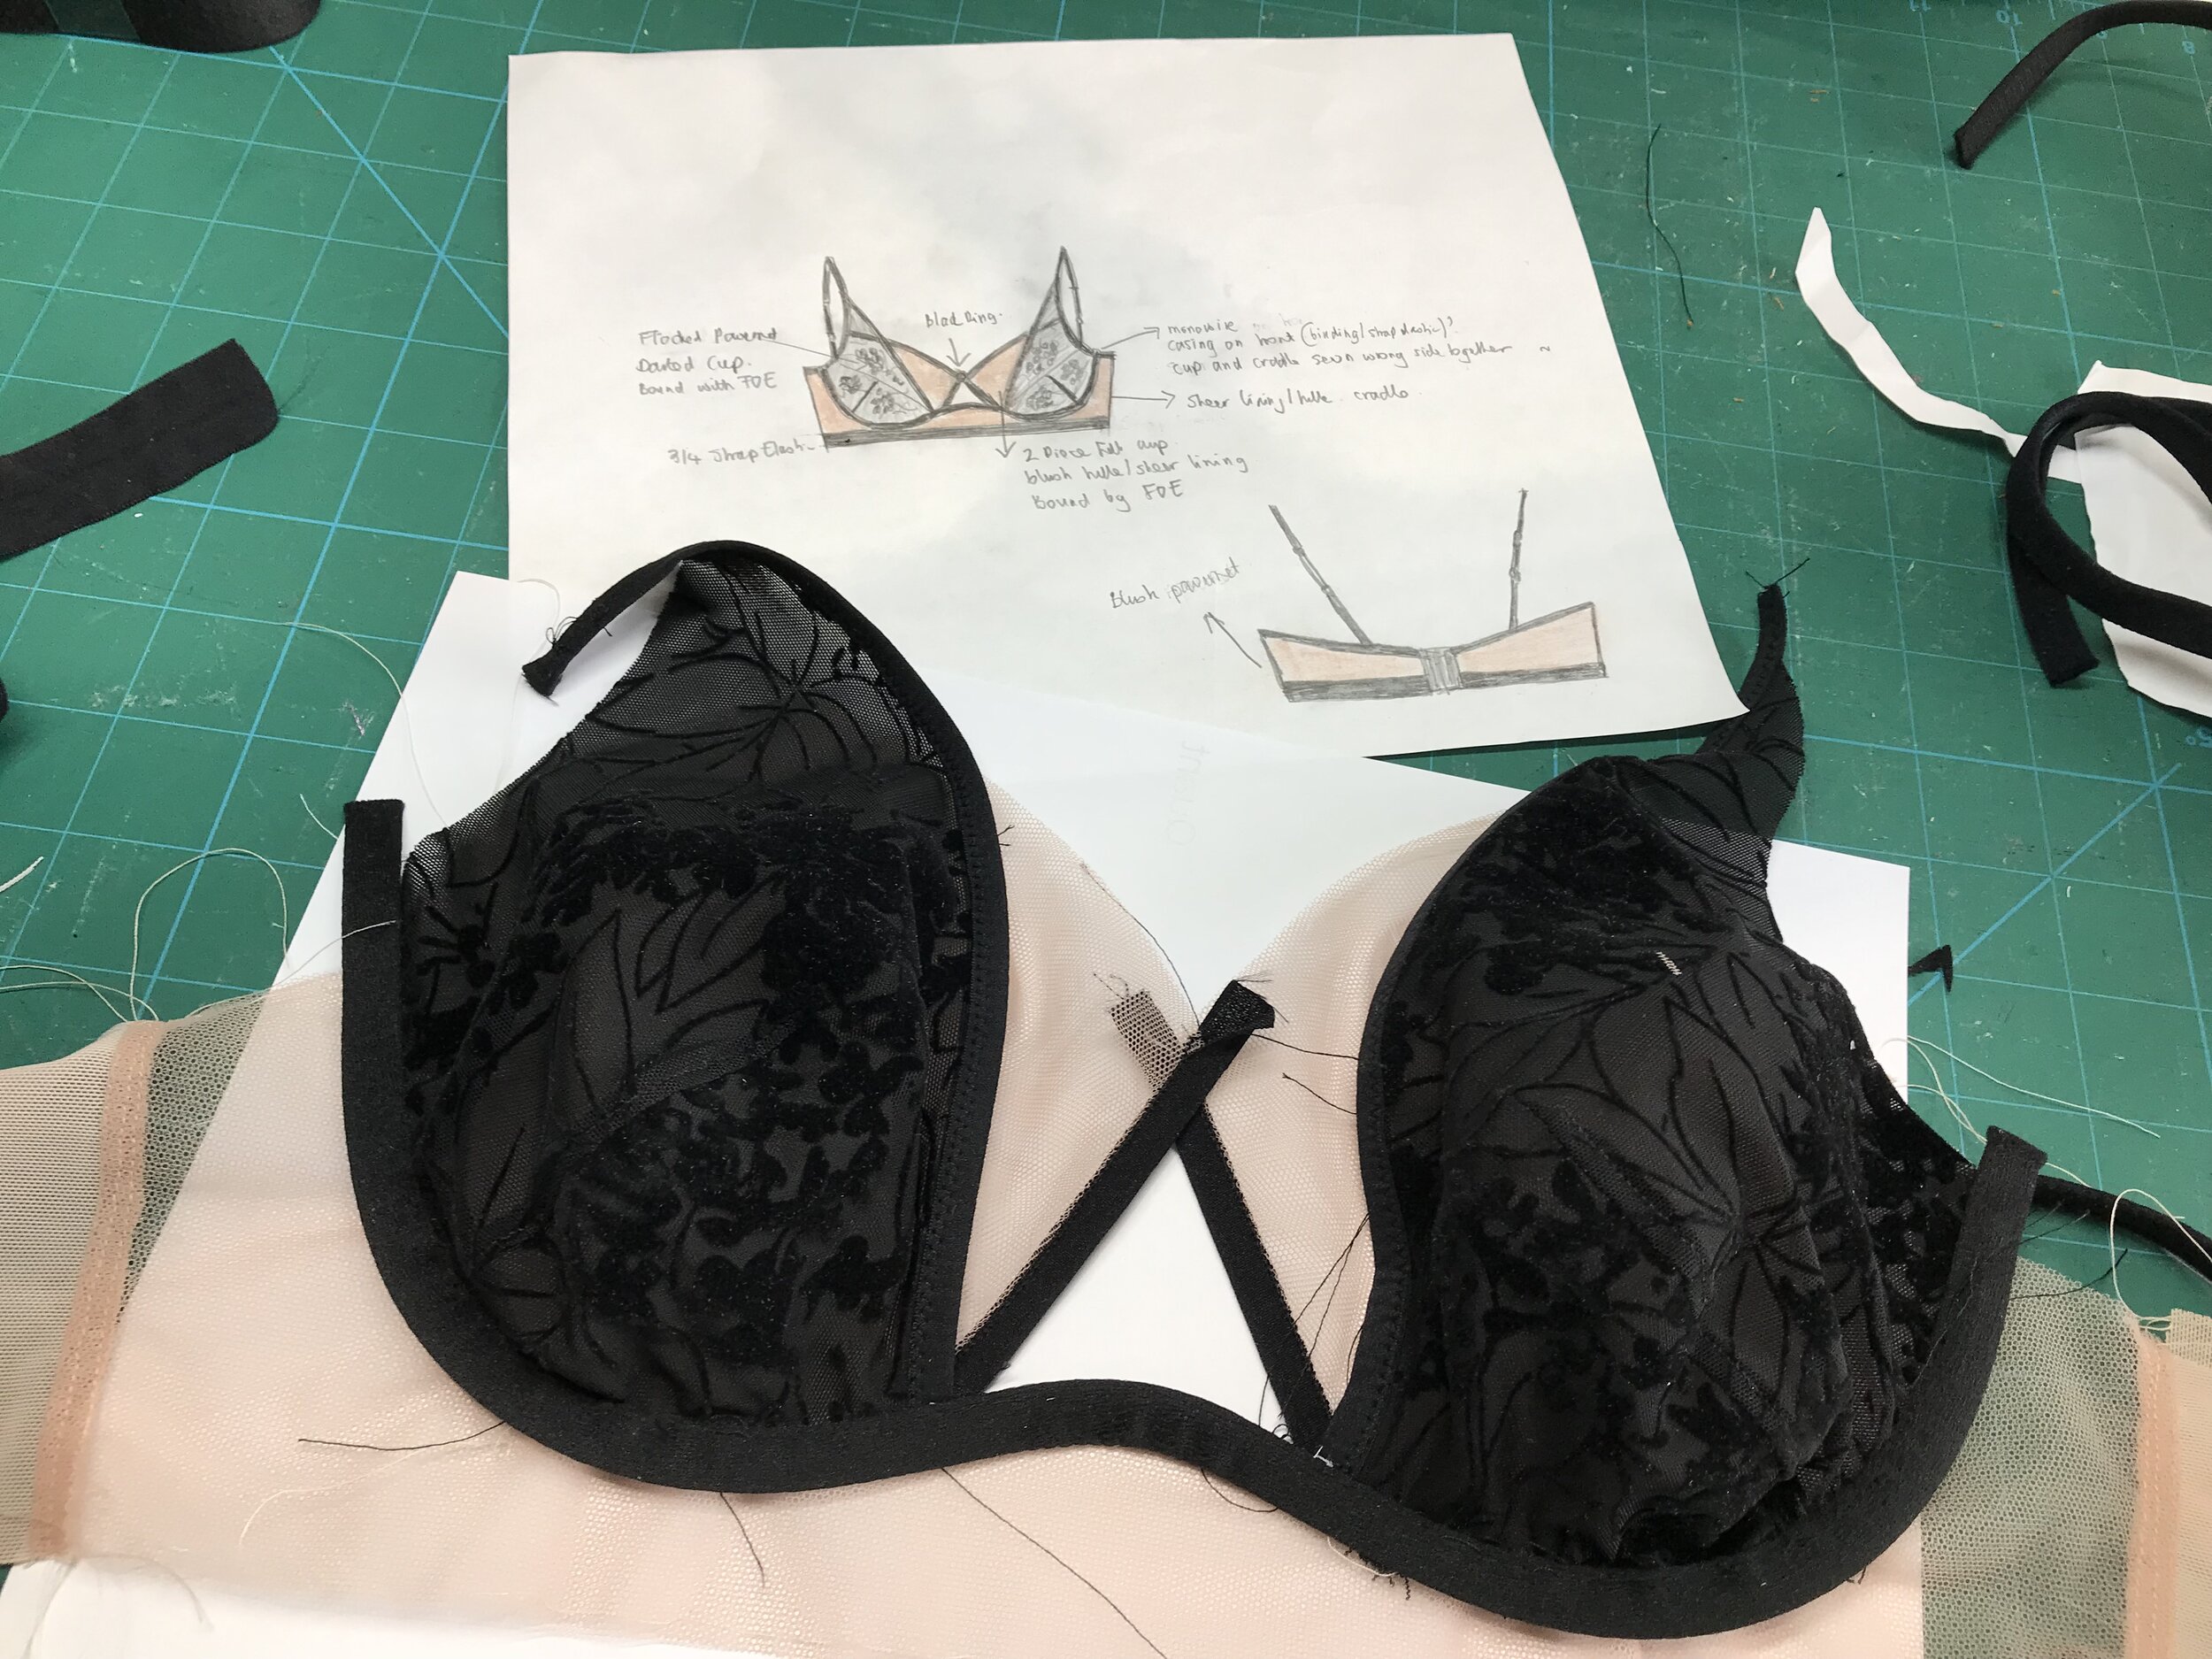
I wanted a sheer look with clean lines. First, I started with the cups and then drew the shape of the monowire so that the outer cup would attach to the frame where the monowire started to go horizontal to cross the front. To accommodate the design I planned to put the channeling on the outside The top edges and neckline would be fold over elastic and the bottom band would be matt strap elastic.

IMG_6976.jpg

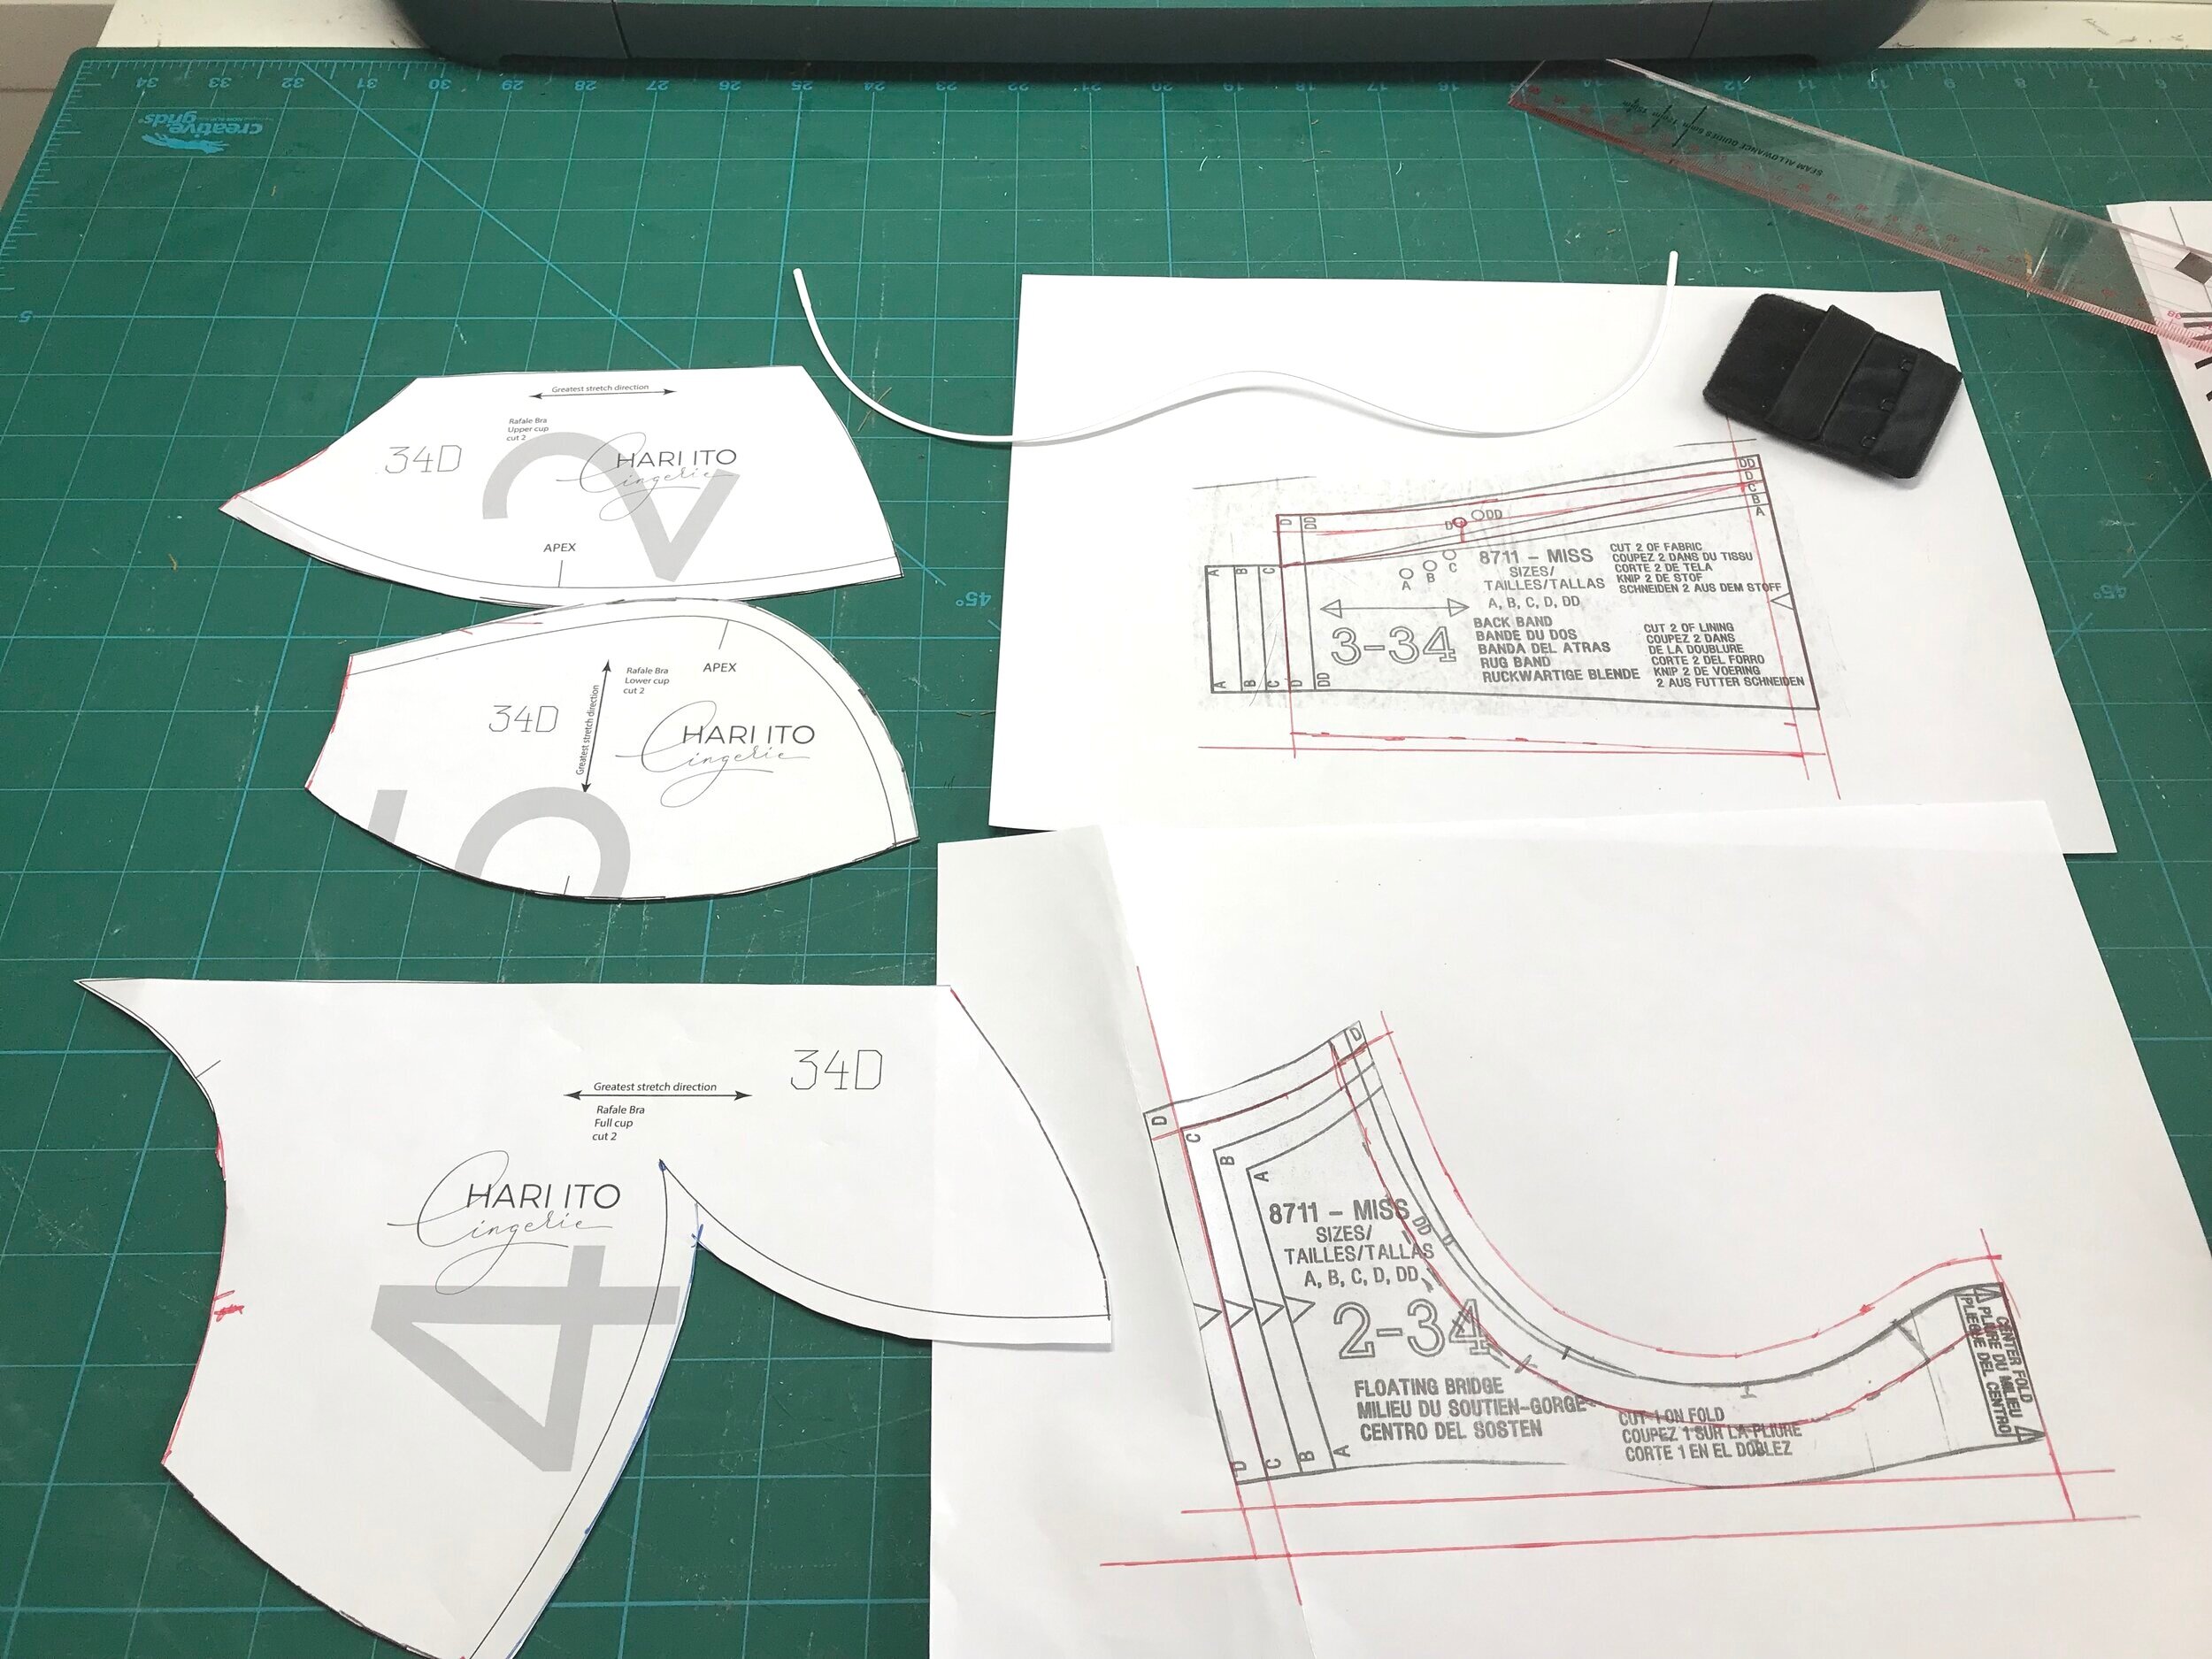
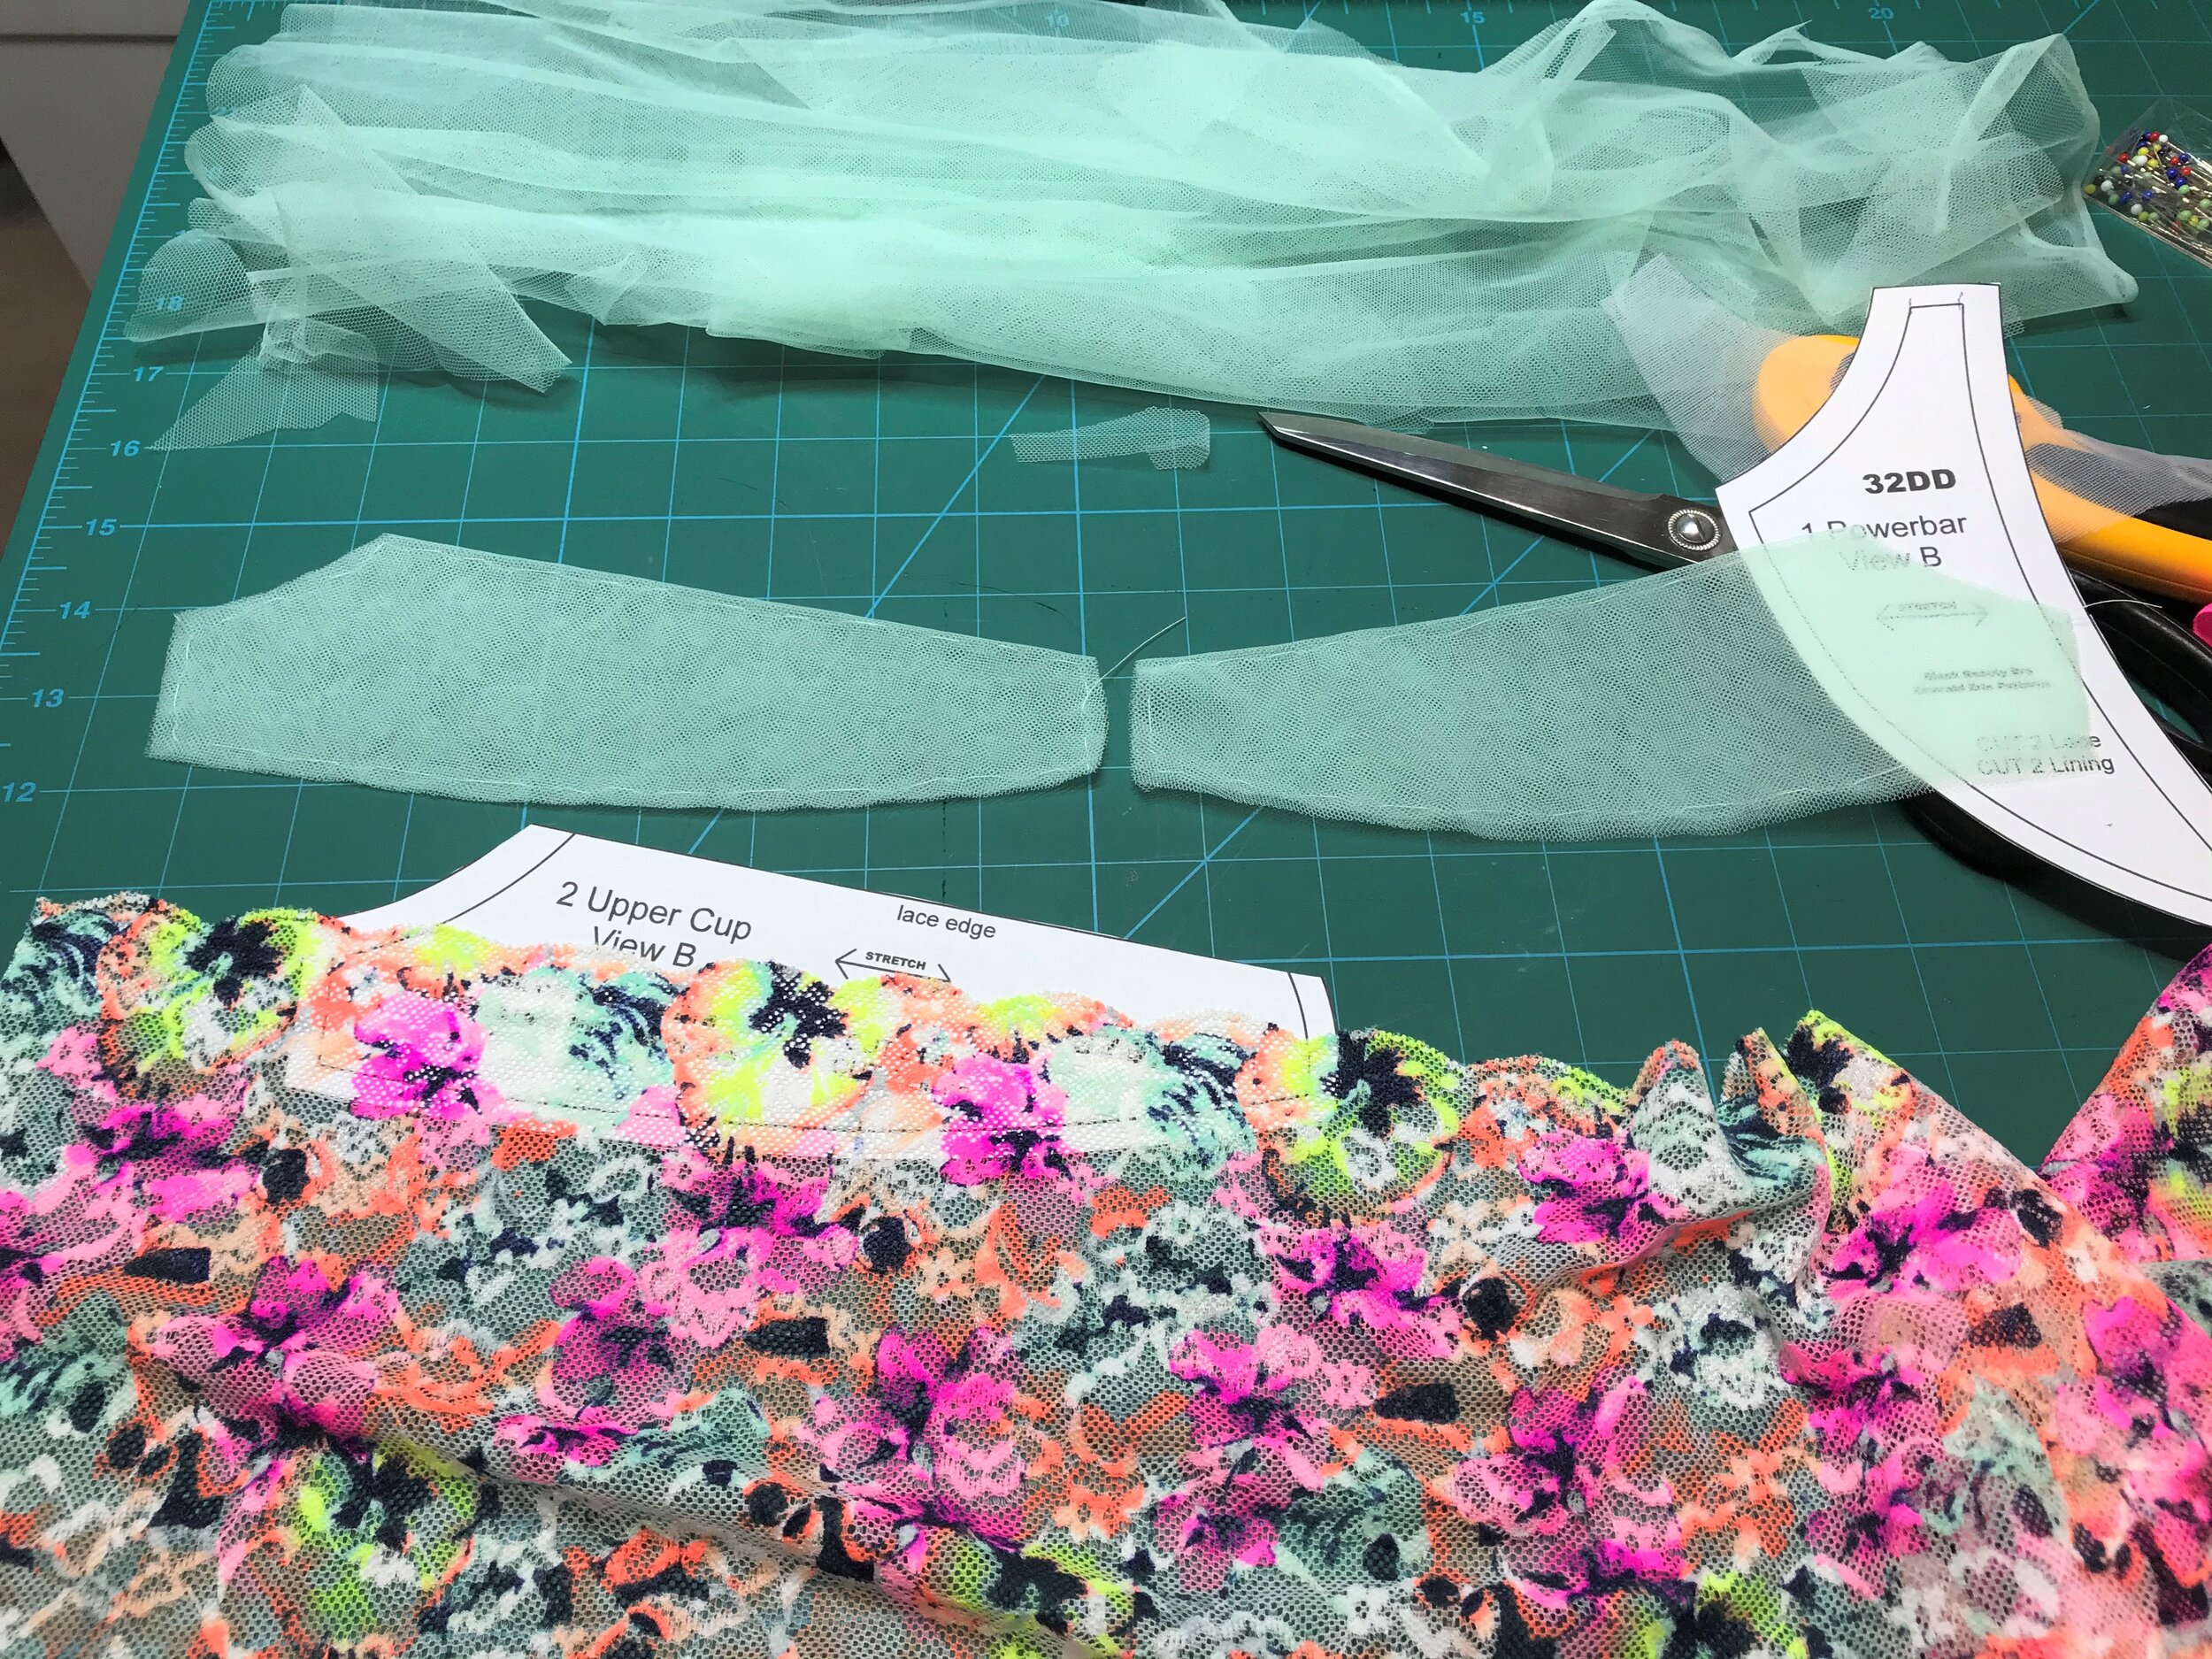
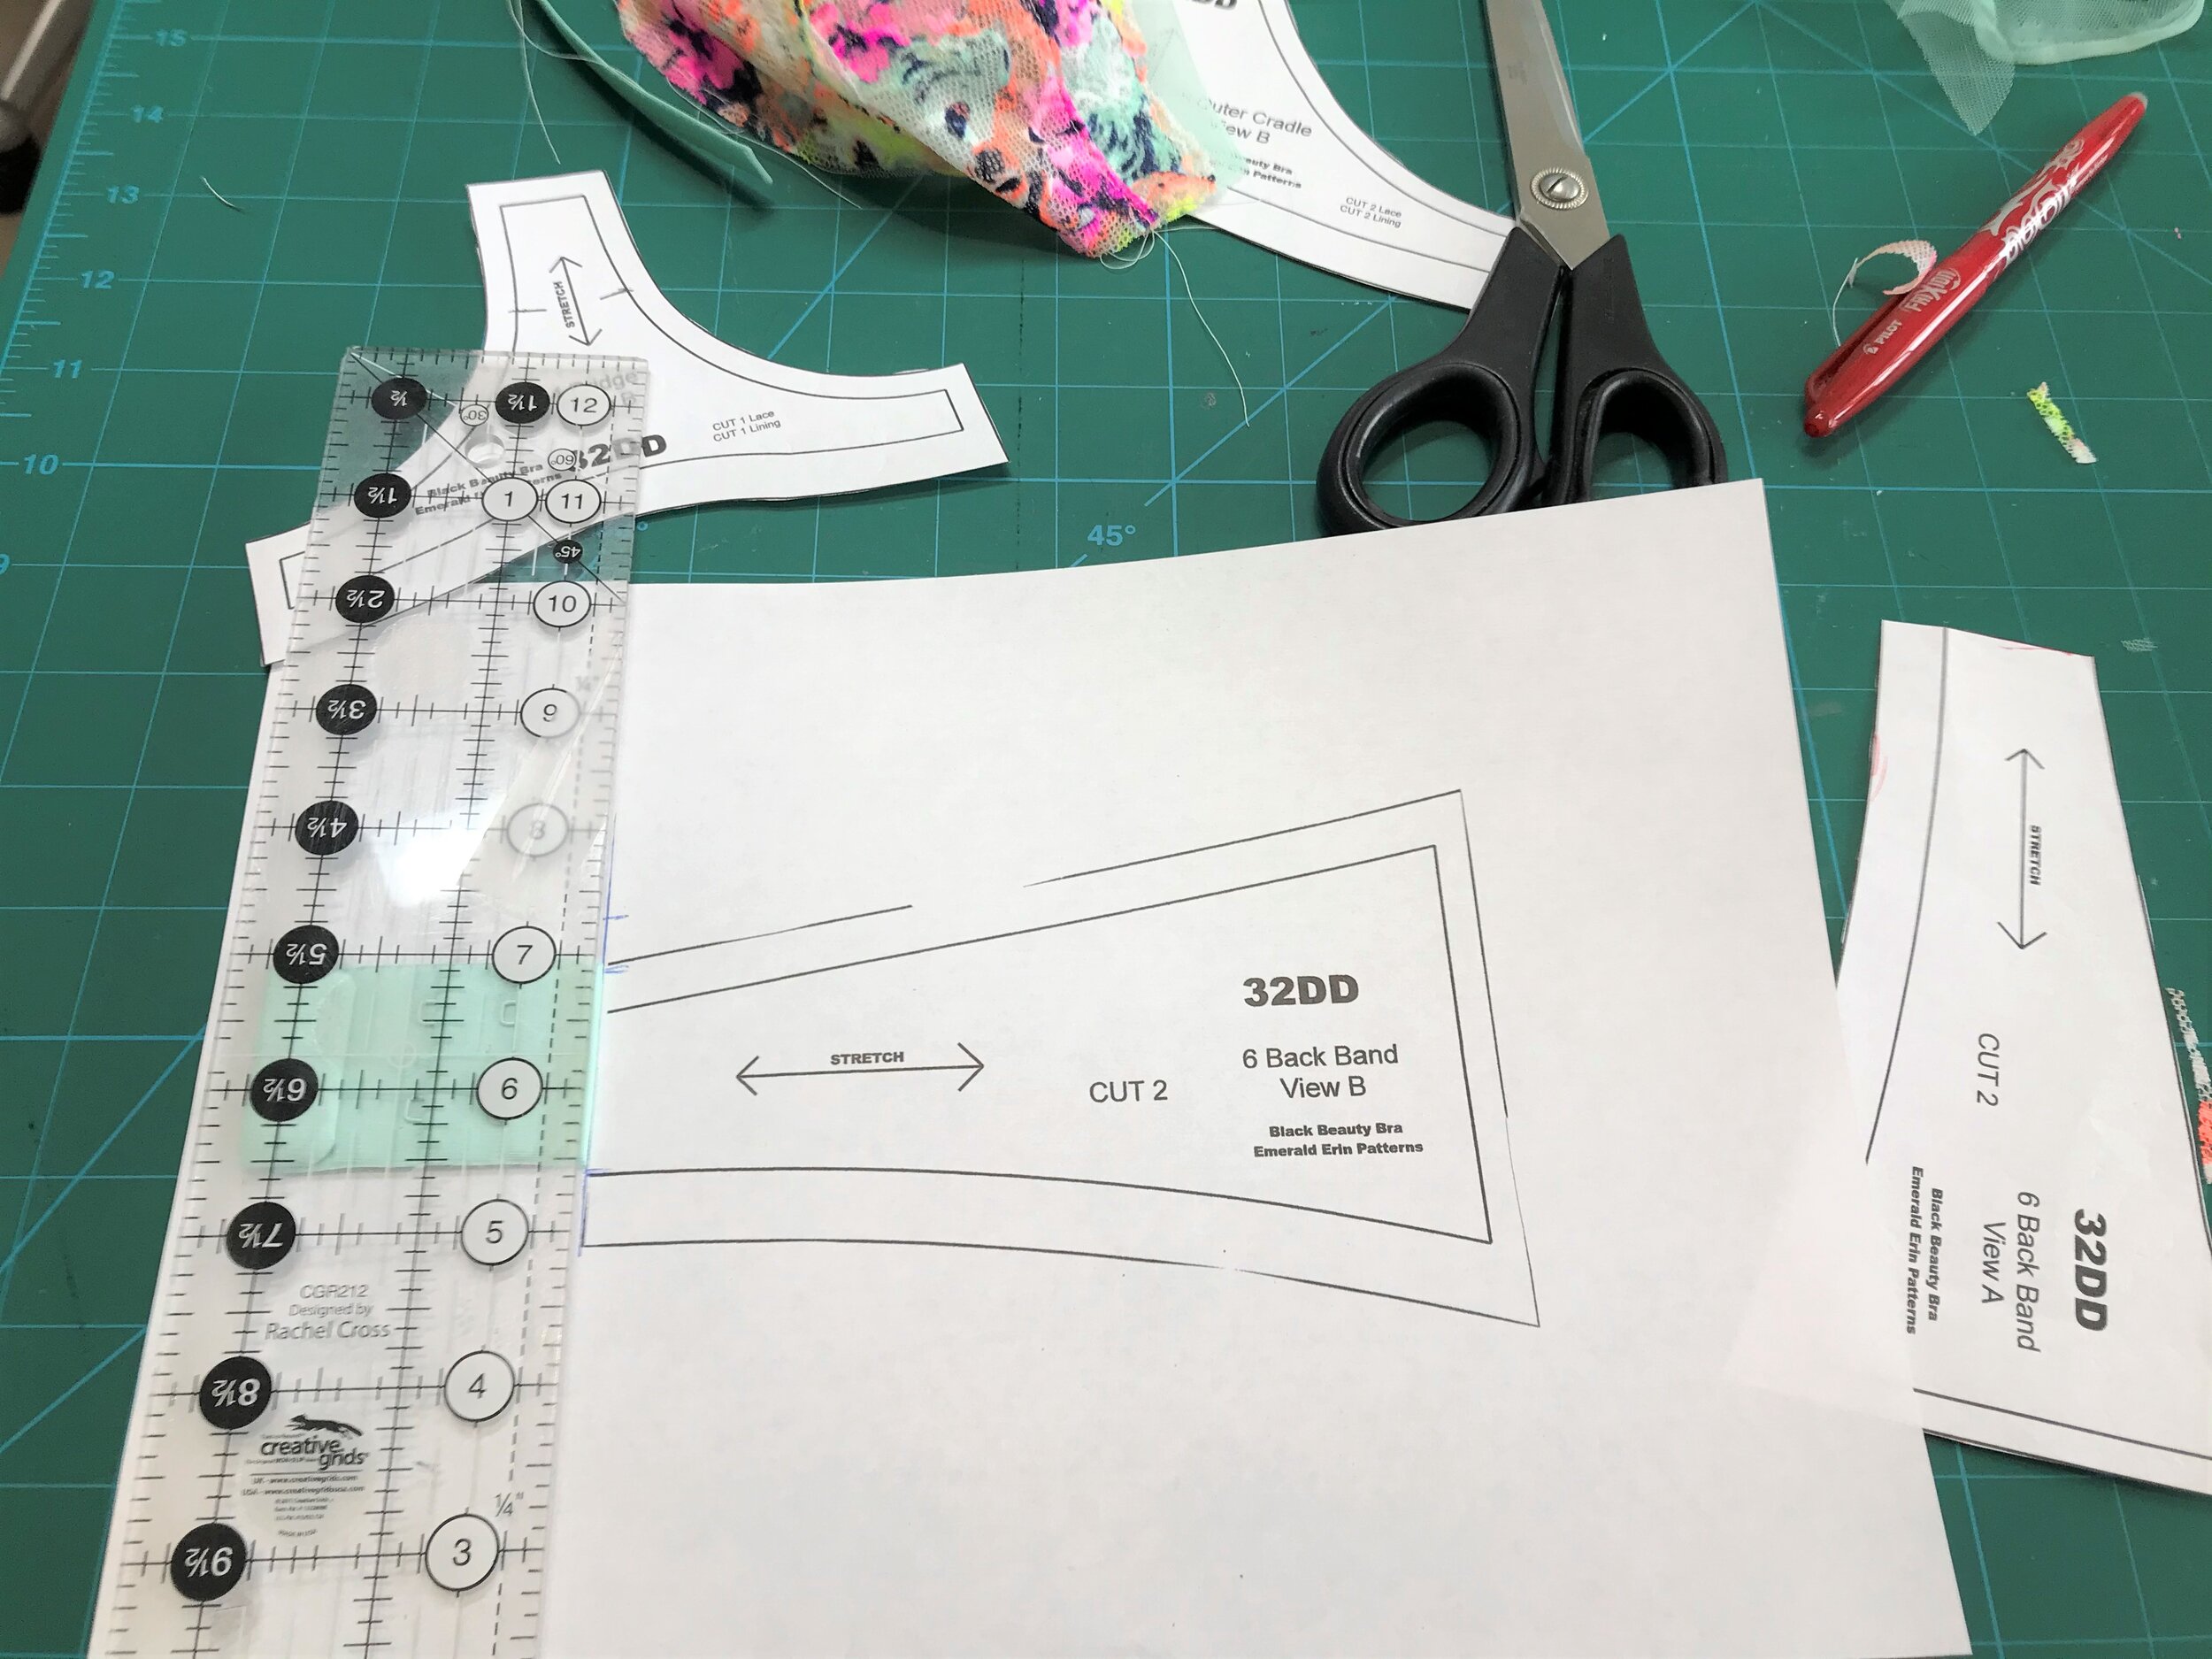
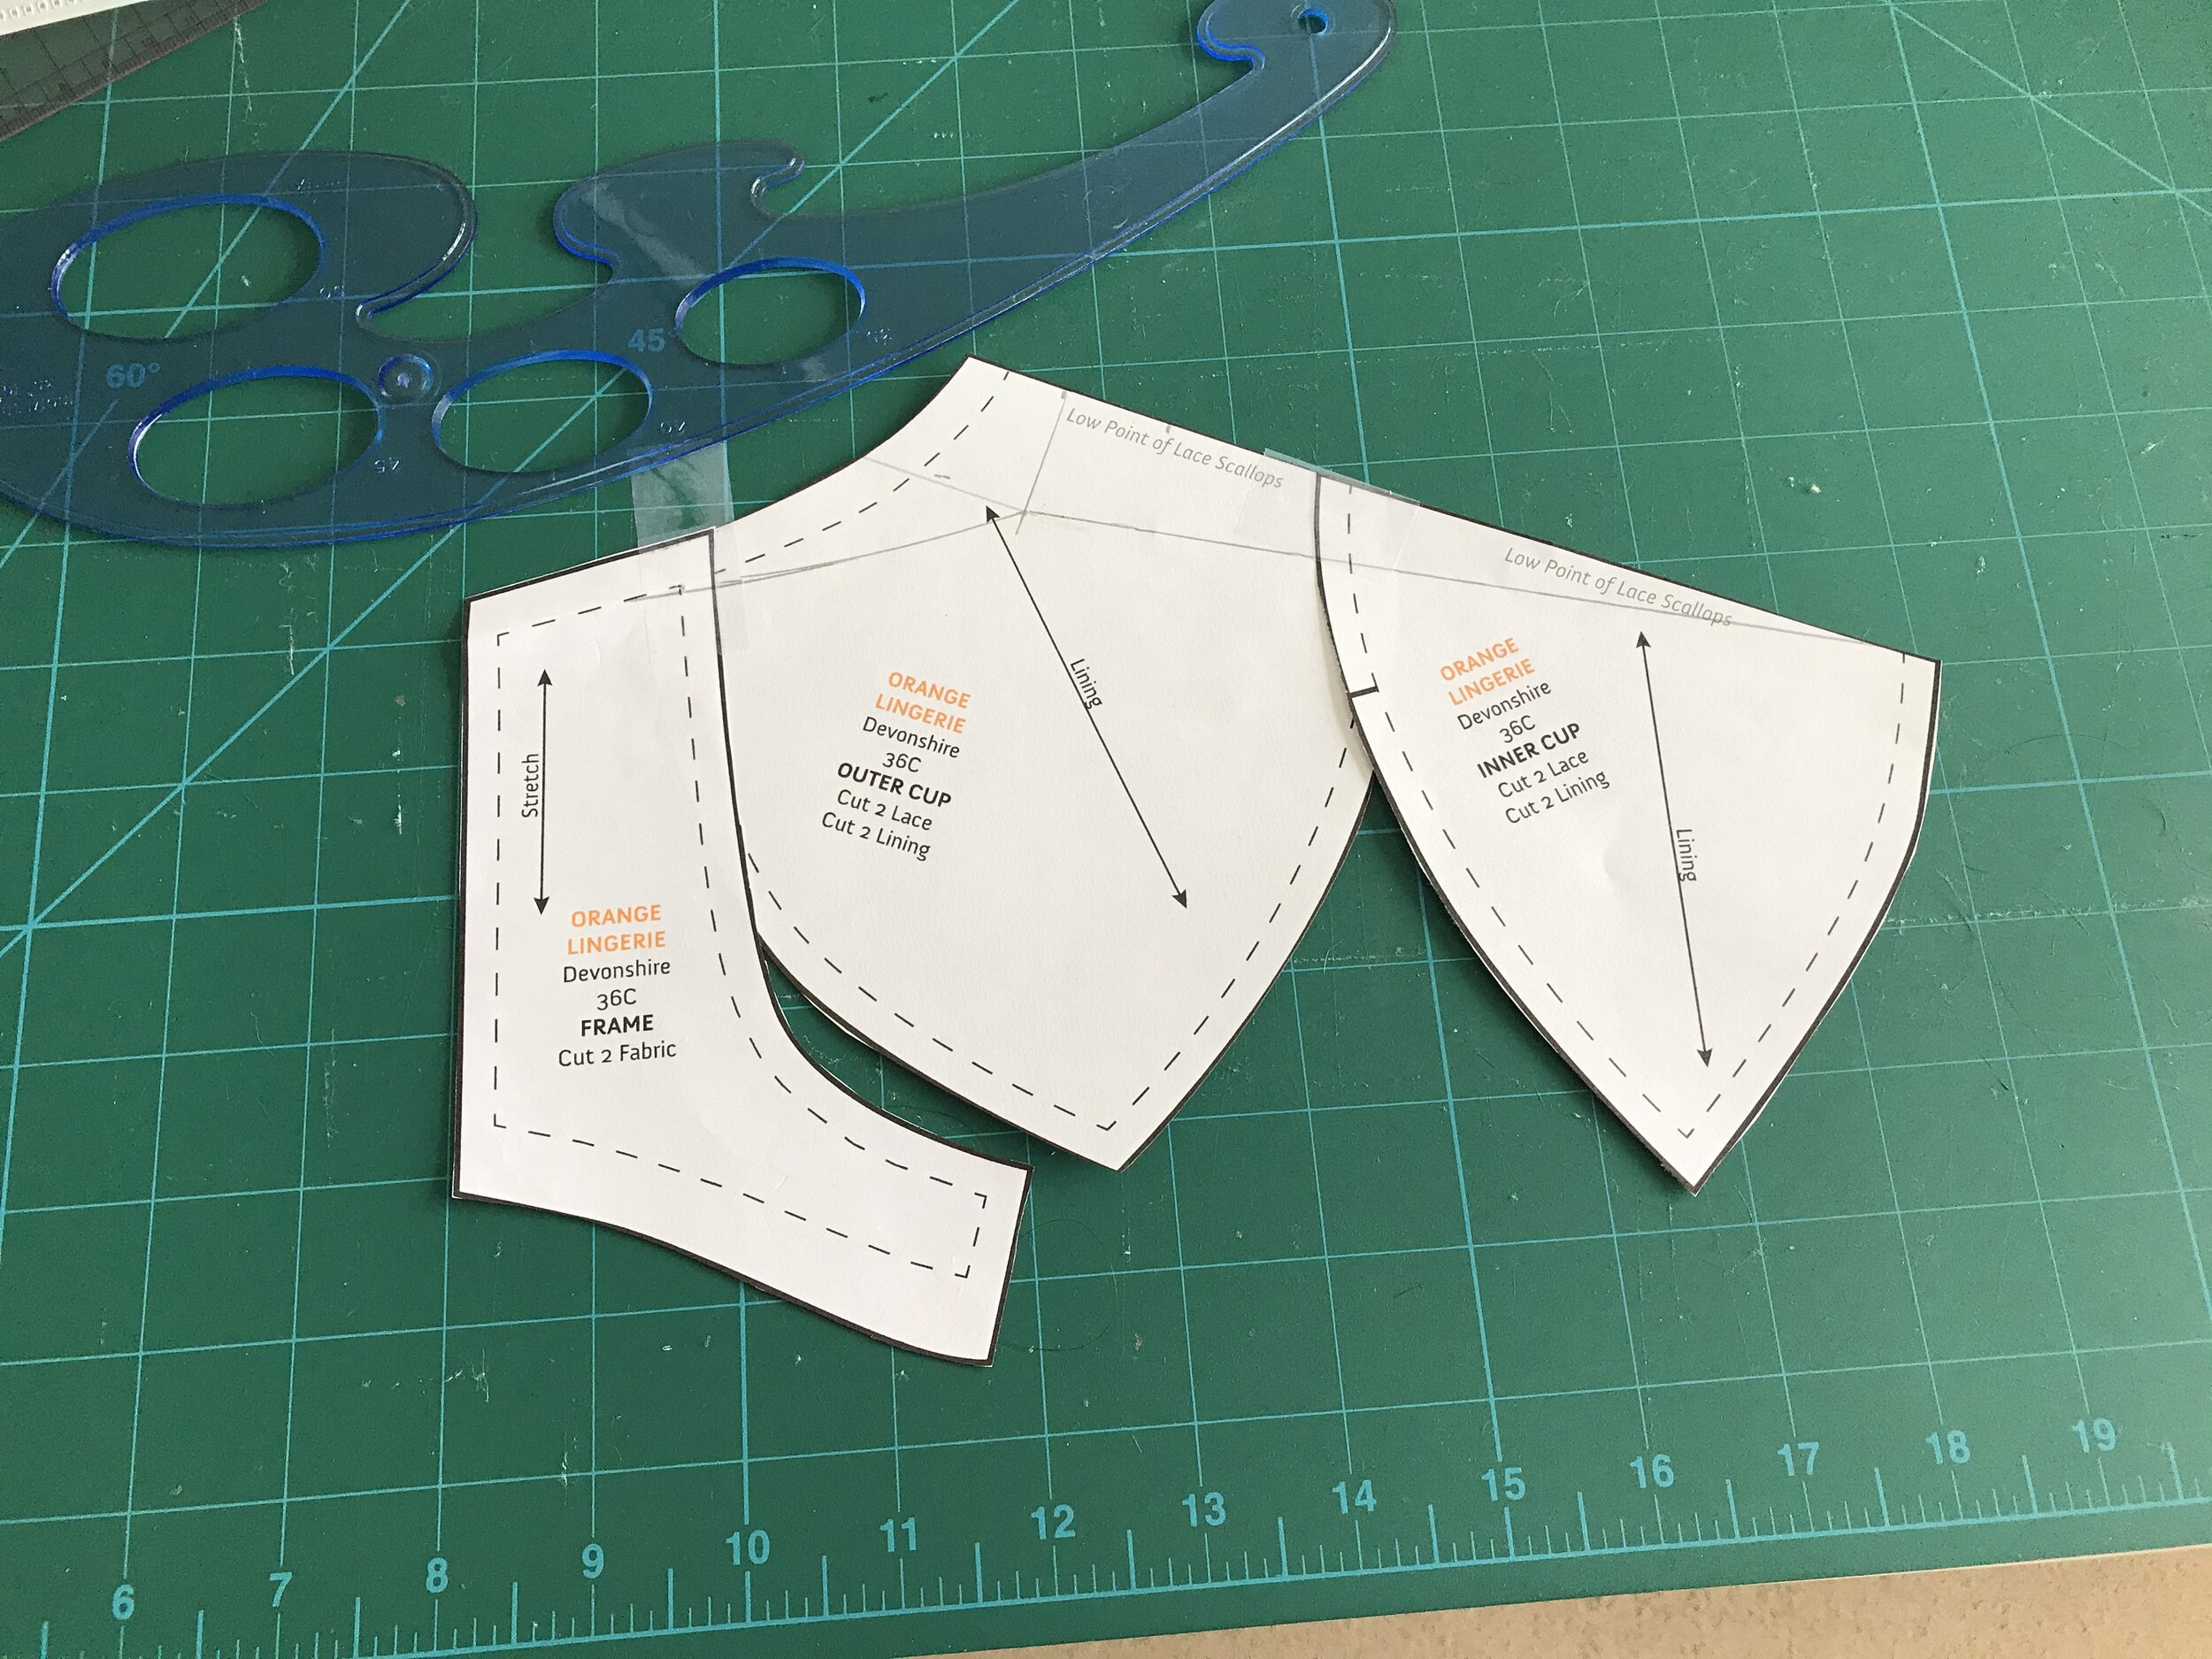
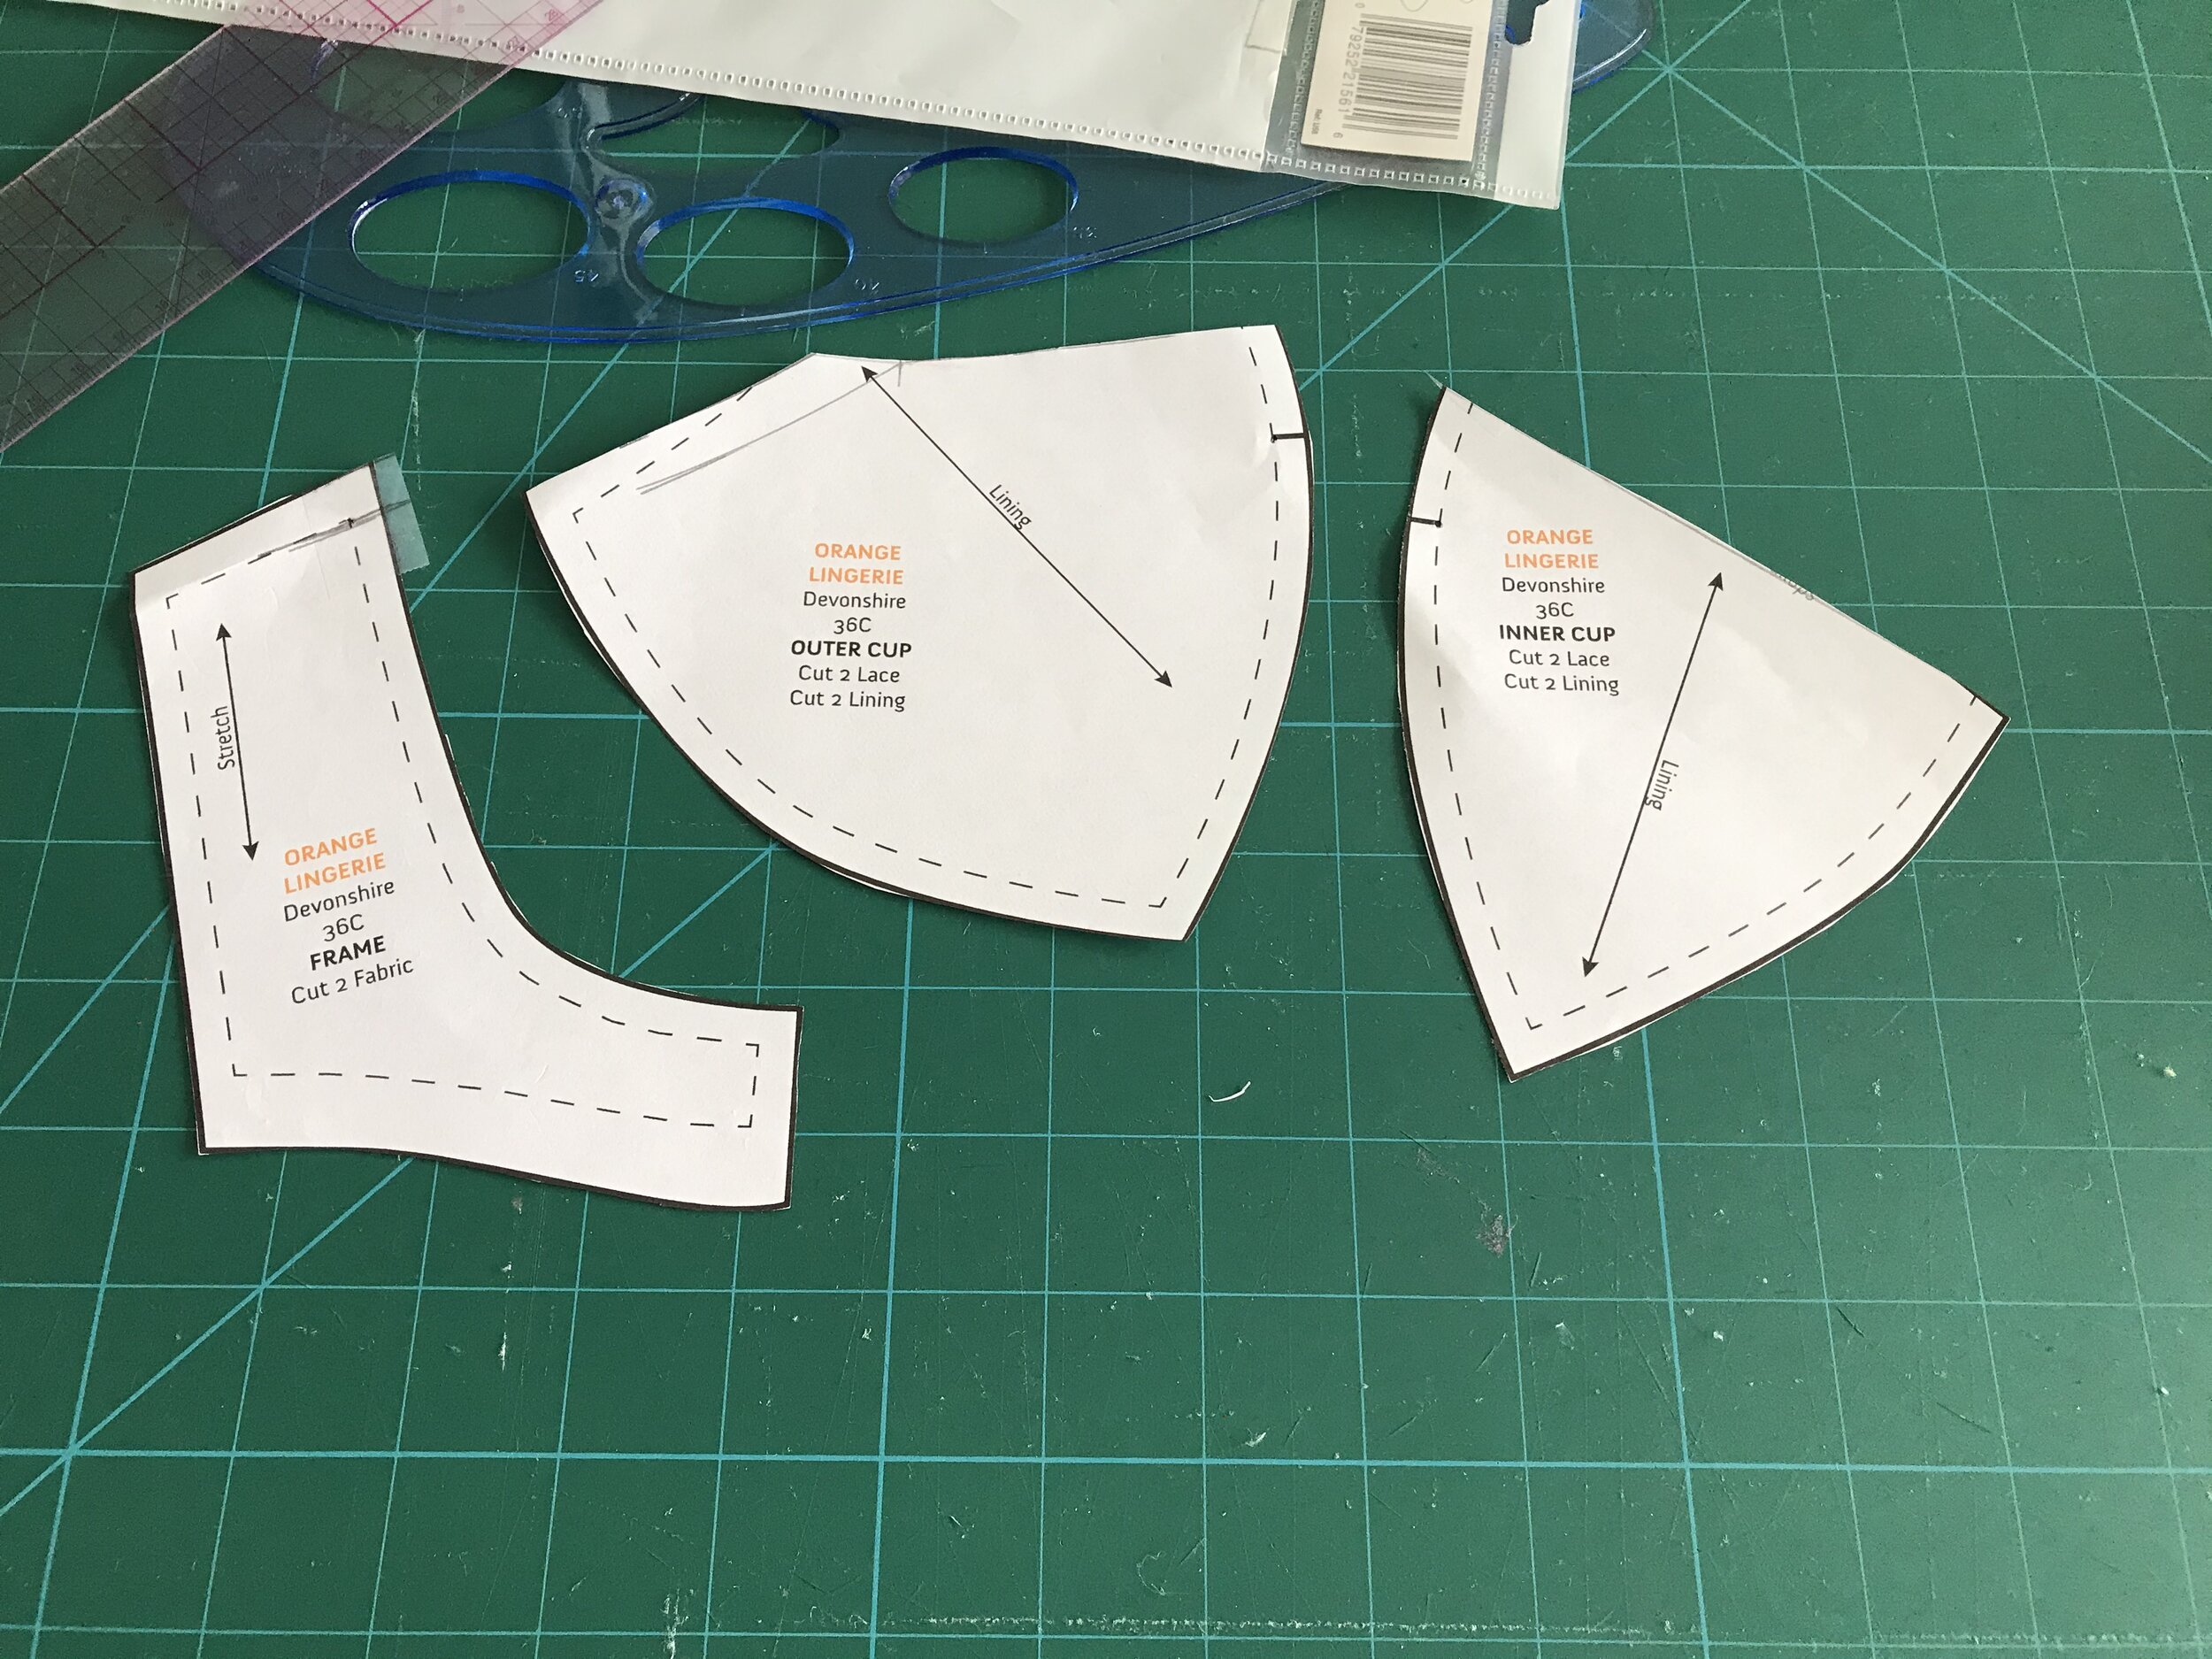
To combine the patterns I started with the 34D pattern pieces for both. For the frame I added the seam allowance to the wire line as the channeling is applied on to this in the original pattern. I took off the seam allowance at the underarm as I was using fold over elastic and I added the width of the strap elastic I was using to the bottom so I would have some of the tulle showing. The Rafale does not have seam allowances so I added these to the dart and cross cup seam. For the wire line I adjusted from a partial band to a full band.

IMG_6980.jpg

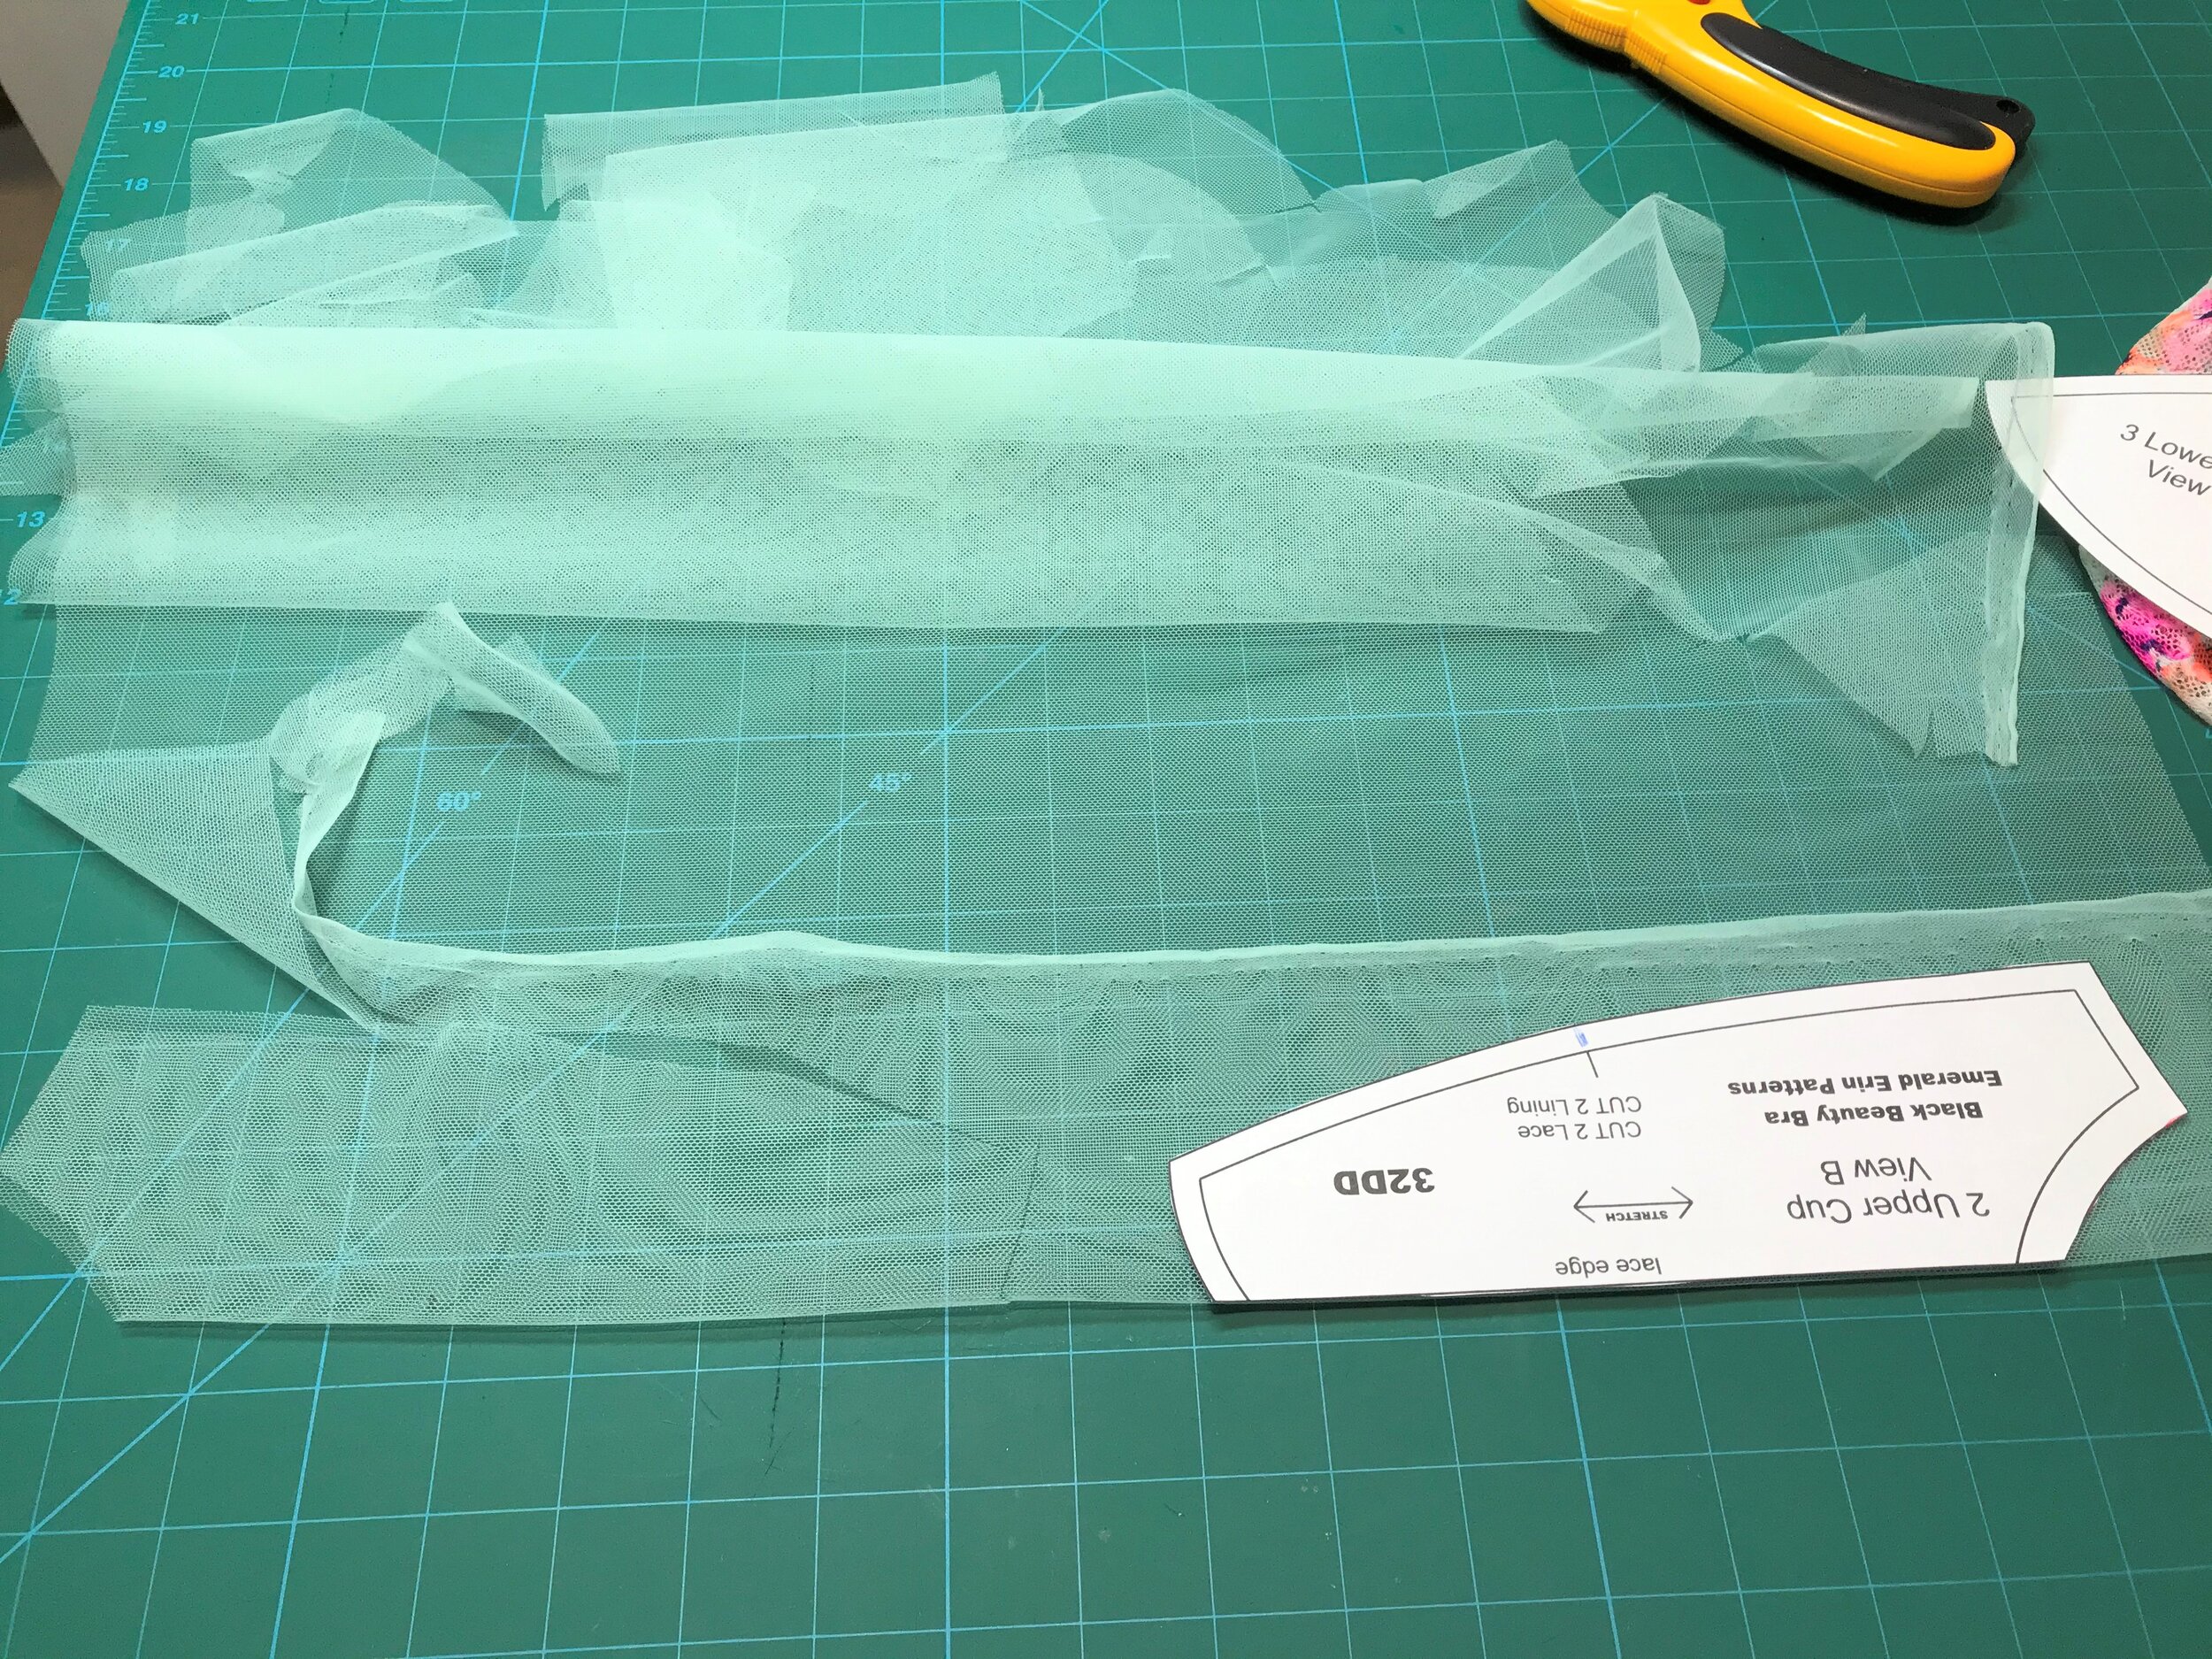
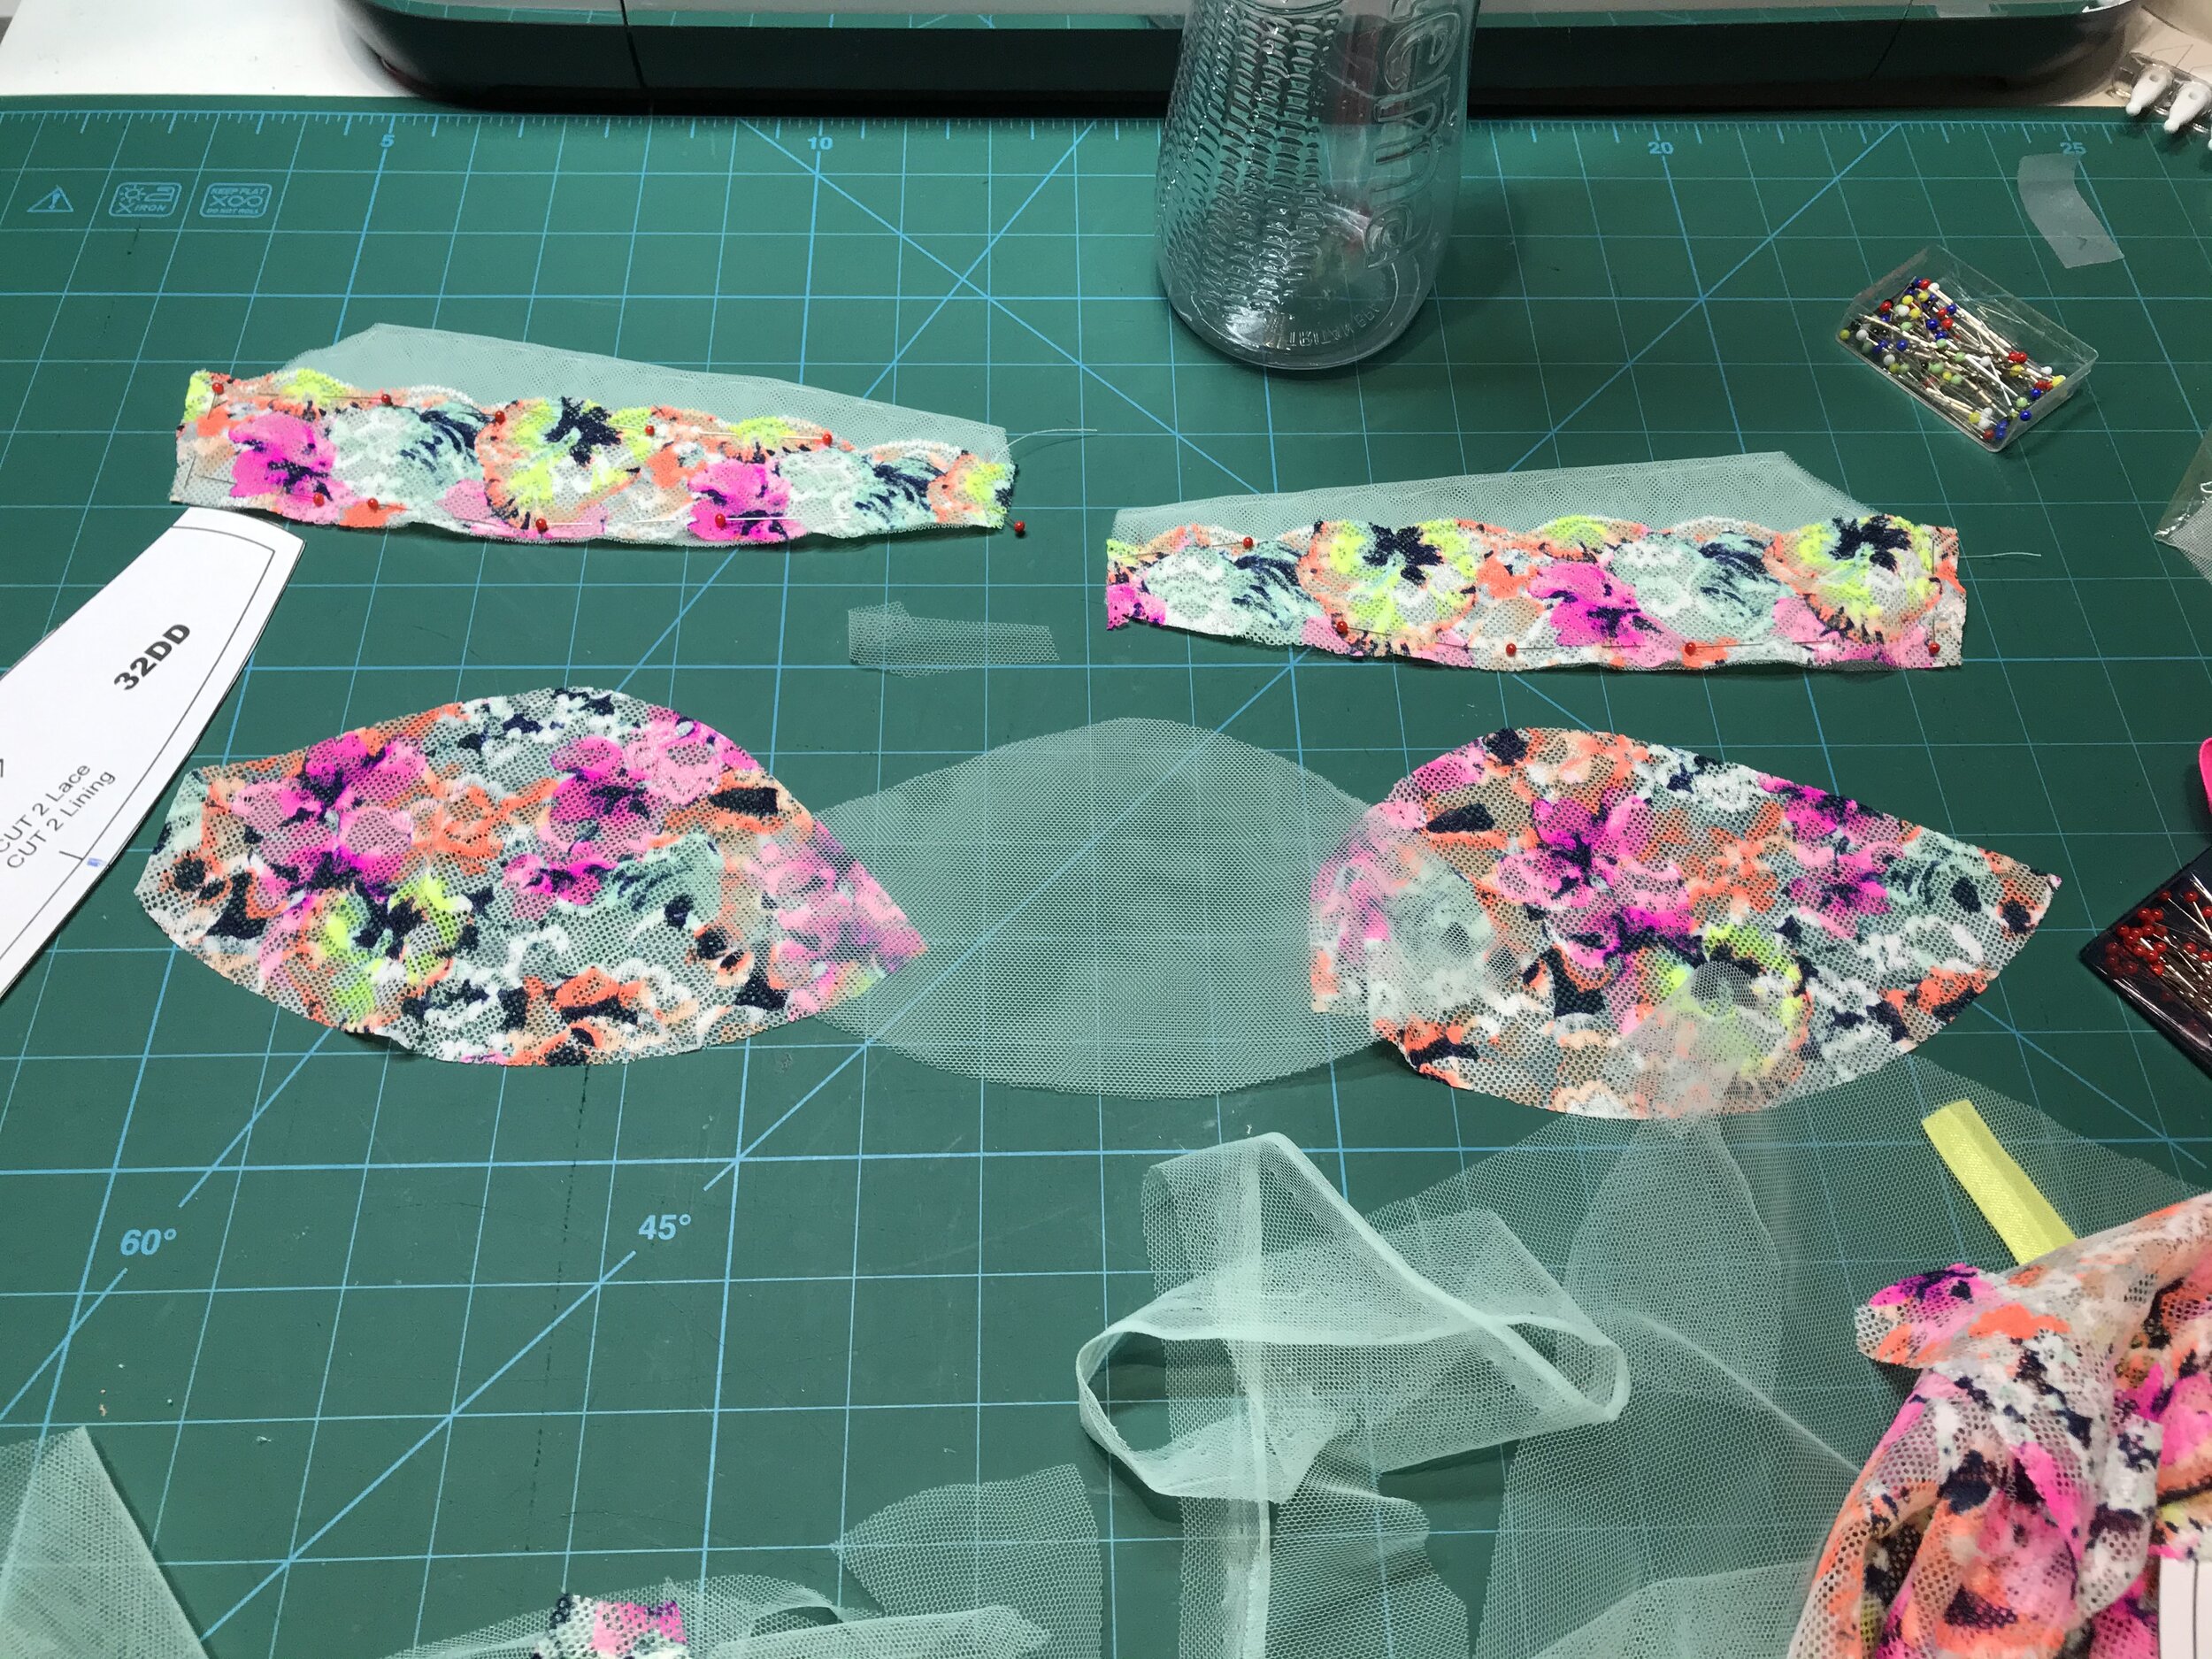
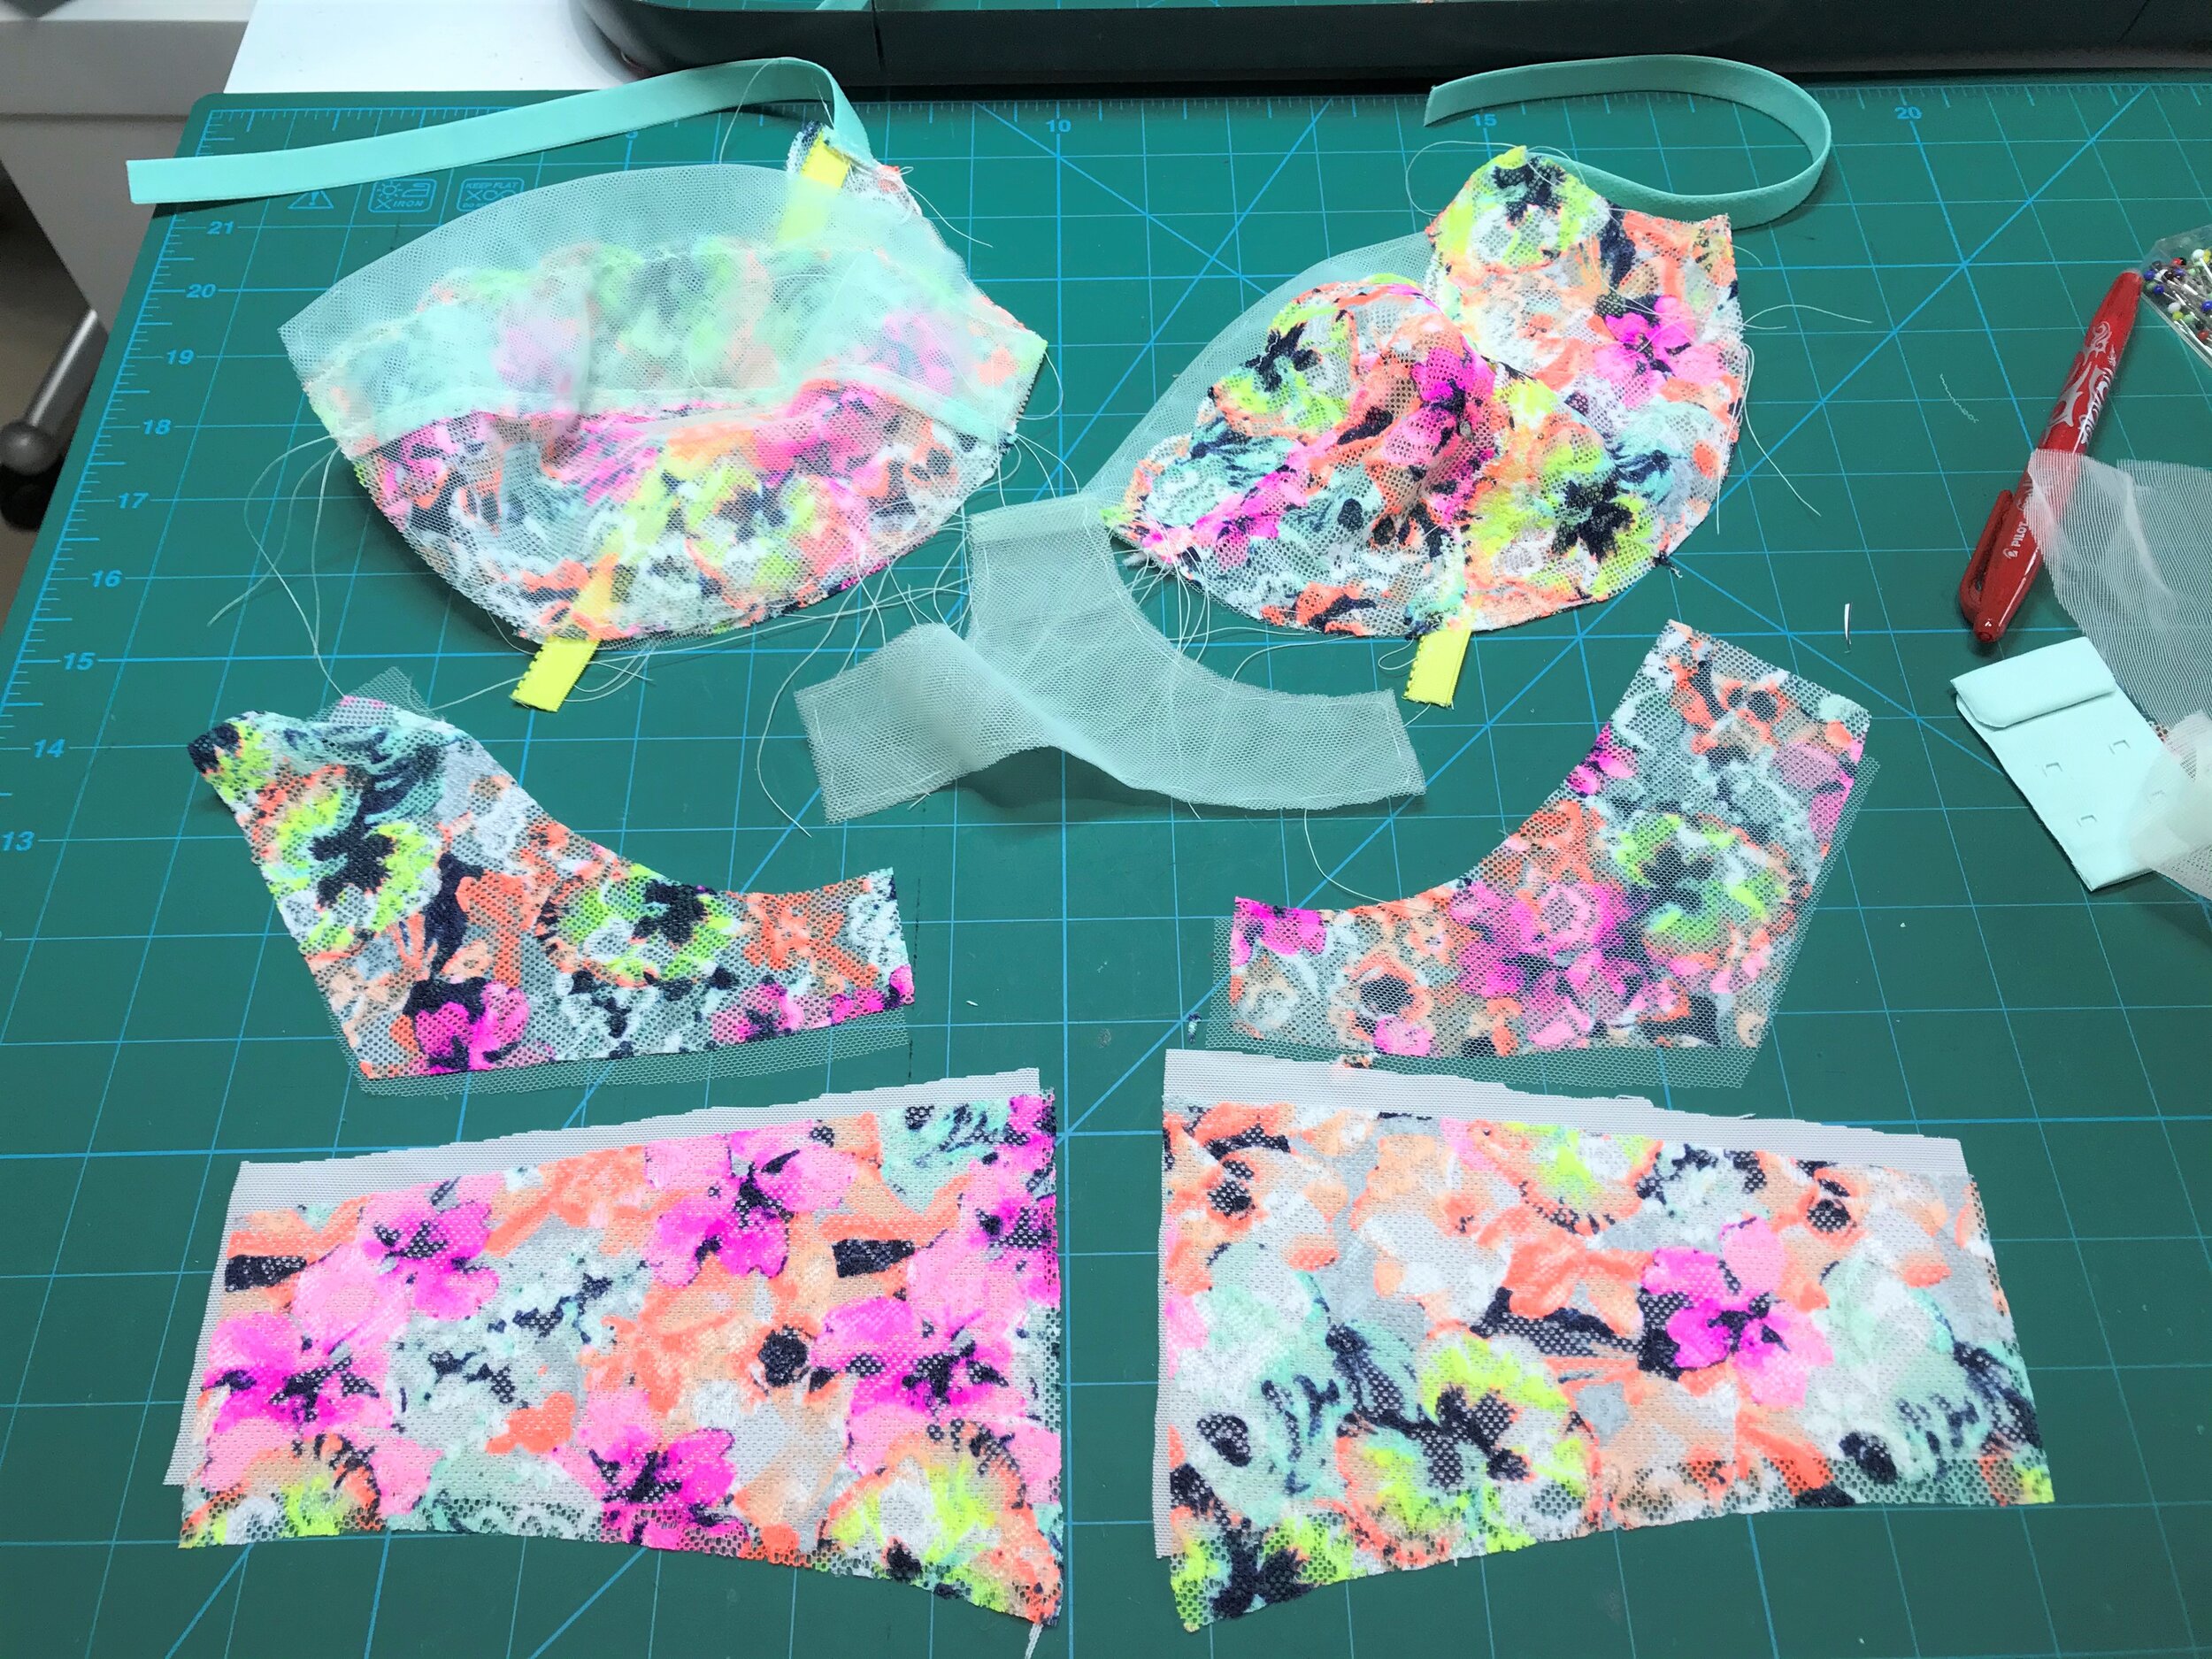
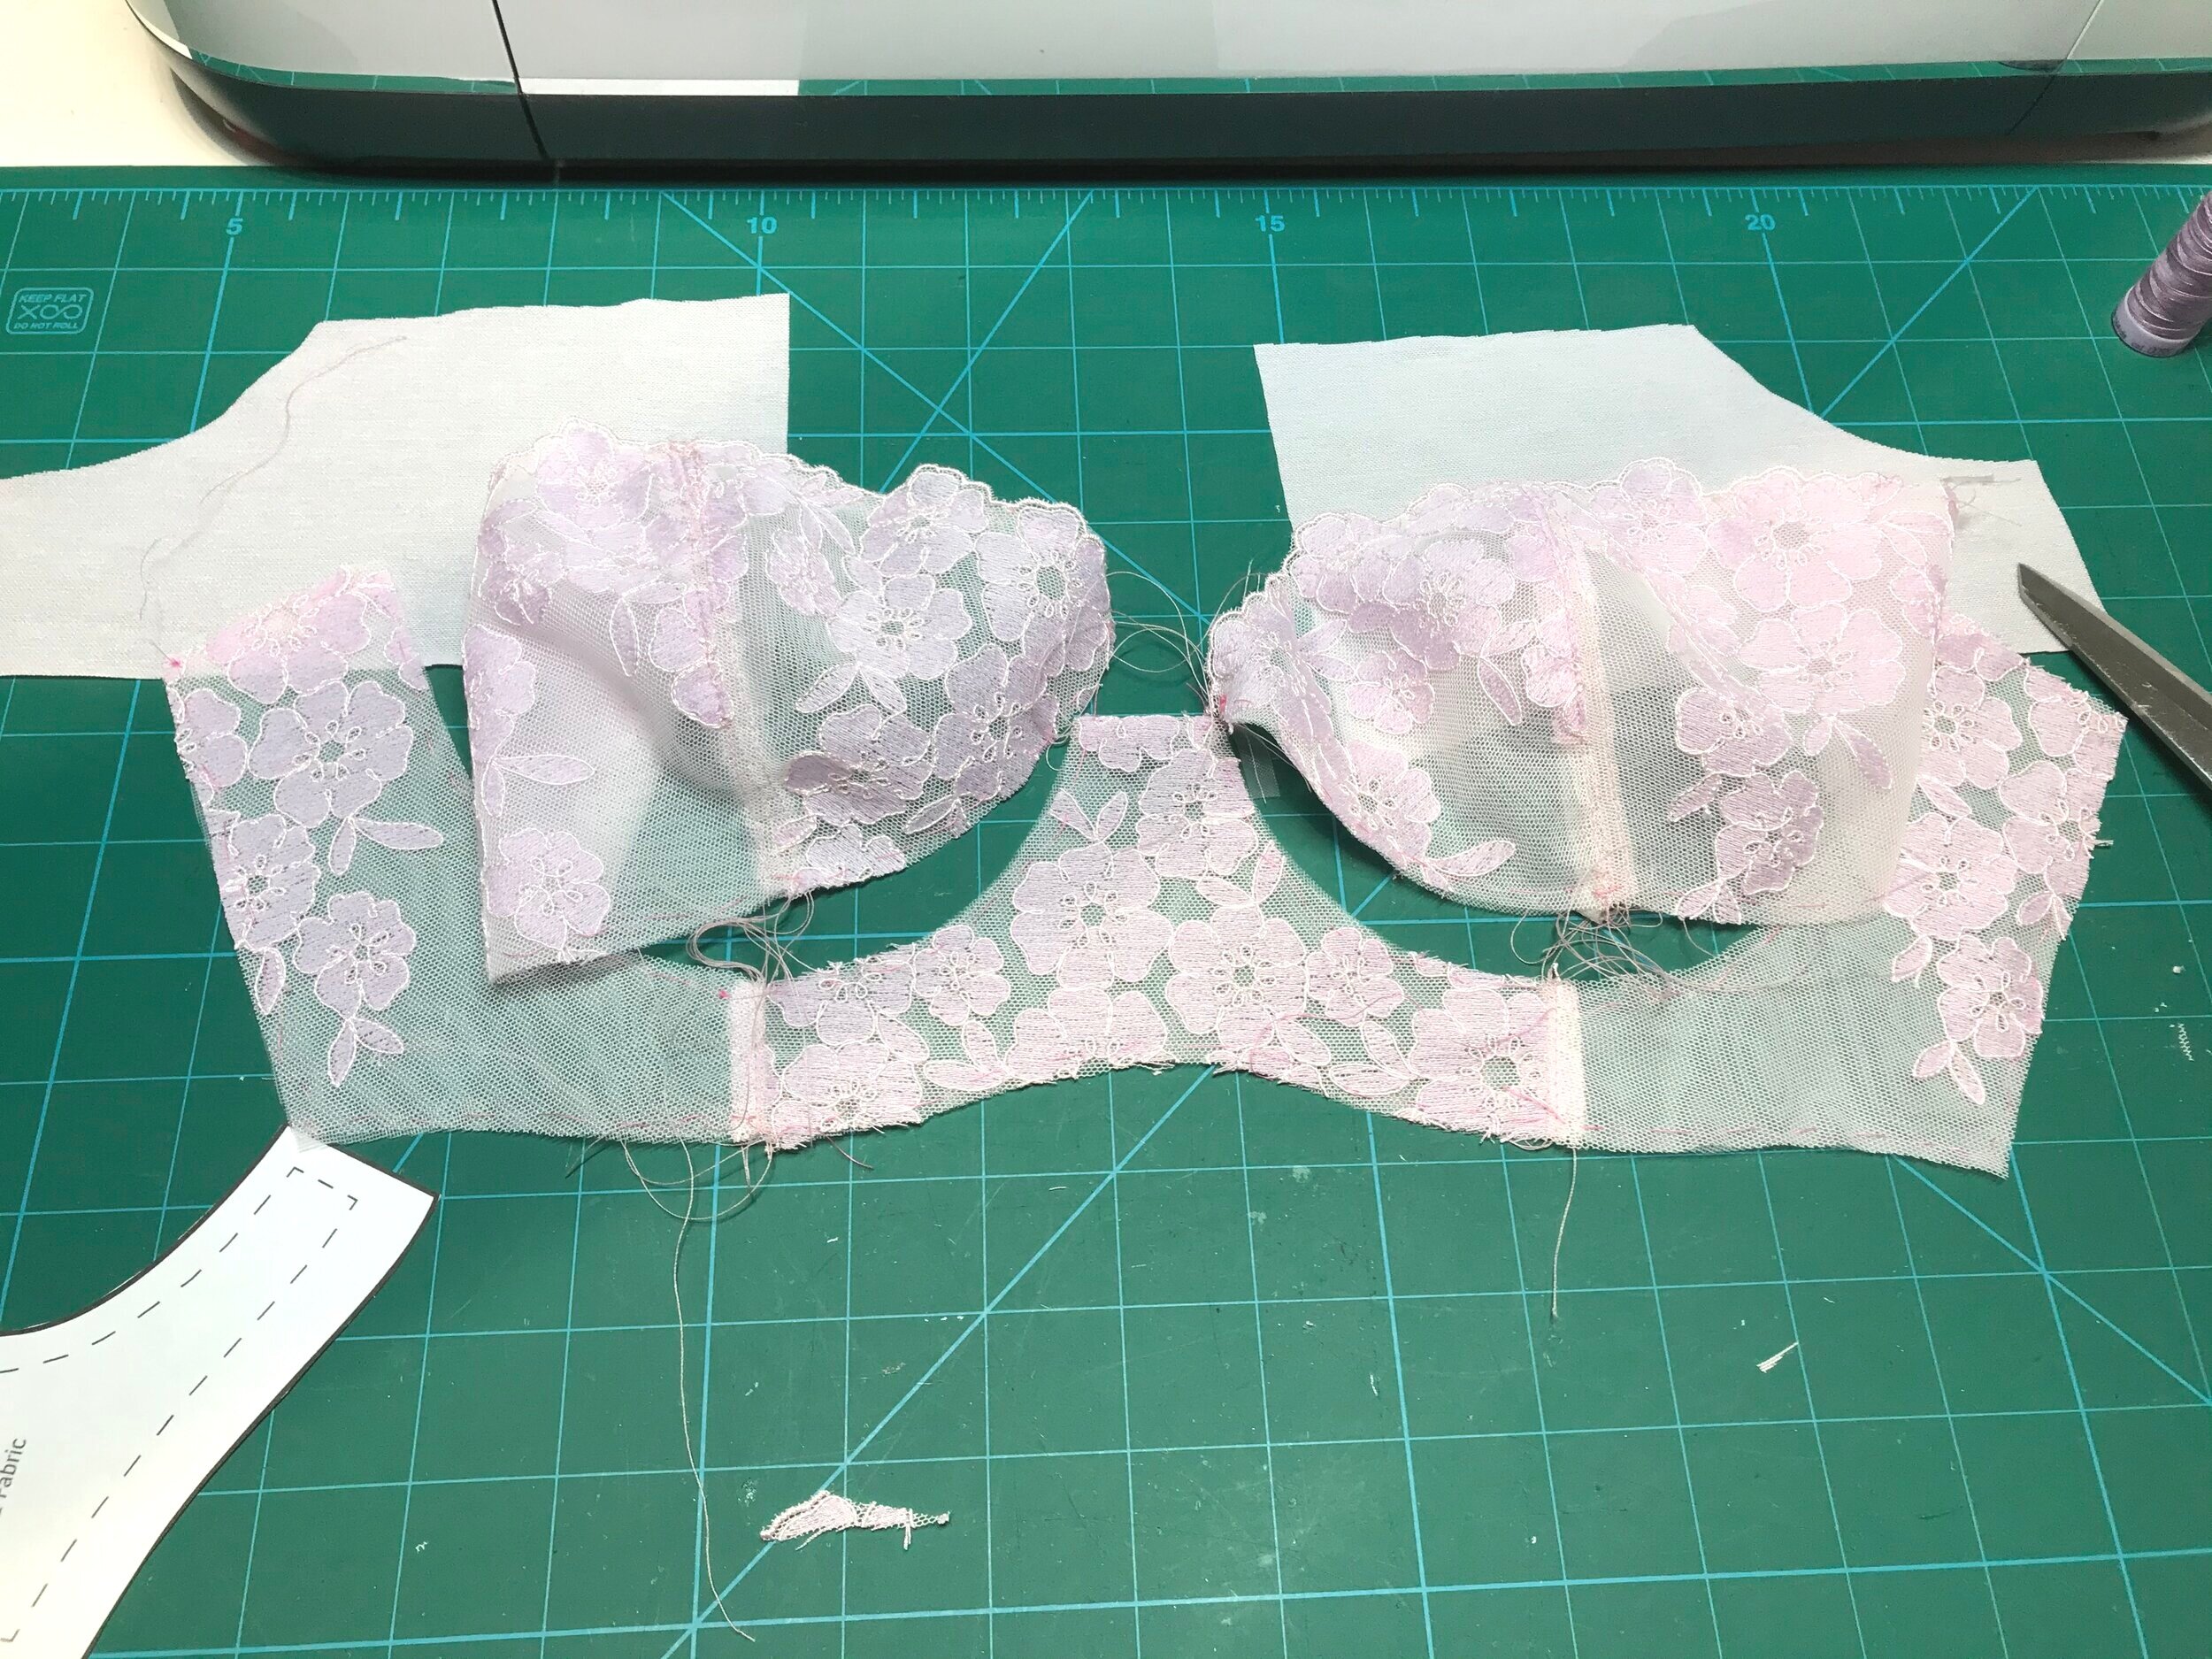
It’s a great feeling when you lay out your pattern pieces and think, yes, this is going to be beautiful. I used two layers of tulle to provide enough stability for the bridge and to enclose the cup seams. At this point I decided to use the matt side of the fold over elastic as the shiny side just looked wrong with the clean lines of the rest of the design. Luckily I had some matt strap elastic which would match perfectly. Now I had to put it altogether to see if it worked.

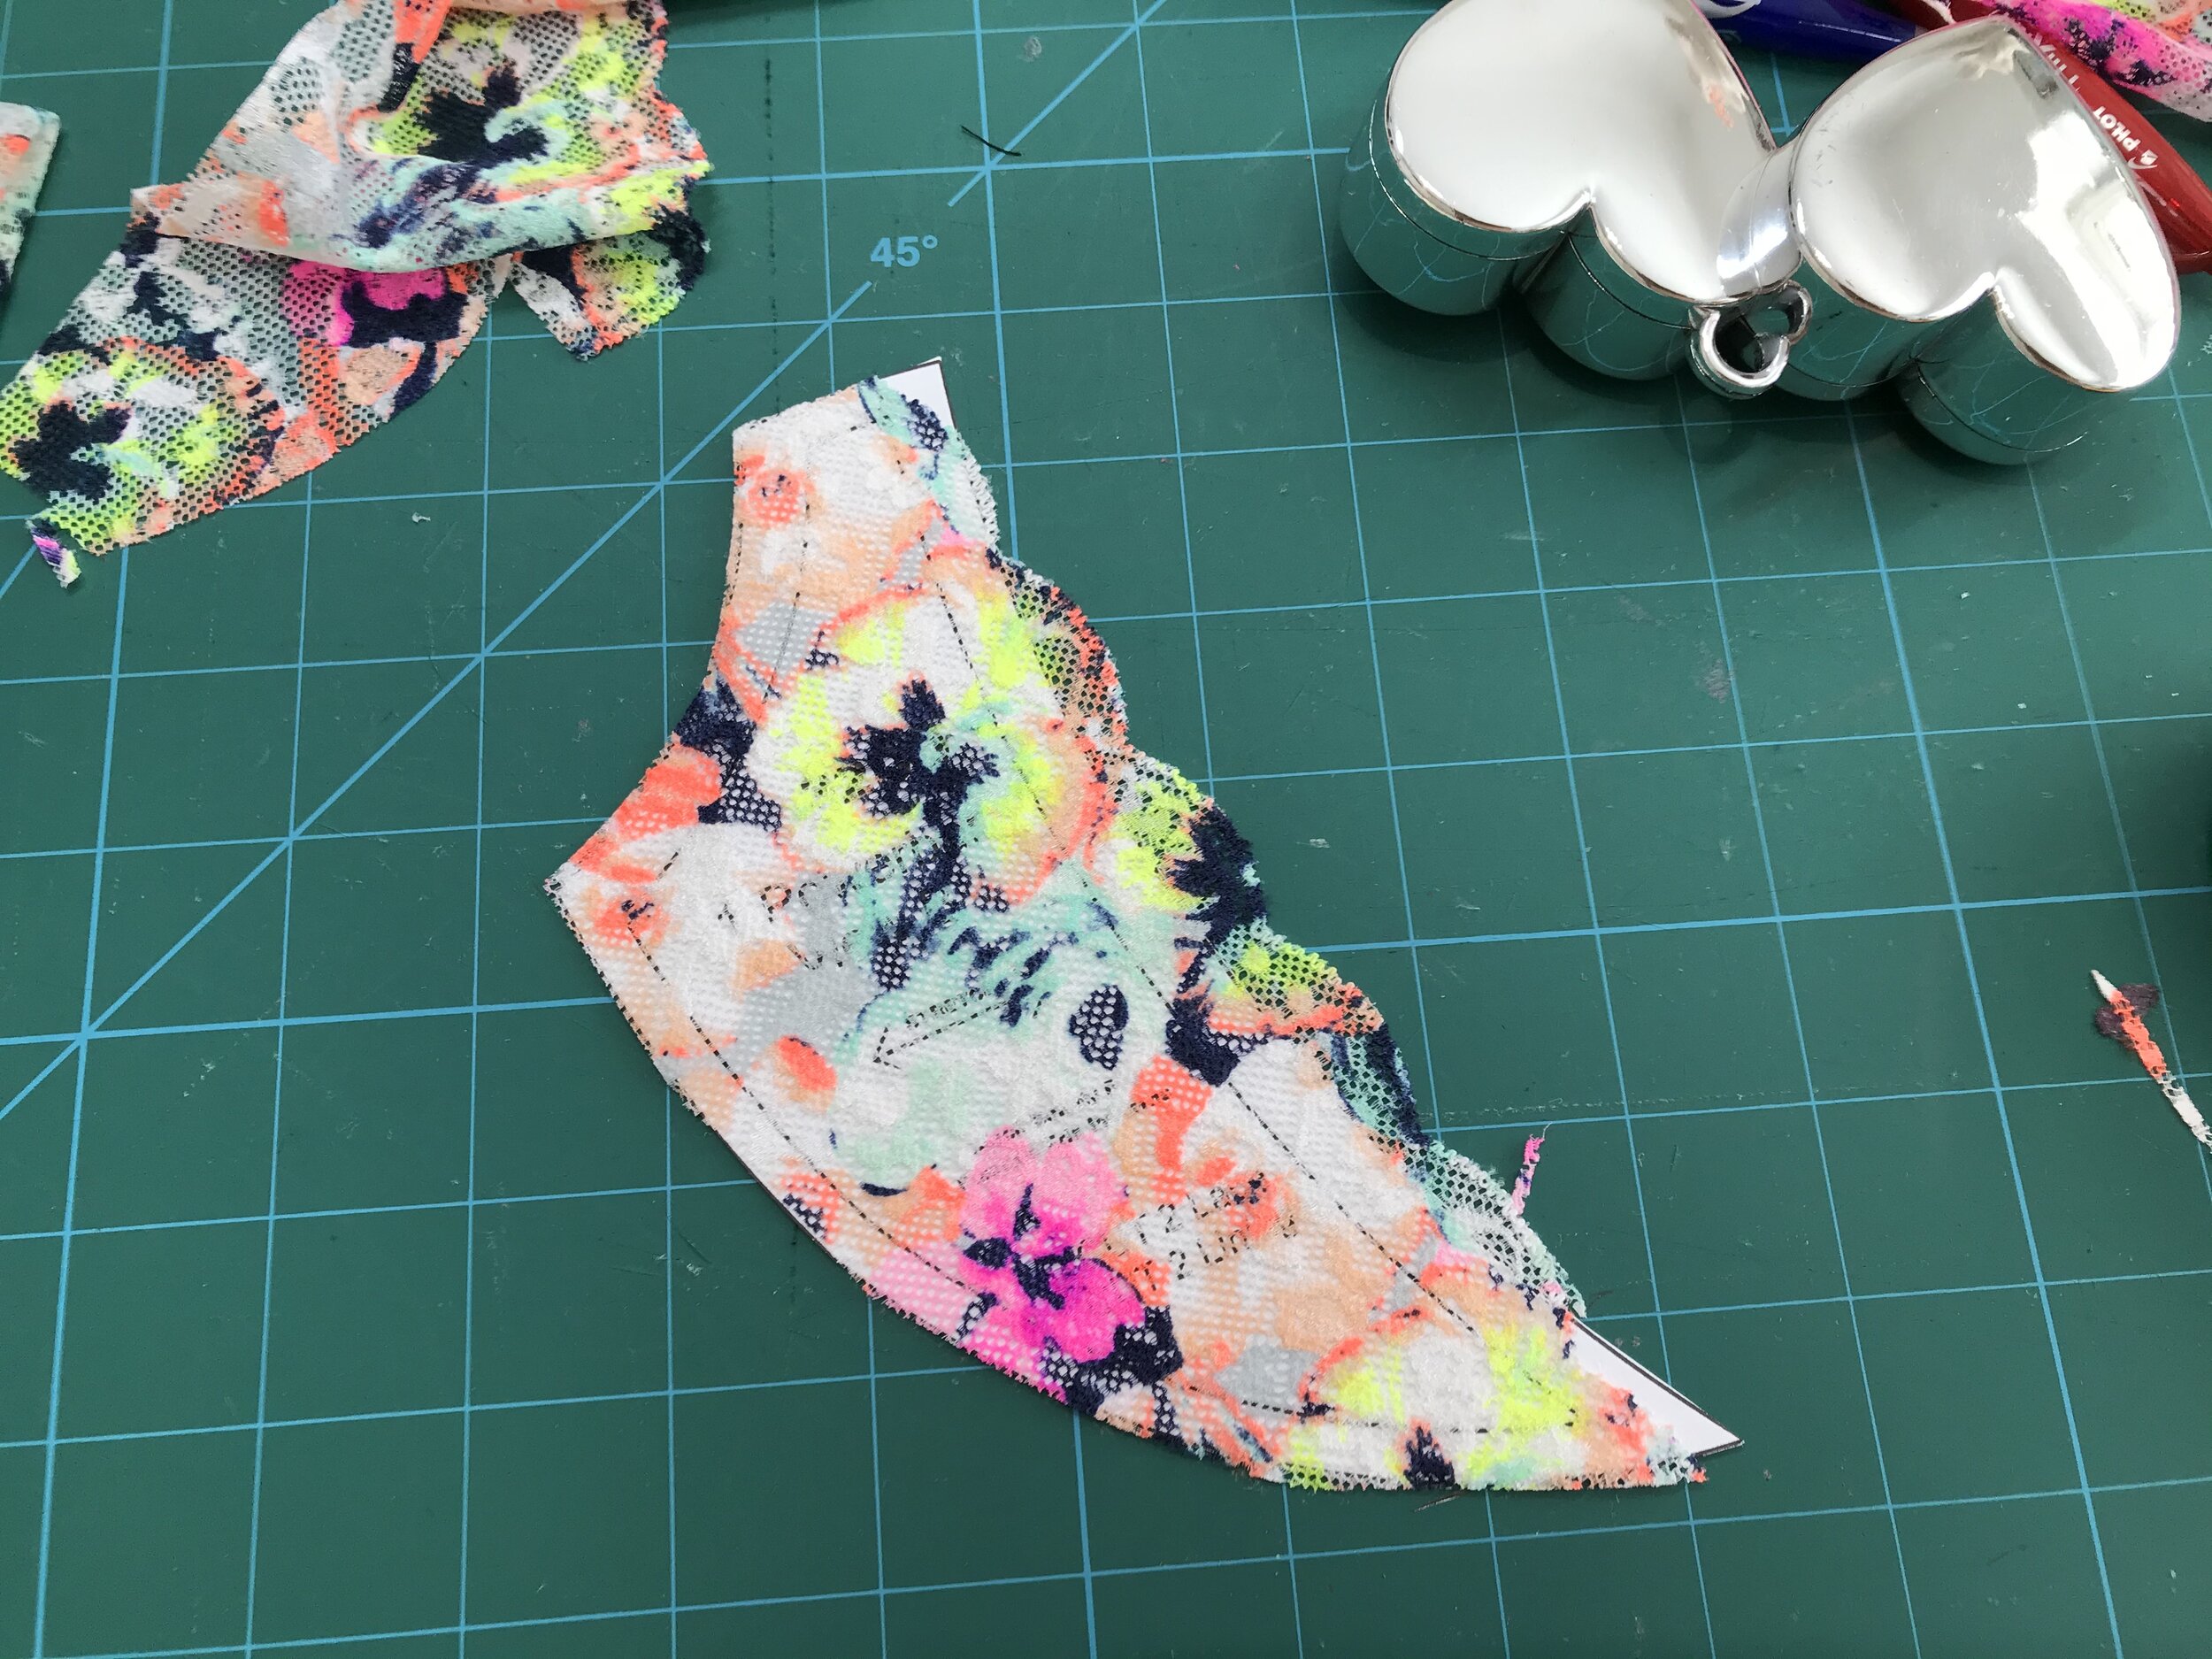
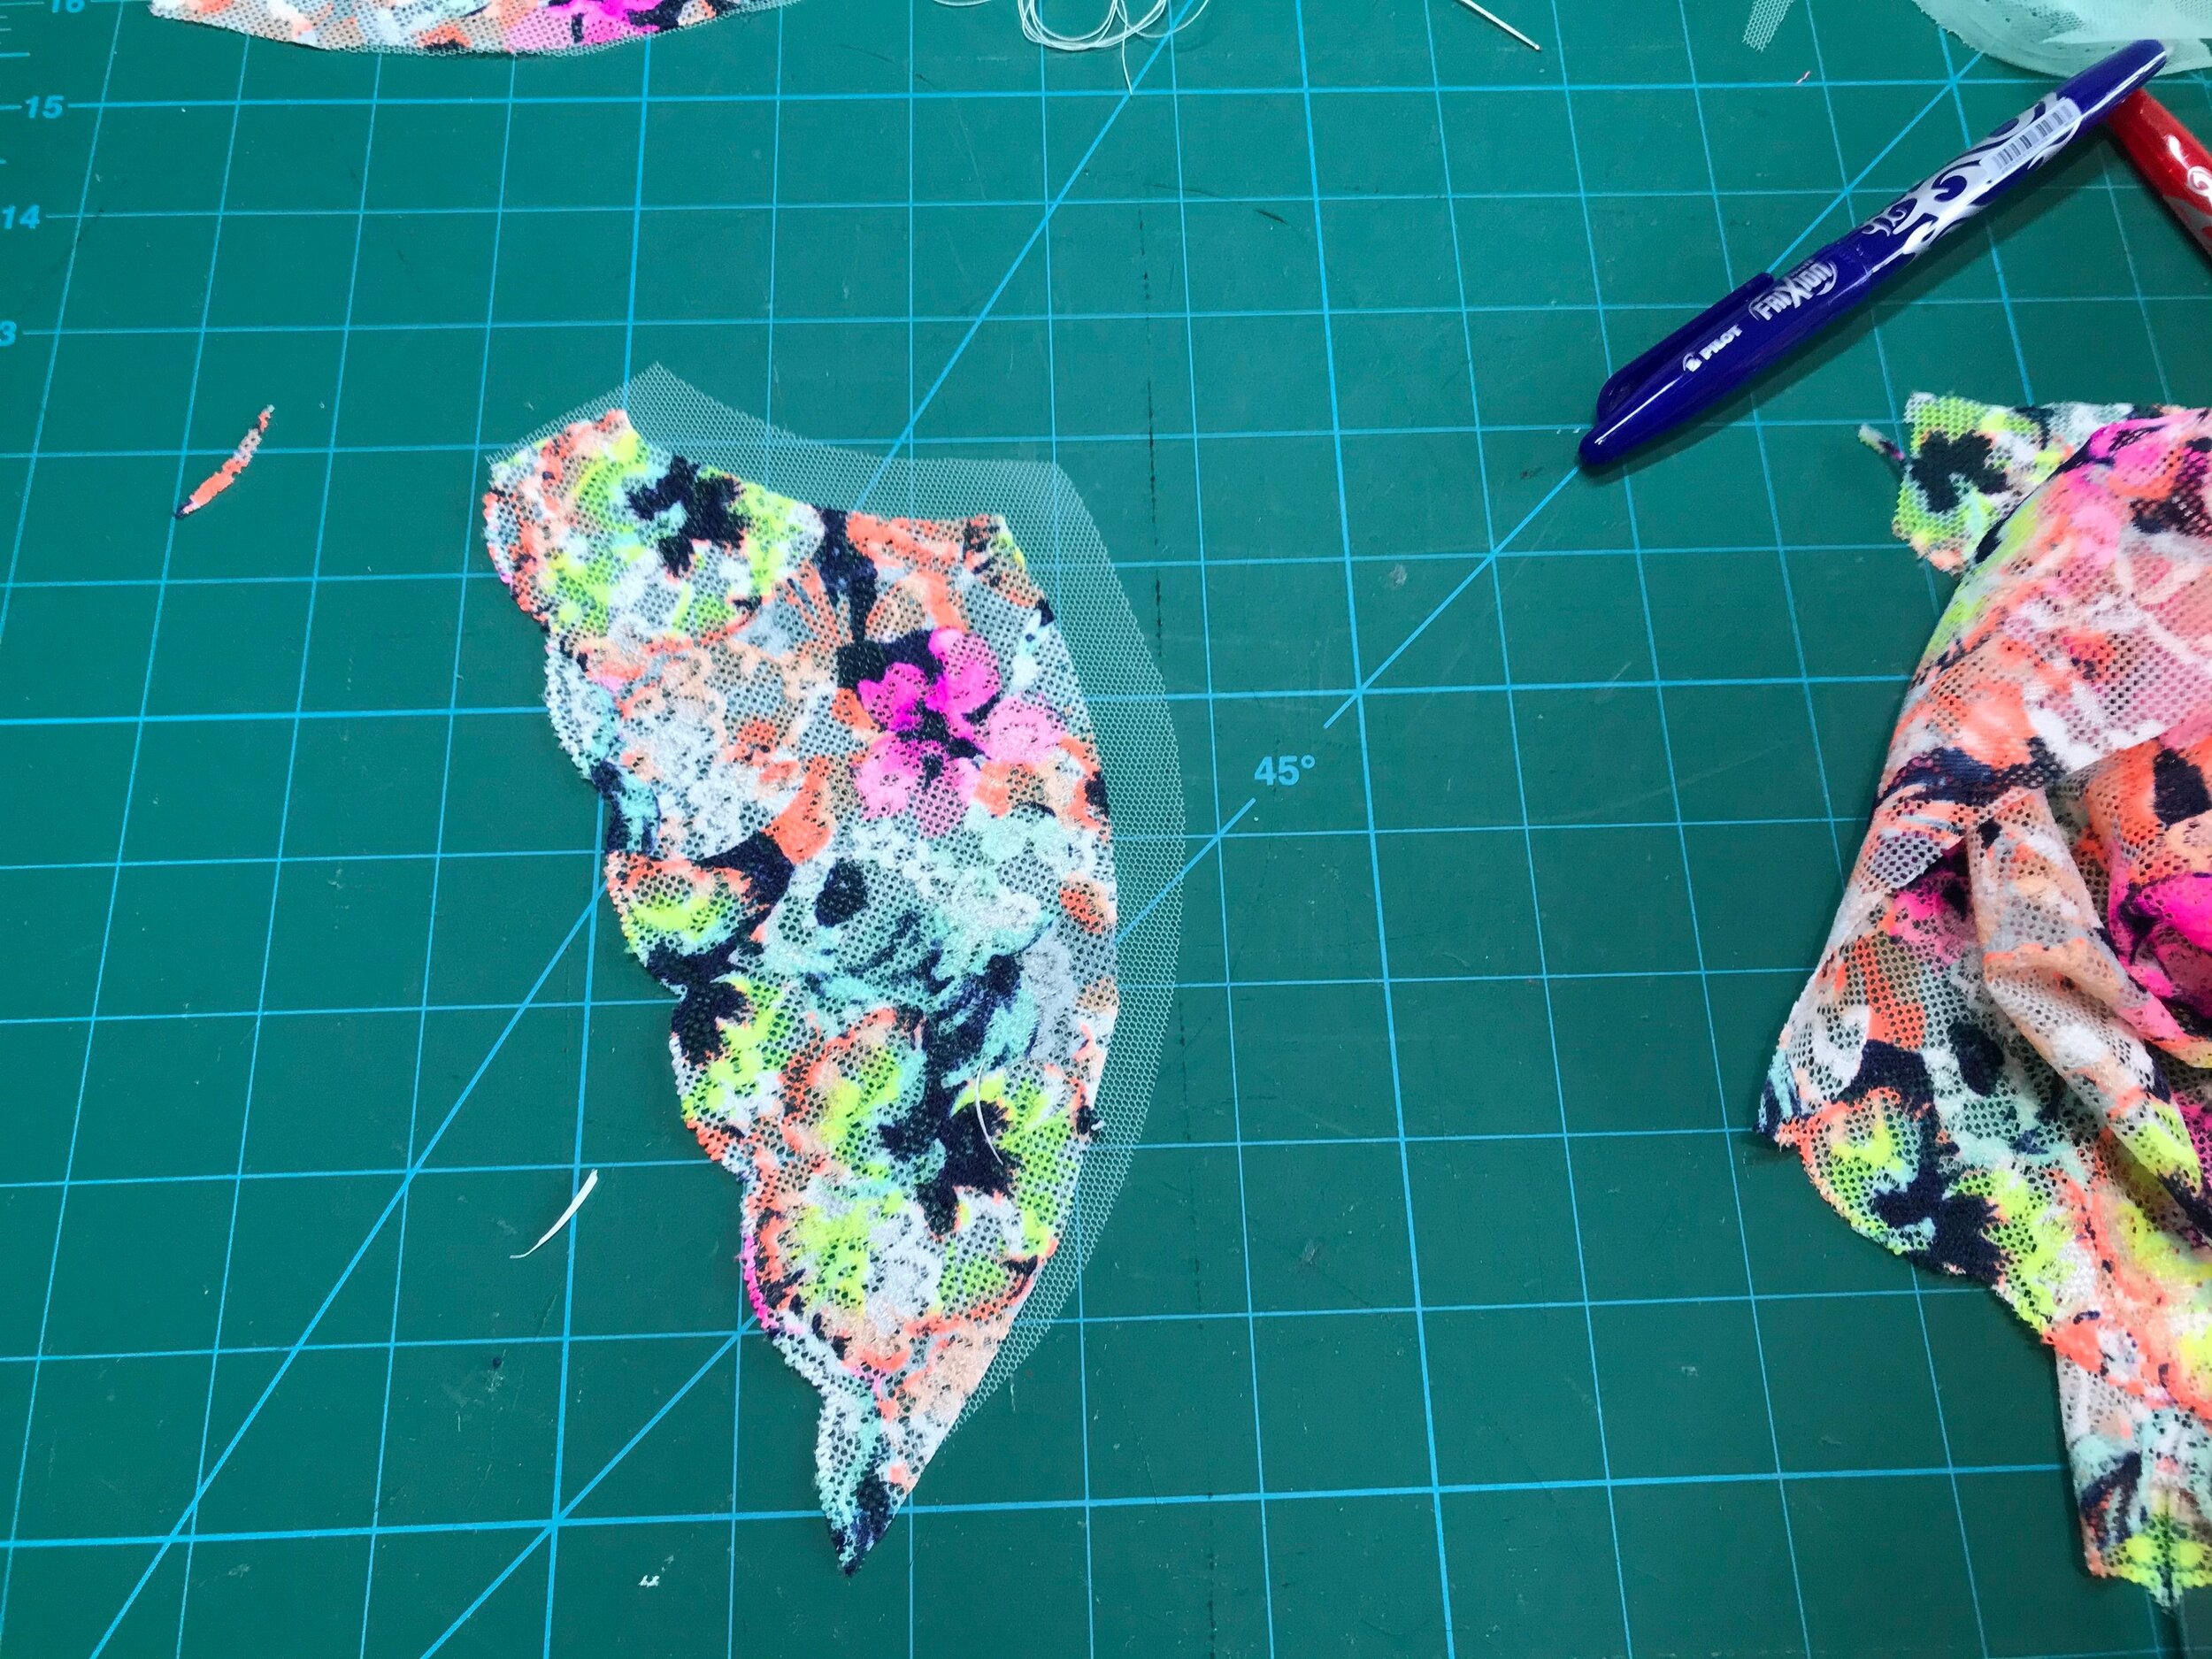
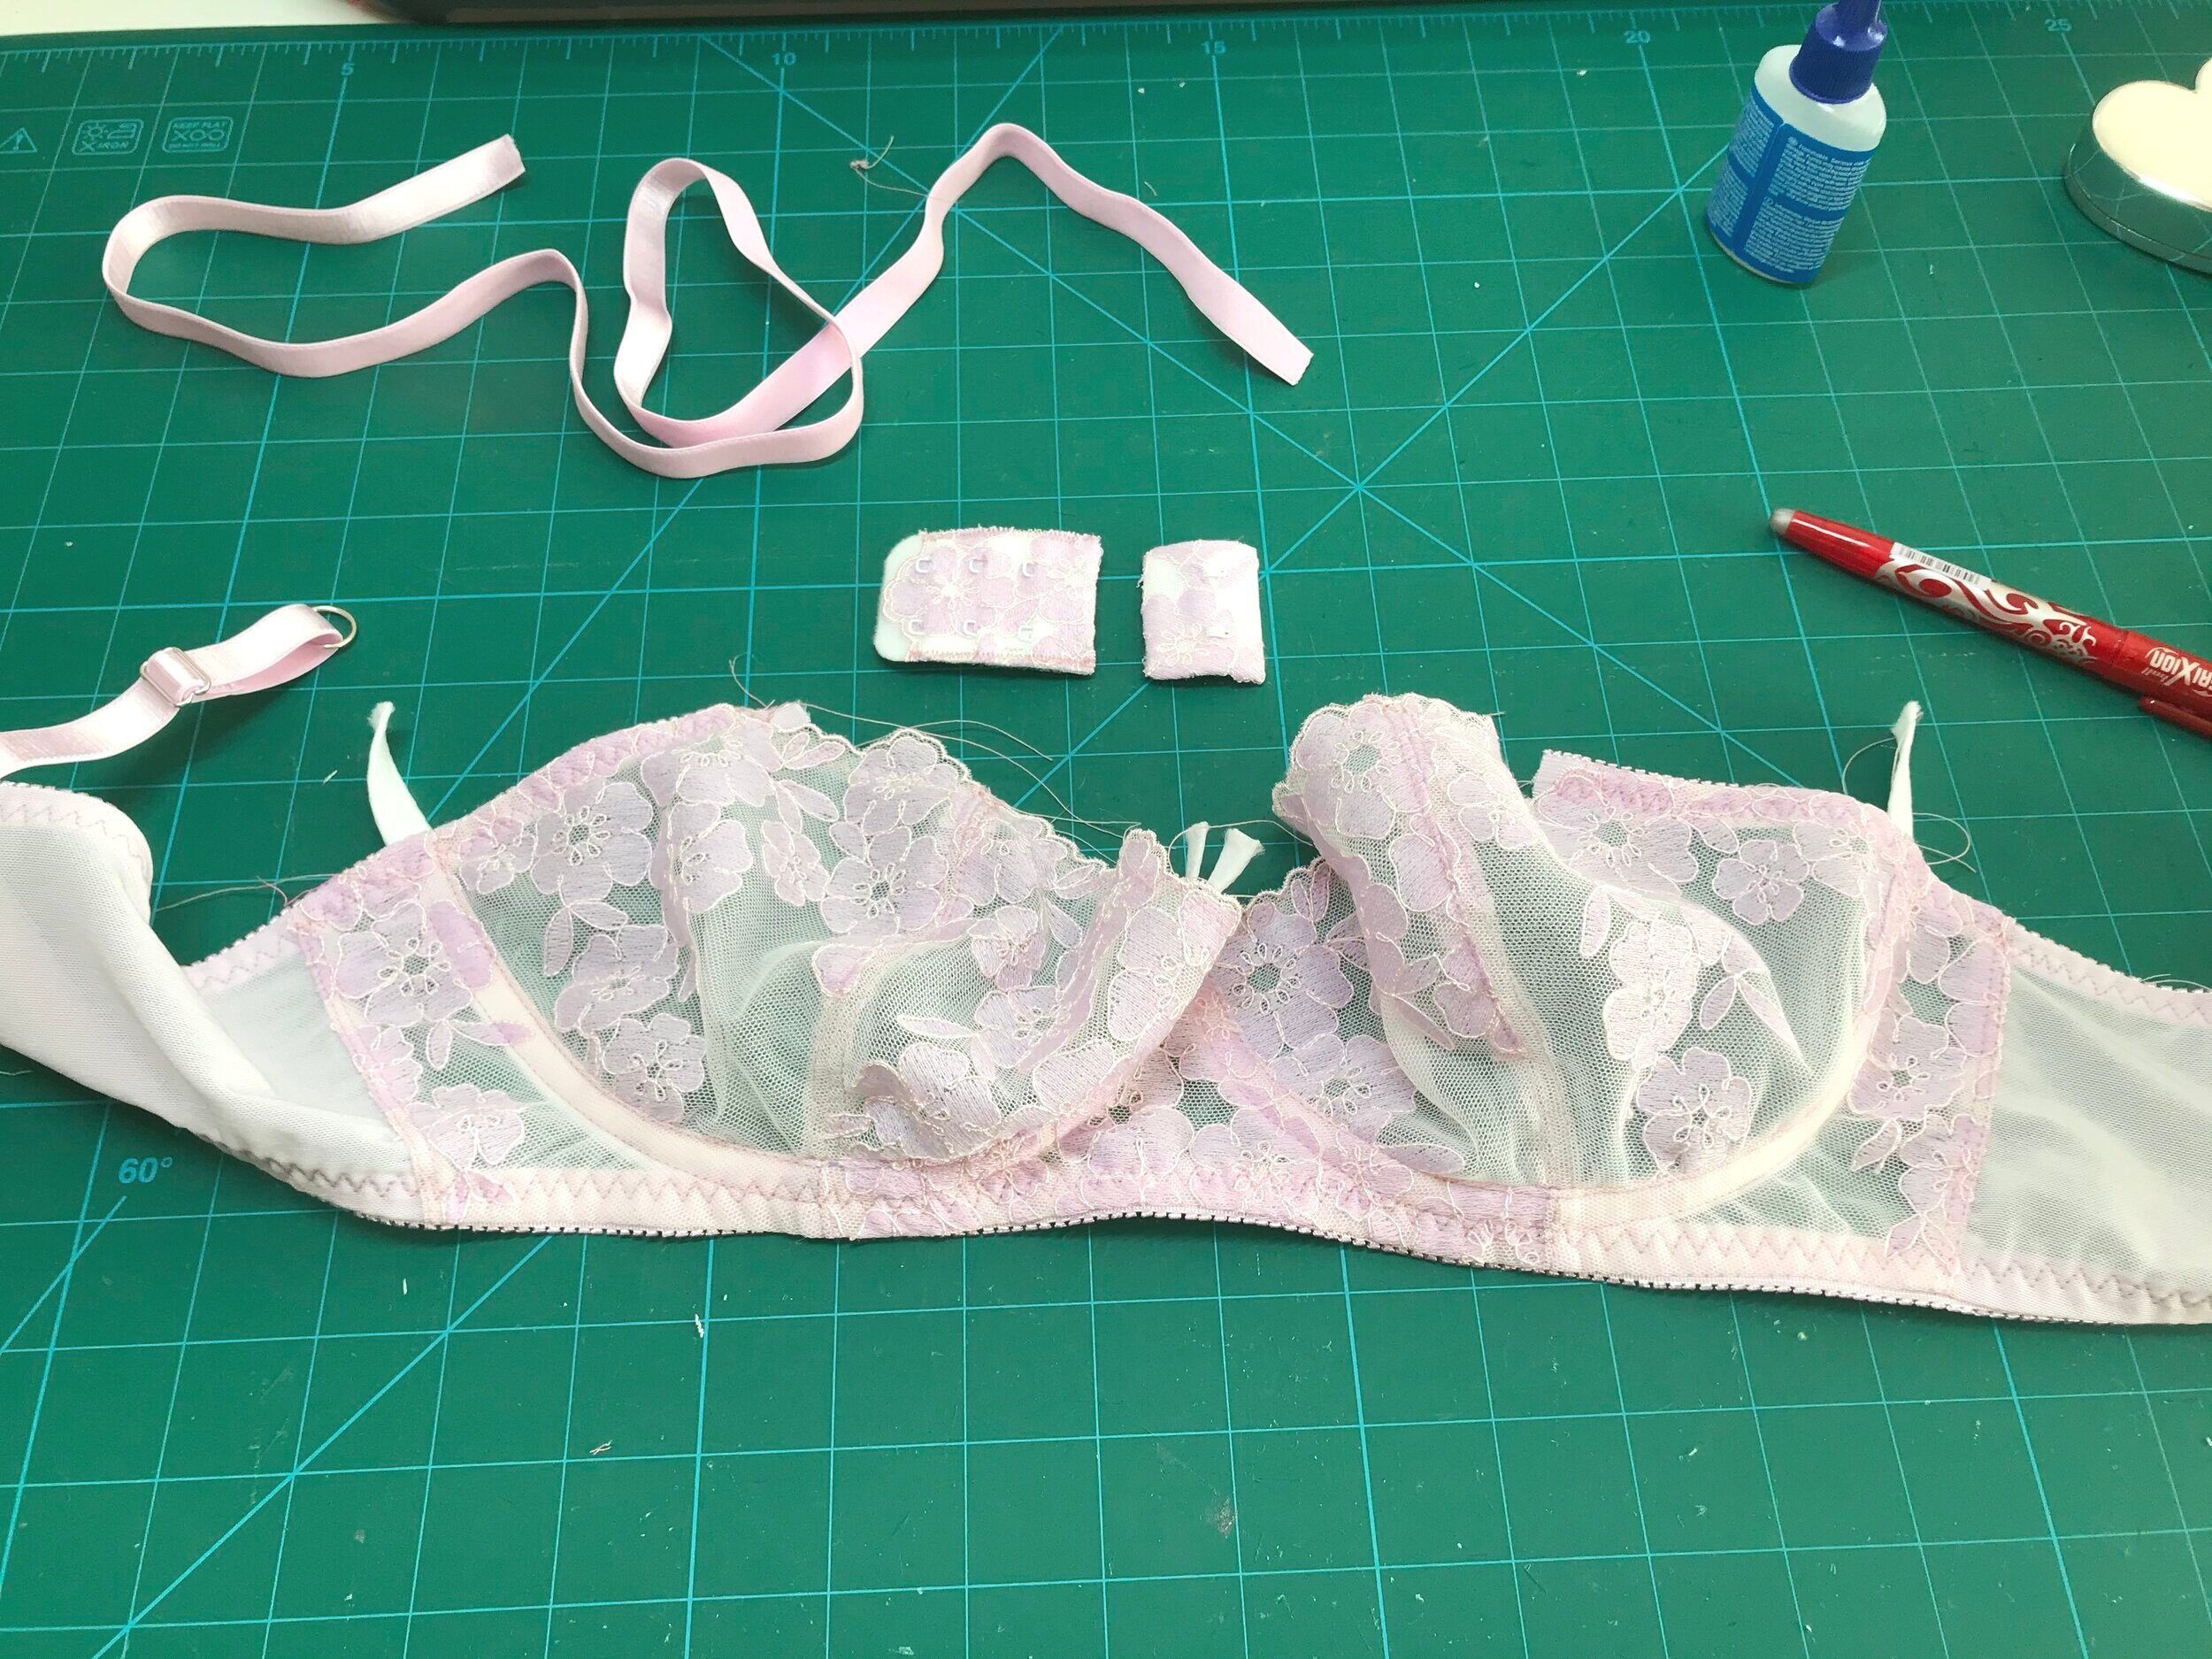
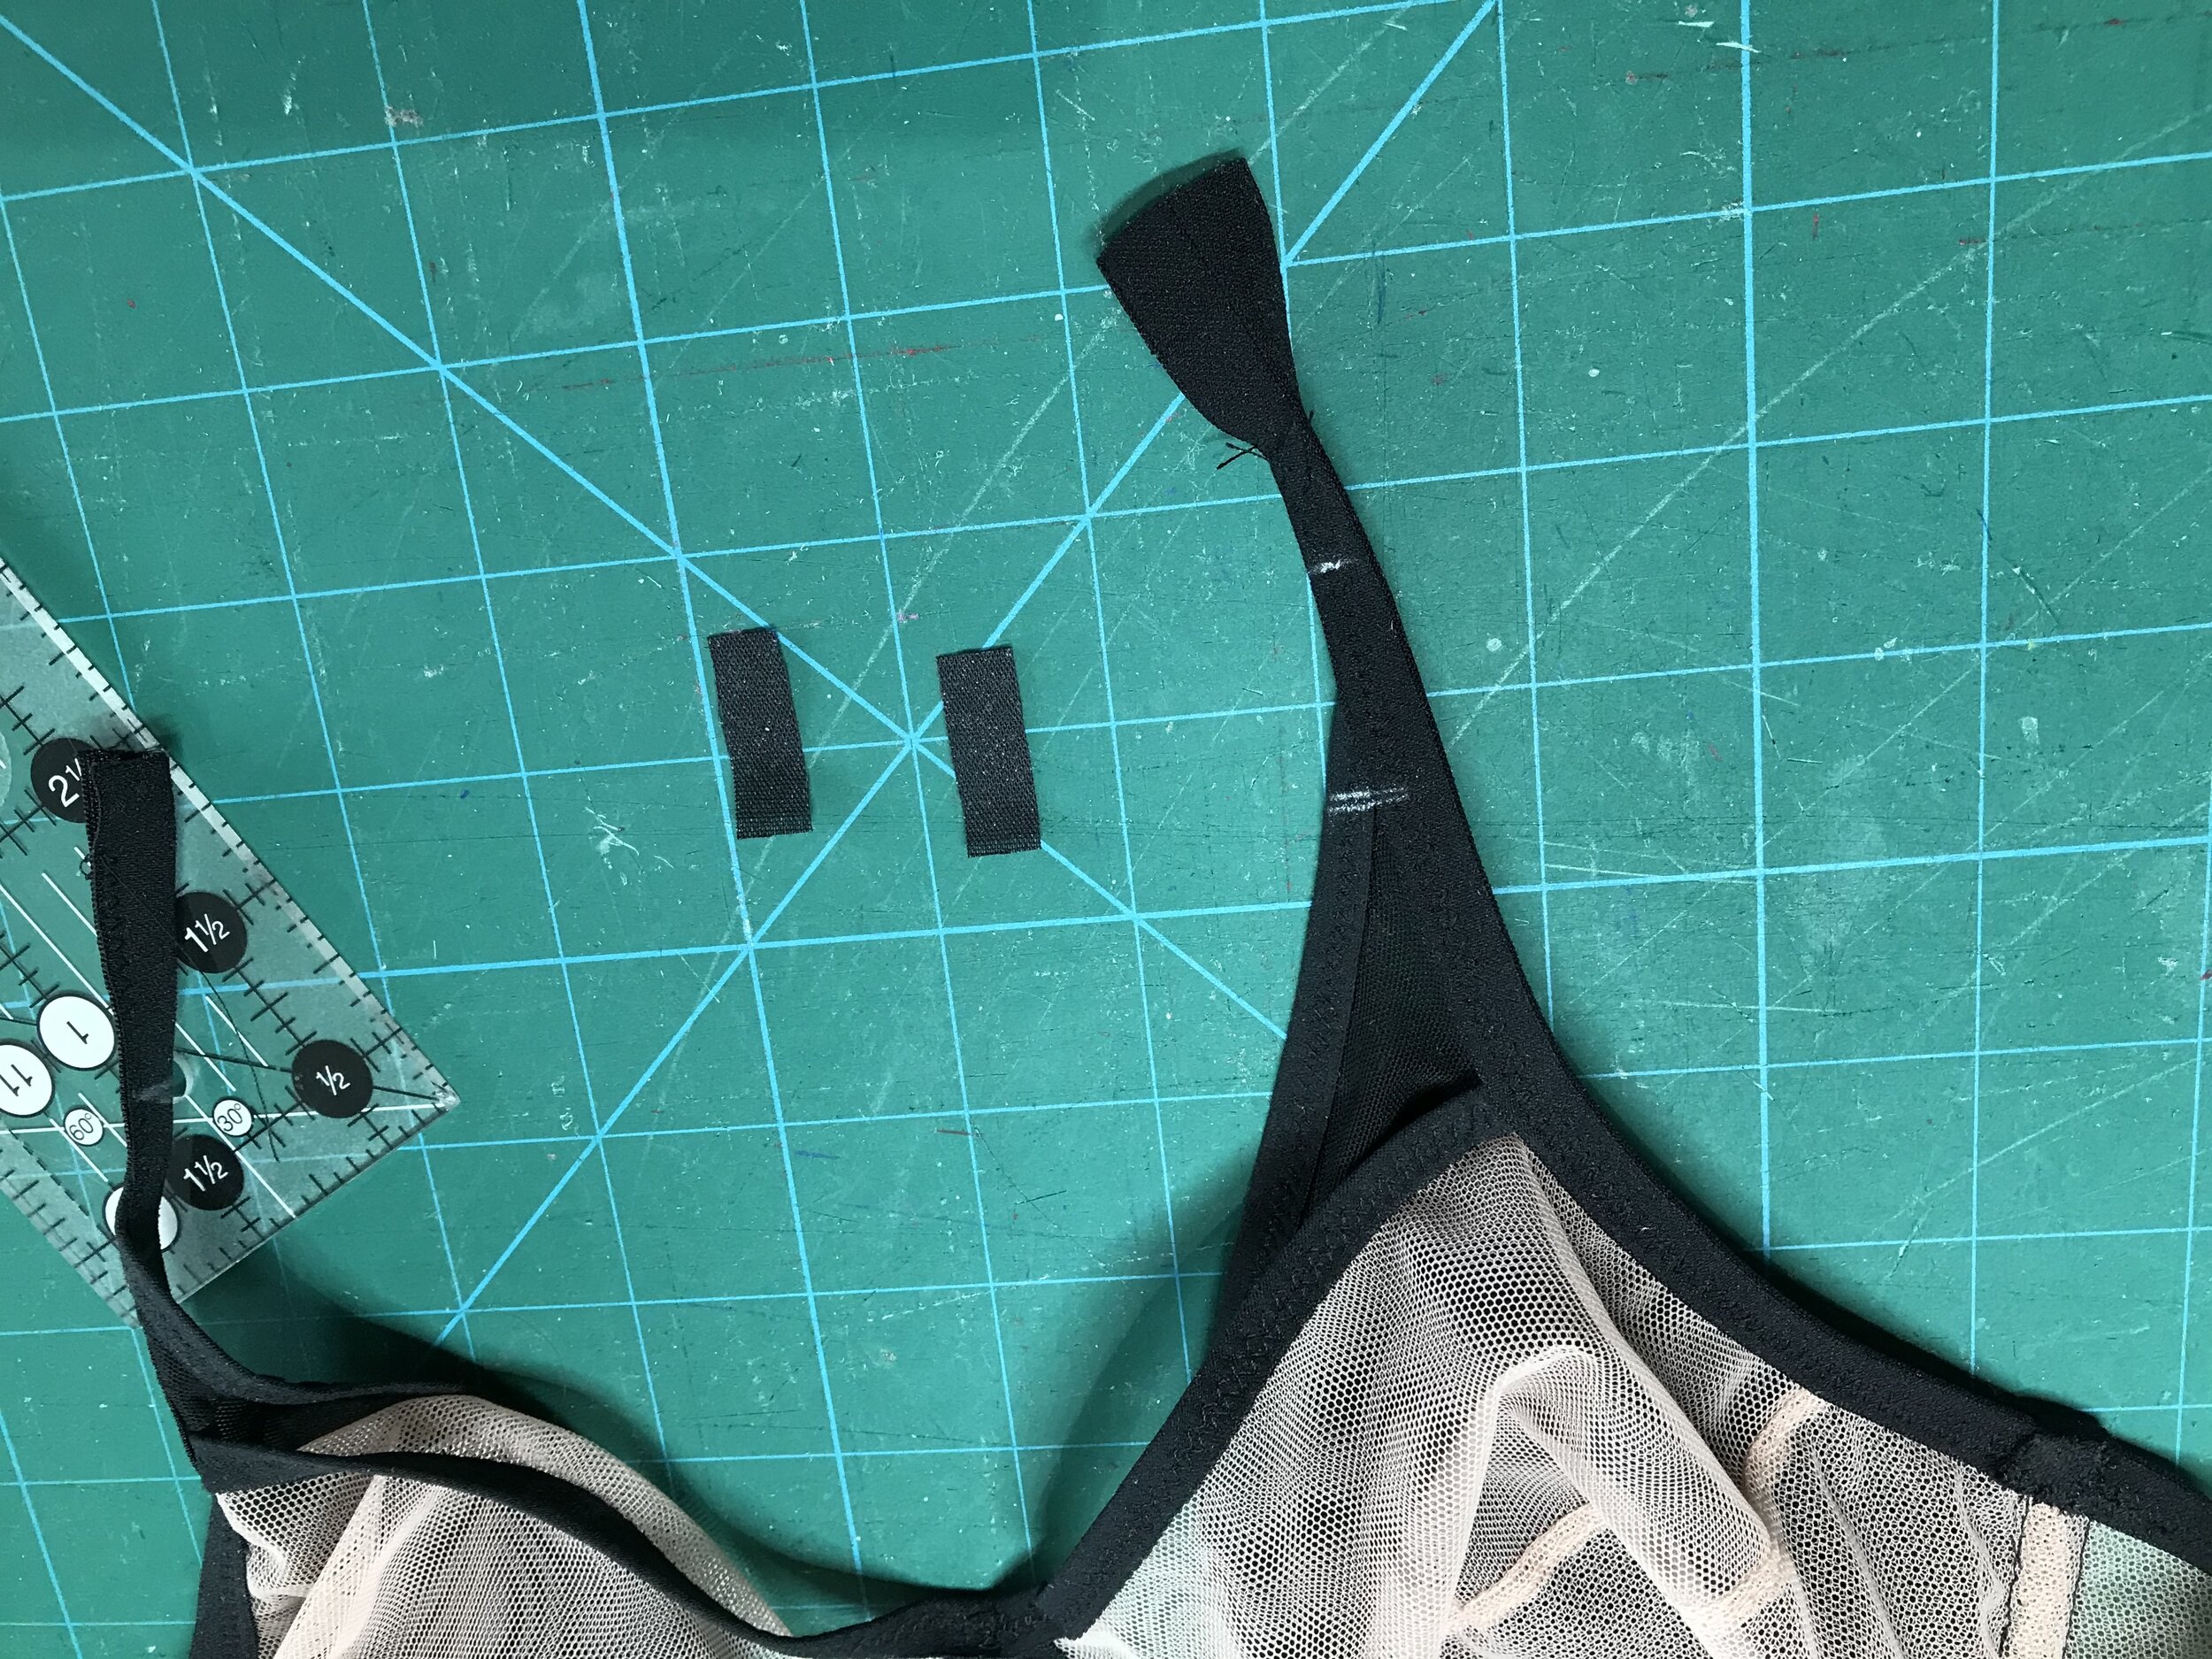
First I made up the darted cup and finished the front edge with elastic. I then made up the tulle cup and I suddenly had a brainwave to enclose some slimline plastic boning from Madalynne in the fold over elastic from the outer cup to the top of the bridge. I attached the two cups together and then sewed in to the frame wrong sides together so I could attach the channeling to the outside along the same stitch line.

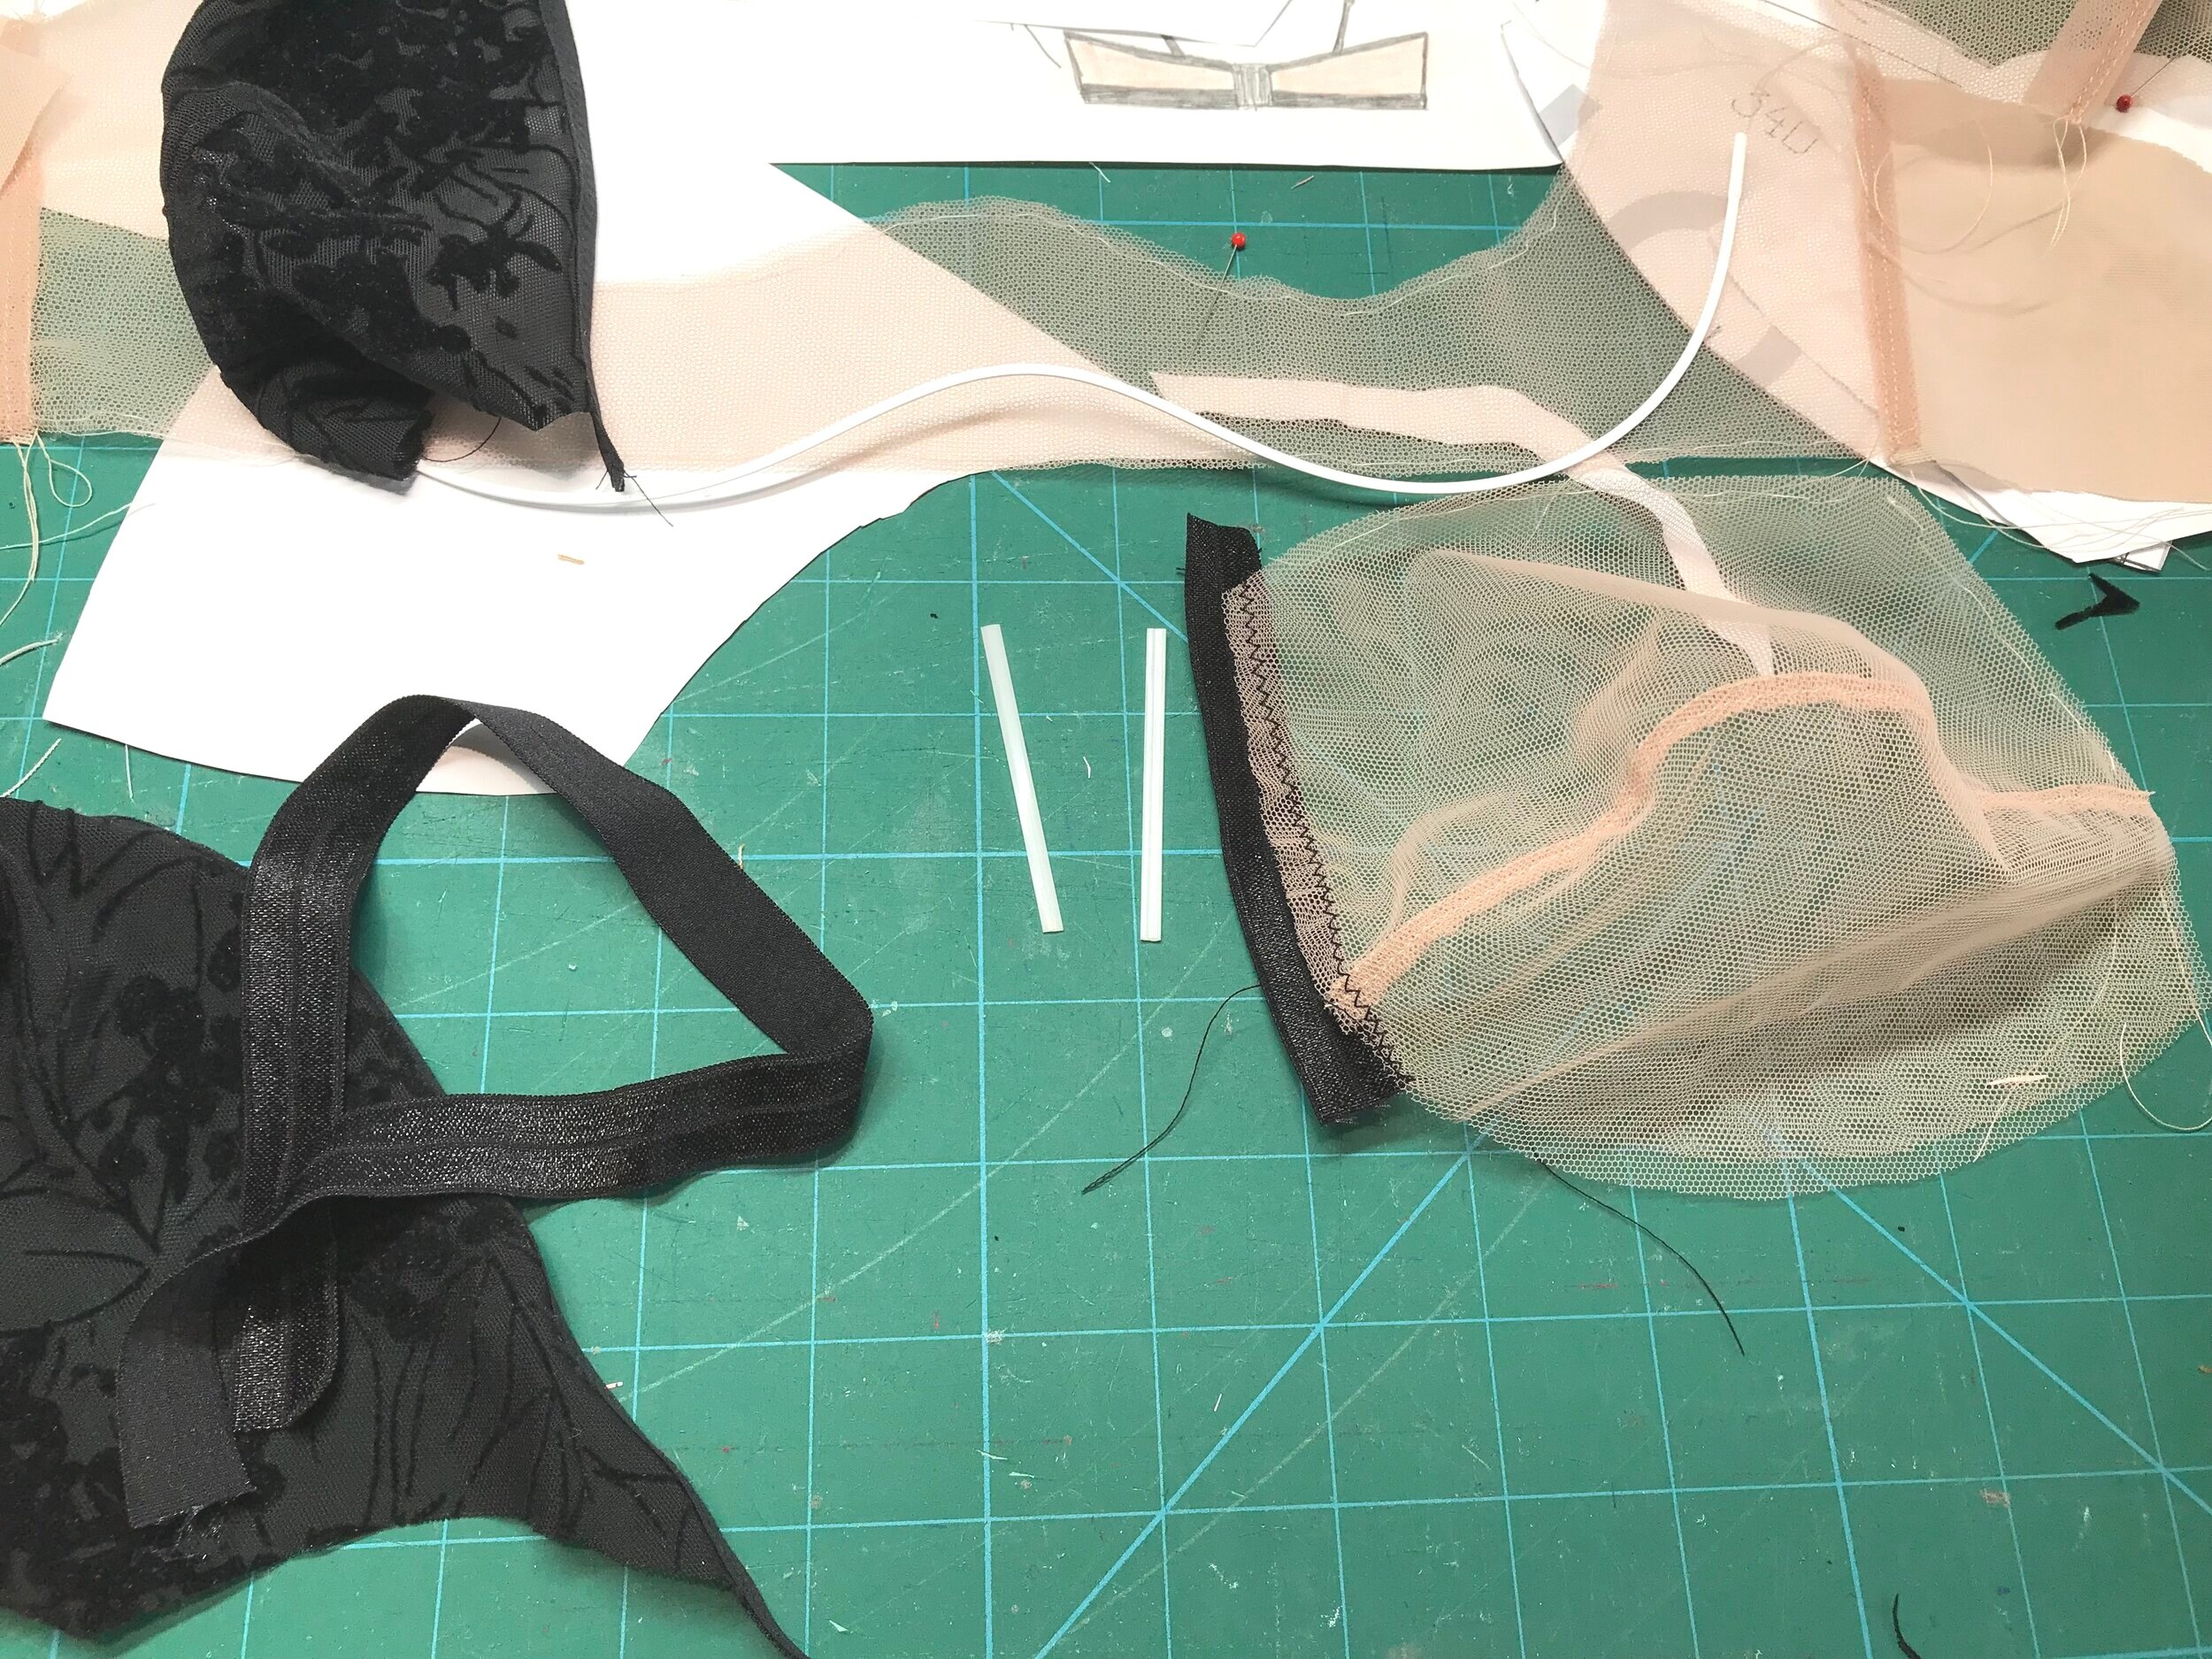
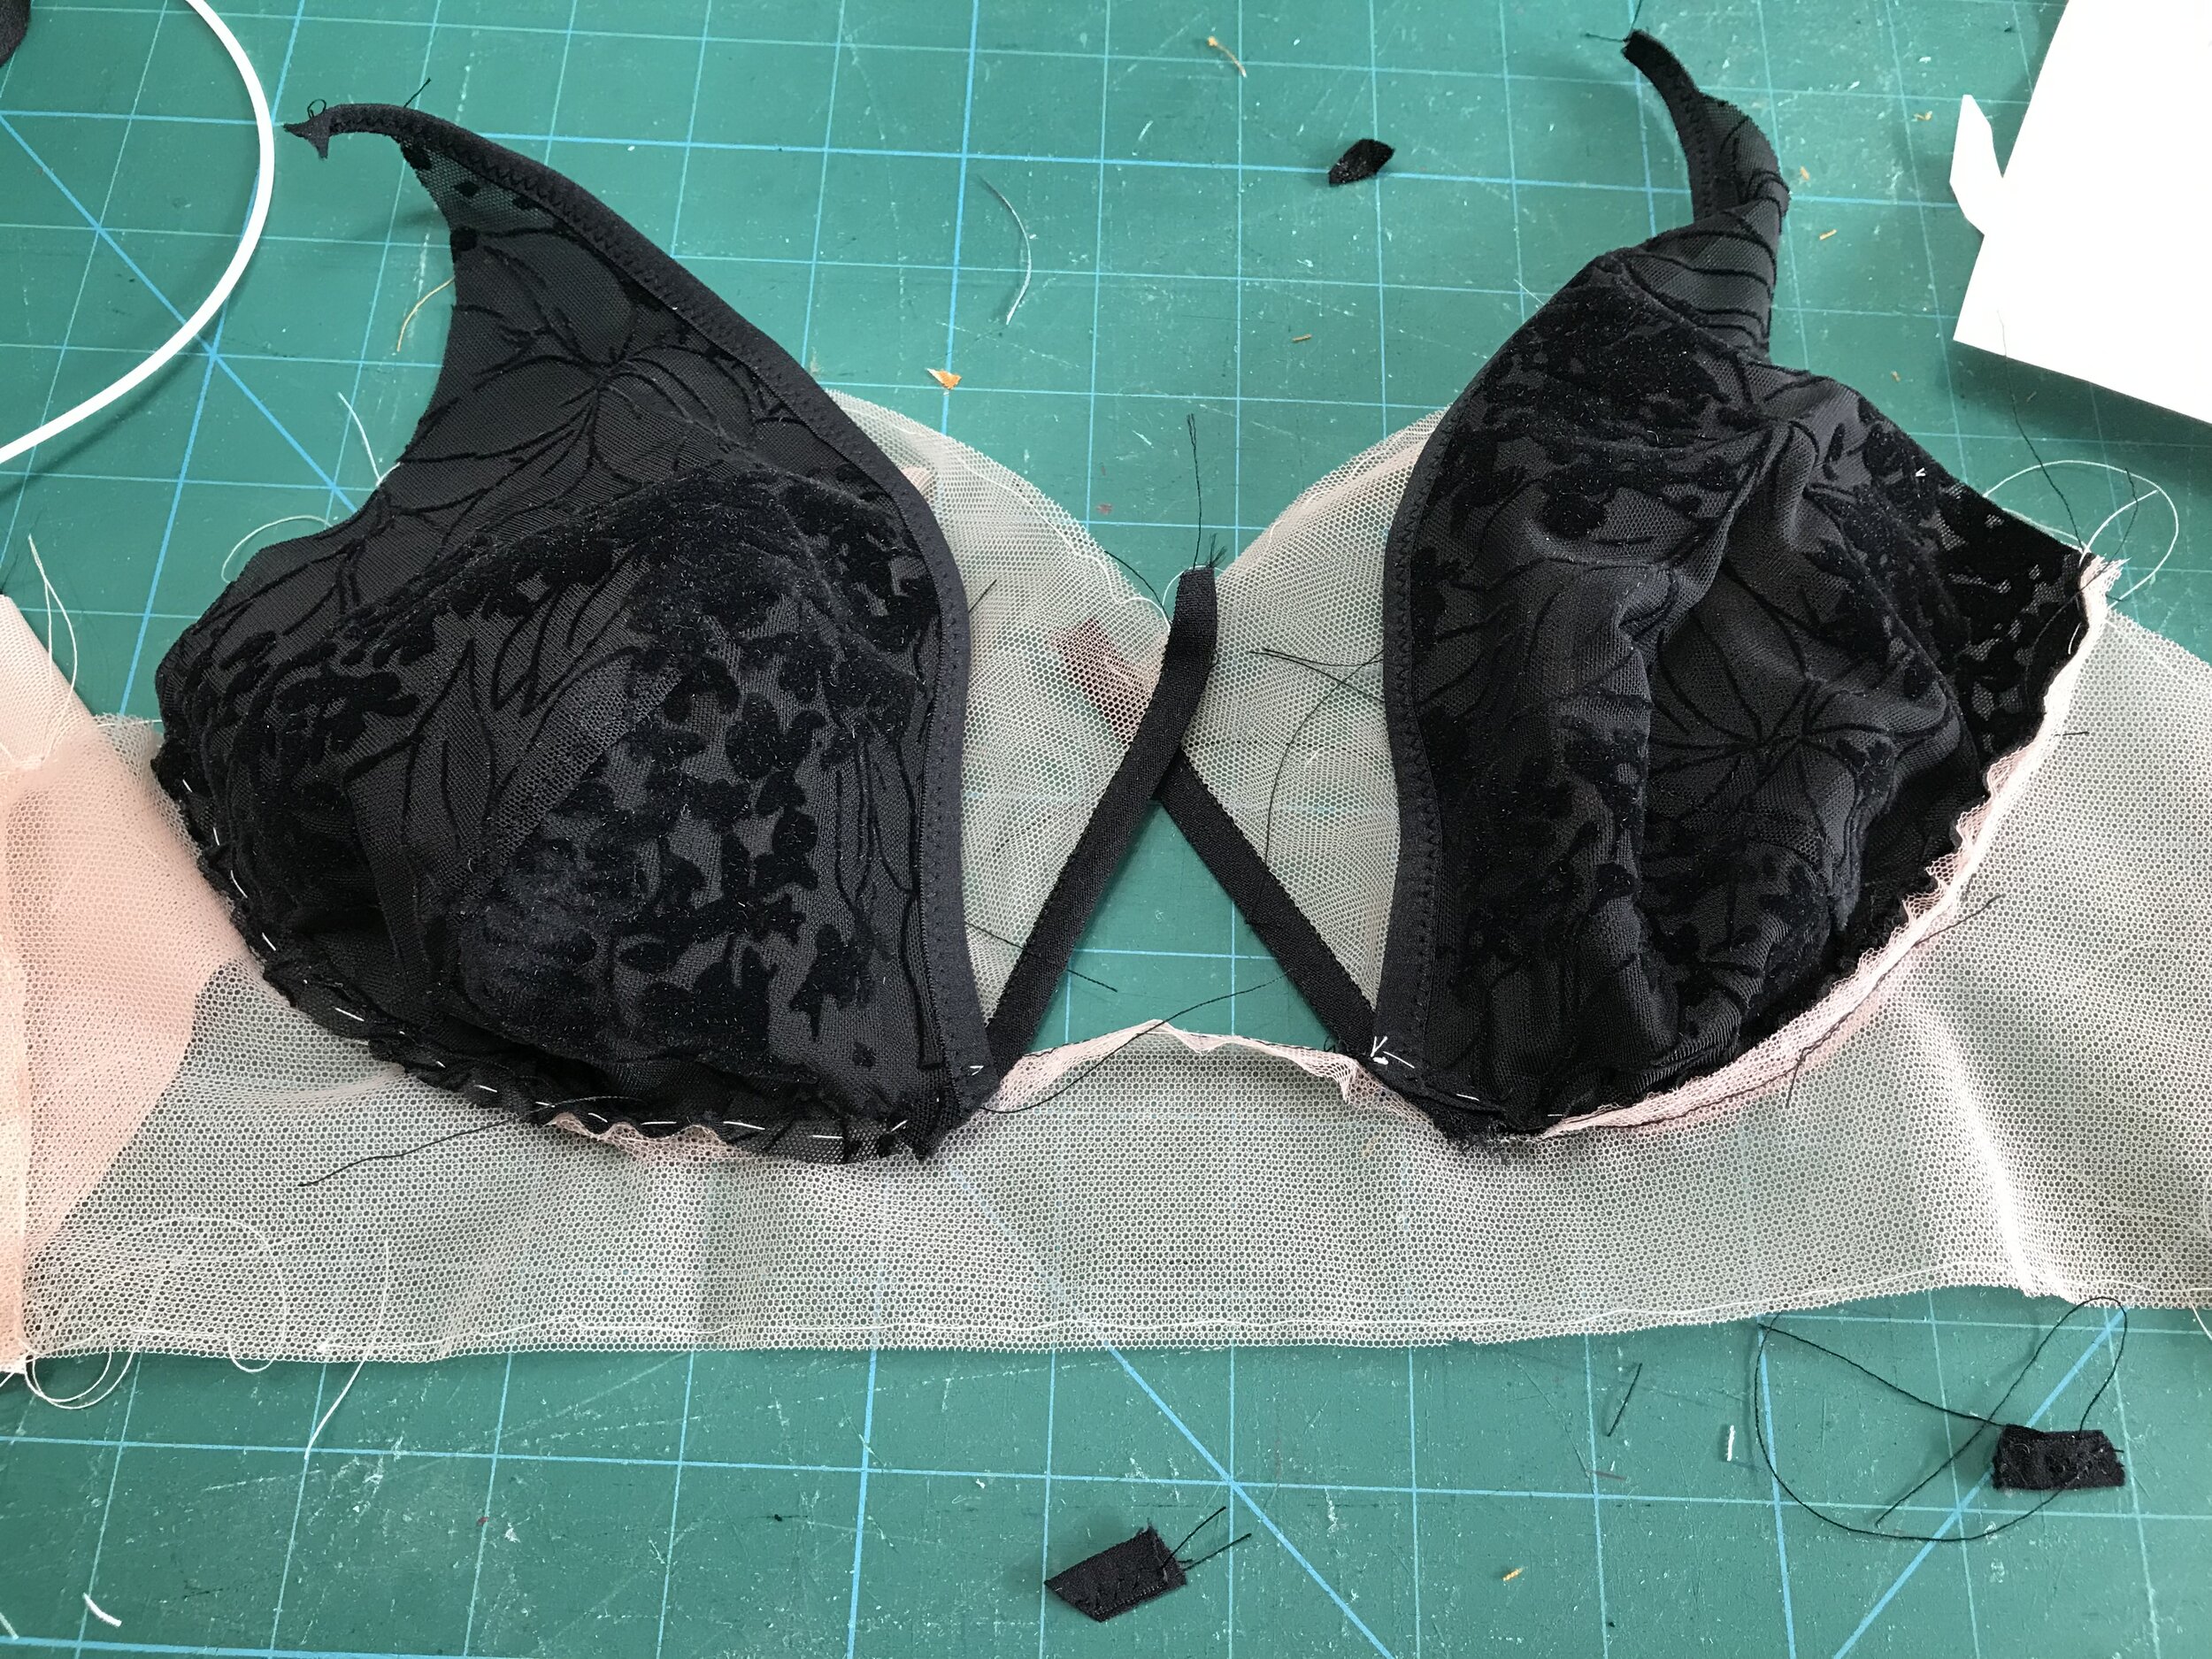
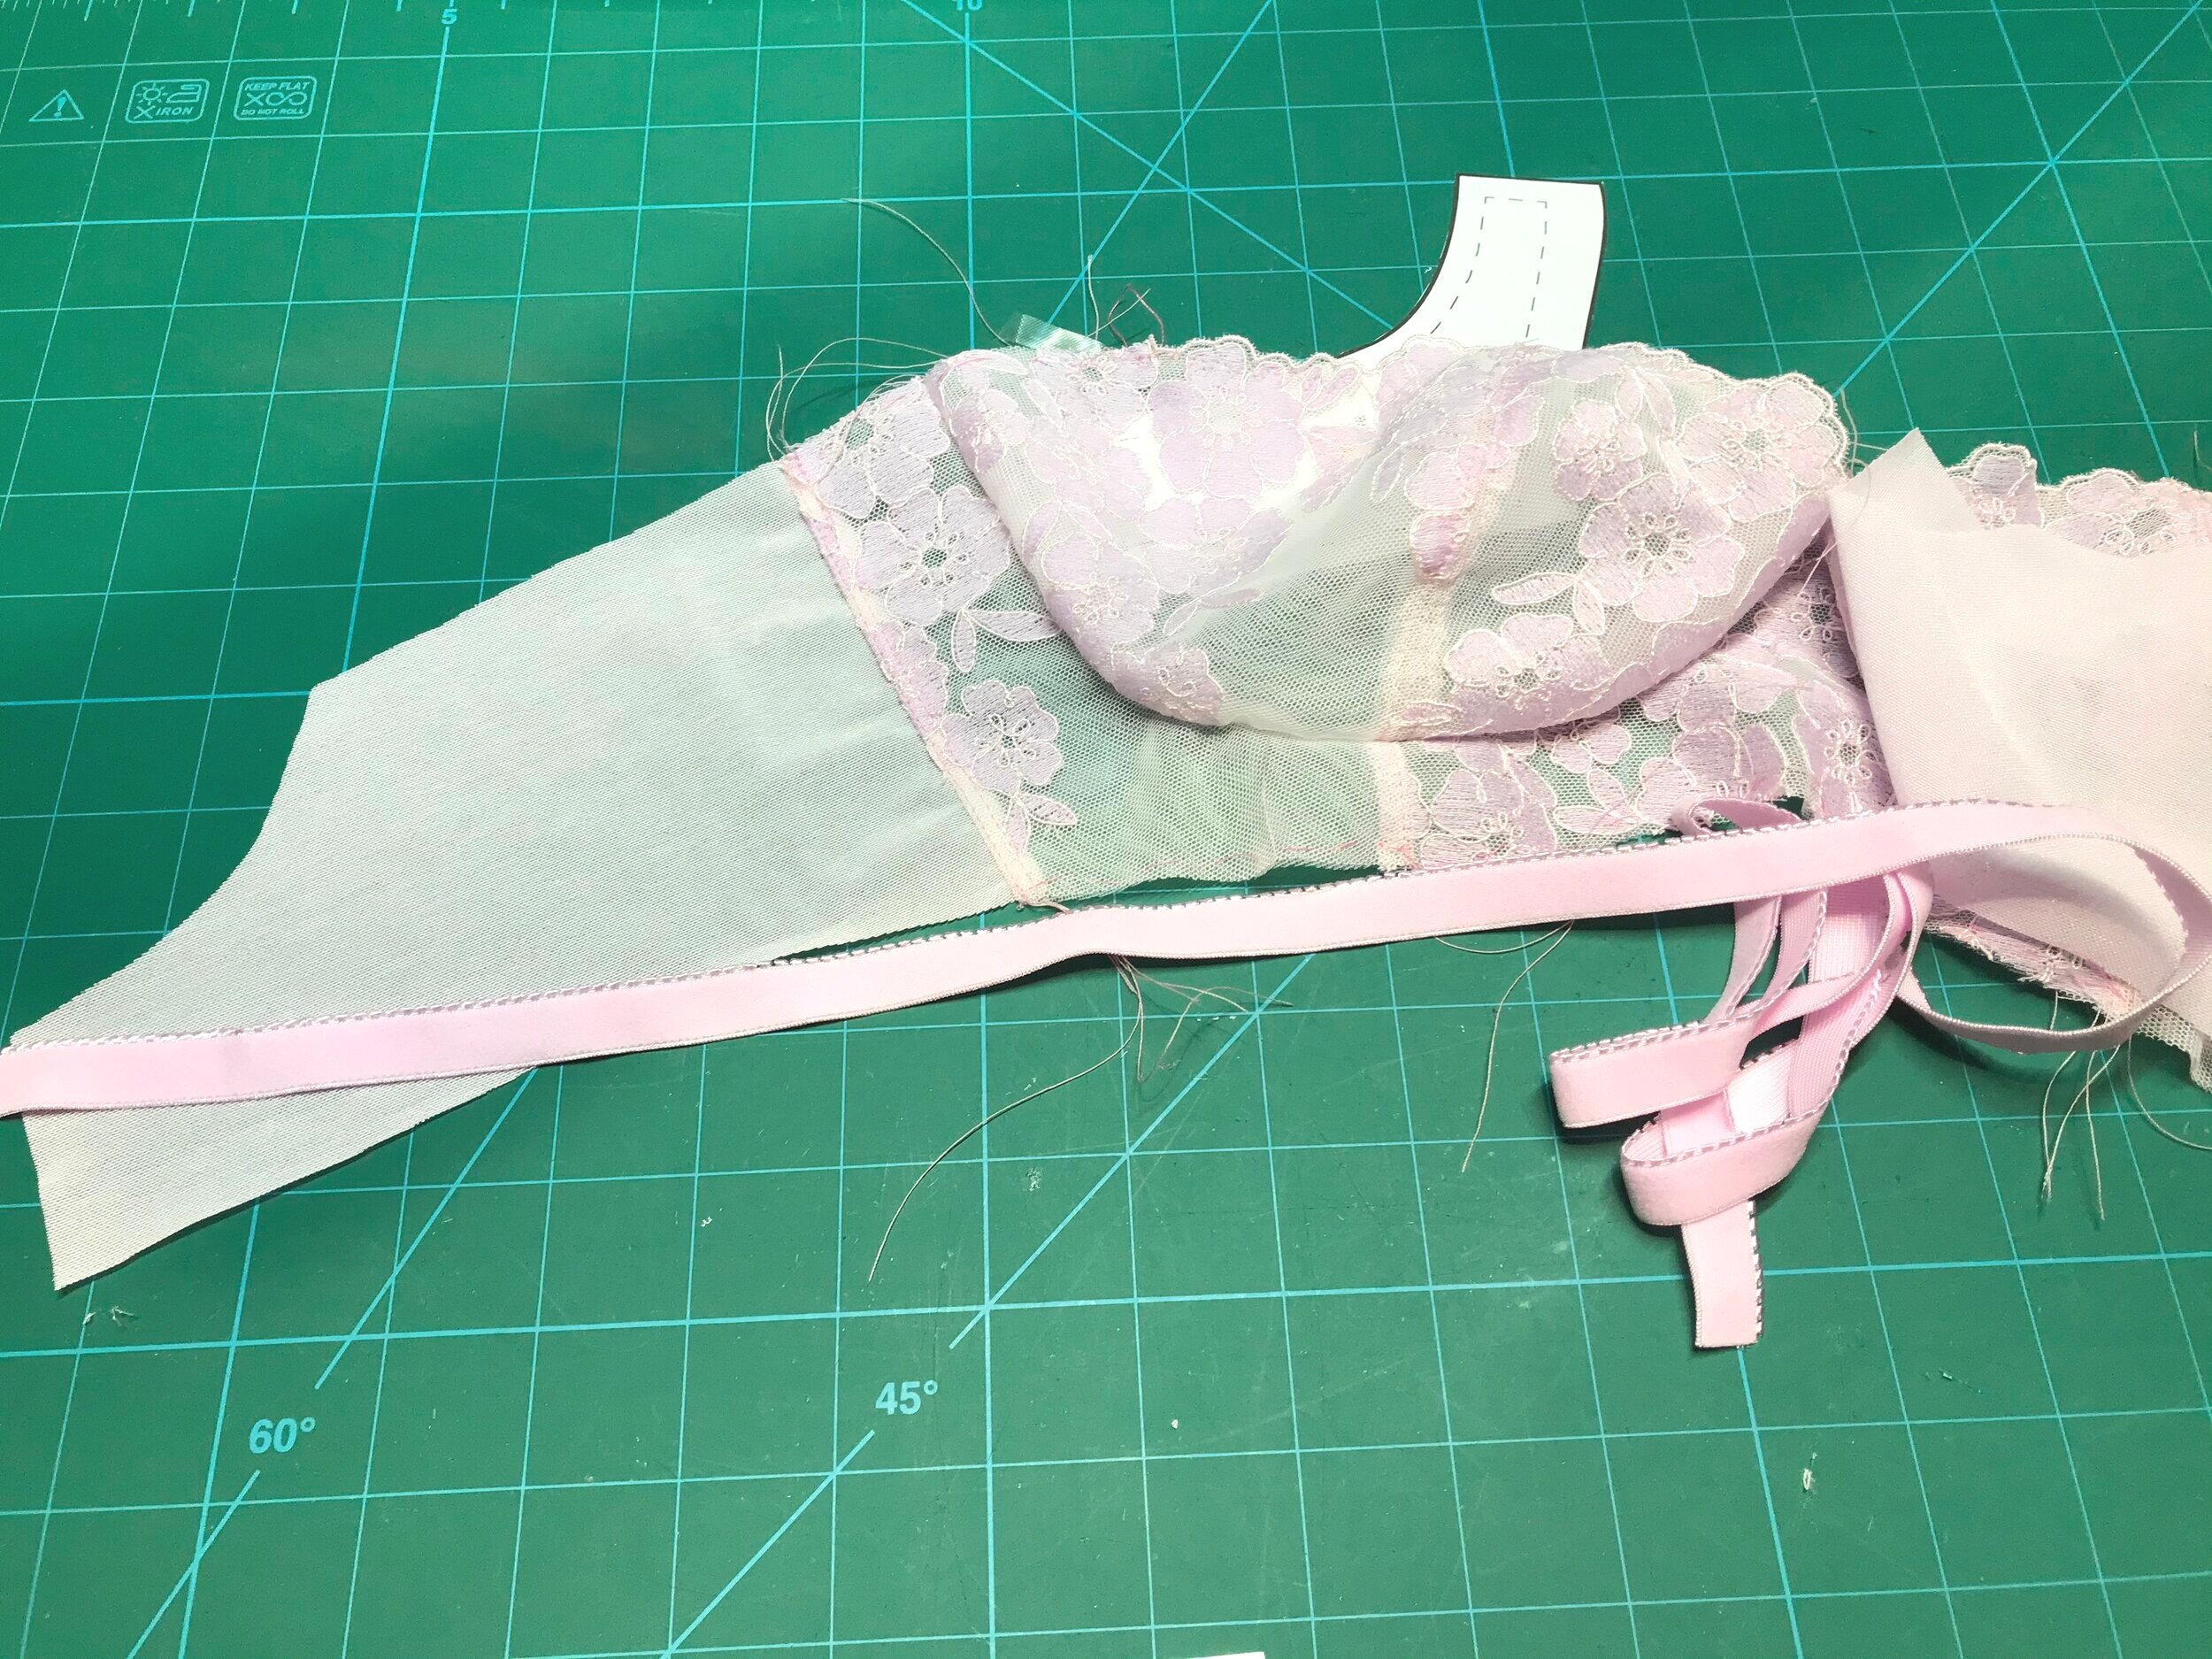
I’m not a big fan of channeling on the outside and originally thought i would cover with fabric as EvielaLuve had done but I didn’t have any fabric fine enough so as not to make this area too bulky. I have quite a stash of black channeling and did find some smooth enough to use on the outside. Having sewn this seam wrong sides together it also made the inside neater and more comfortable.

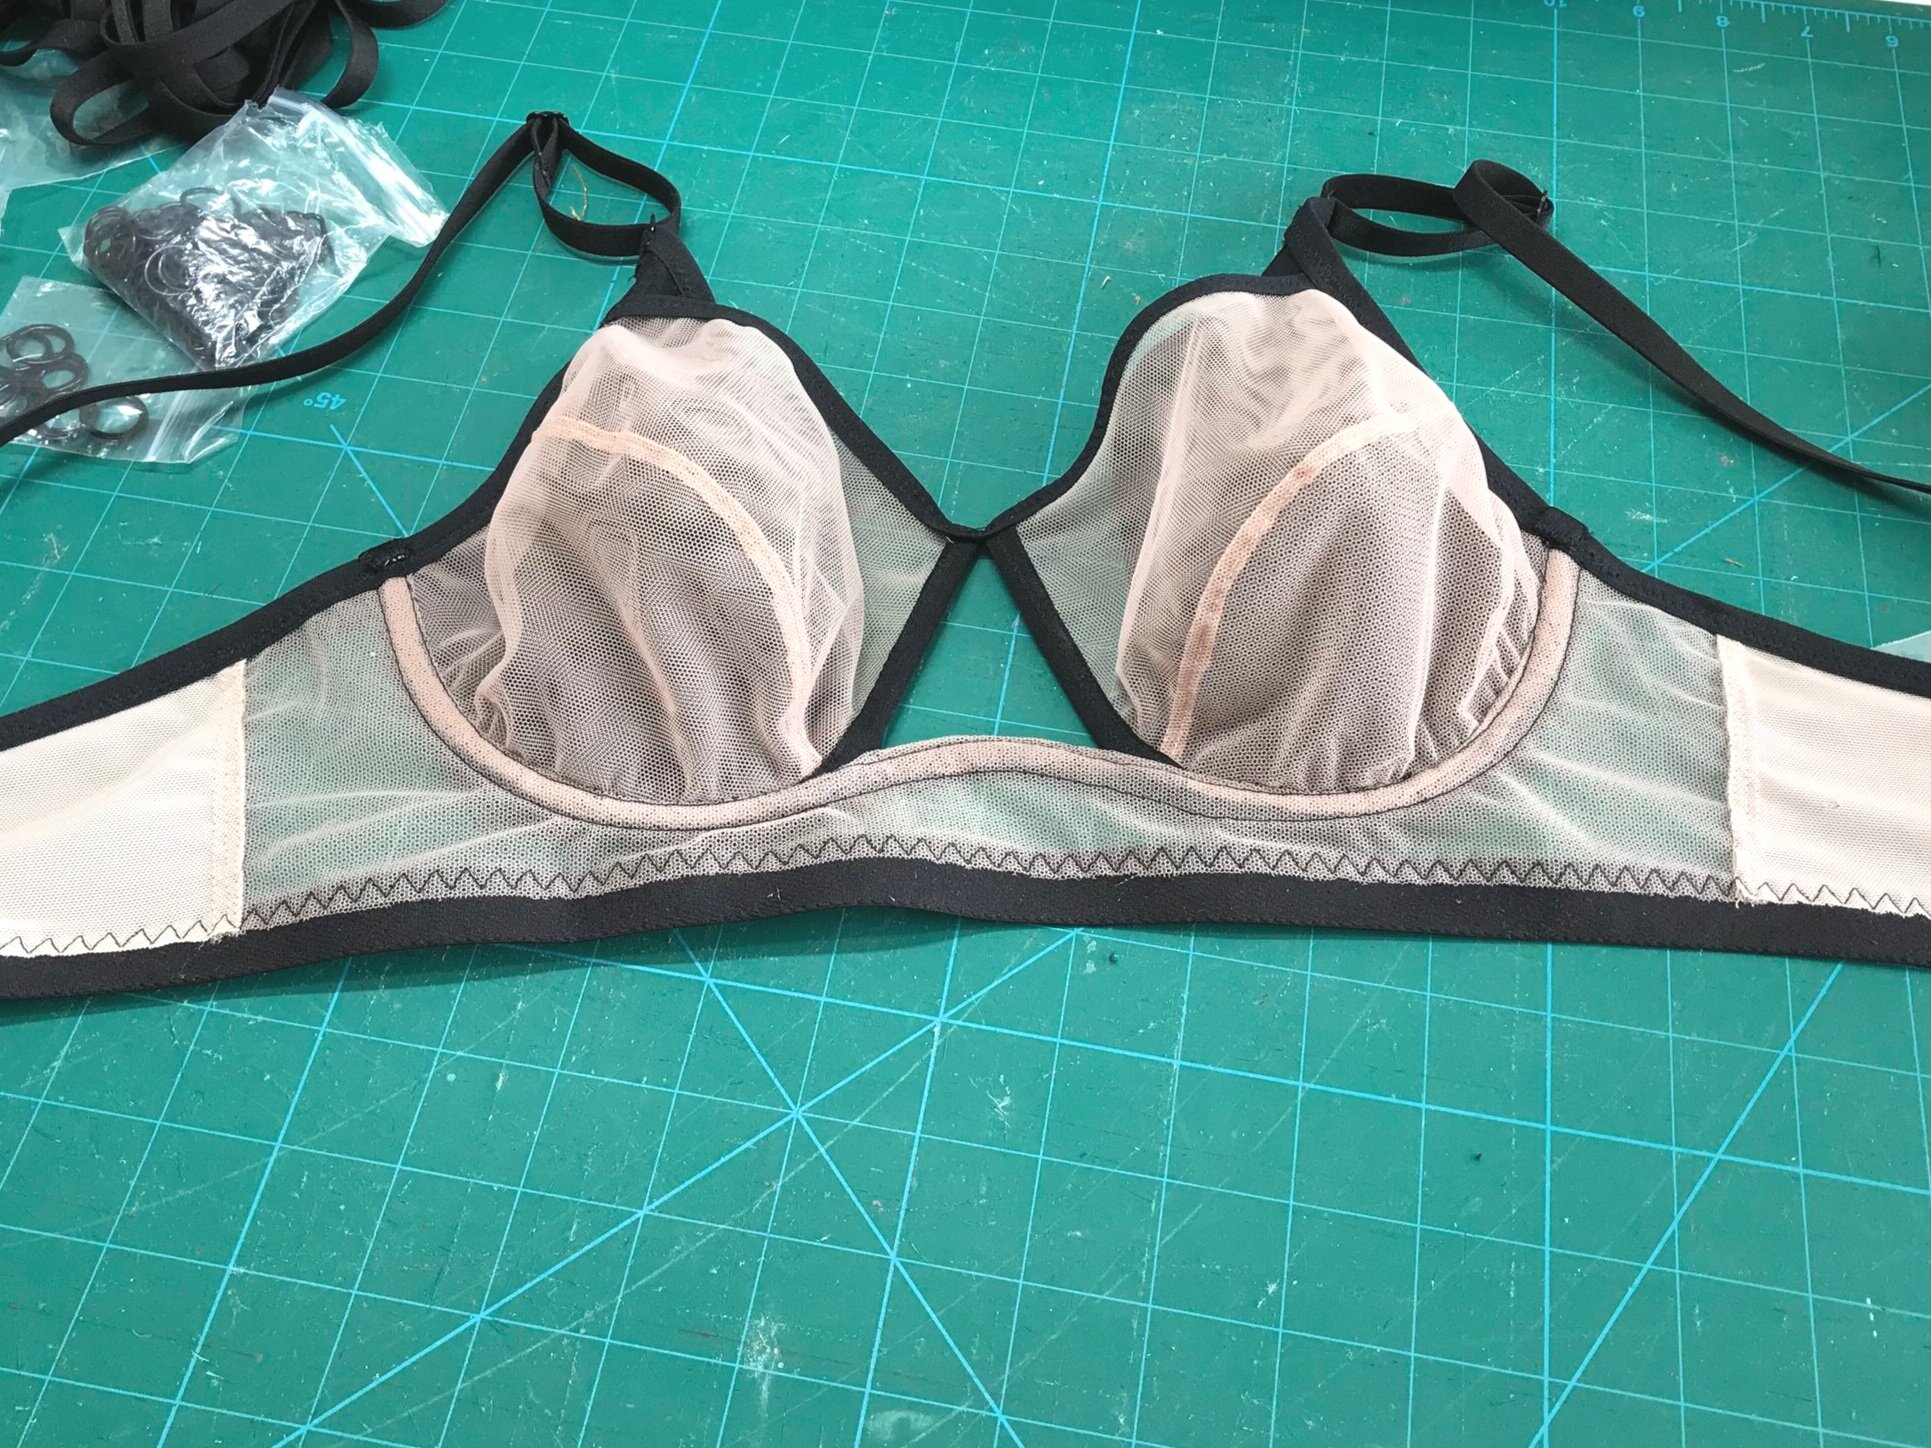
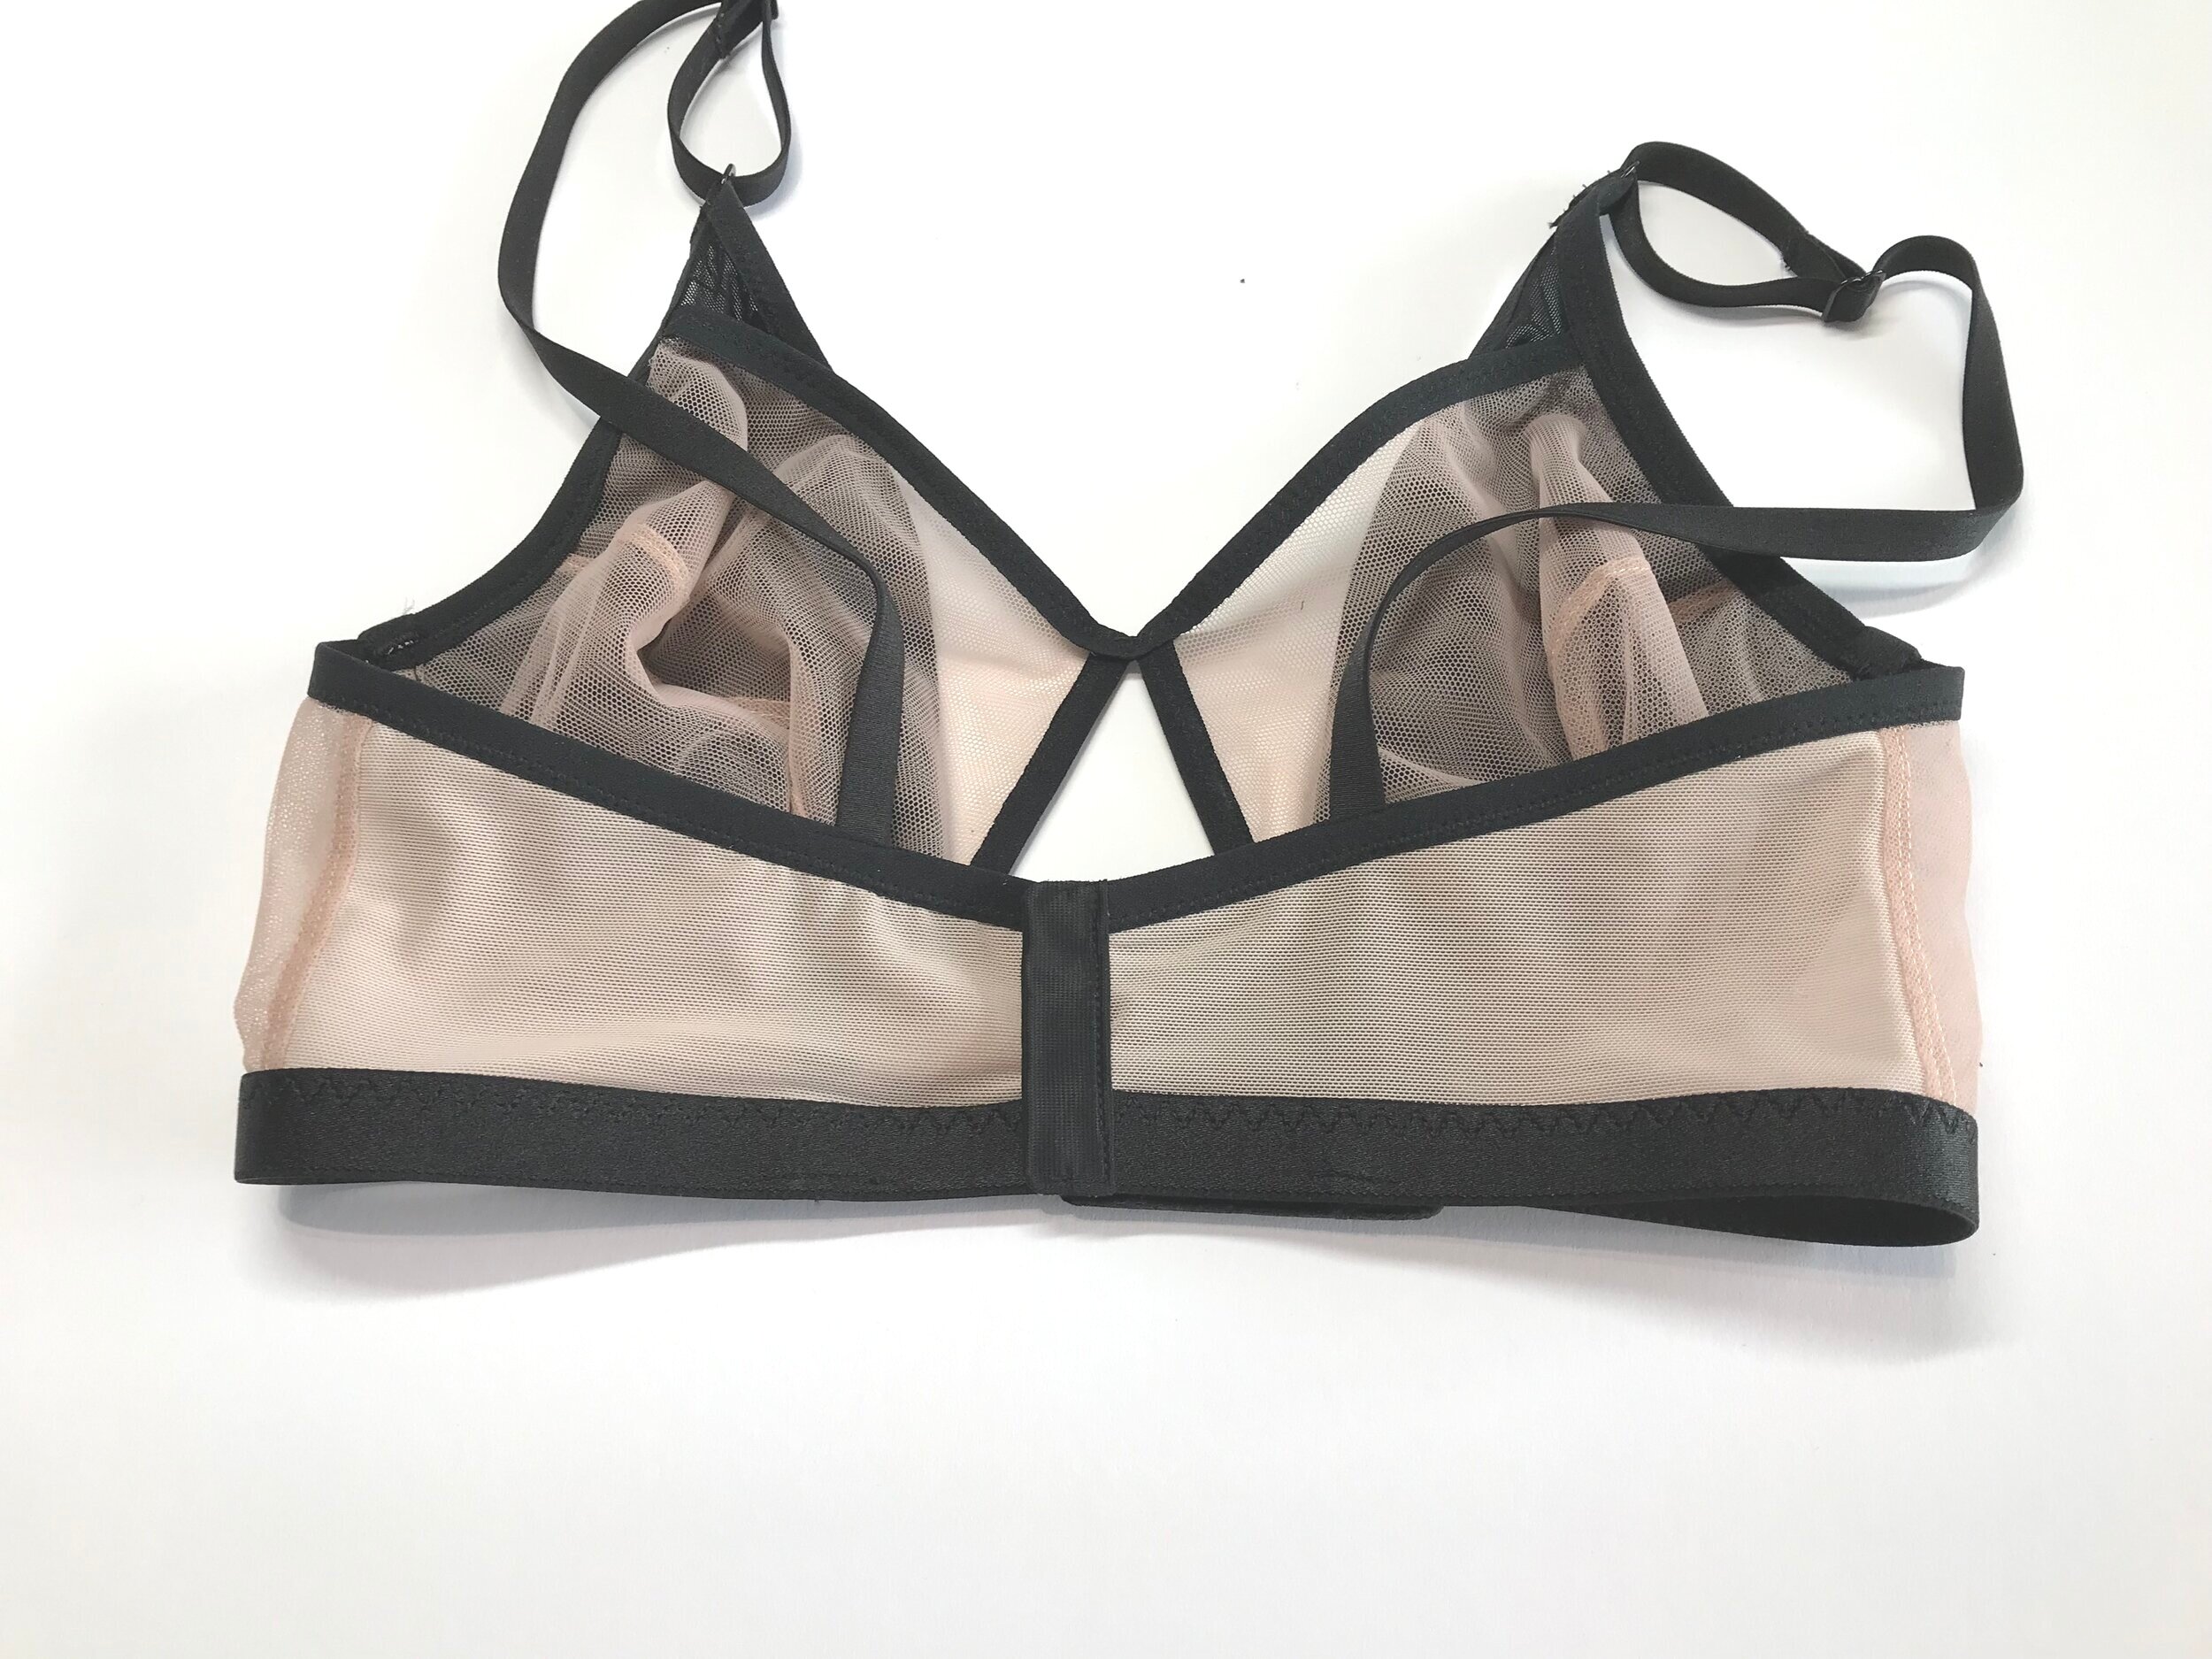
To finish I applied the fold over elastic to the armhole and the strap elastic to the bottom. When attaching the straps to this sort of back I like to attach from the bottom band and bar tack both here and on the top band as I find this gives more stability. I also like to add stabiliser to the elastic where it is folded over the ring so it doesn’t stretch out. With the bra finished I now had to design matching underwear.

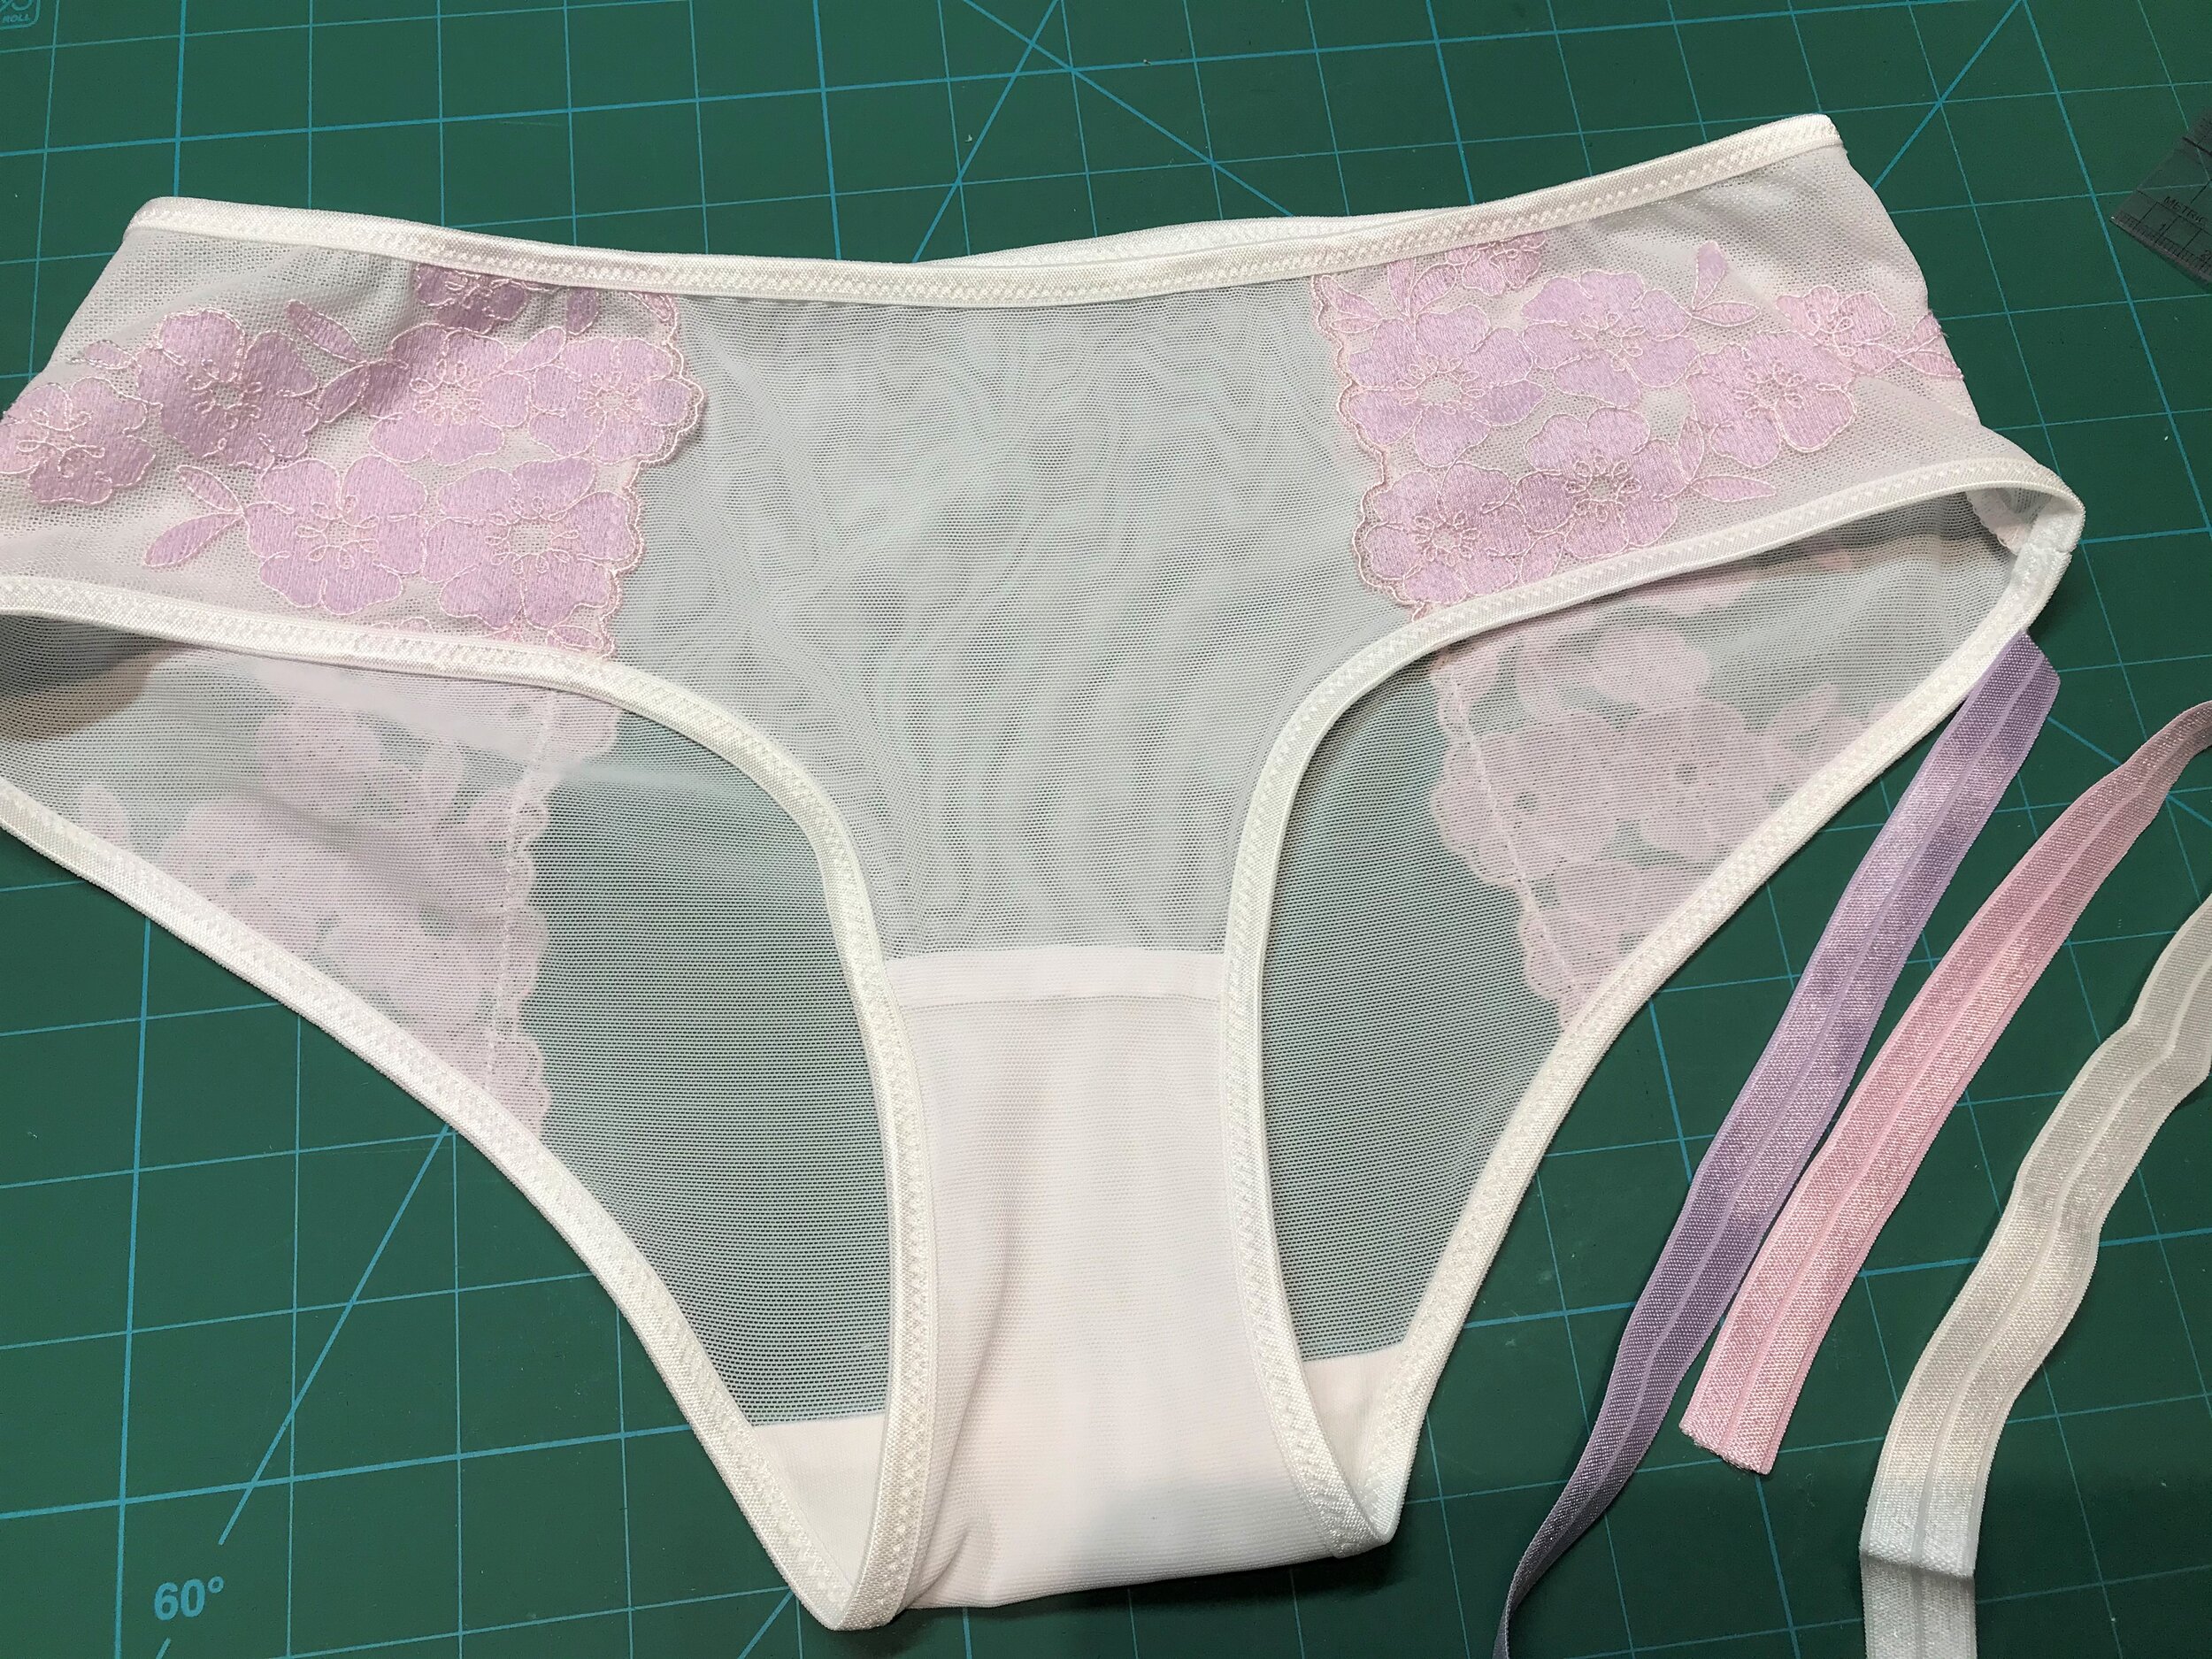
My thoughts were to match the lines of the bra especially the cut out. I immediately thought of the EvielaLuve Binky as I love the fit and the front is deep enough to accommodate the same size cut out. I sketched out my idea and thought of adding sections to the back to break up the mesh.

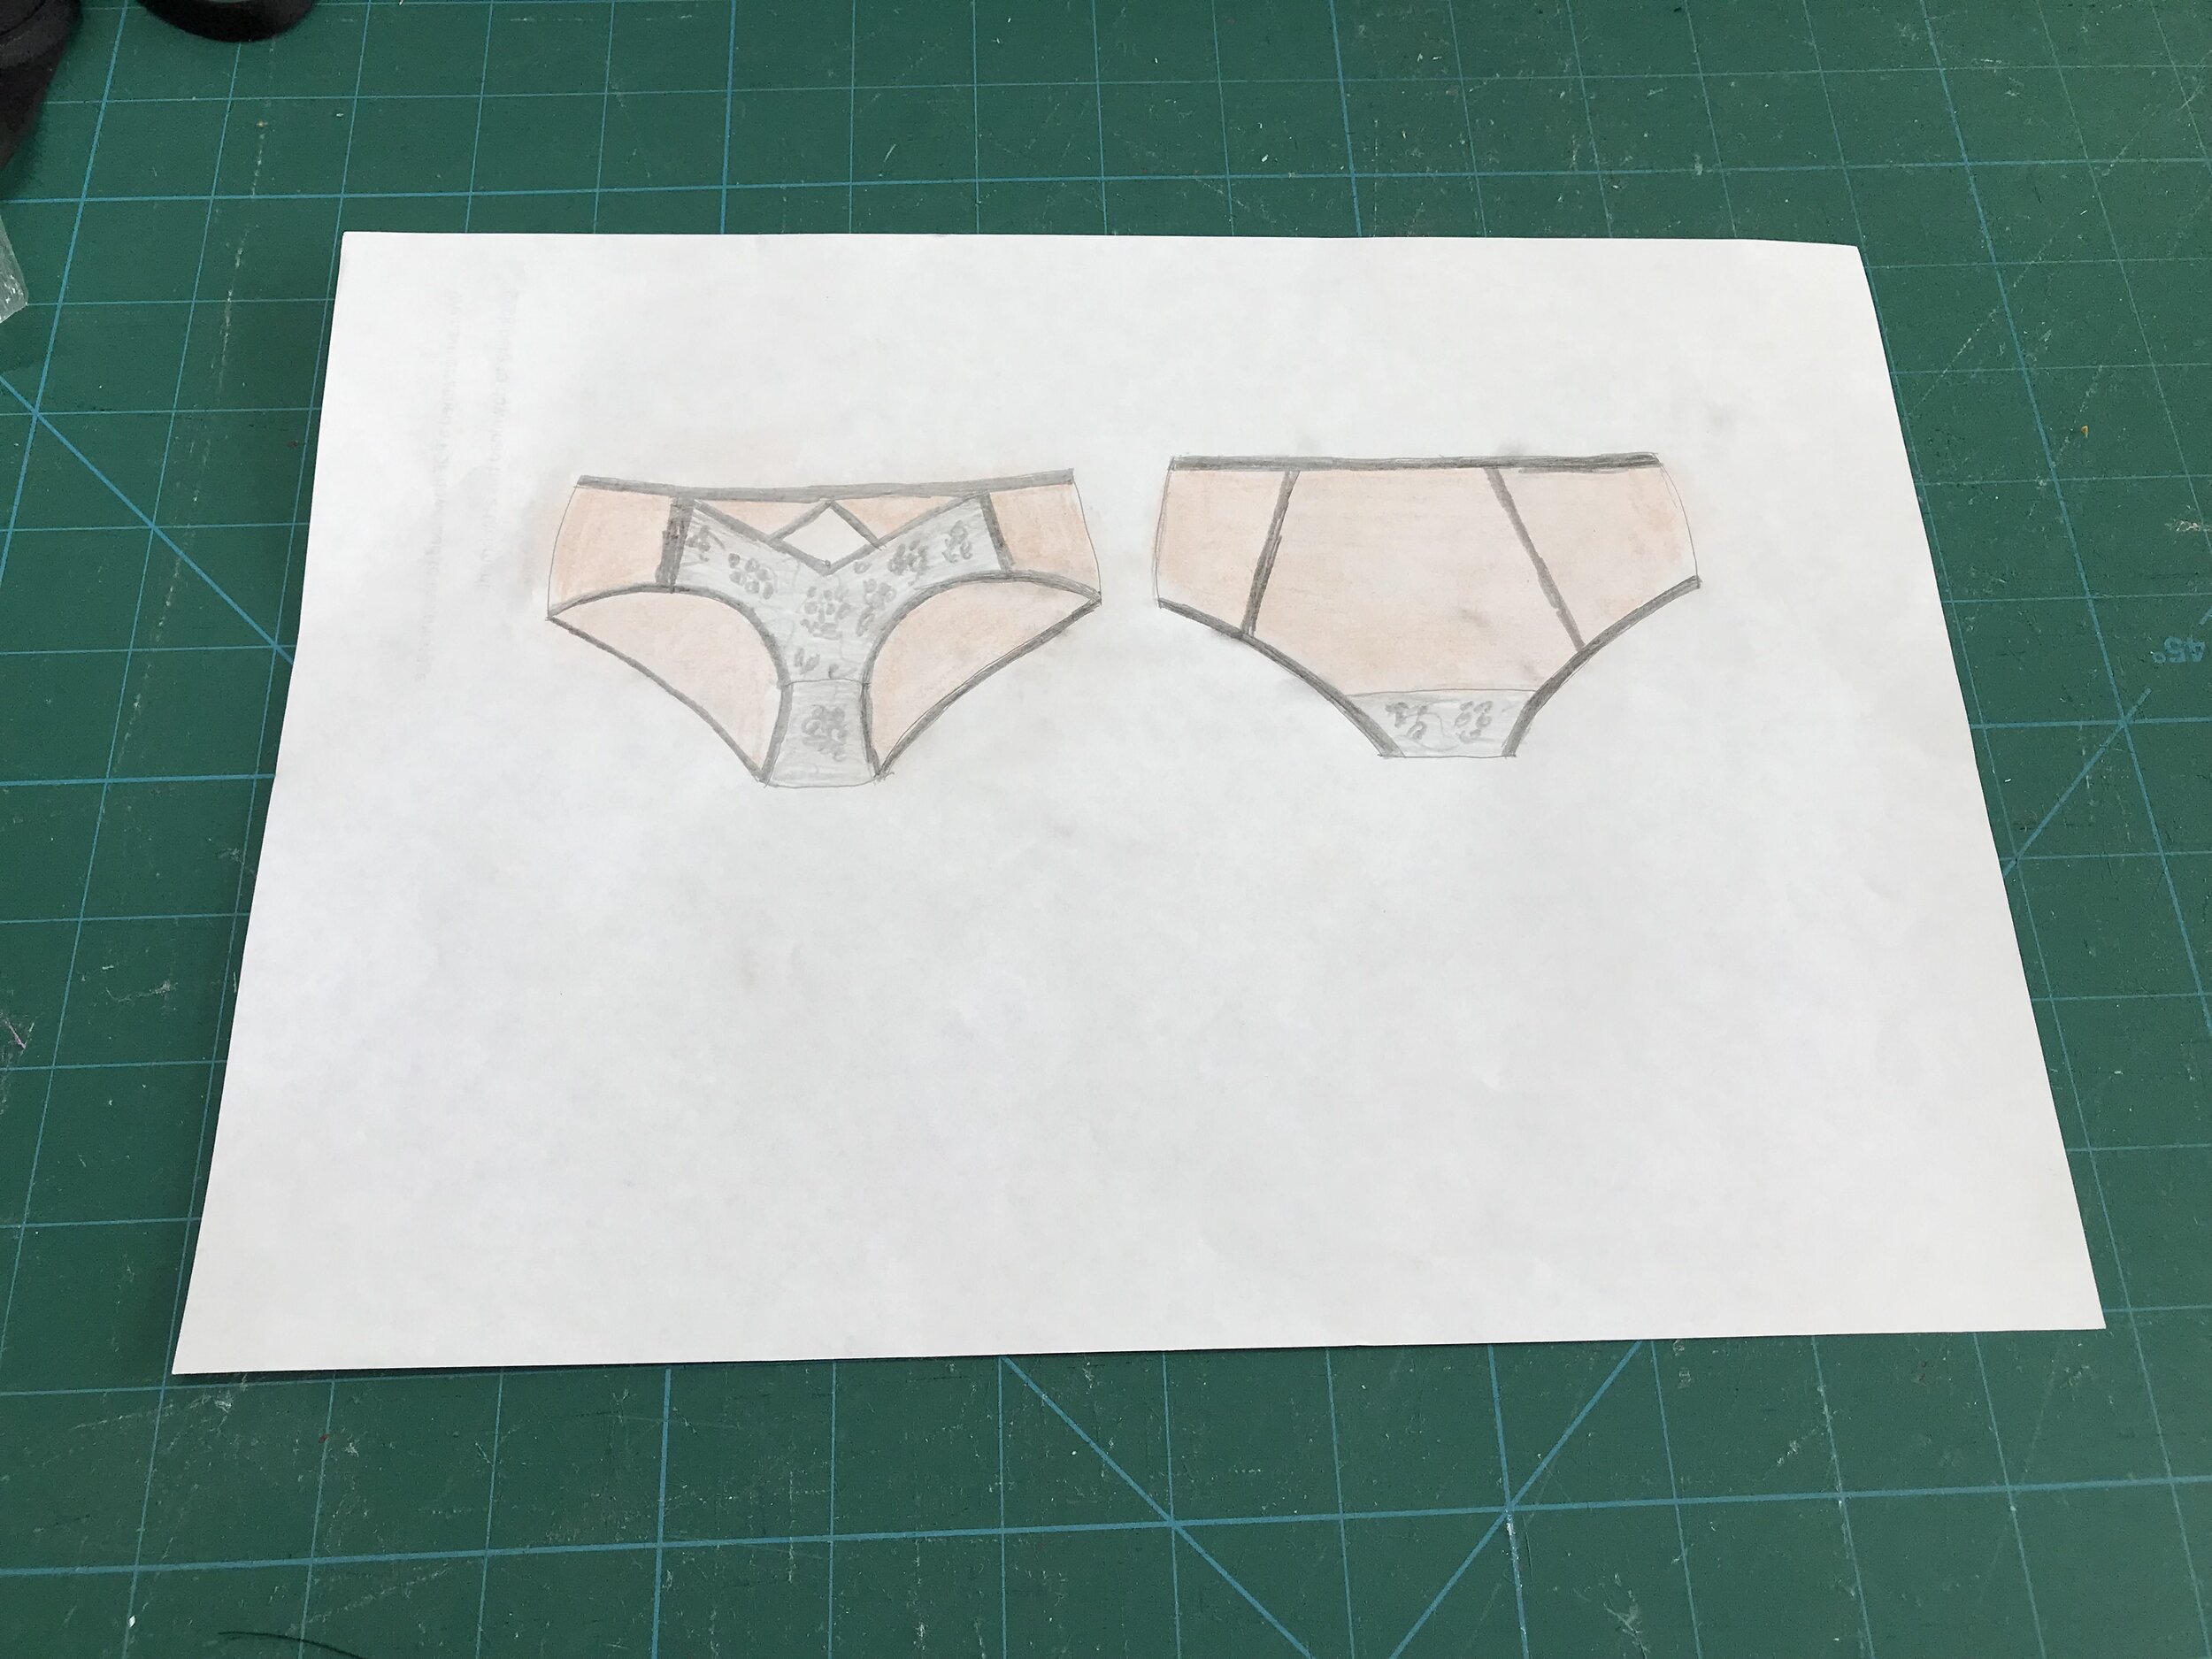
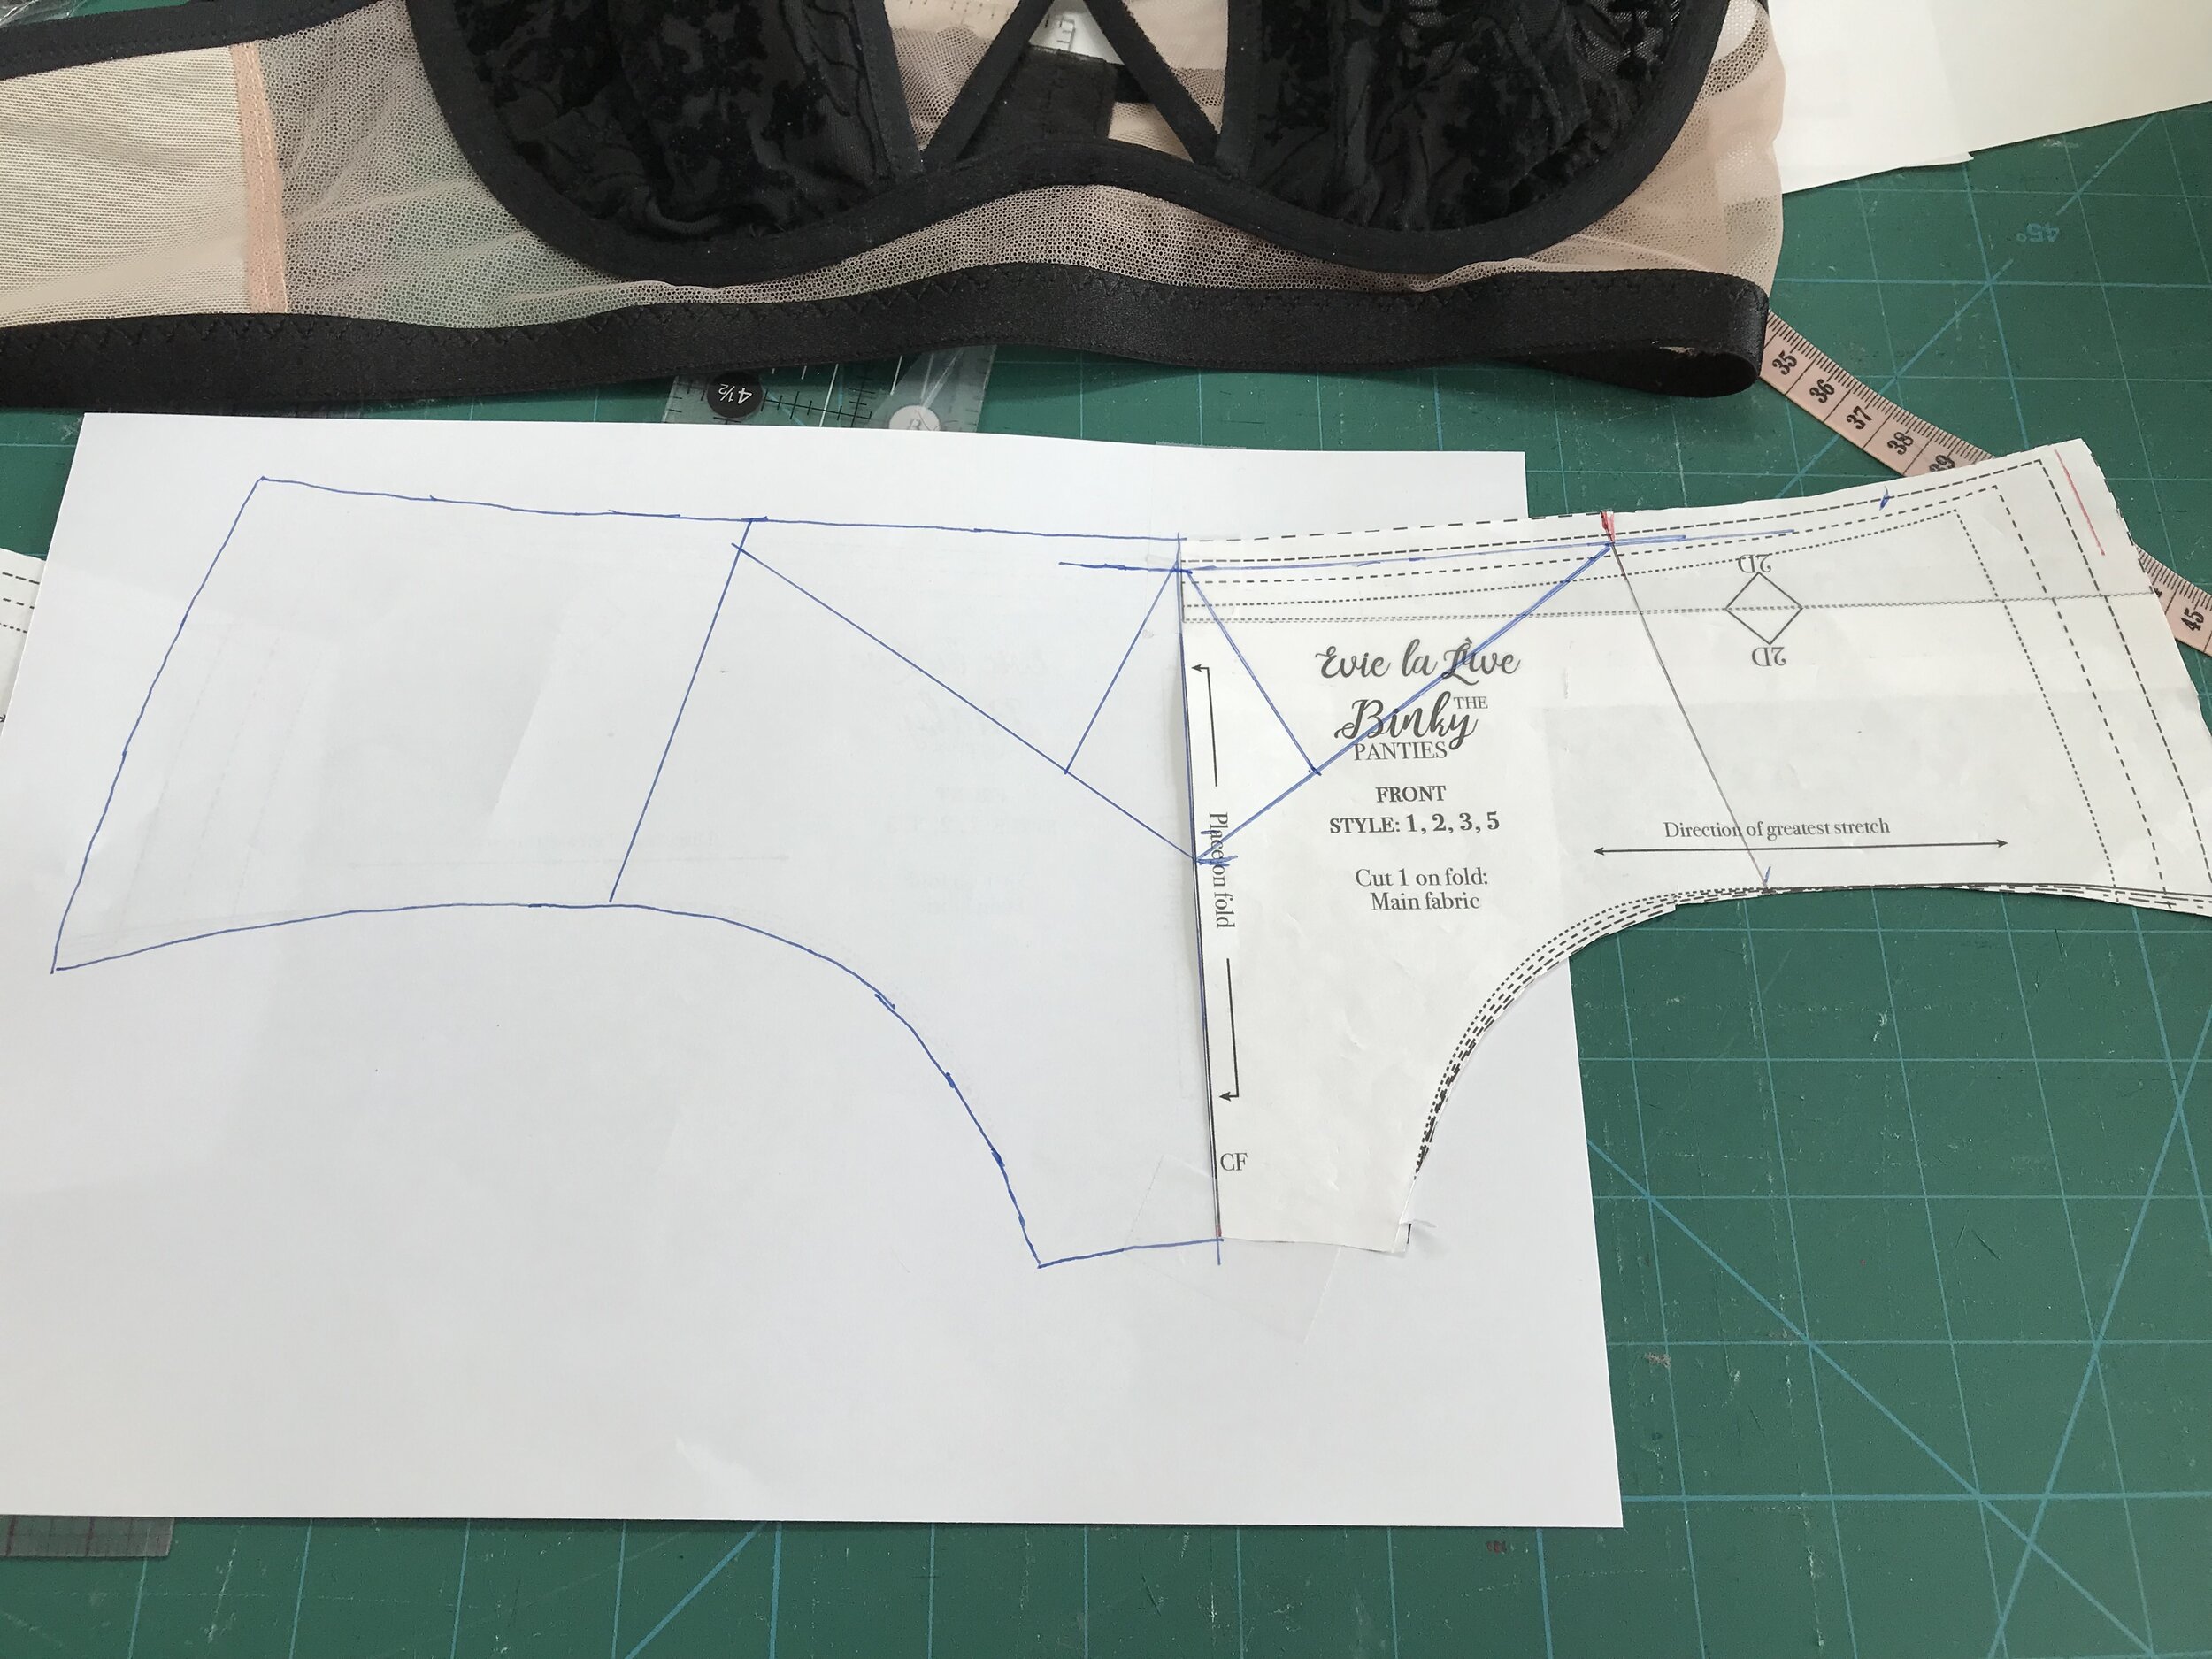
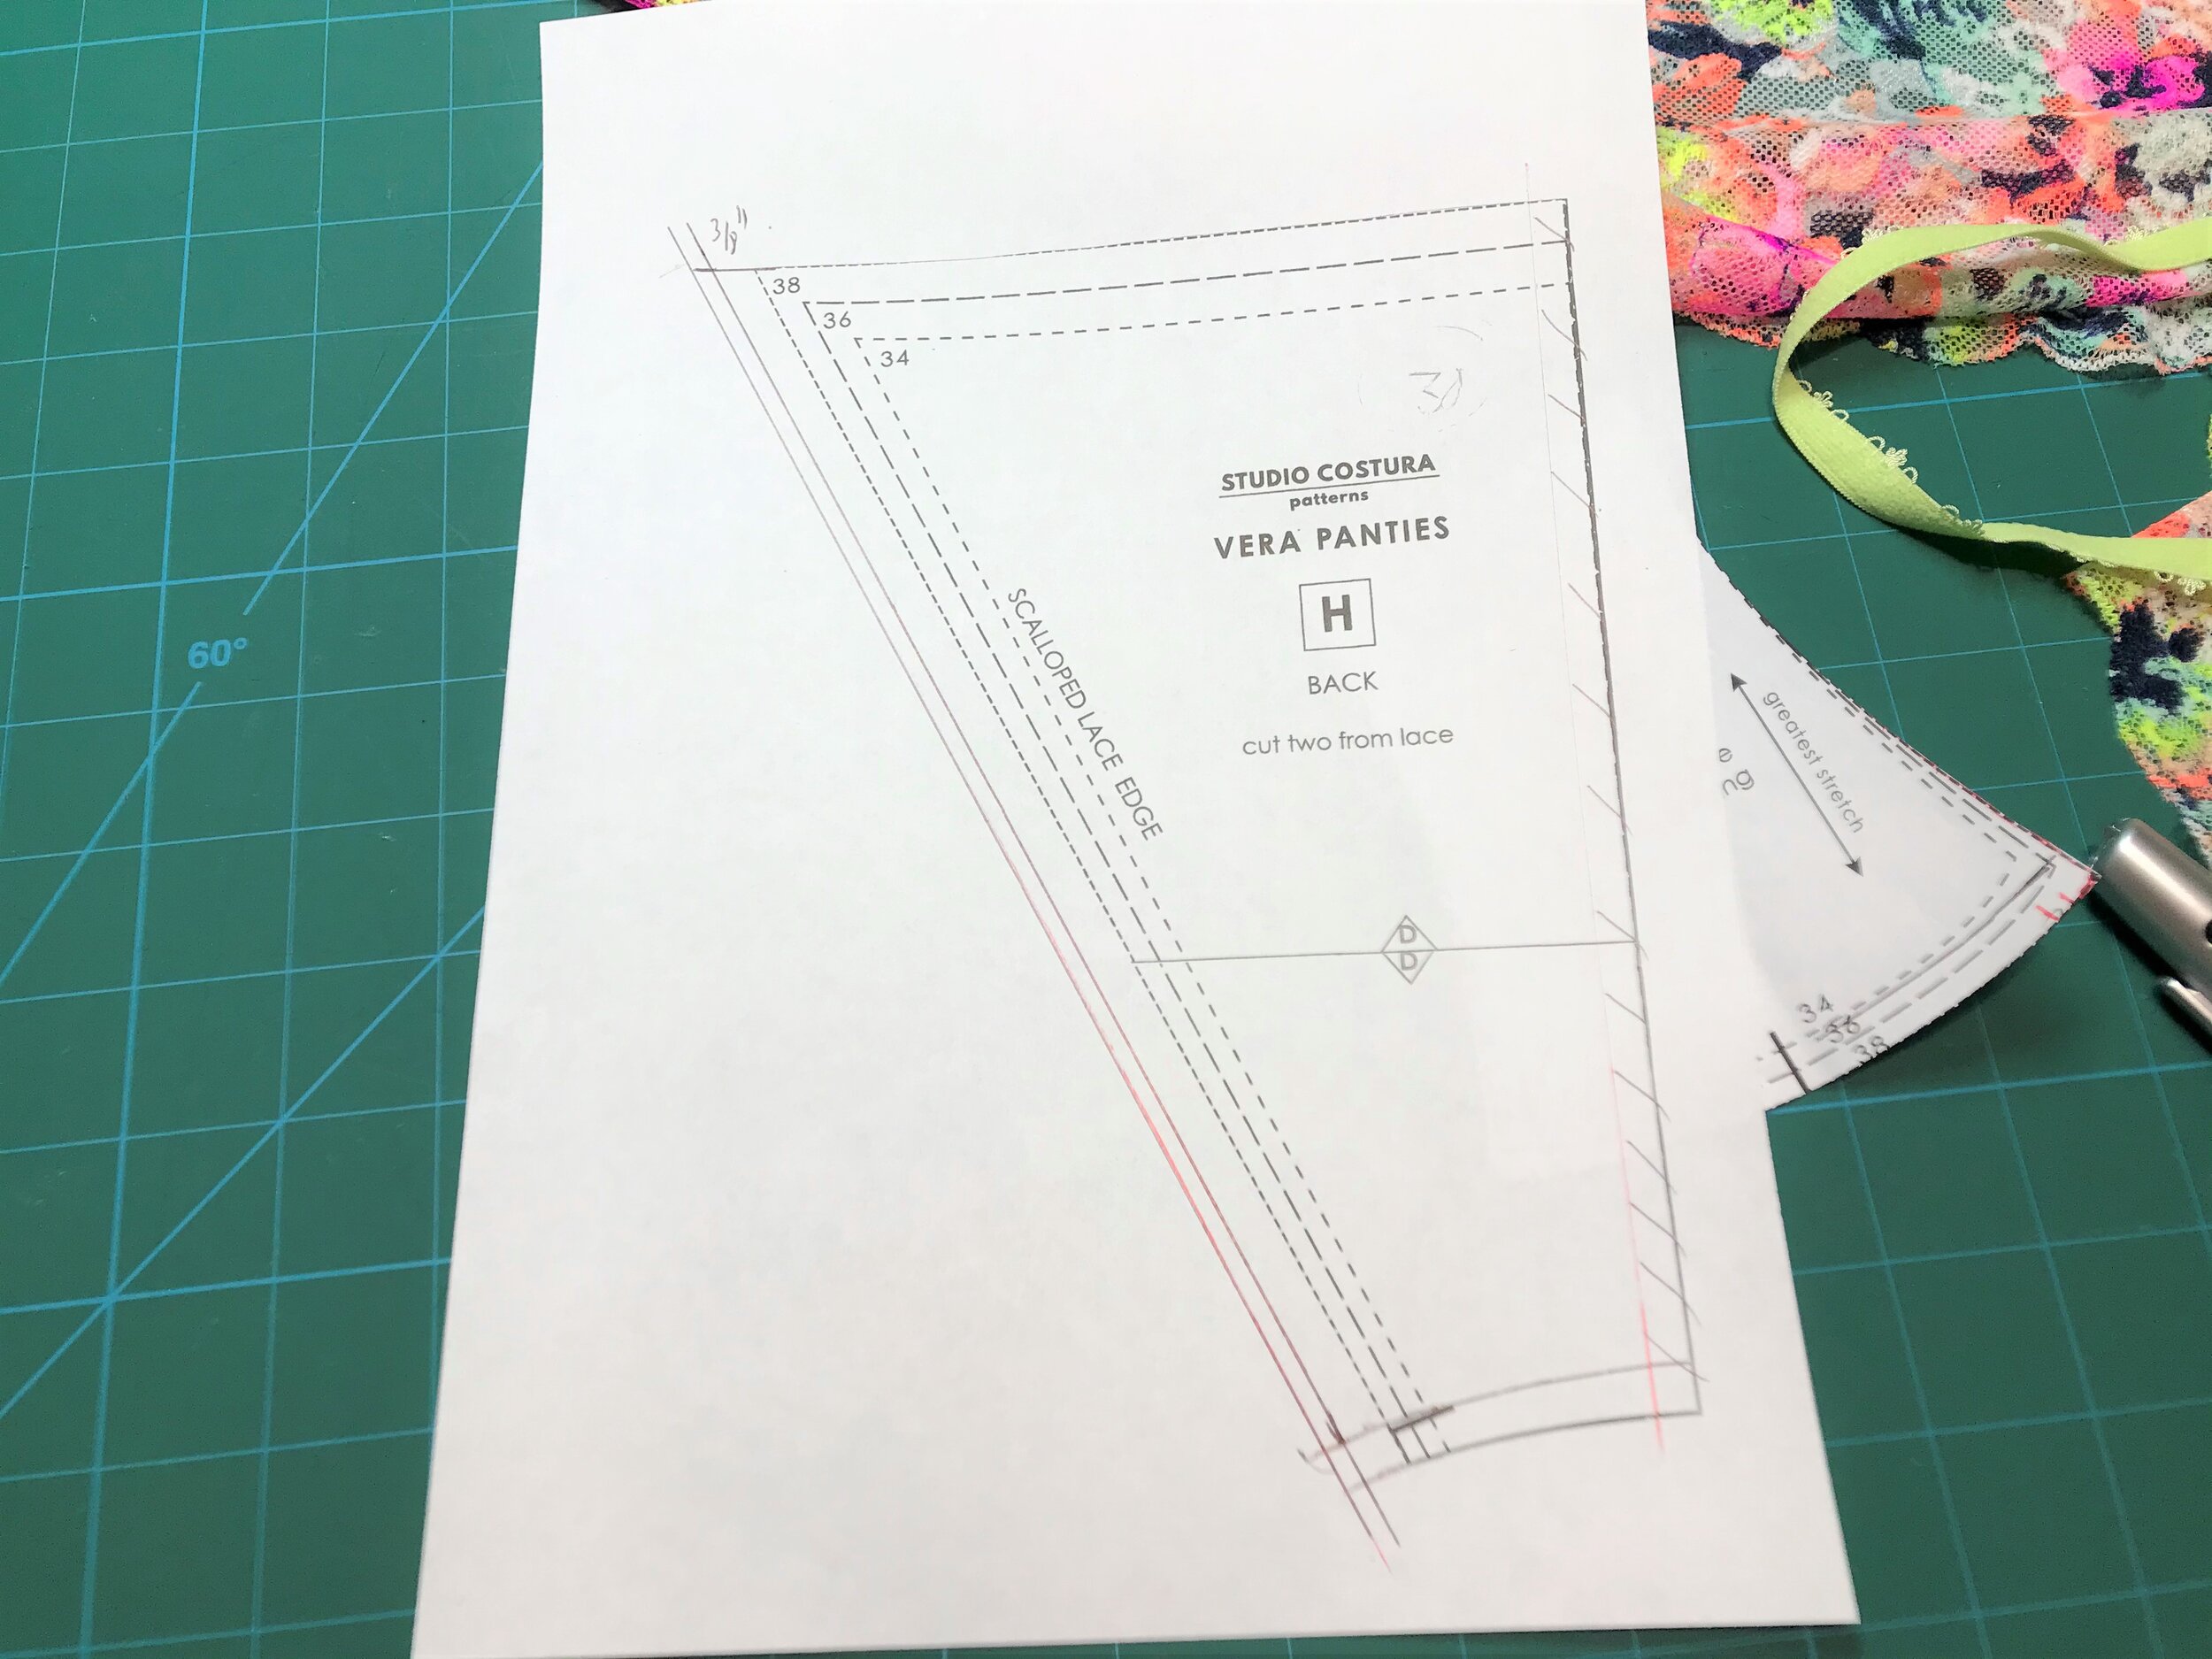
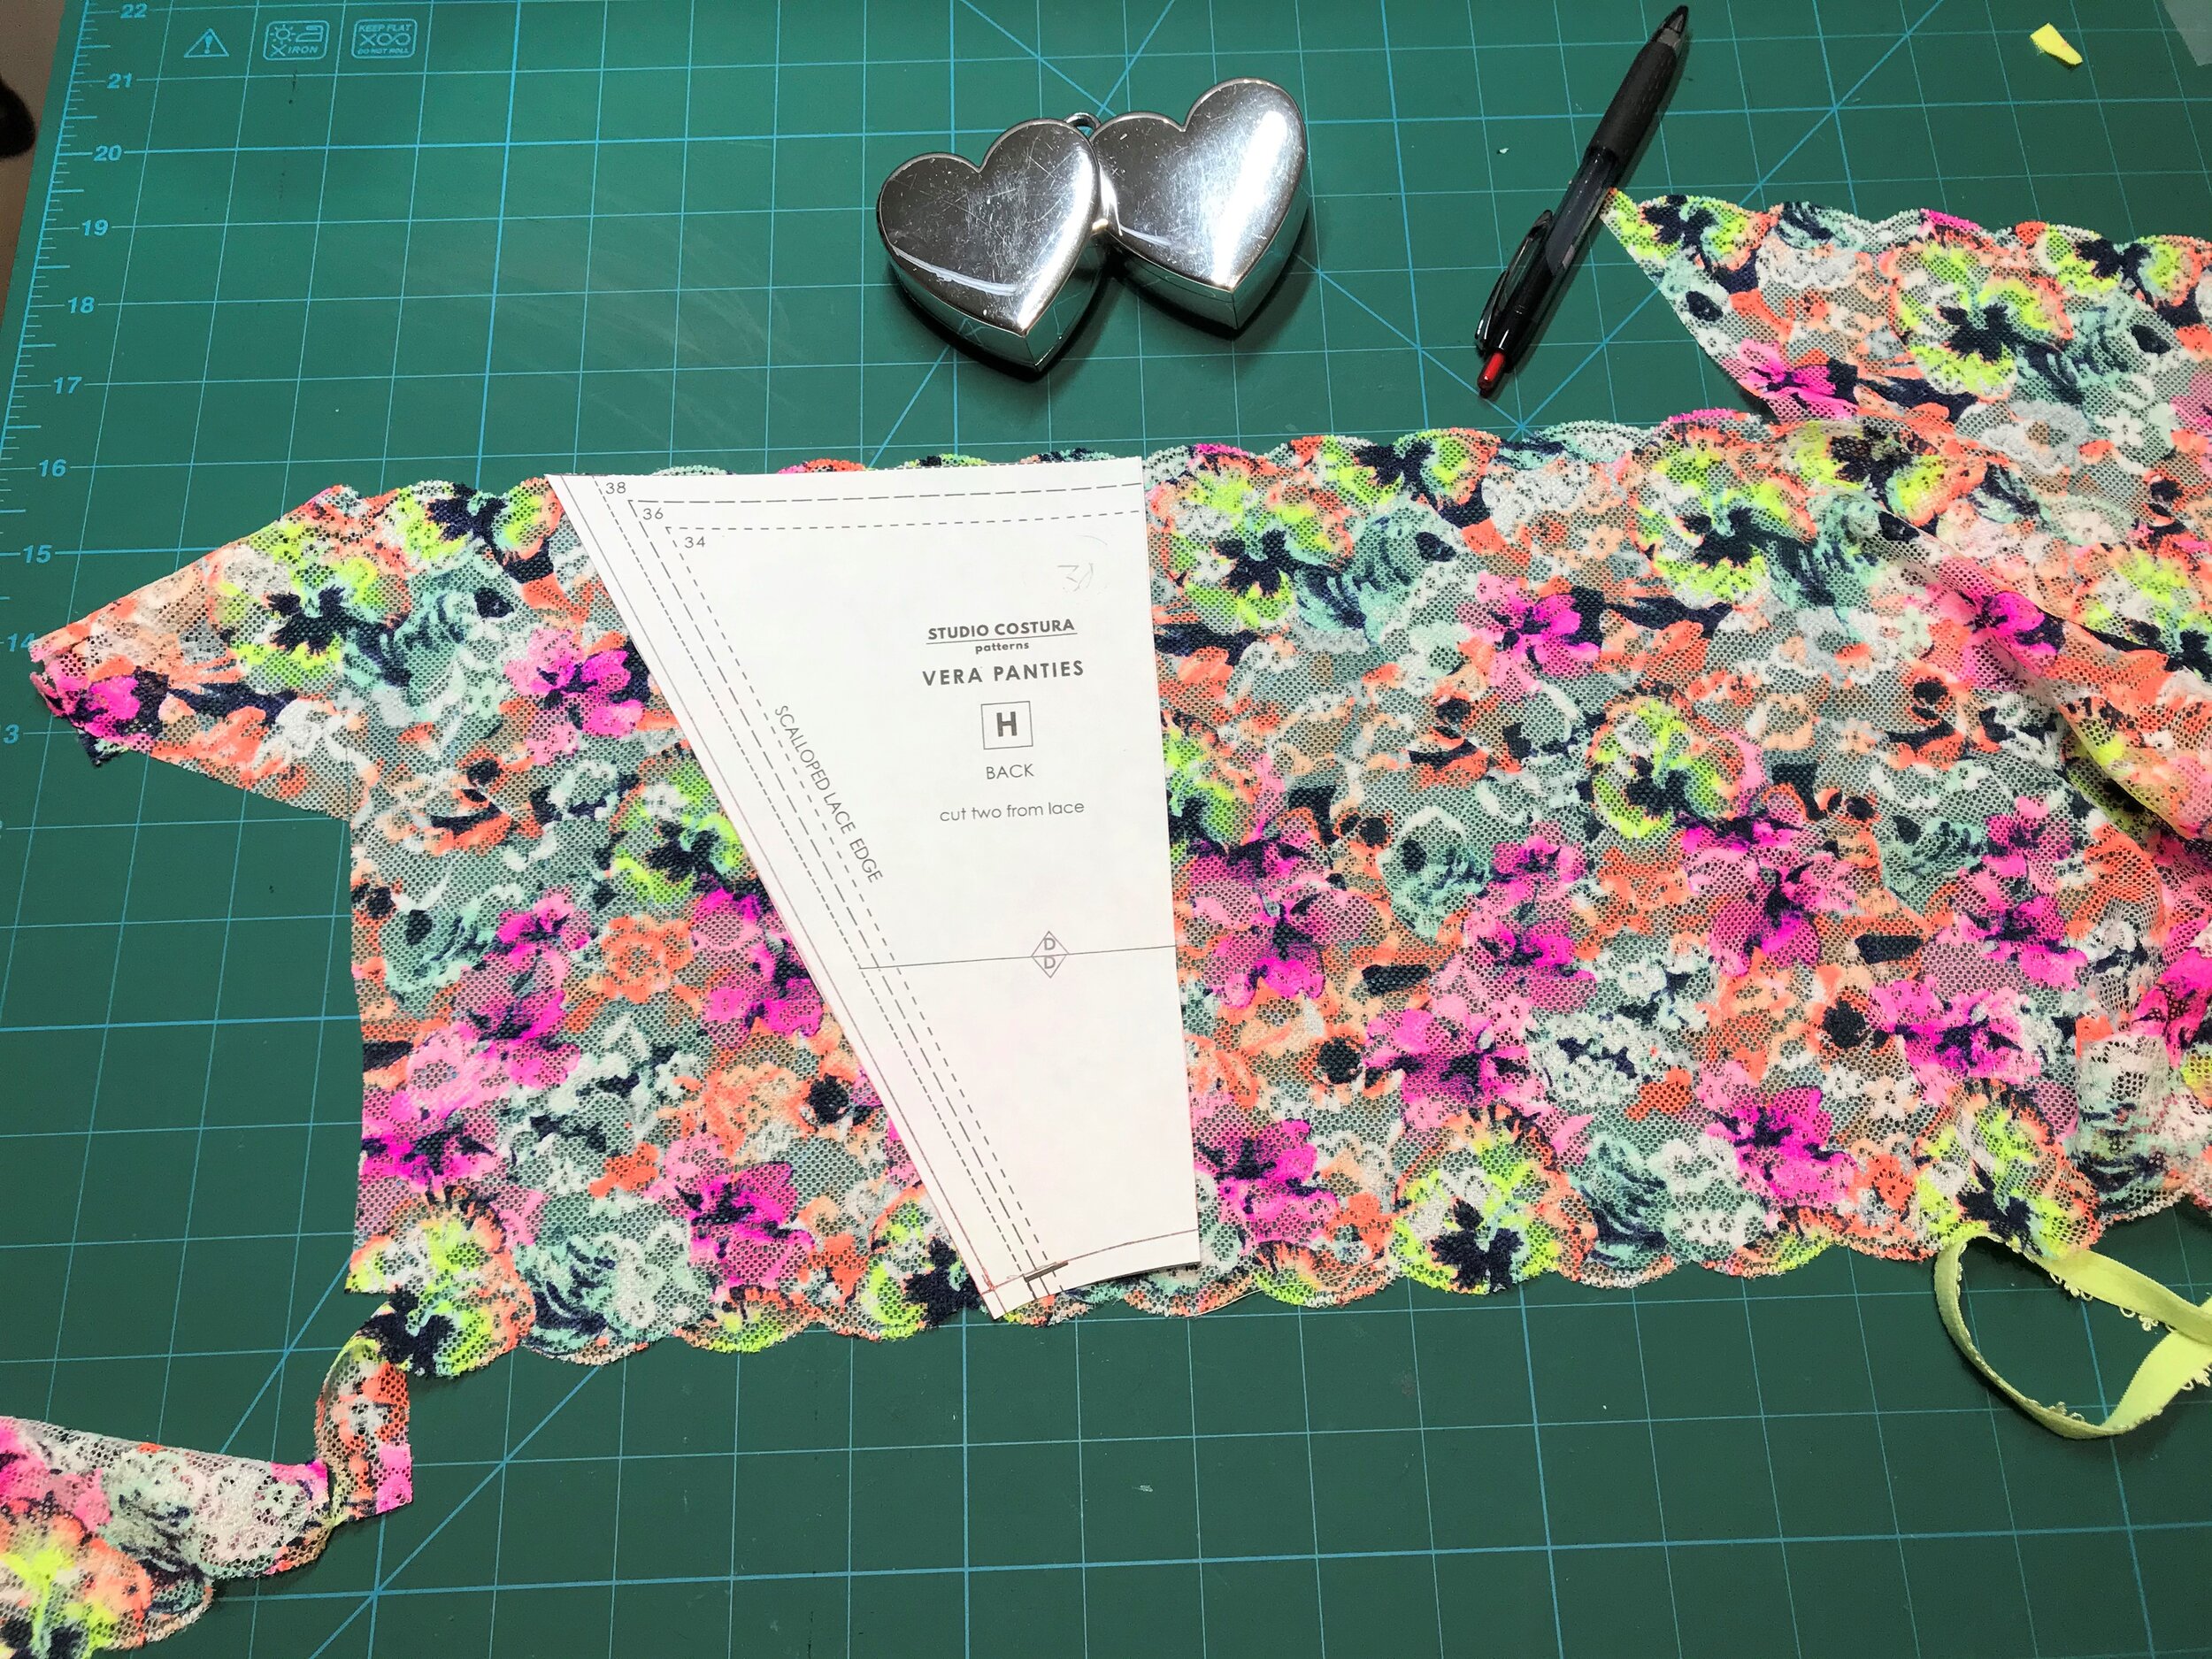
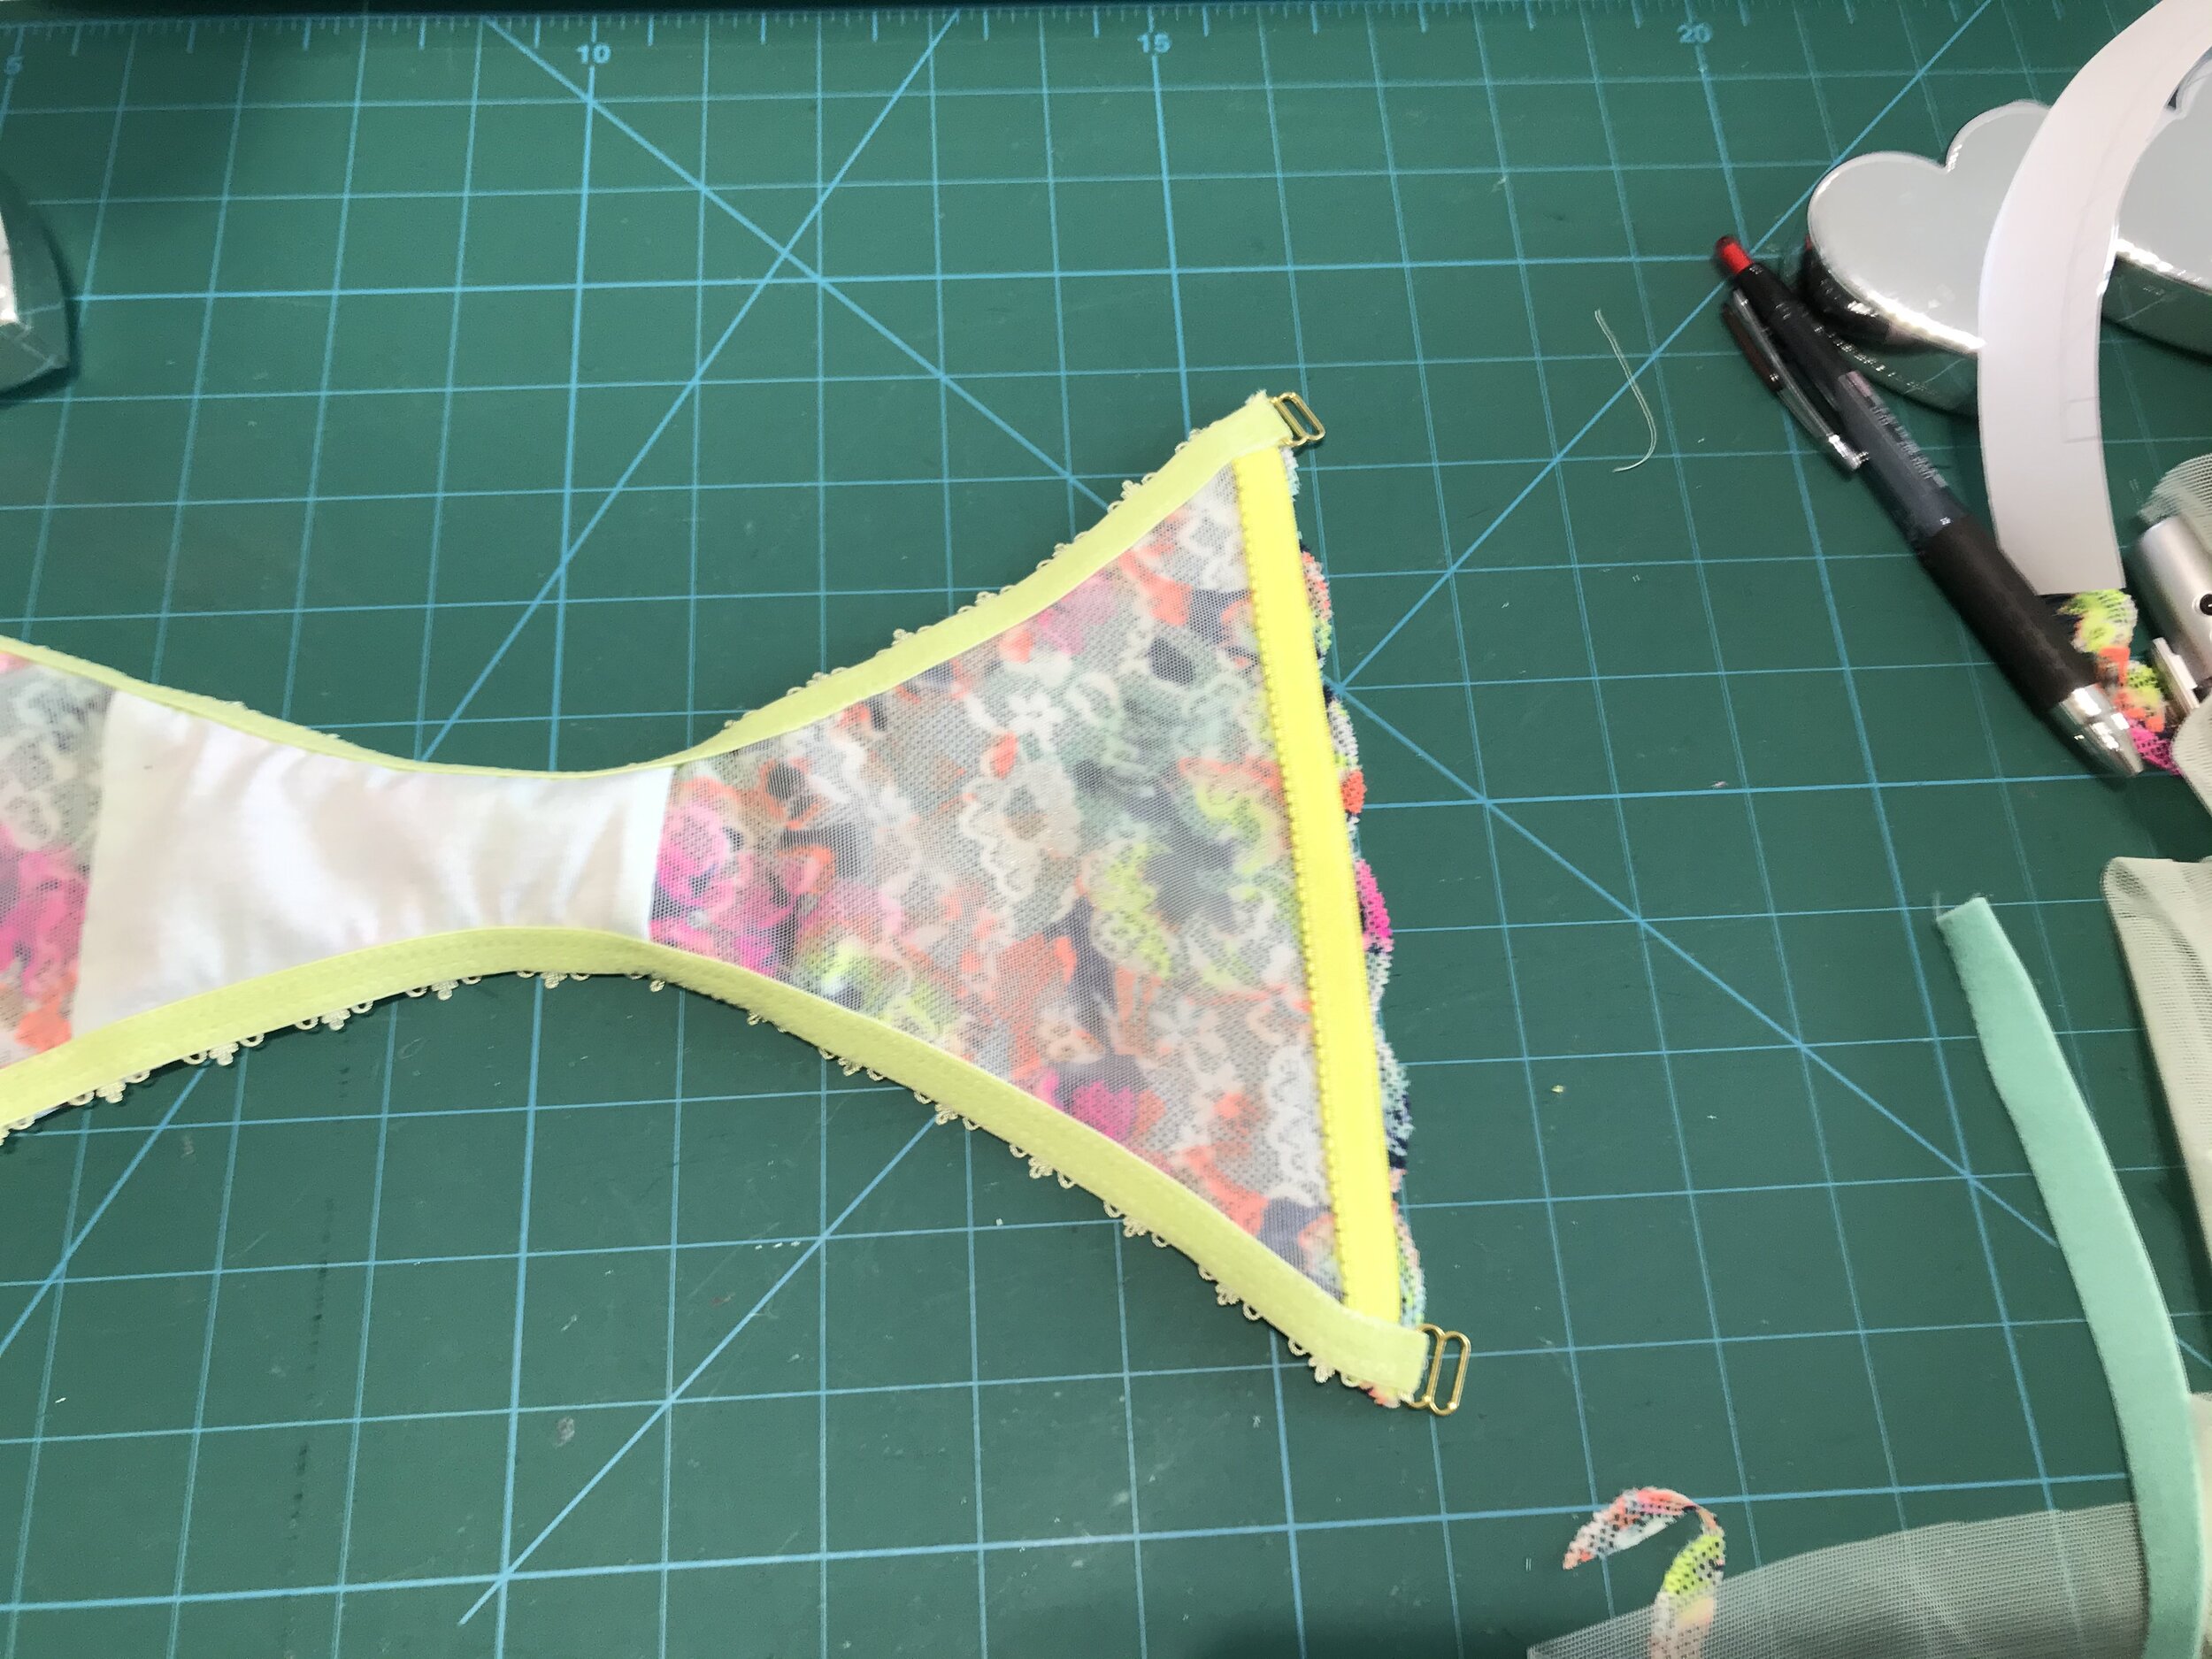
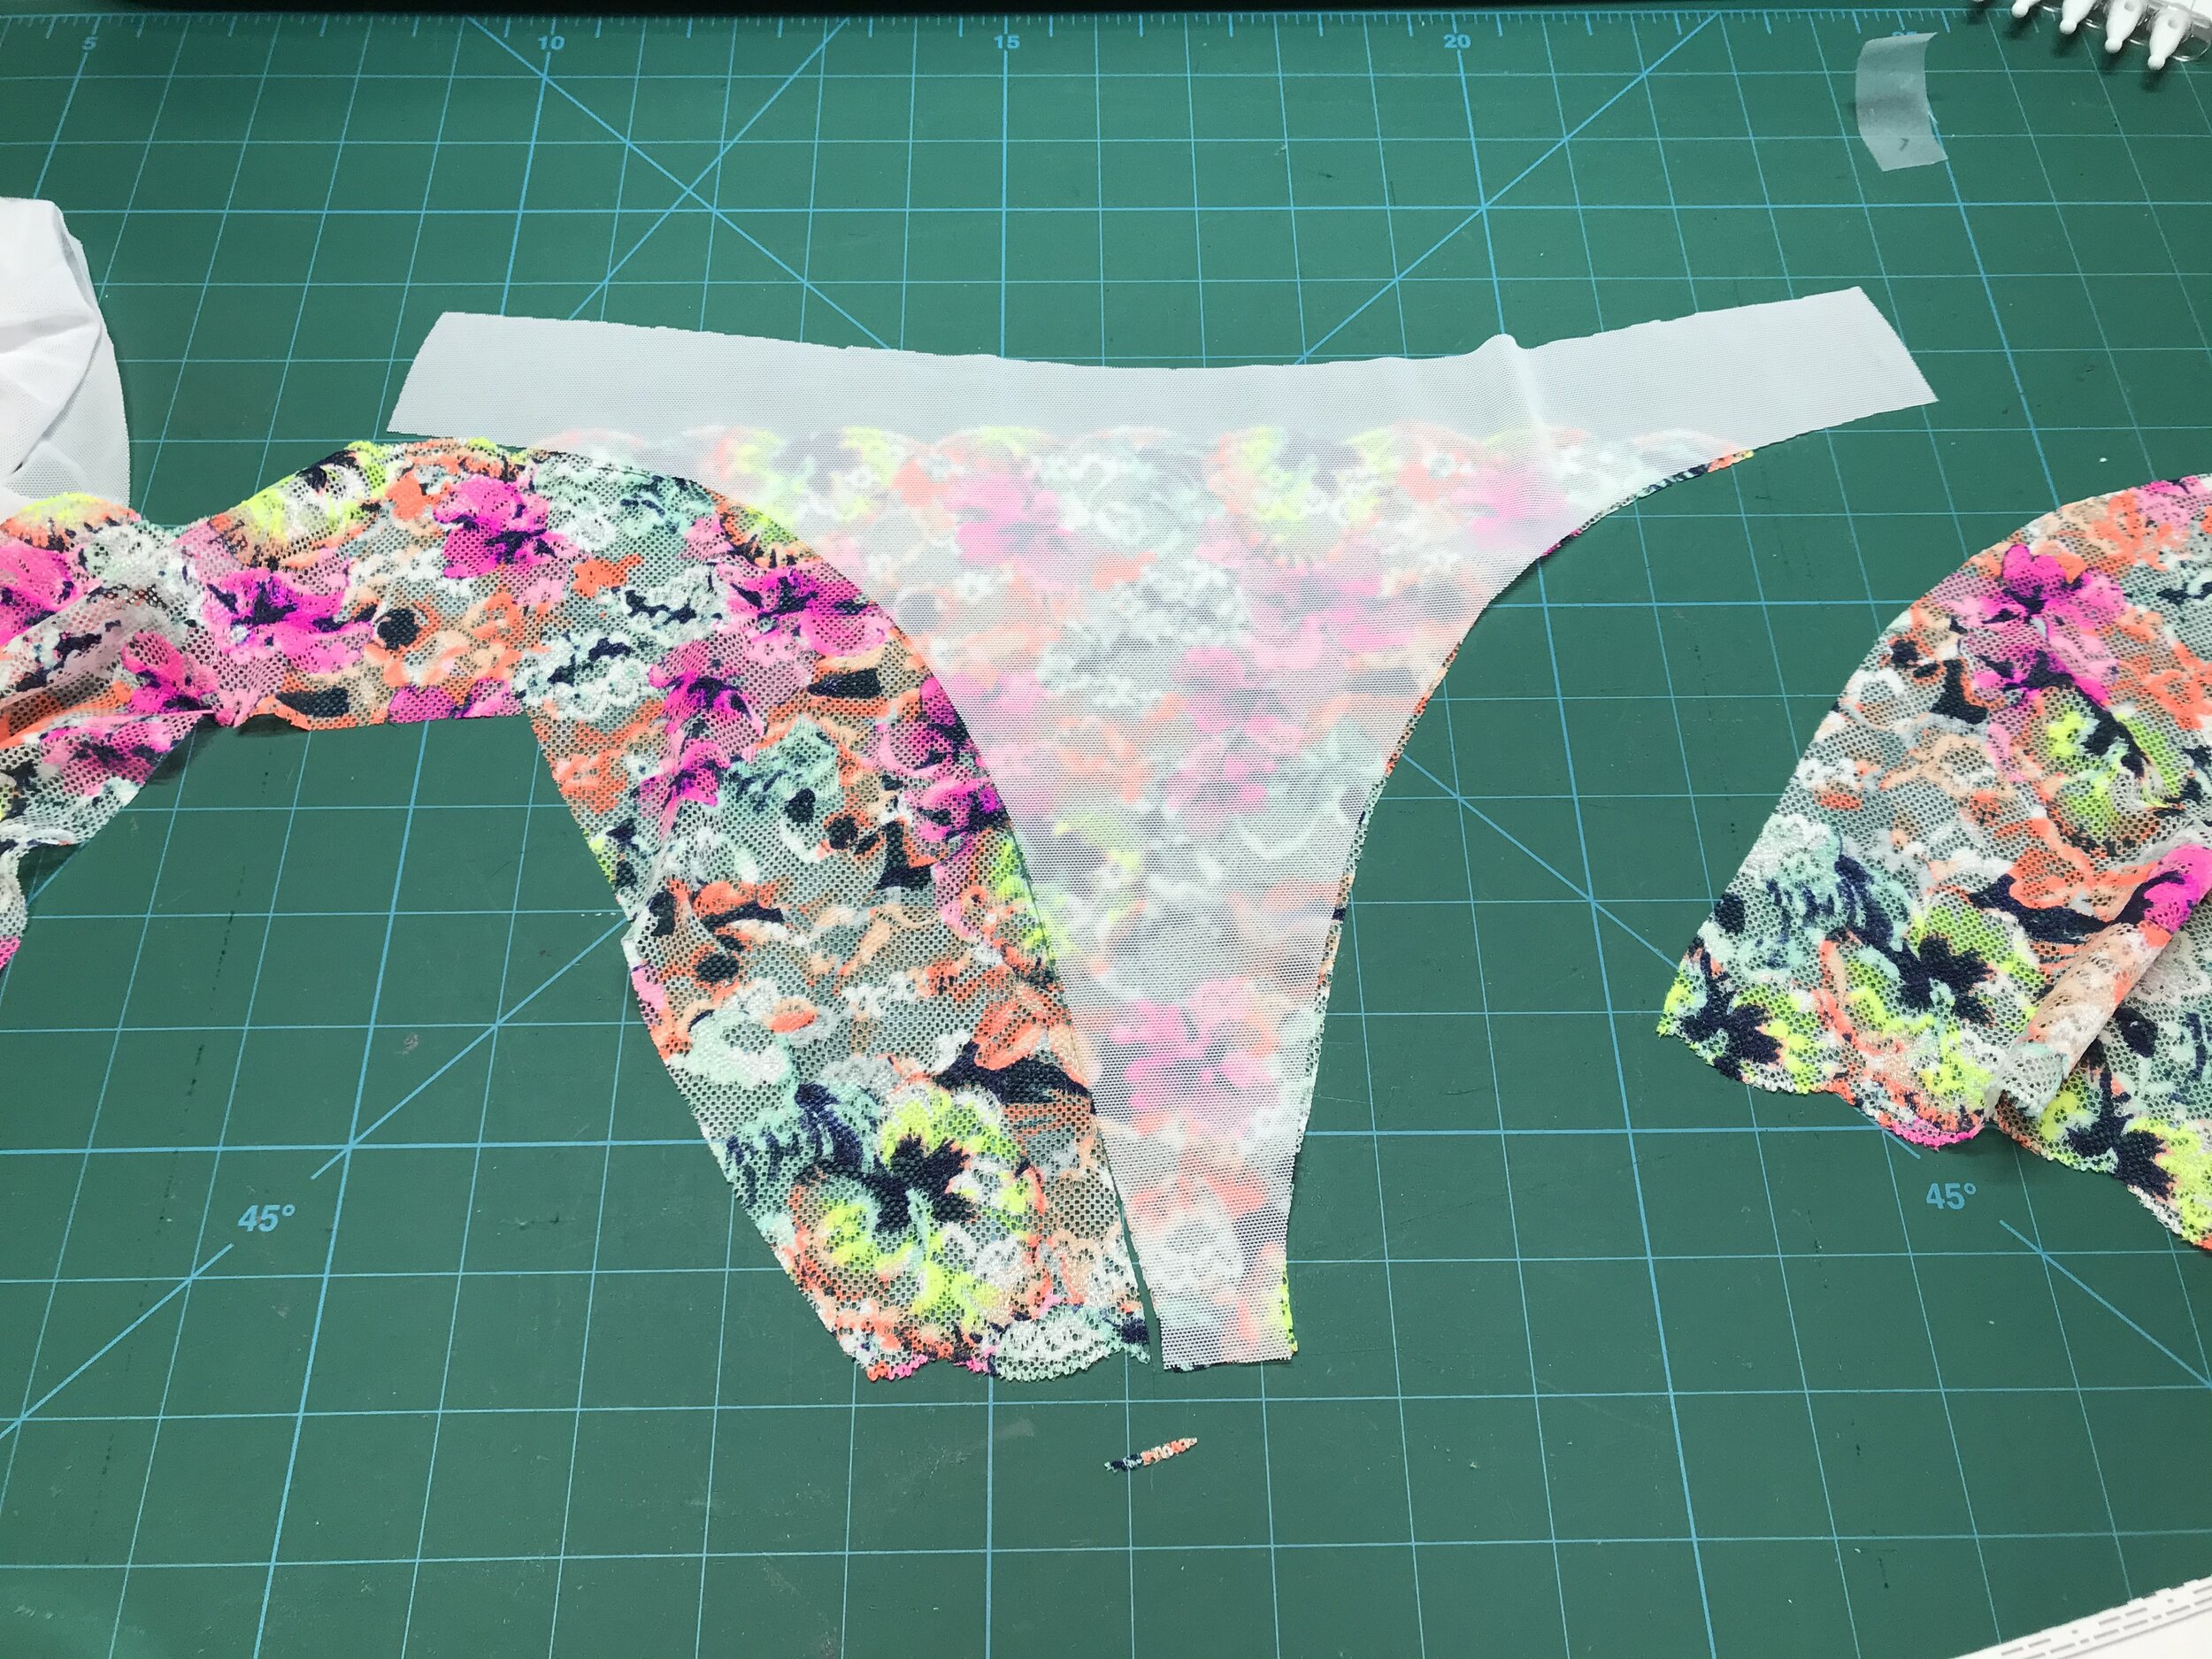
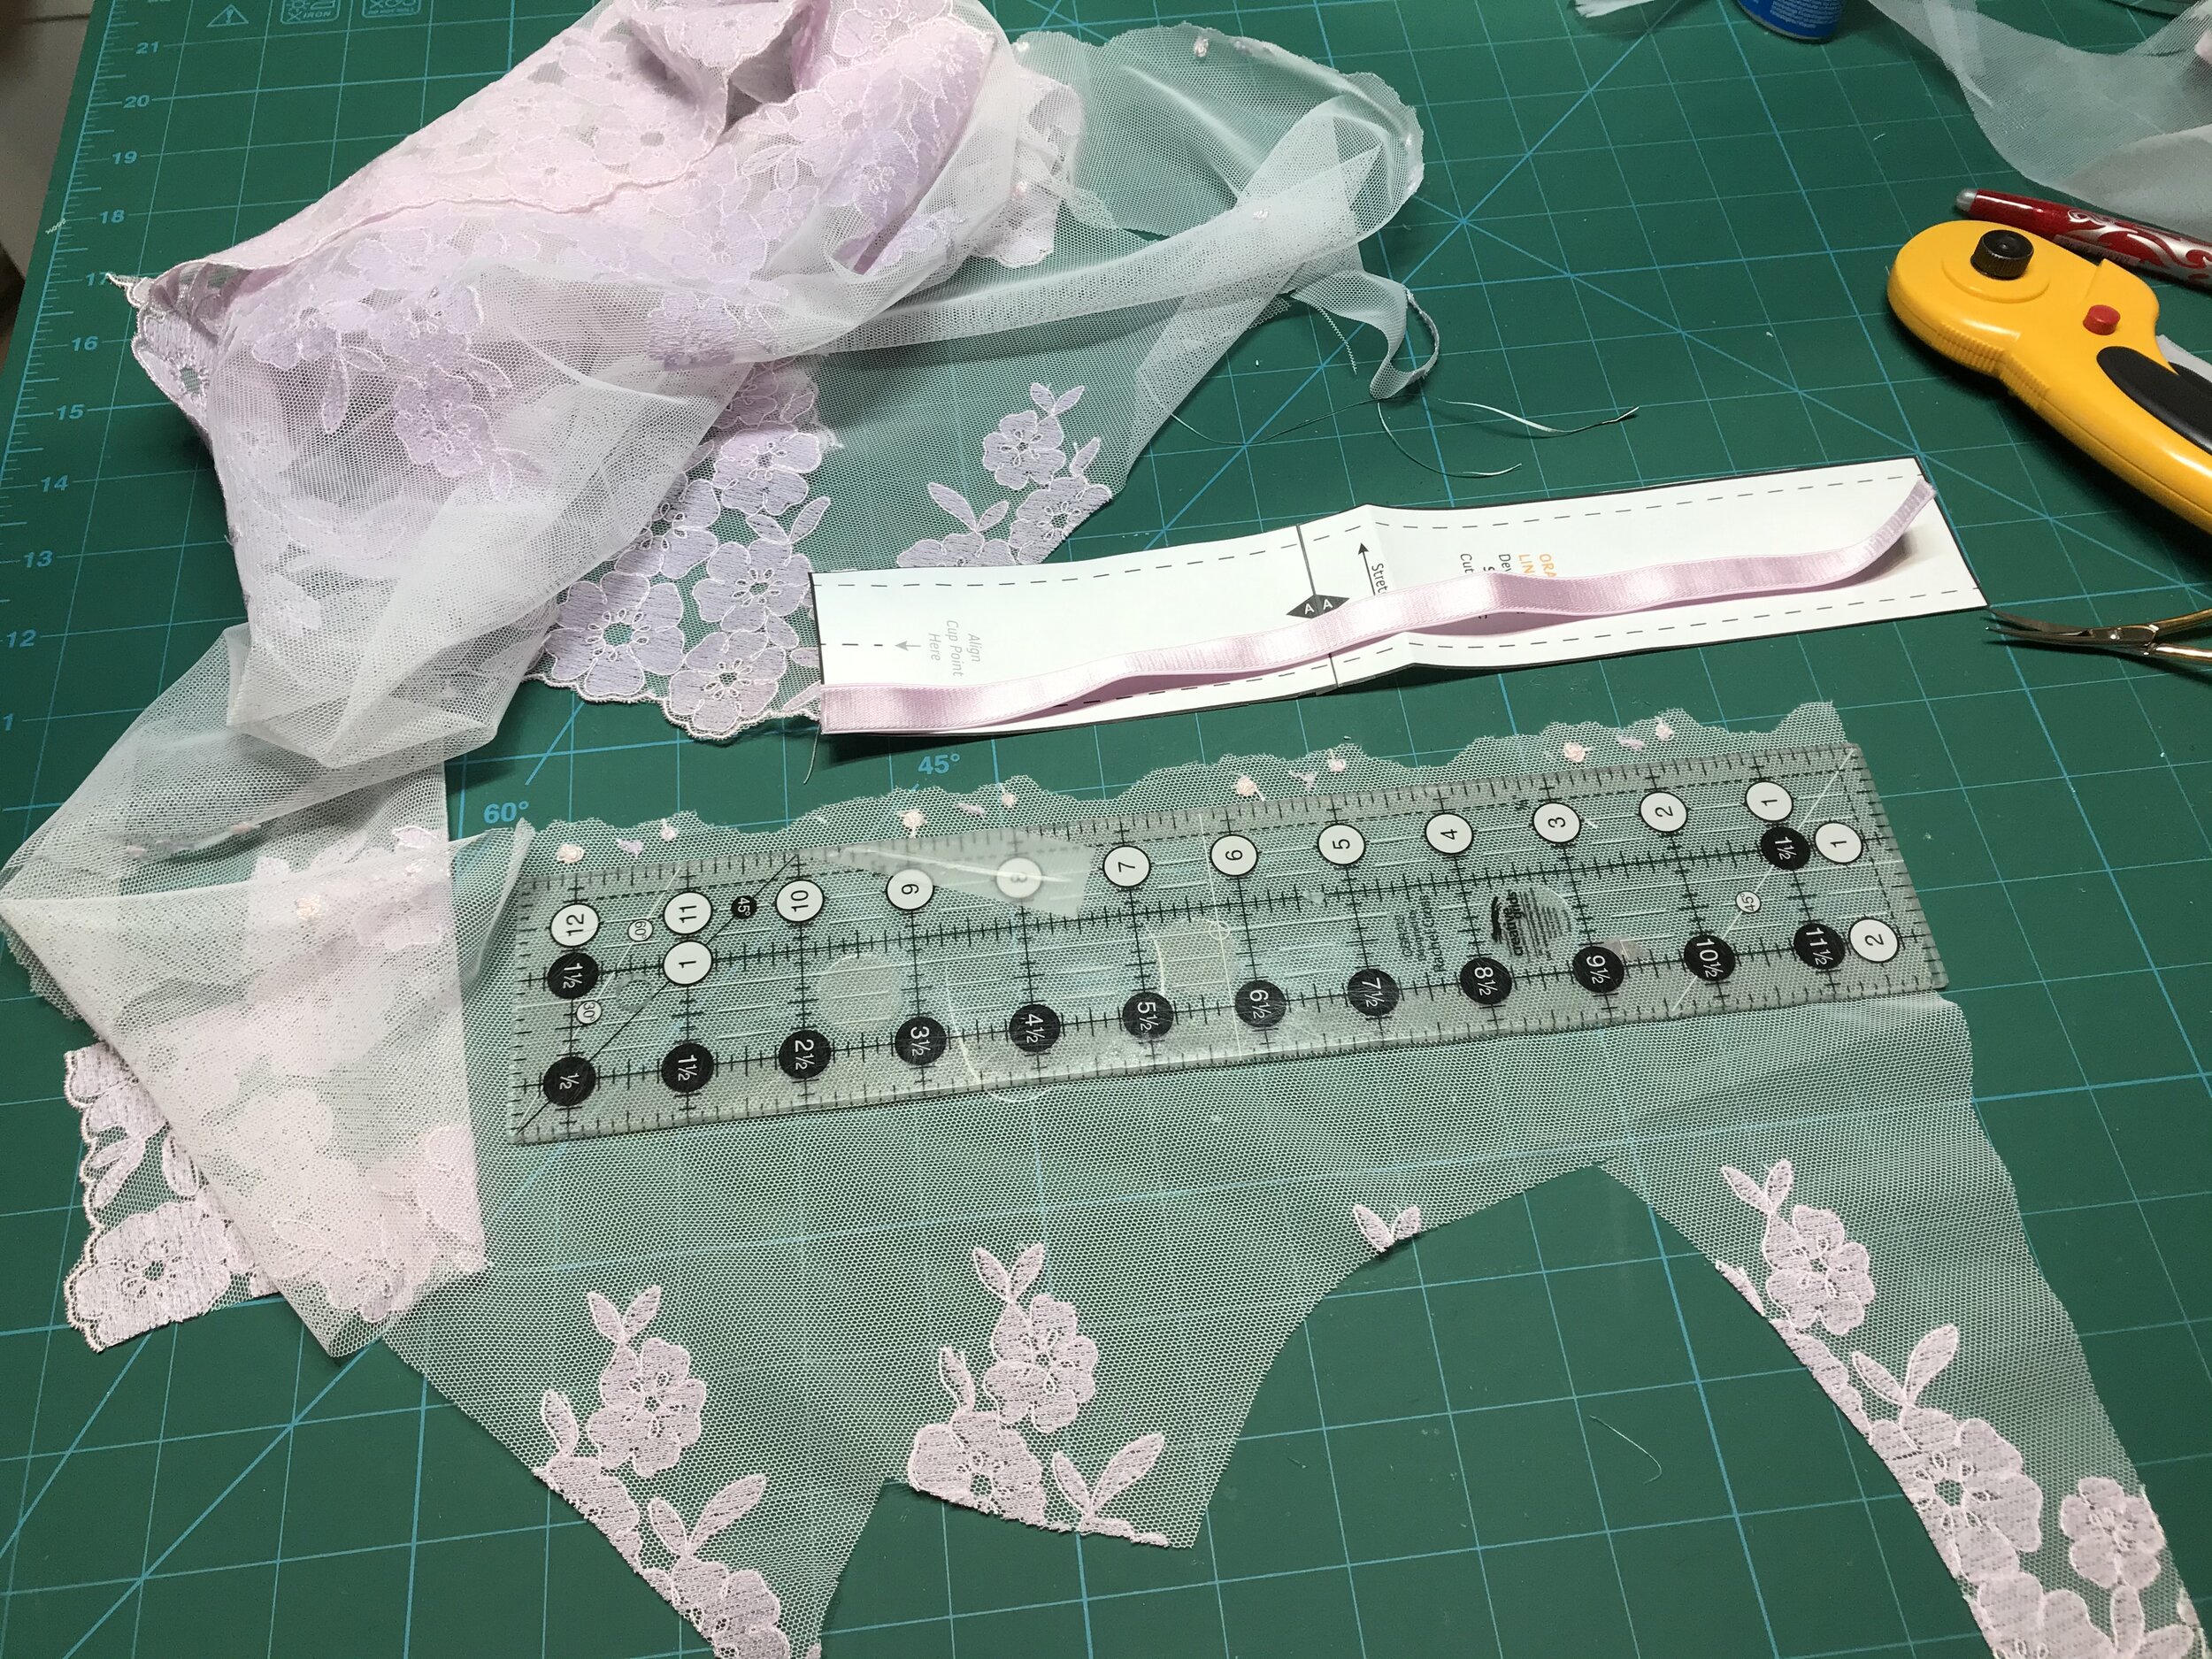
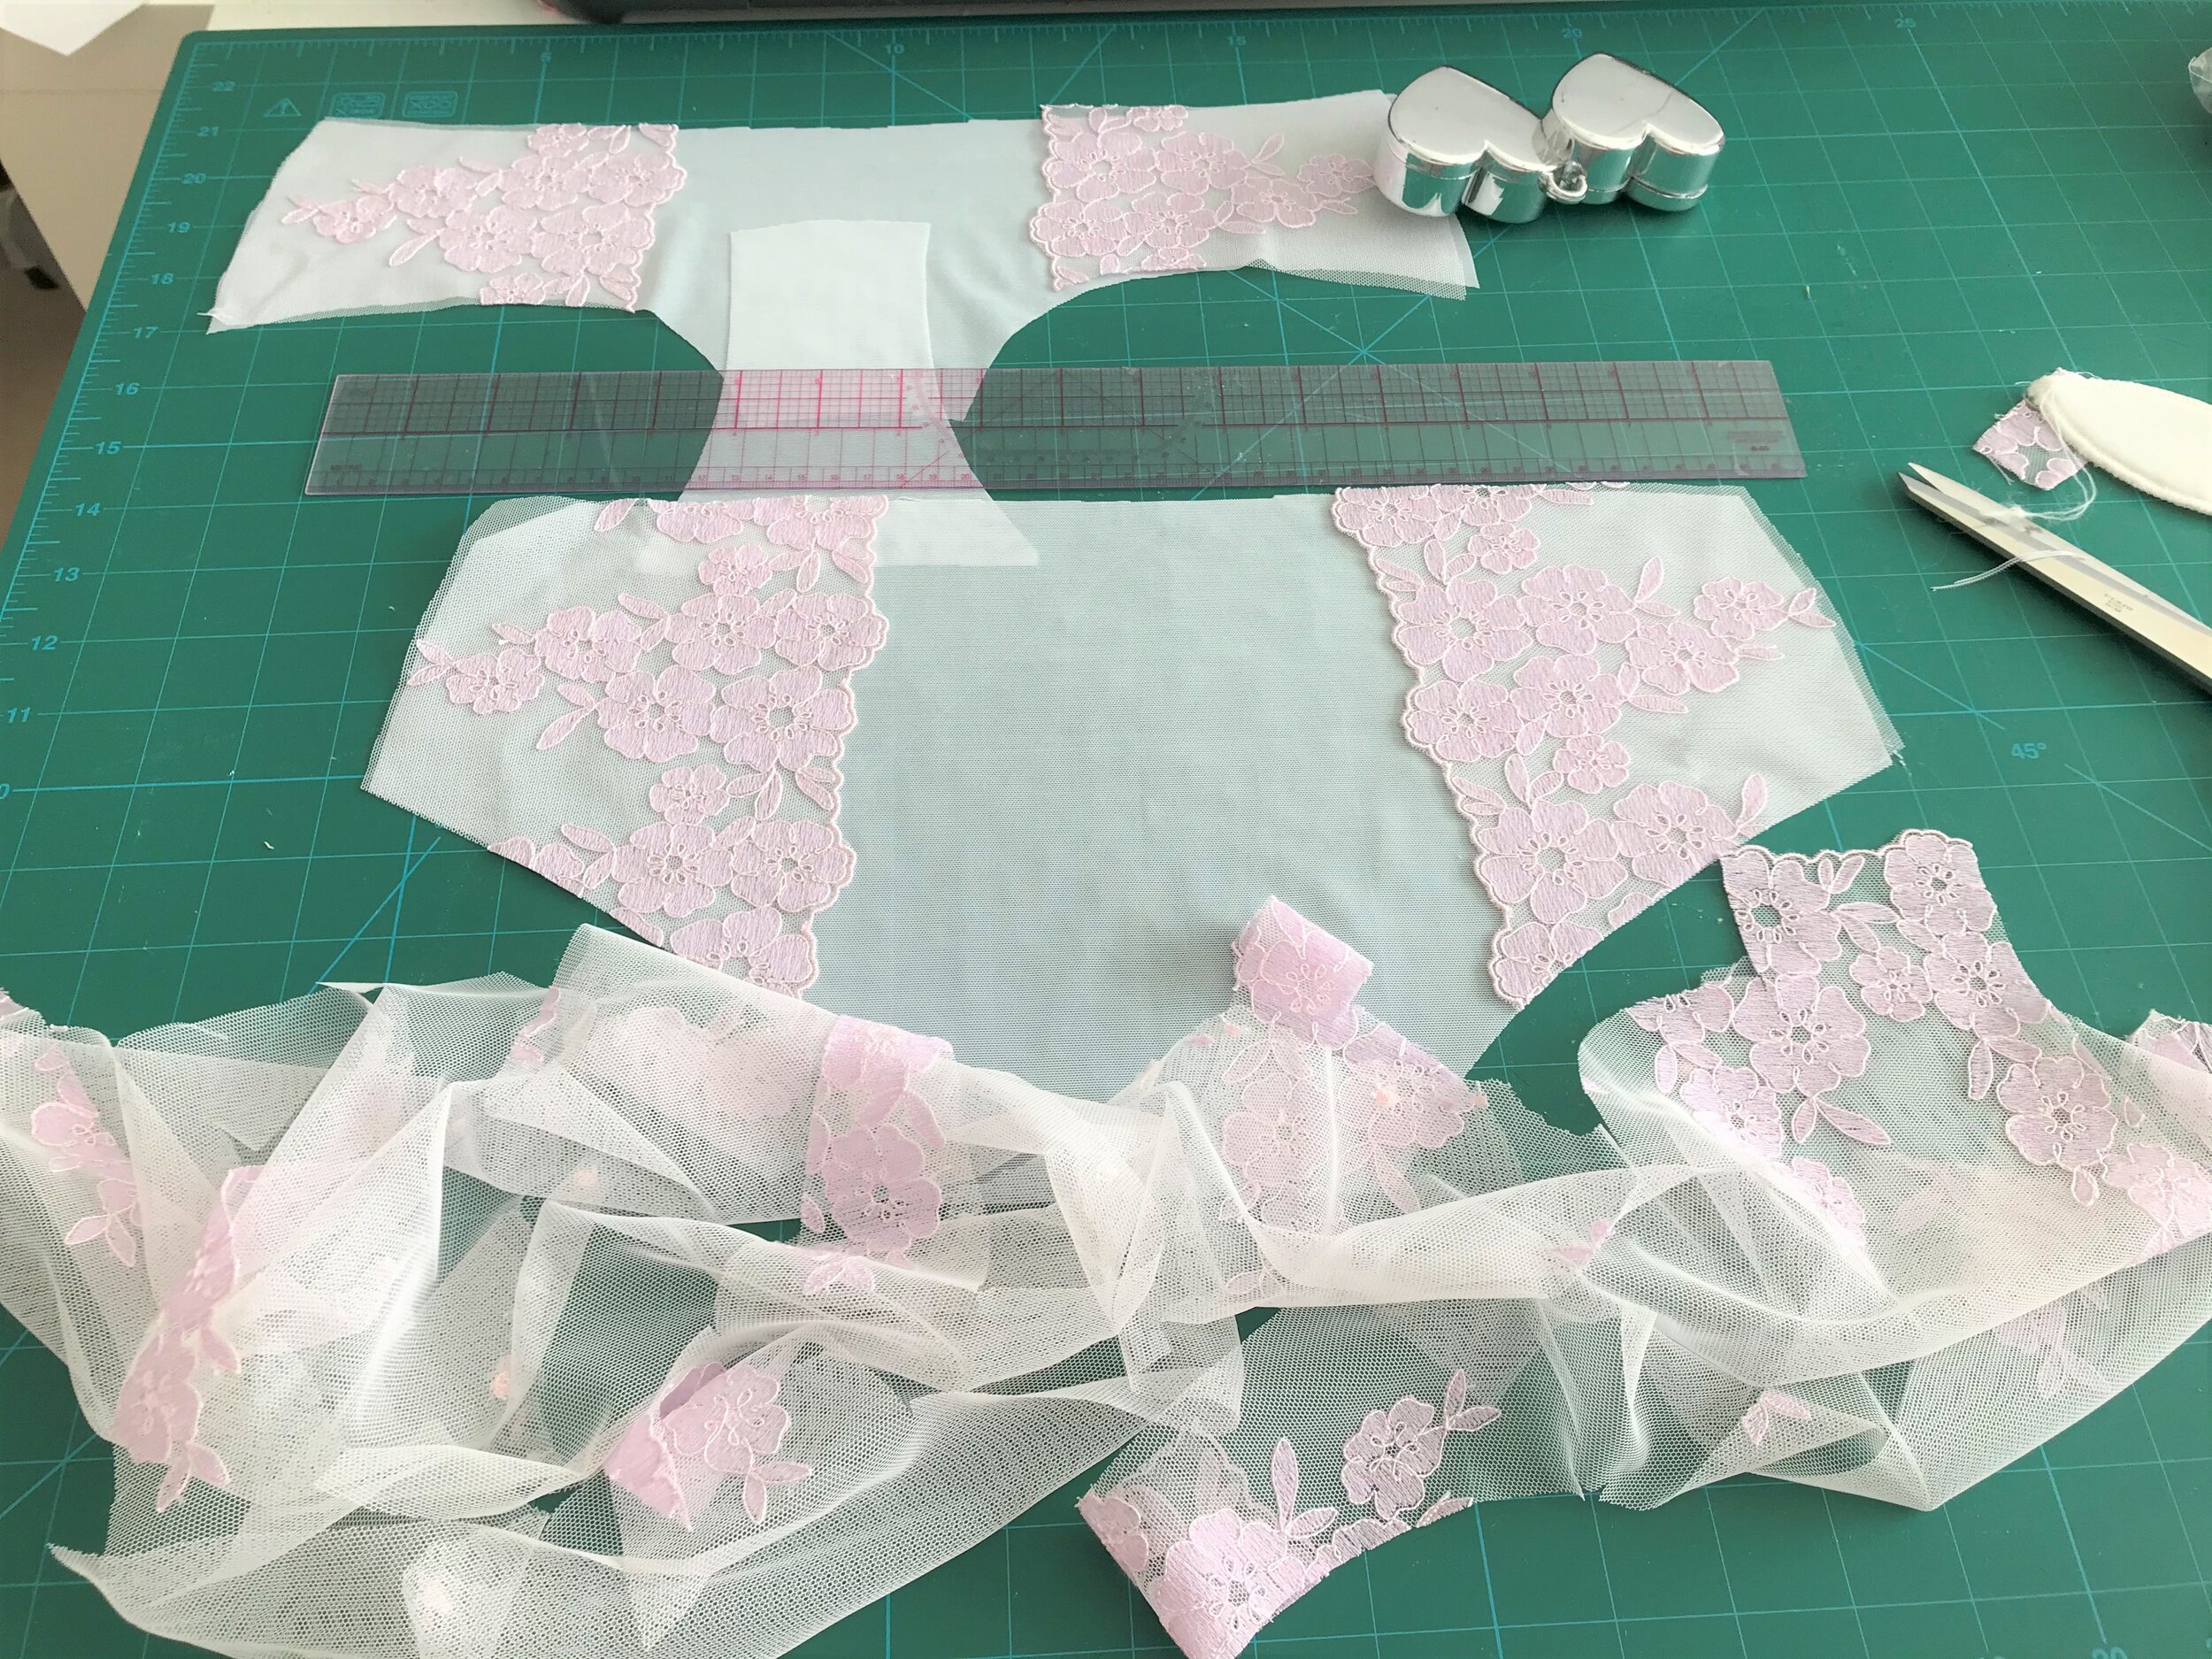
To help determine the proportions of the design I made up the front pattern piece by flipping the original pattern piece and tracing to give a complete front. I decided on the placement of the side pieces, then lay the bra over the centre front and drew in the the cut out and then drew a line from the side to the cut out continuing to the centre front. On to the construction.

IMG_7006.jpg

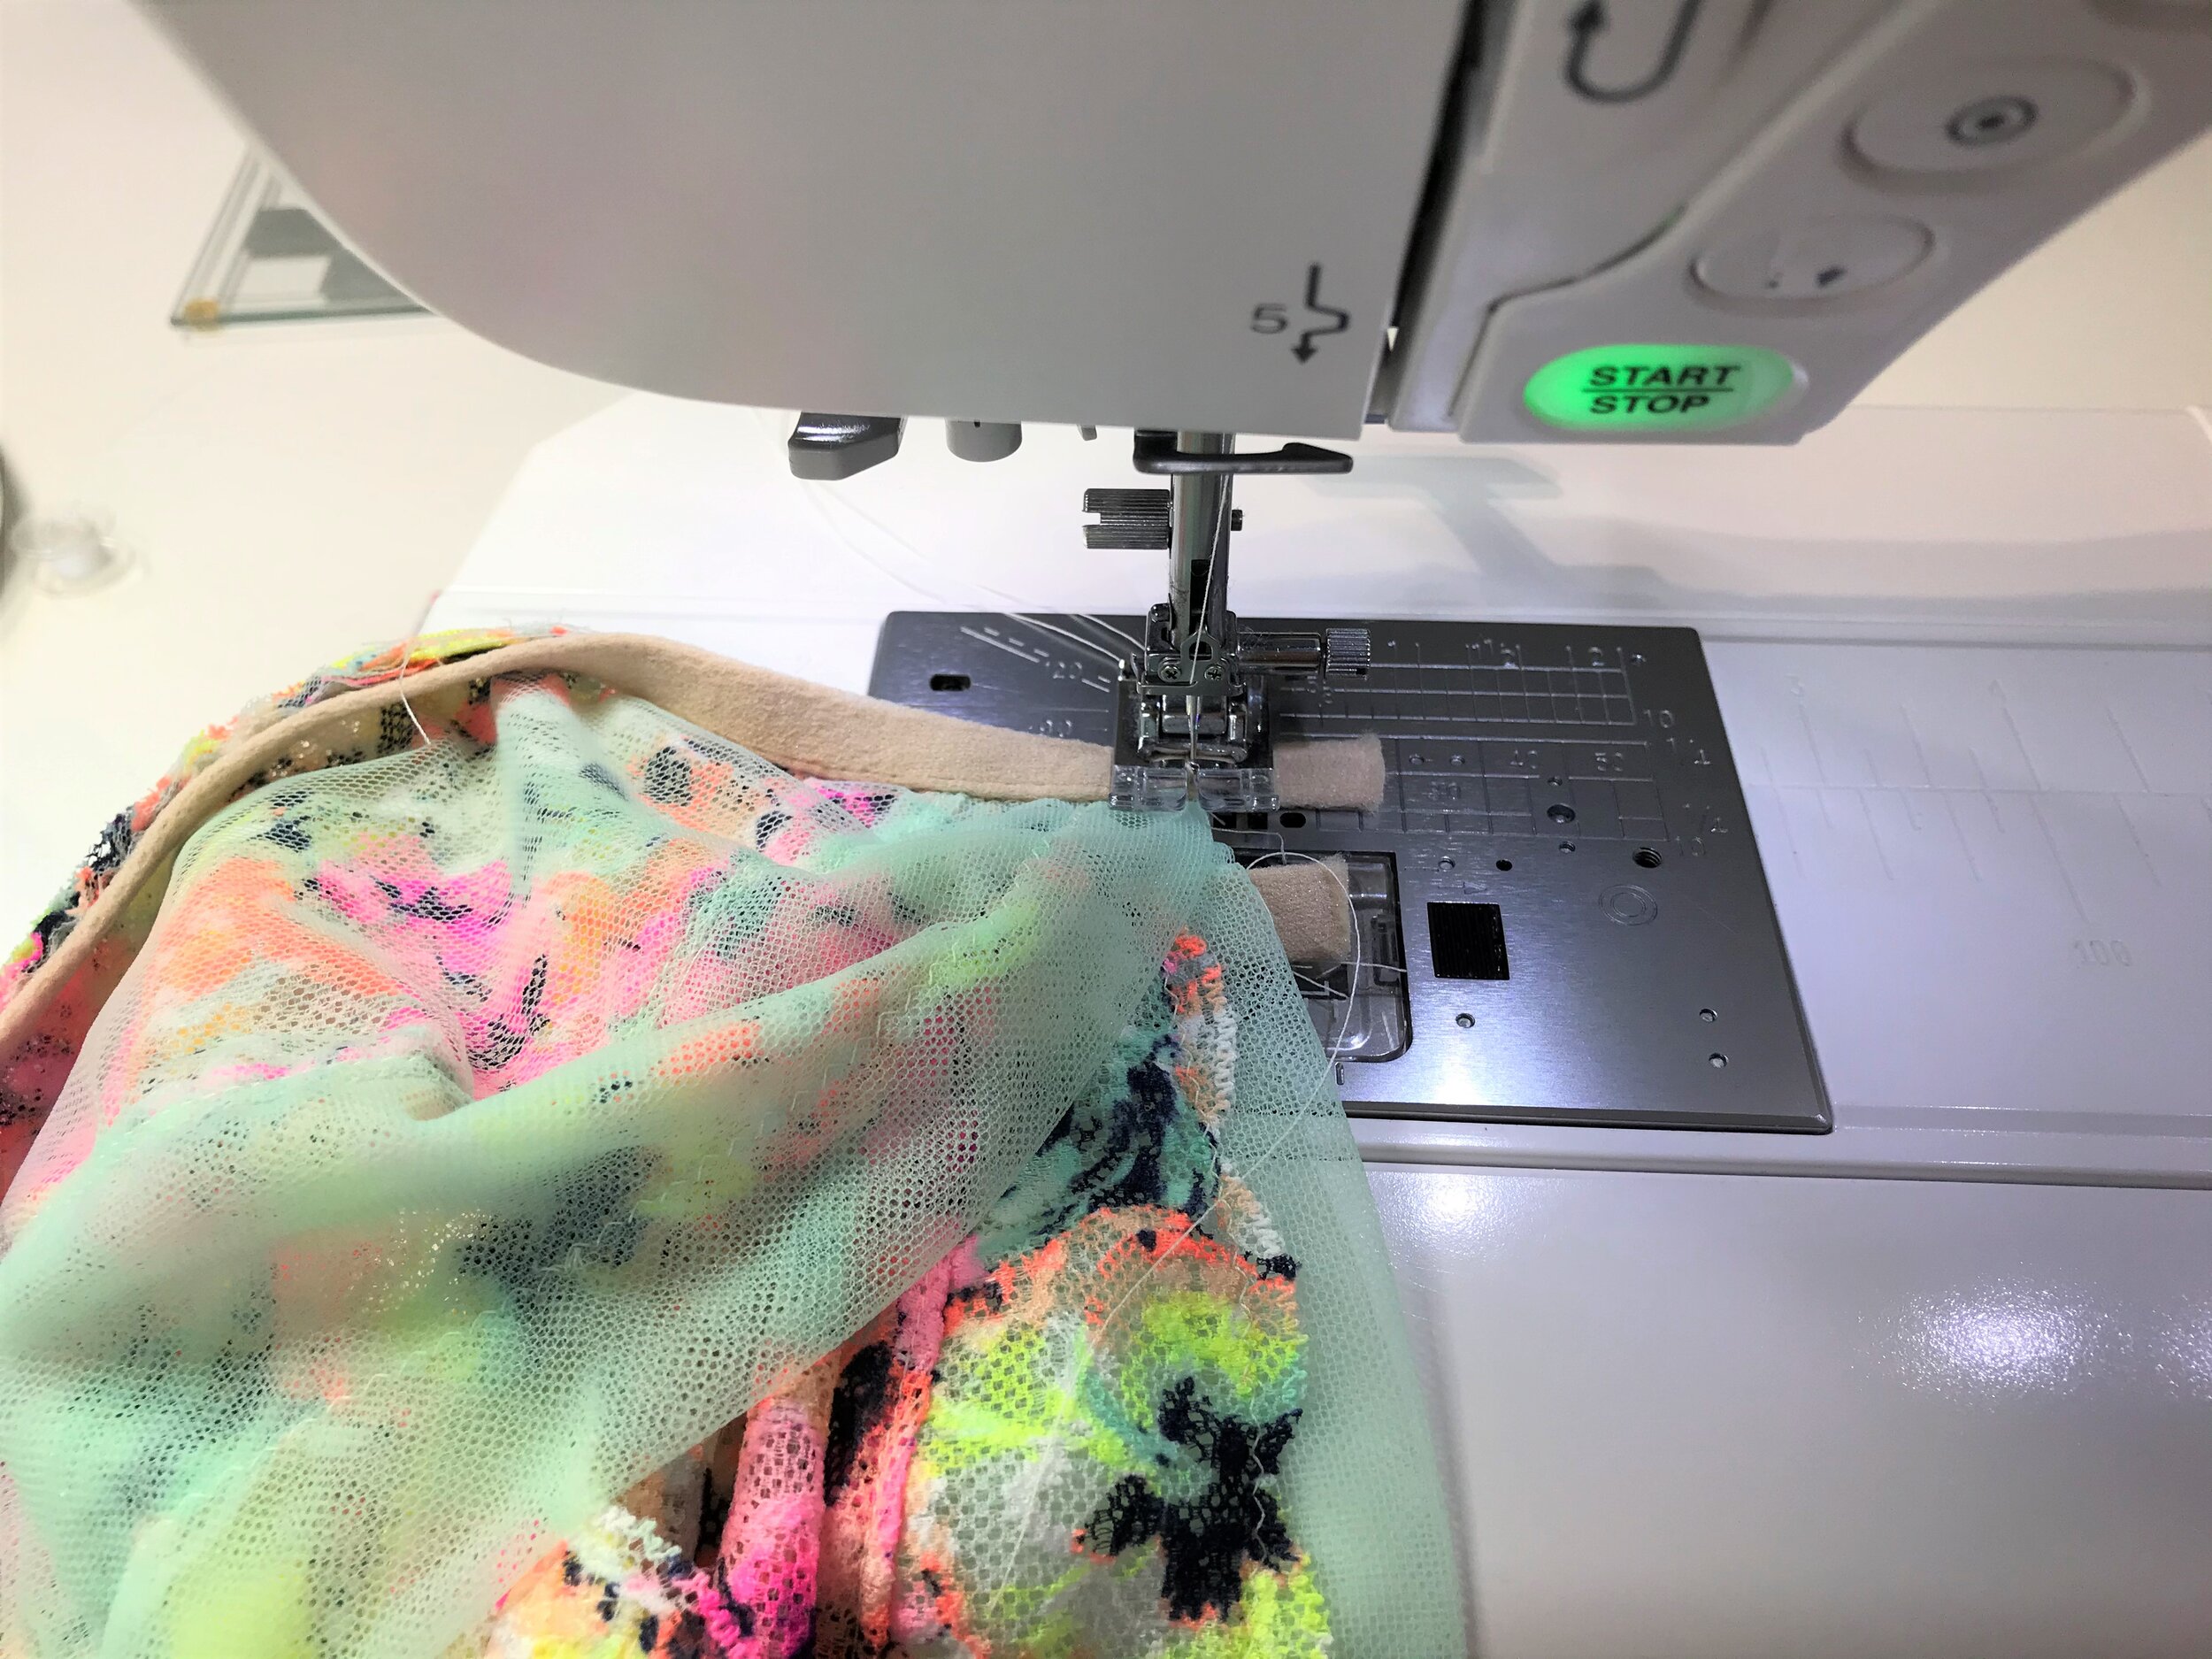
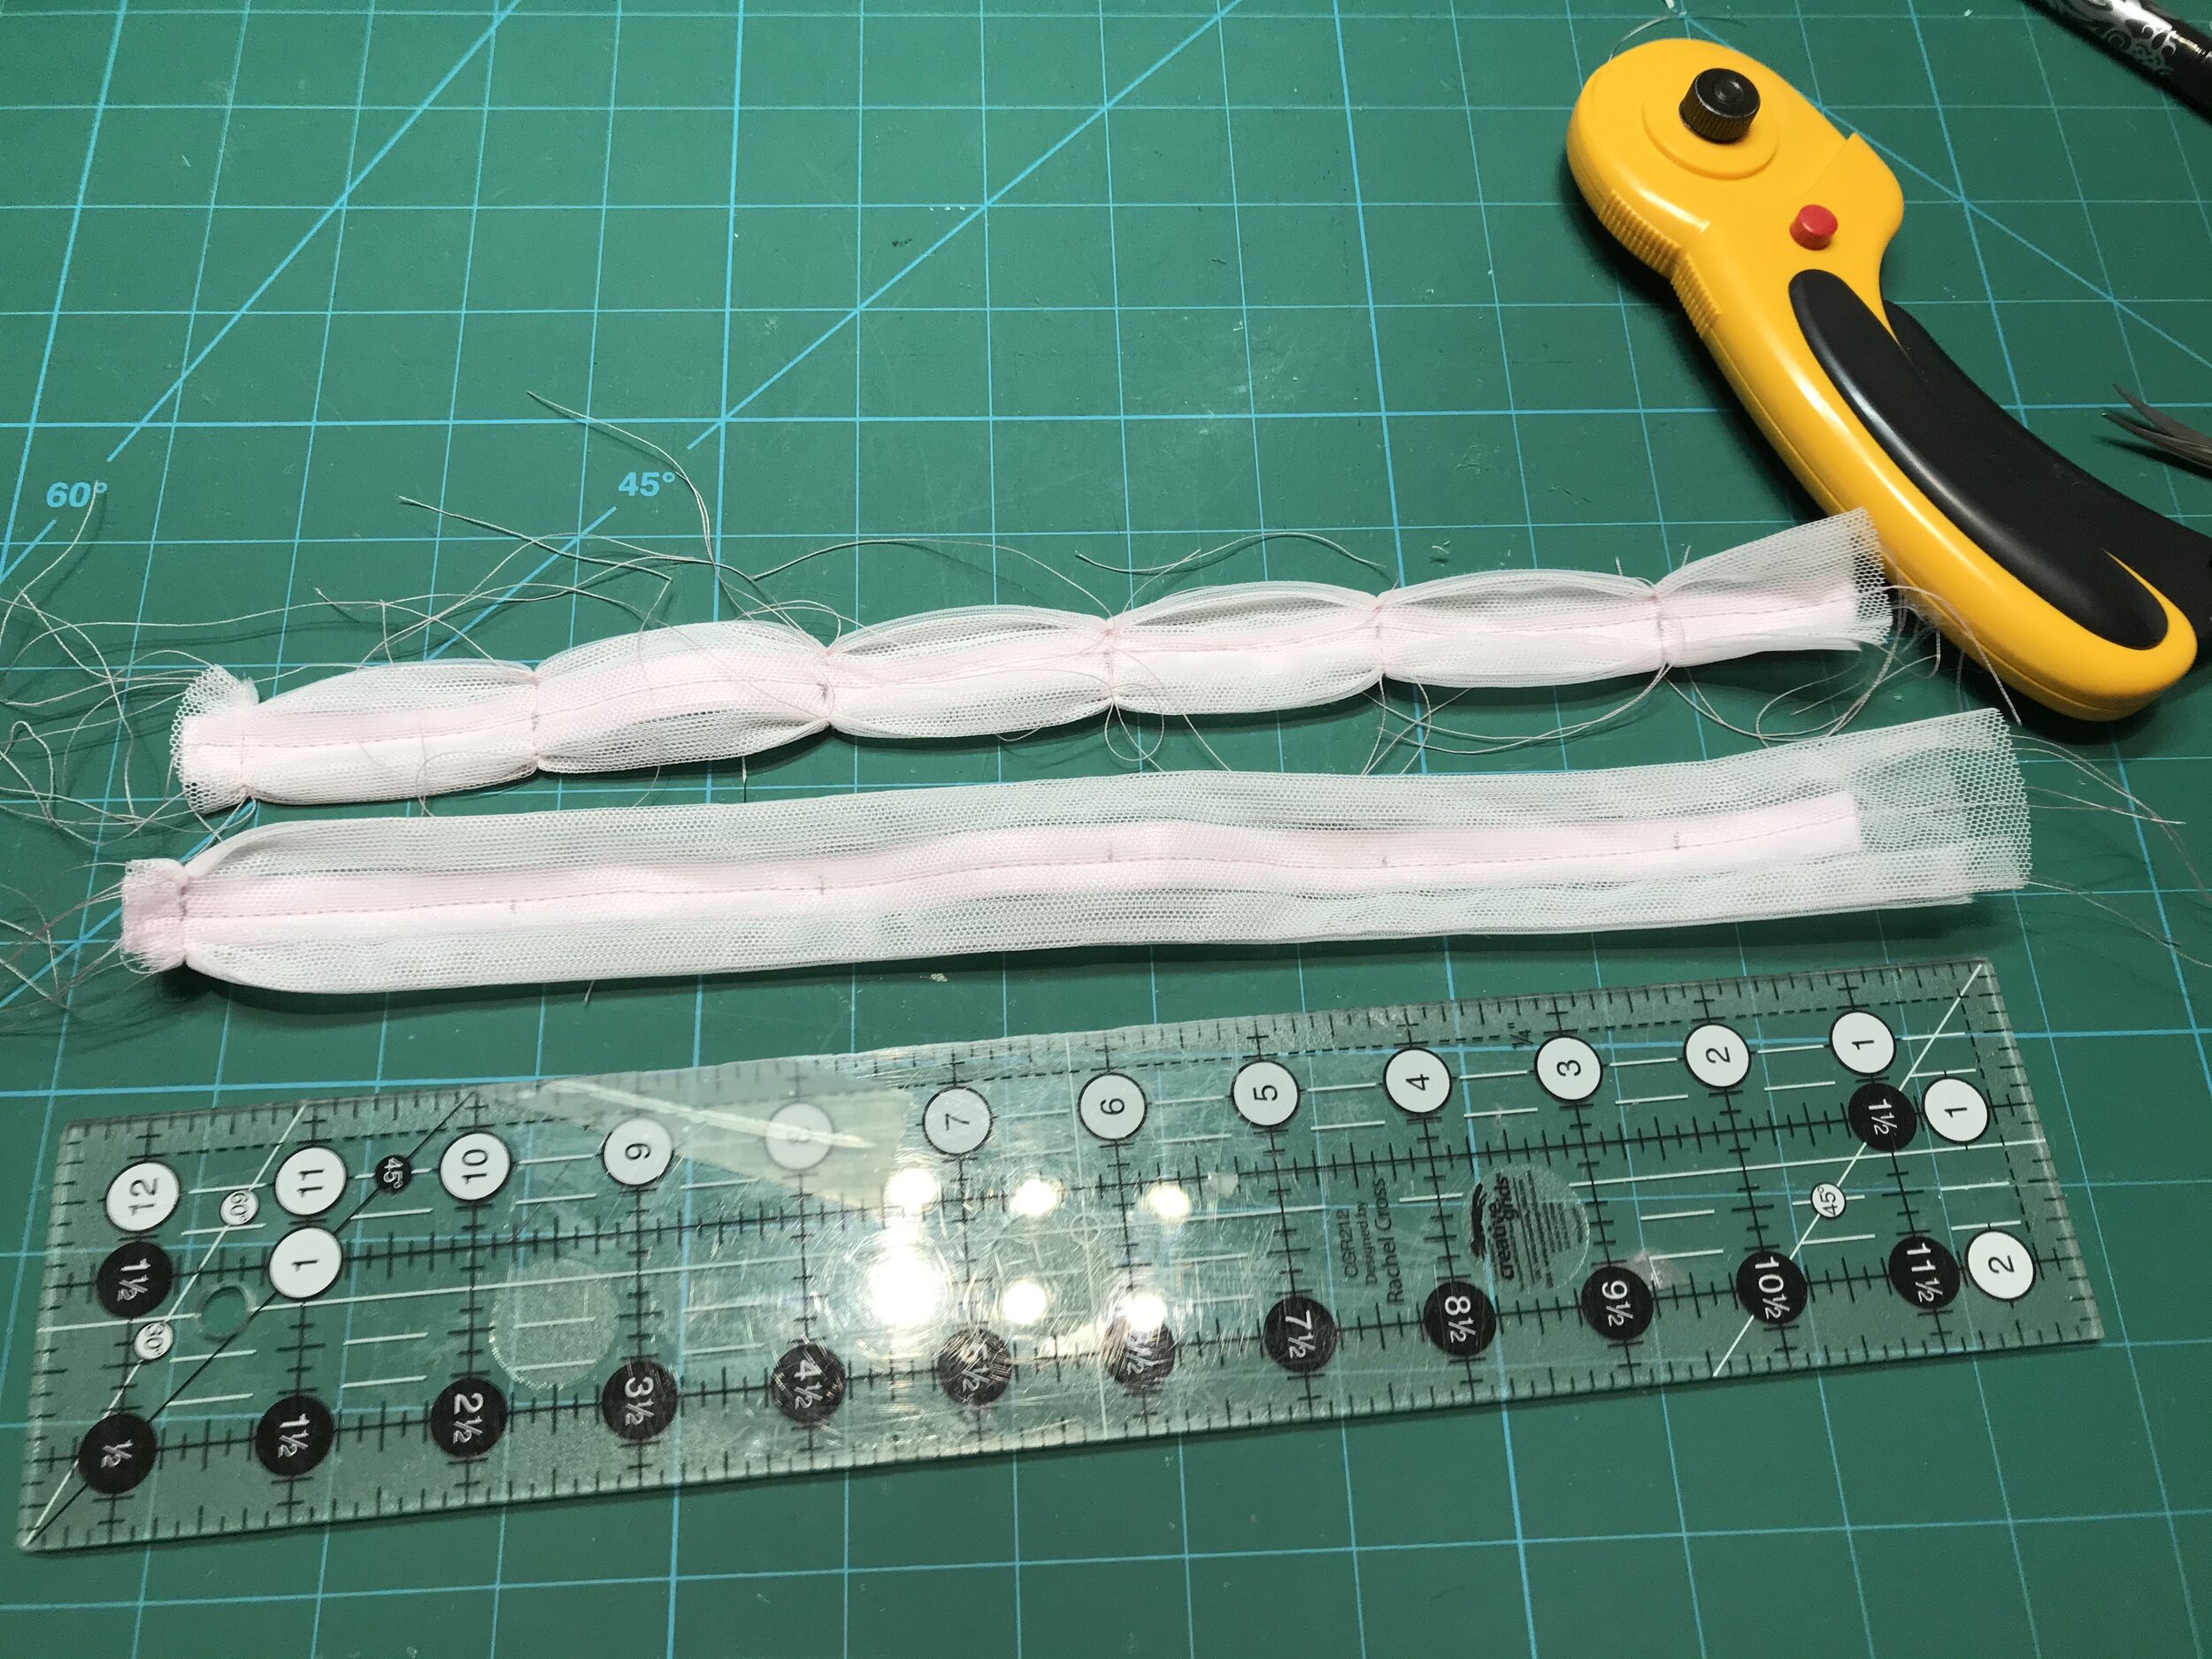
I started with the back. The closest colour mesh I had was a blush also from Tailormade. I used two layers to balance the powernet panel and it enhanced the colour. Rather than create bulky seams I just overlaid the elastic on the complete back piece. The elastic was one I’ve had in my stash forever but is matt ready folded almost to the point I didn’t realise it was folded. I thought it would be perfect as it isn’t as bulky as regular fold over elastic.

IMG_7008.jpg

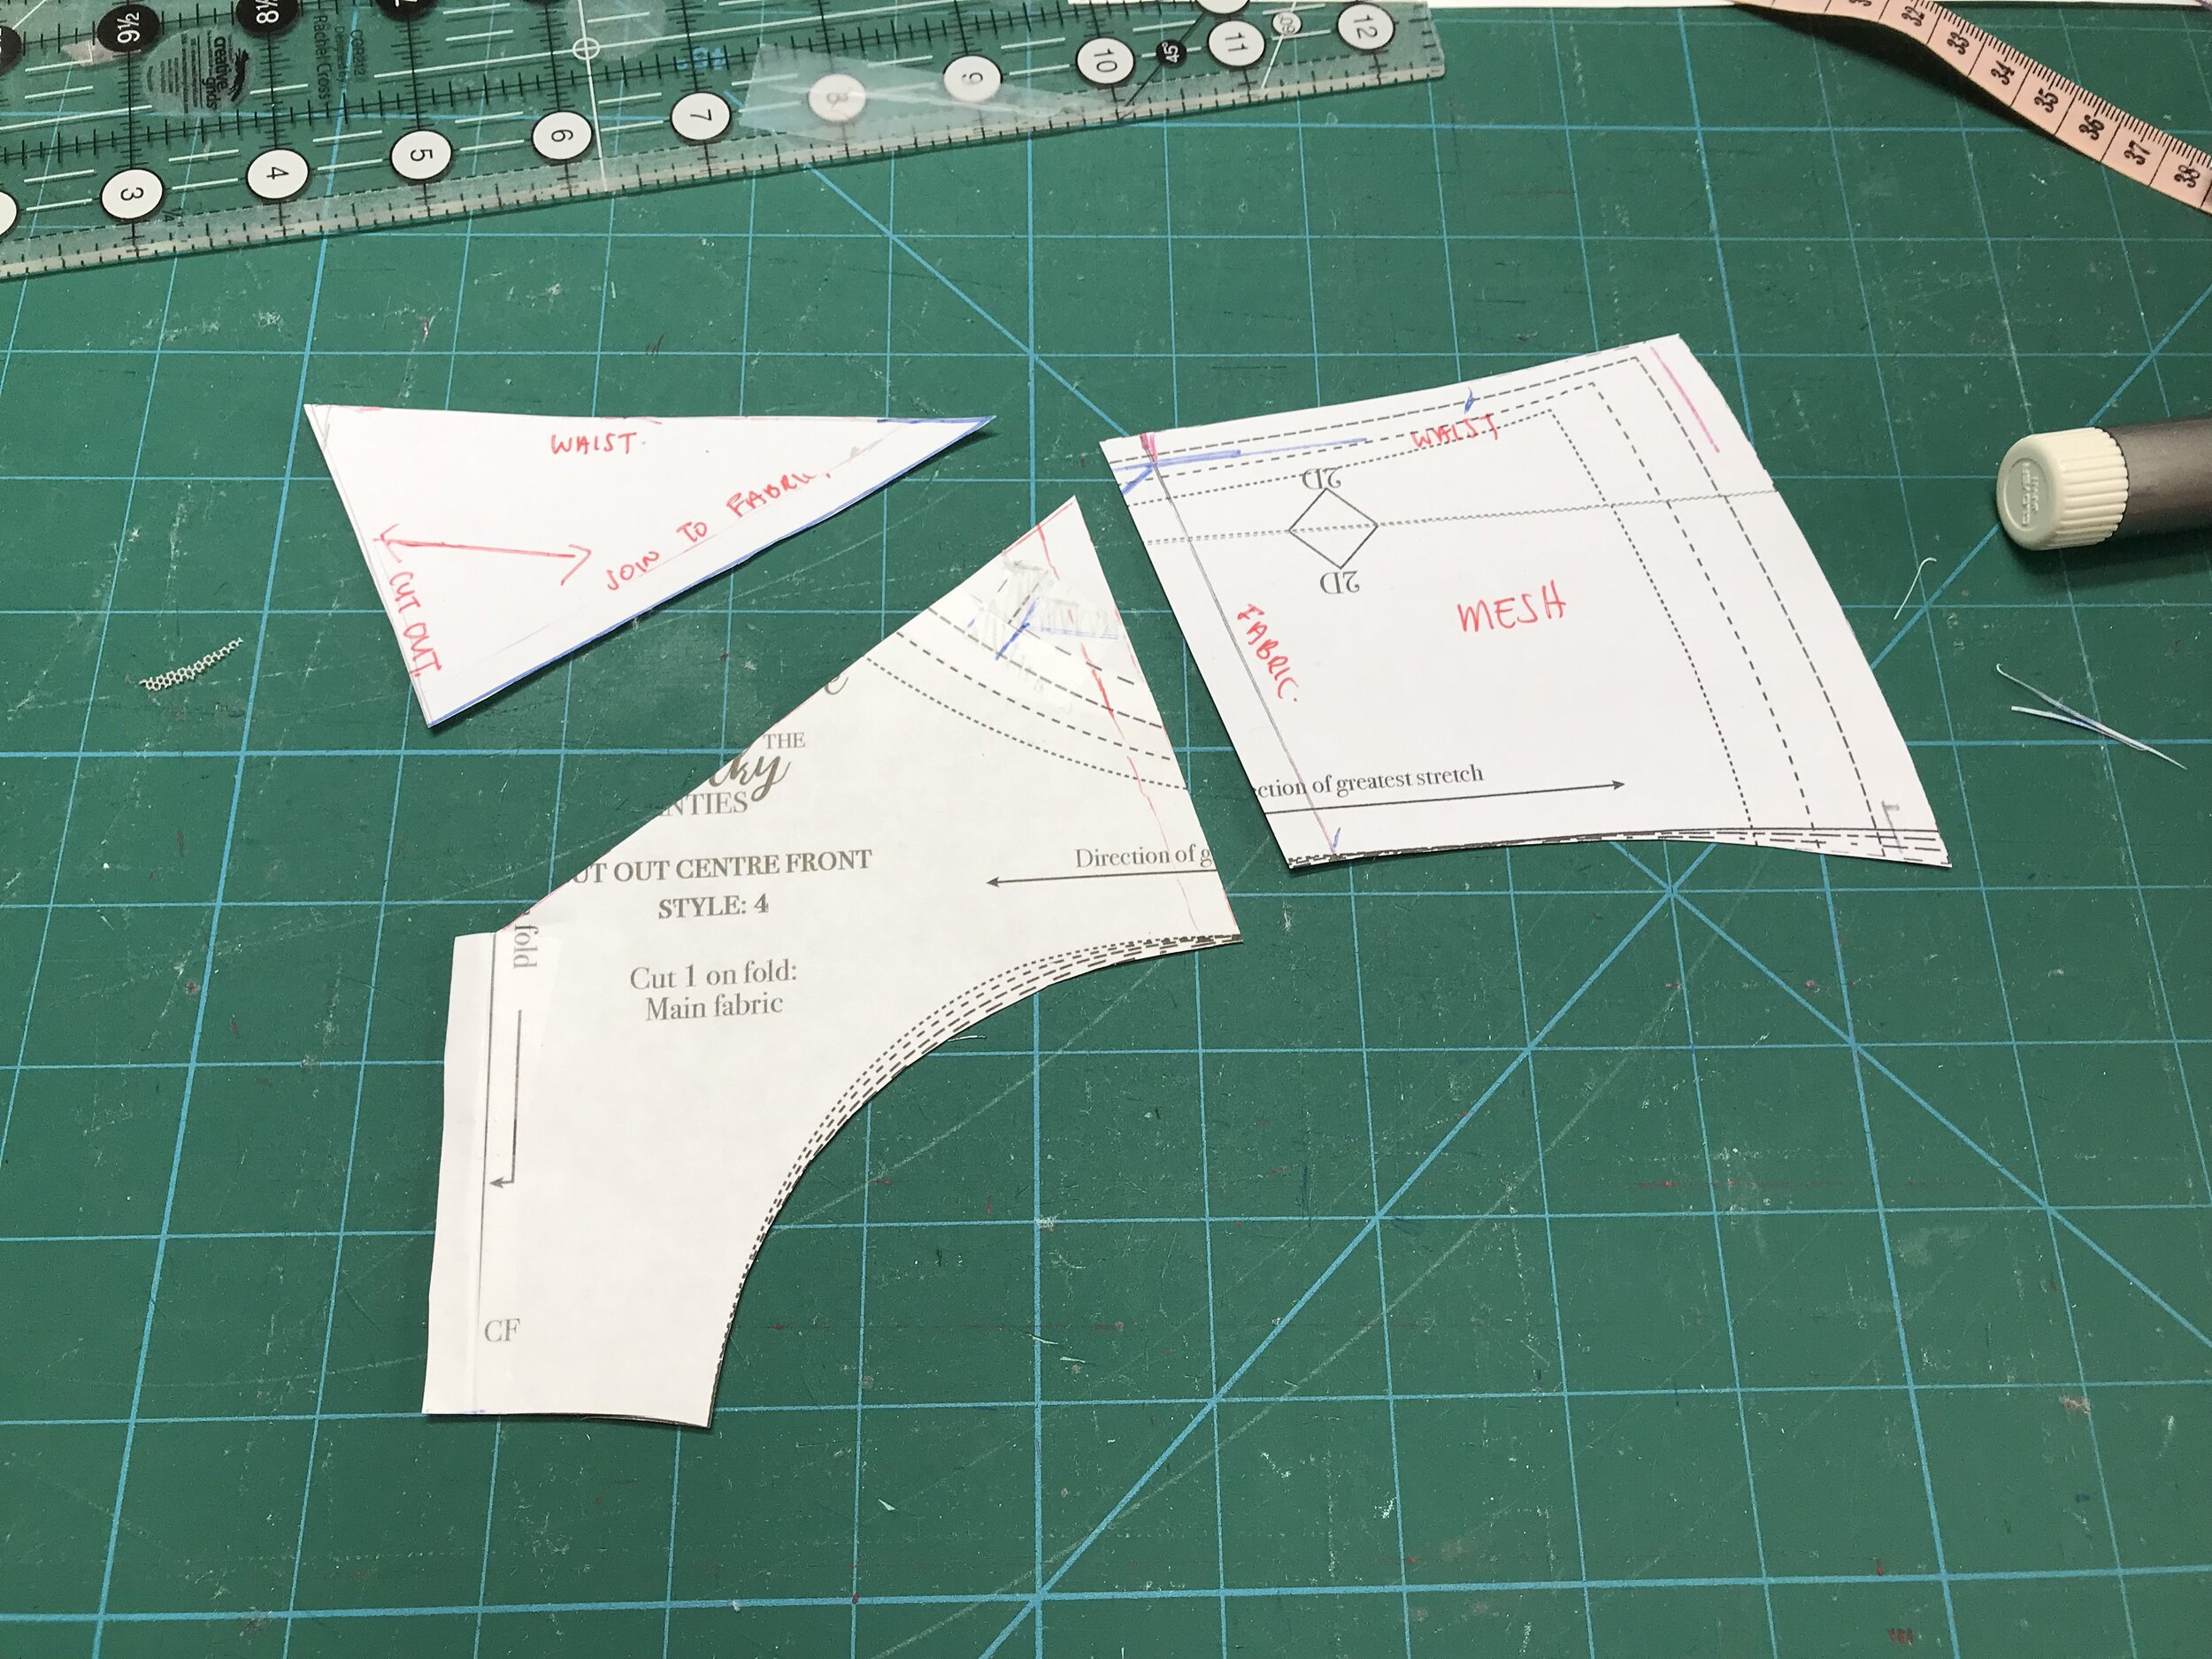
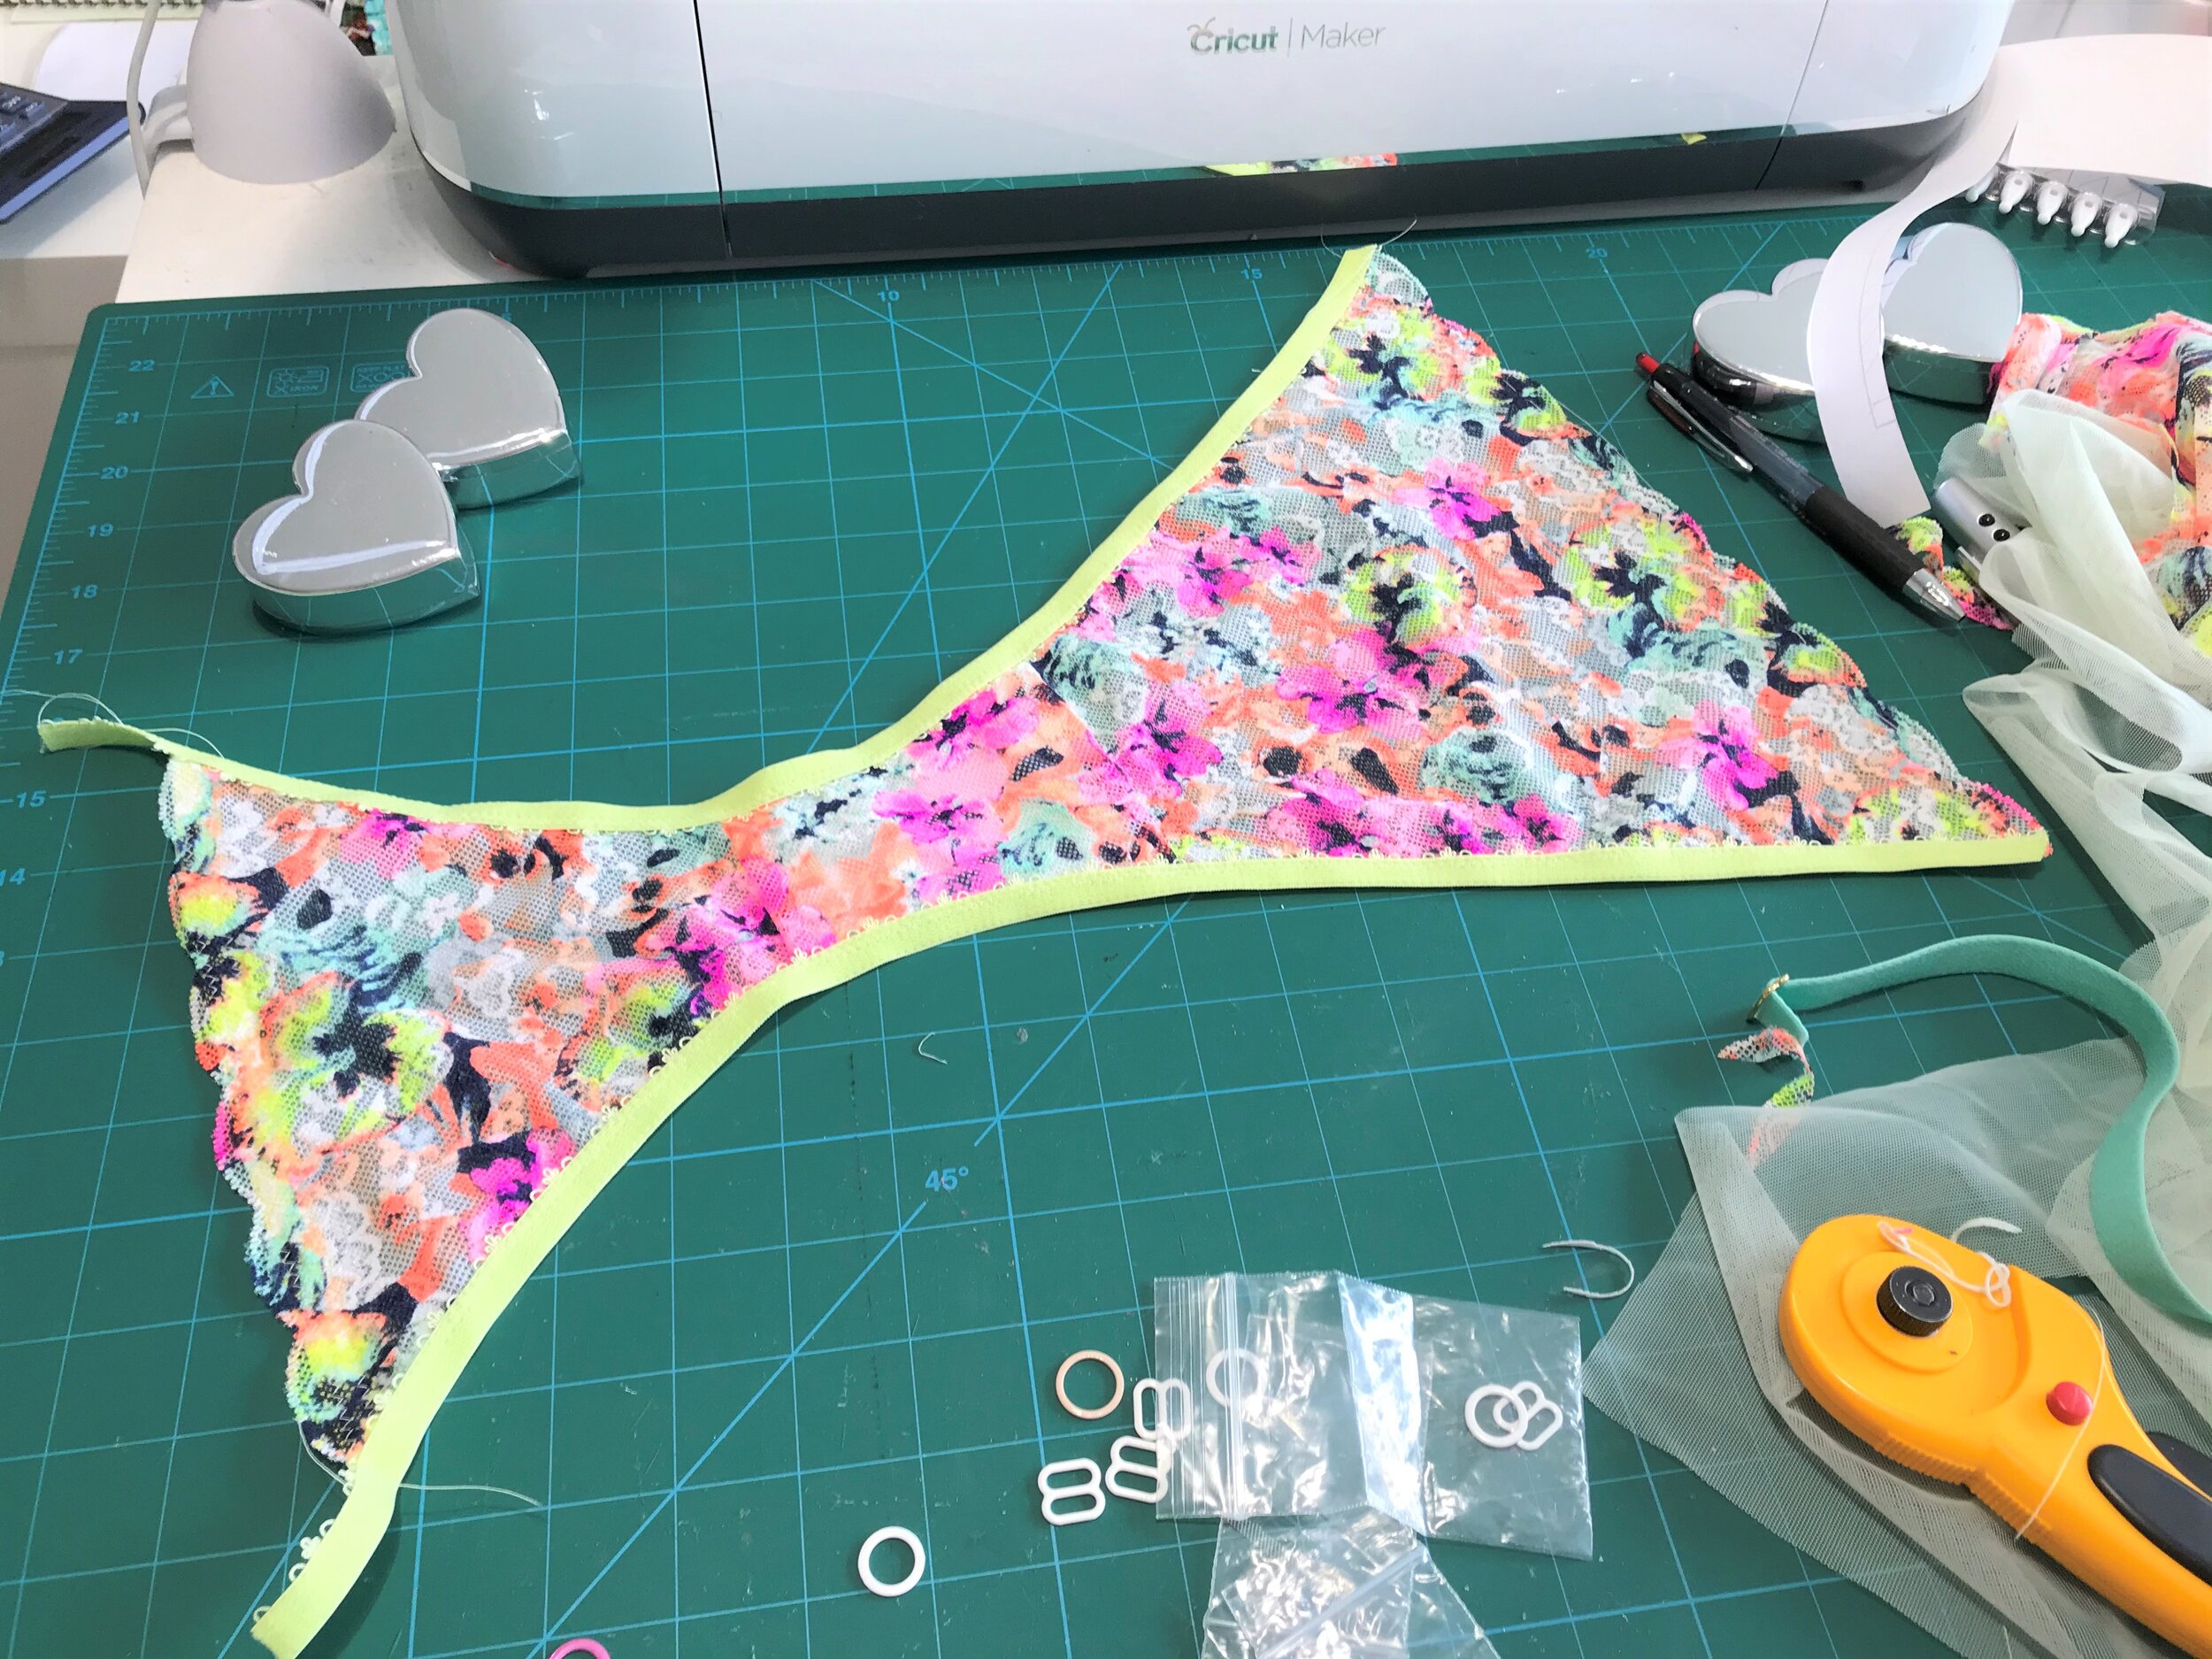
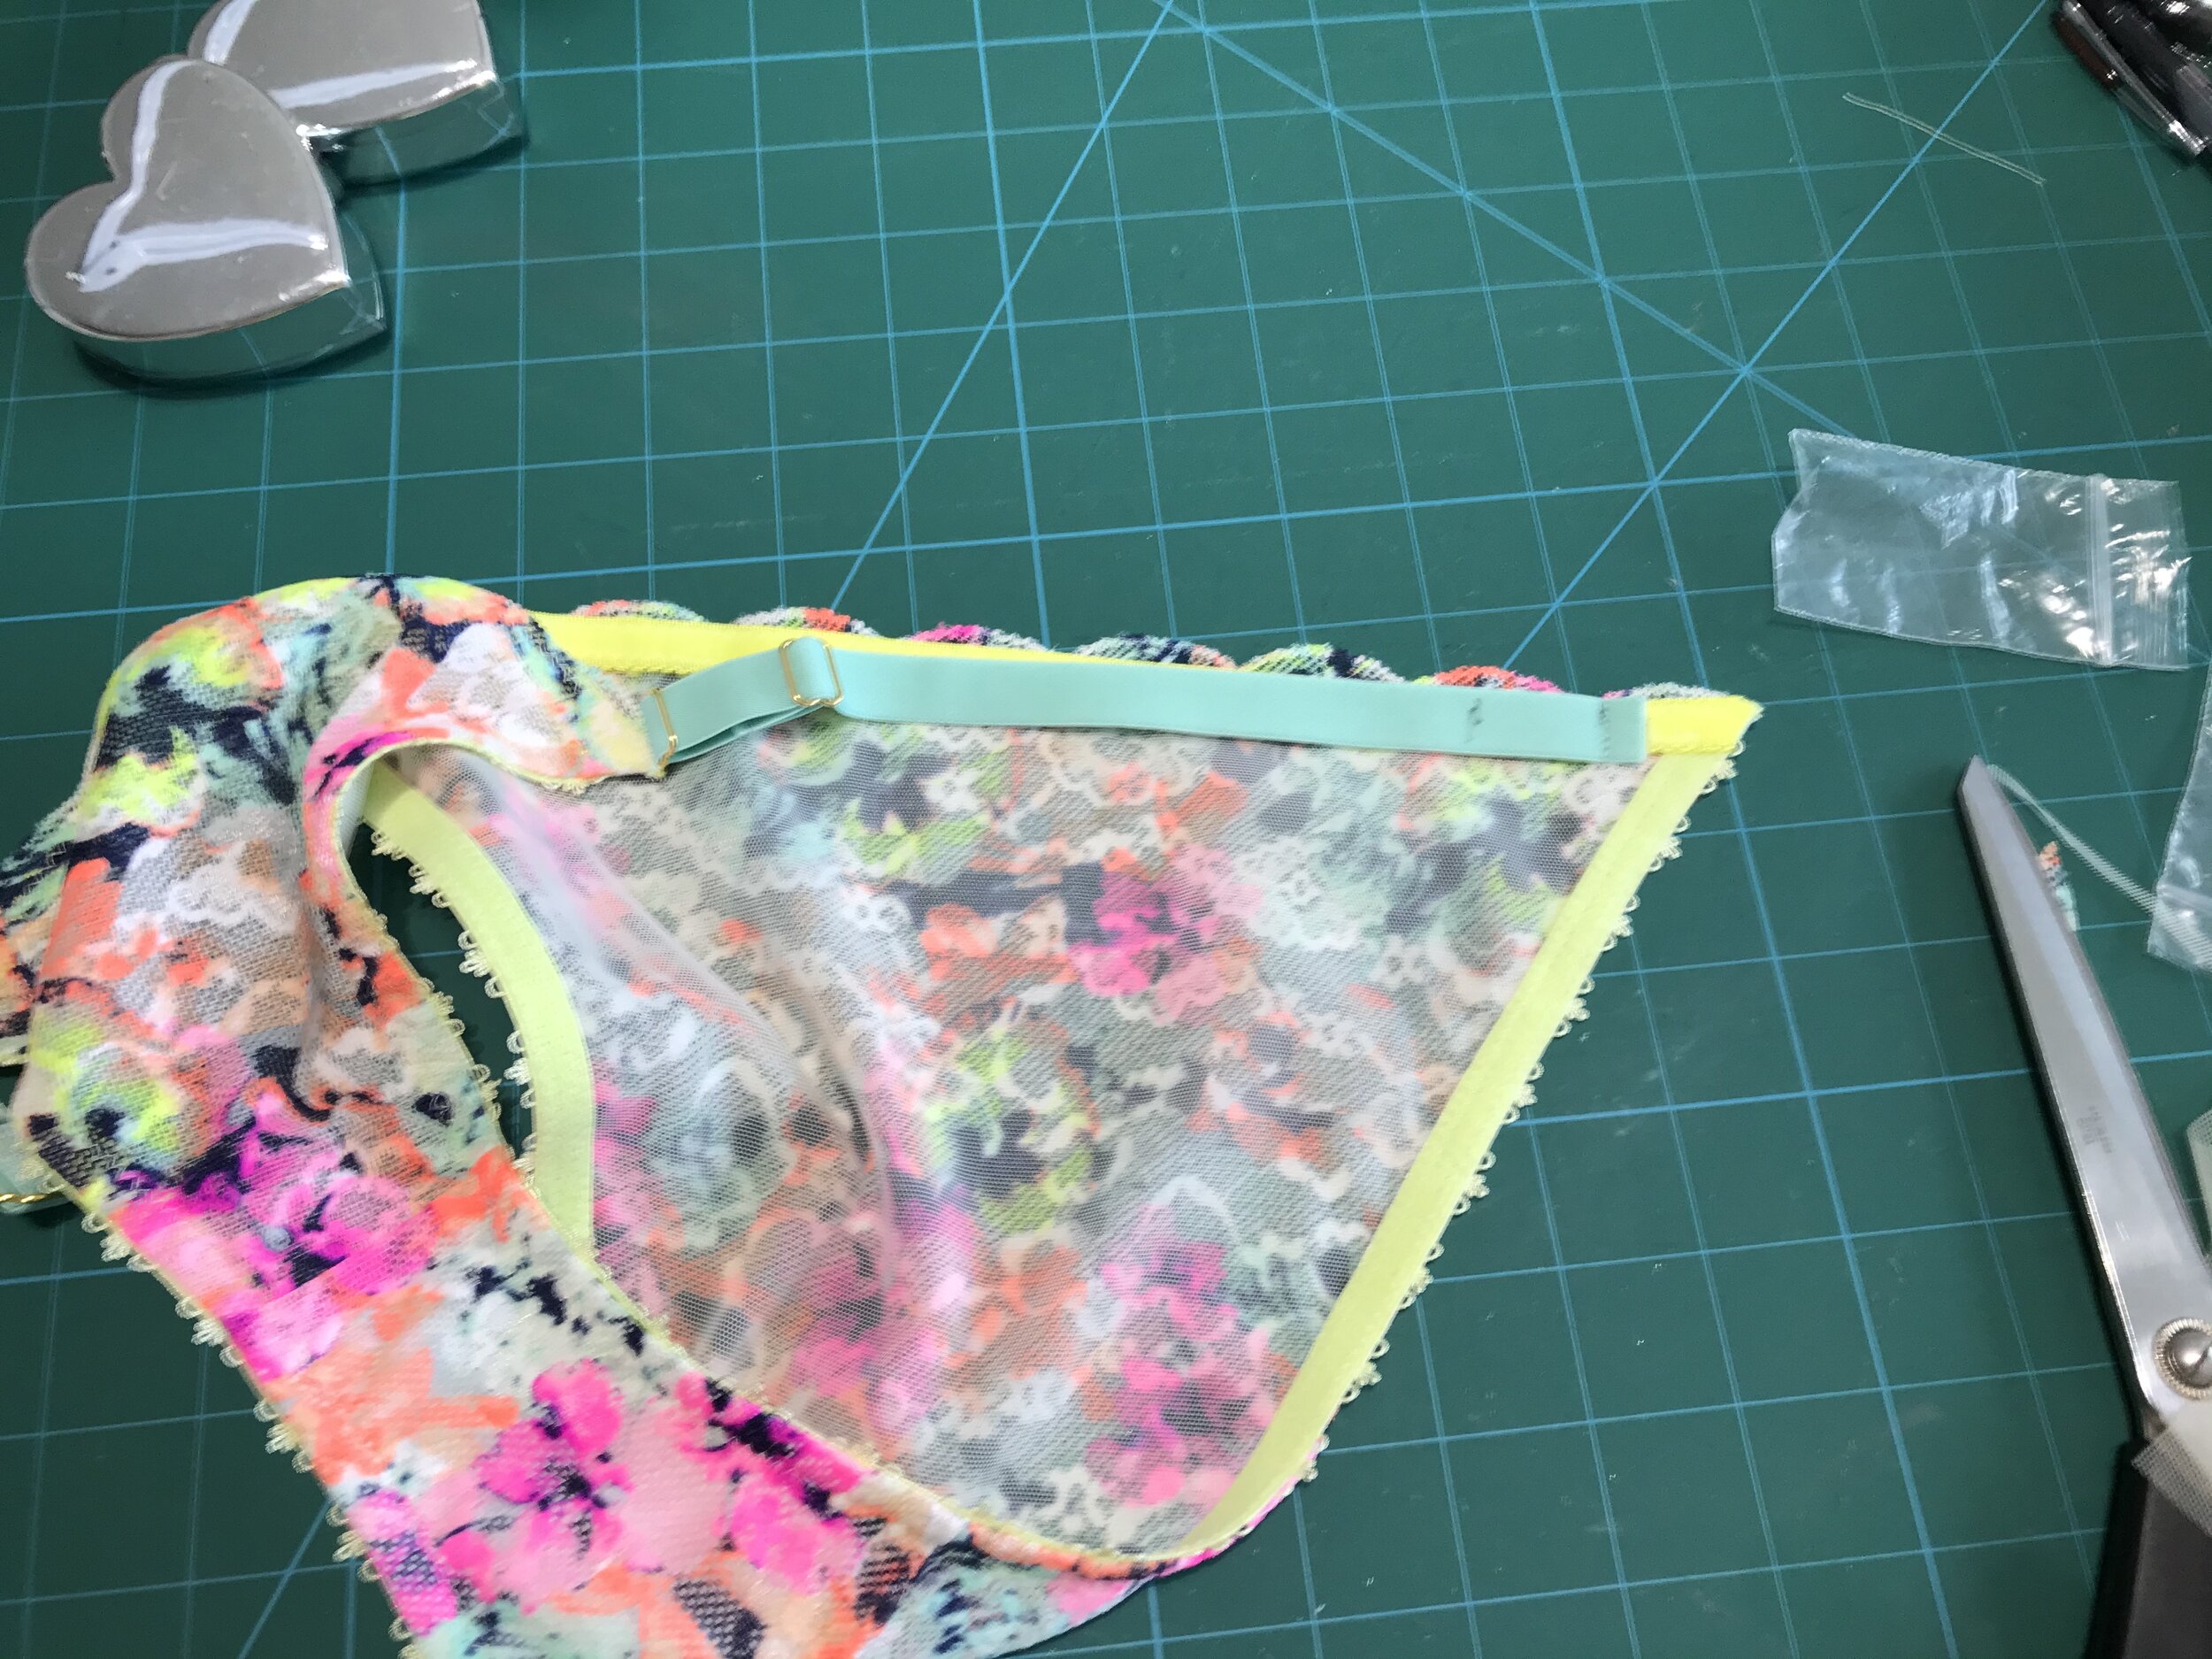
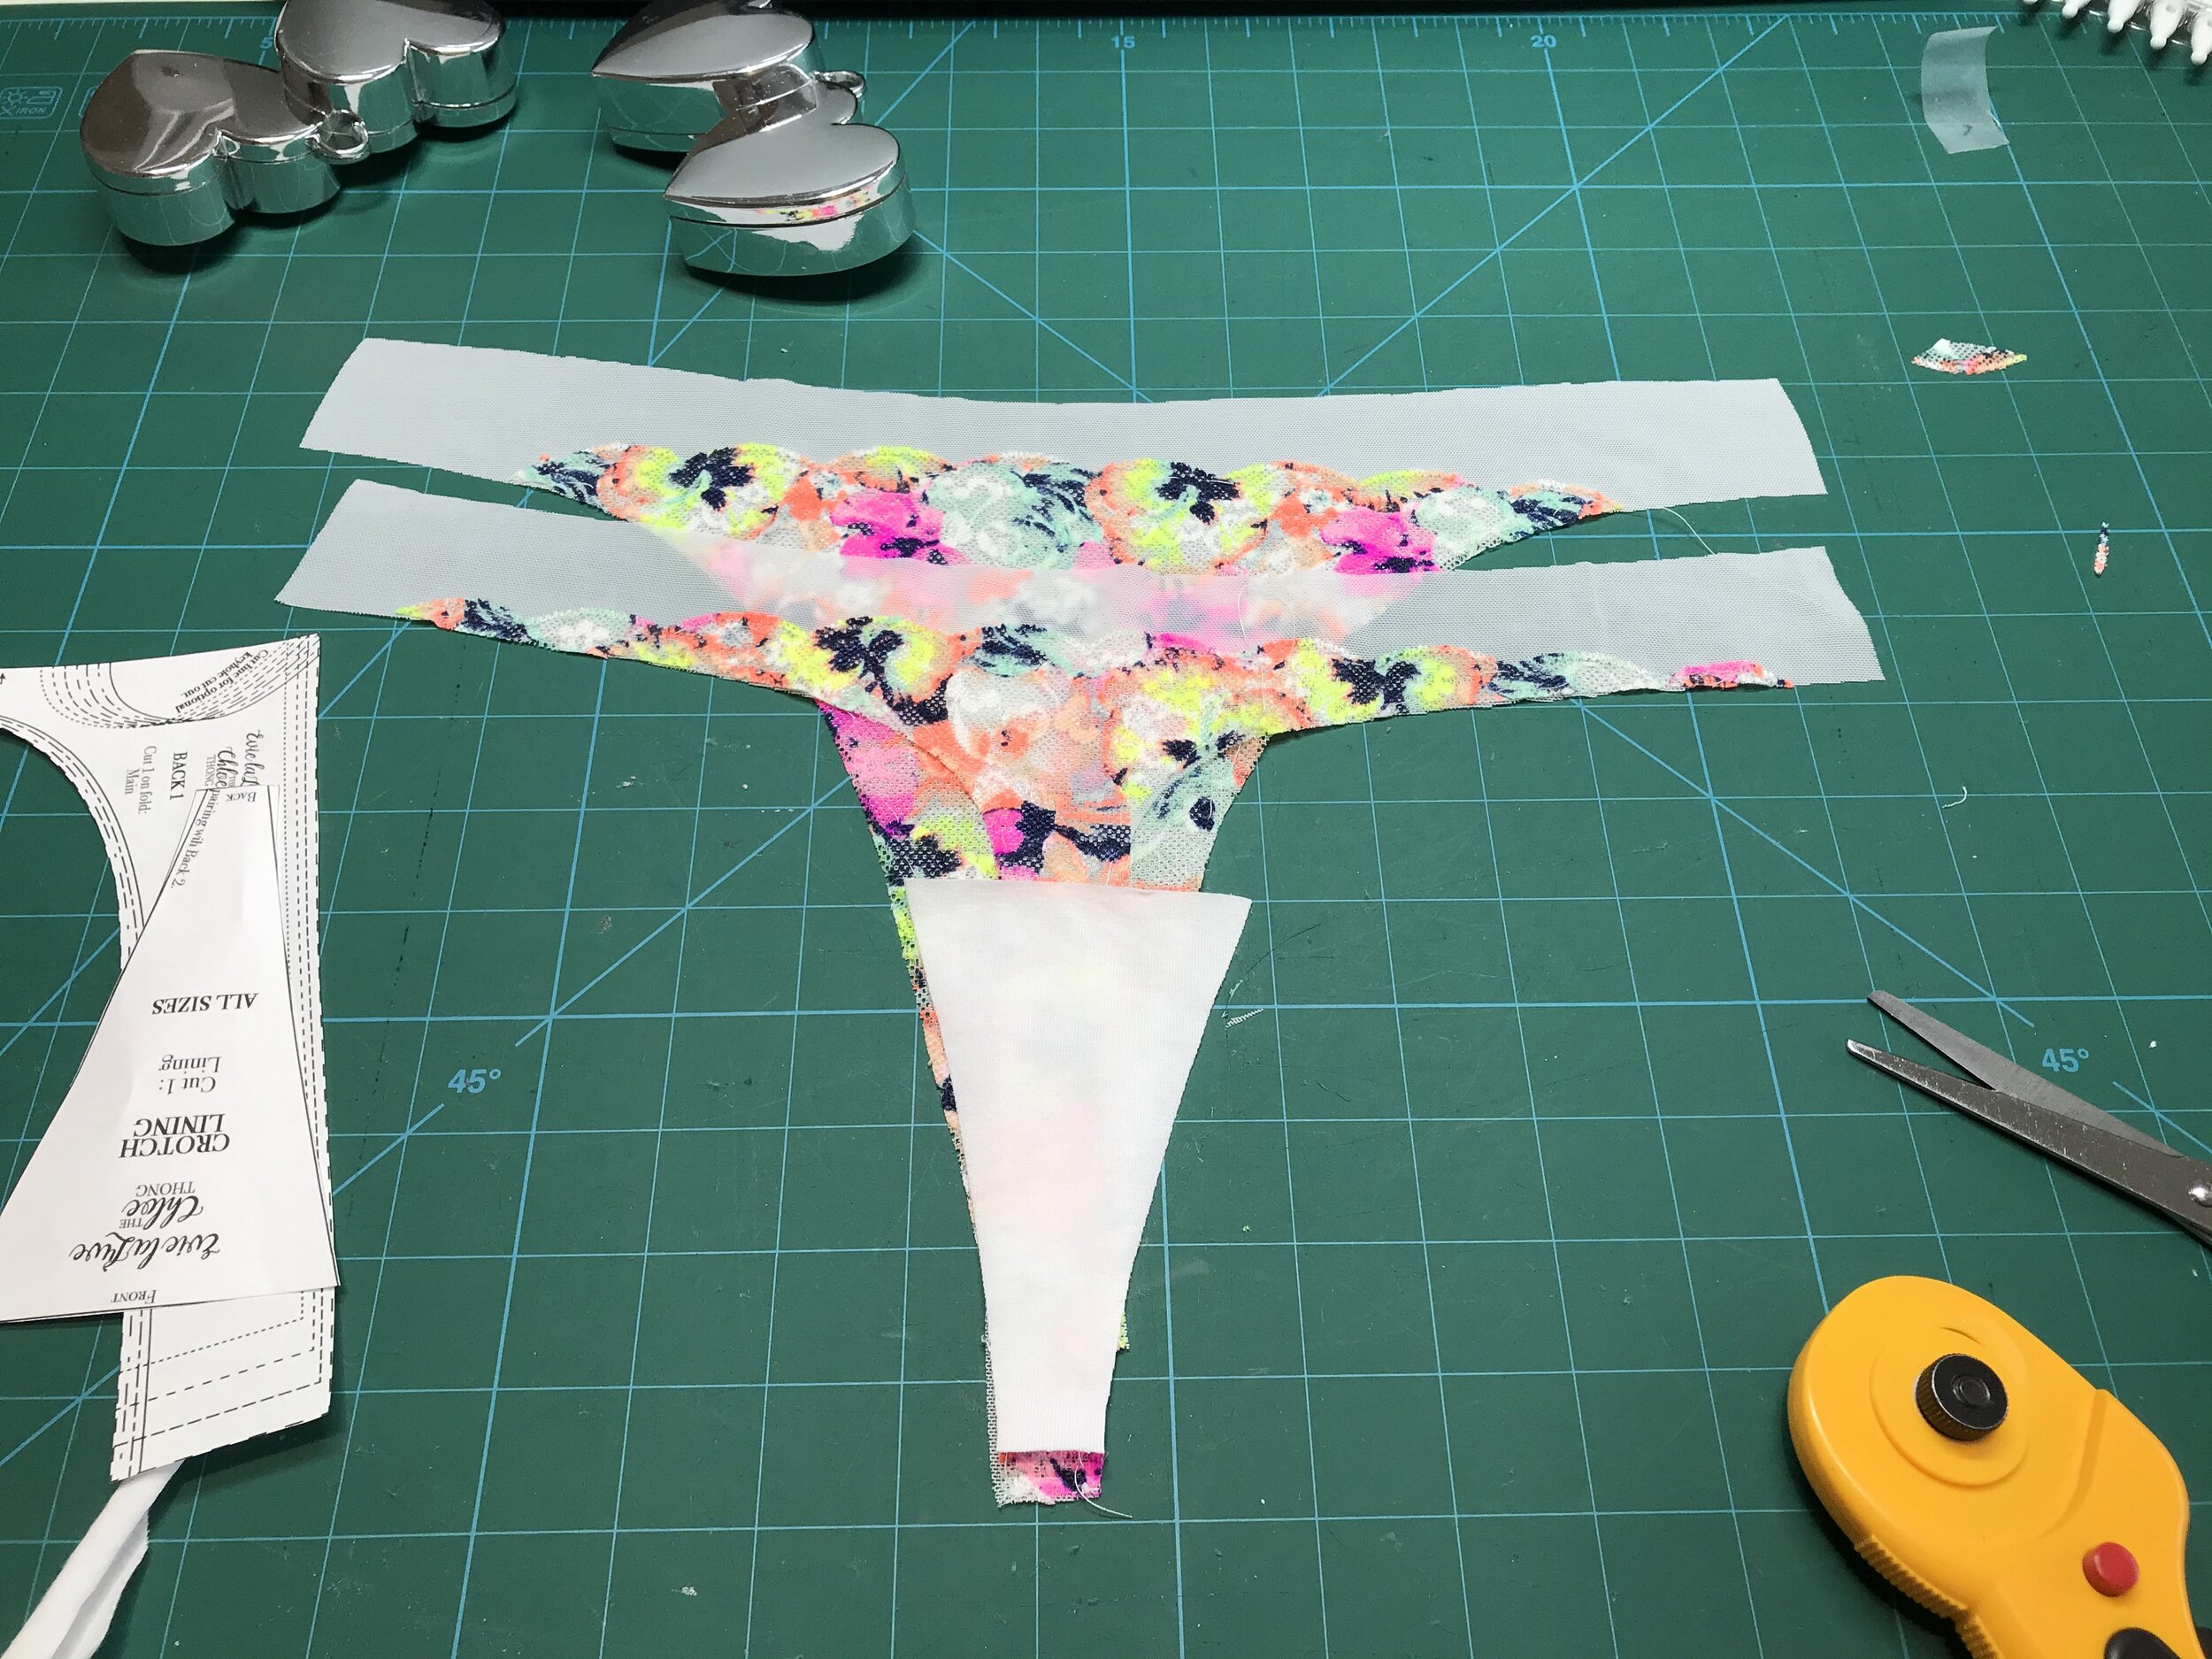
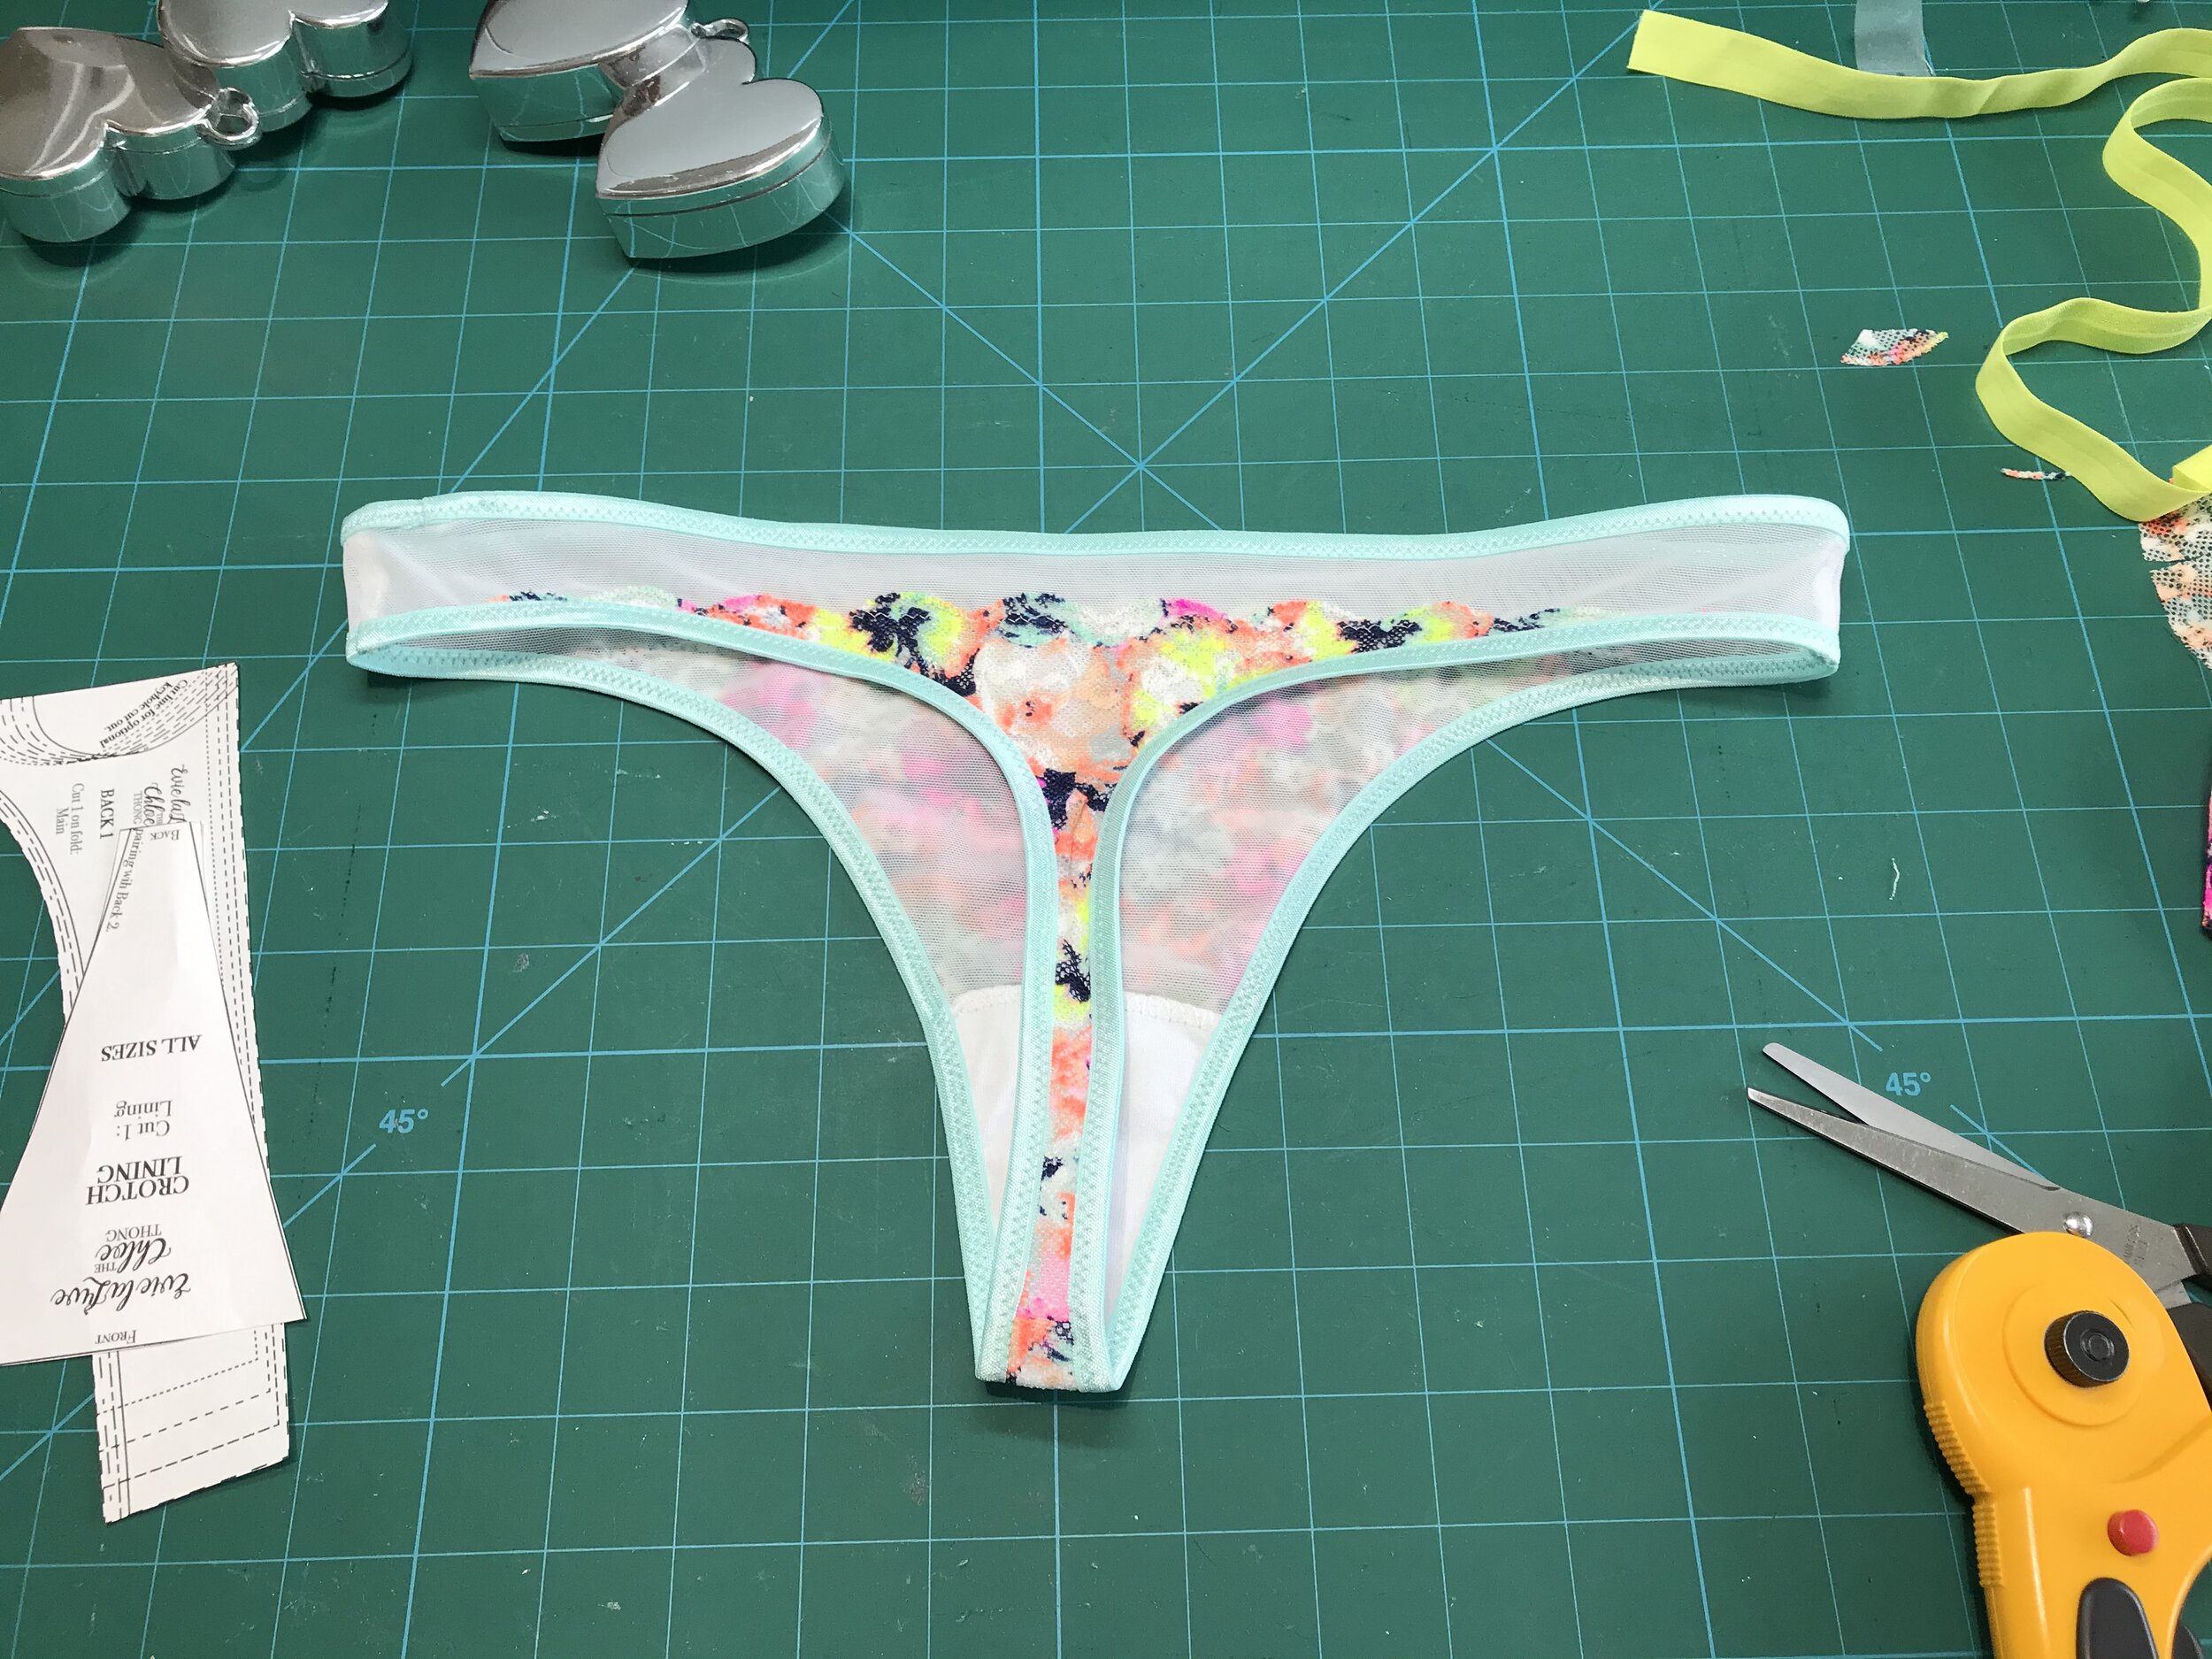
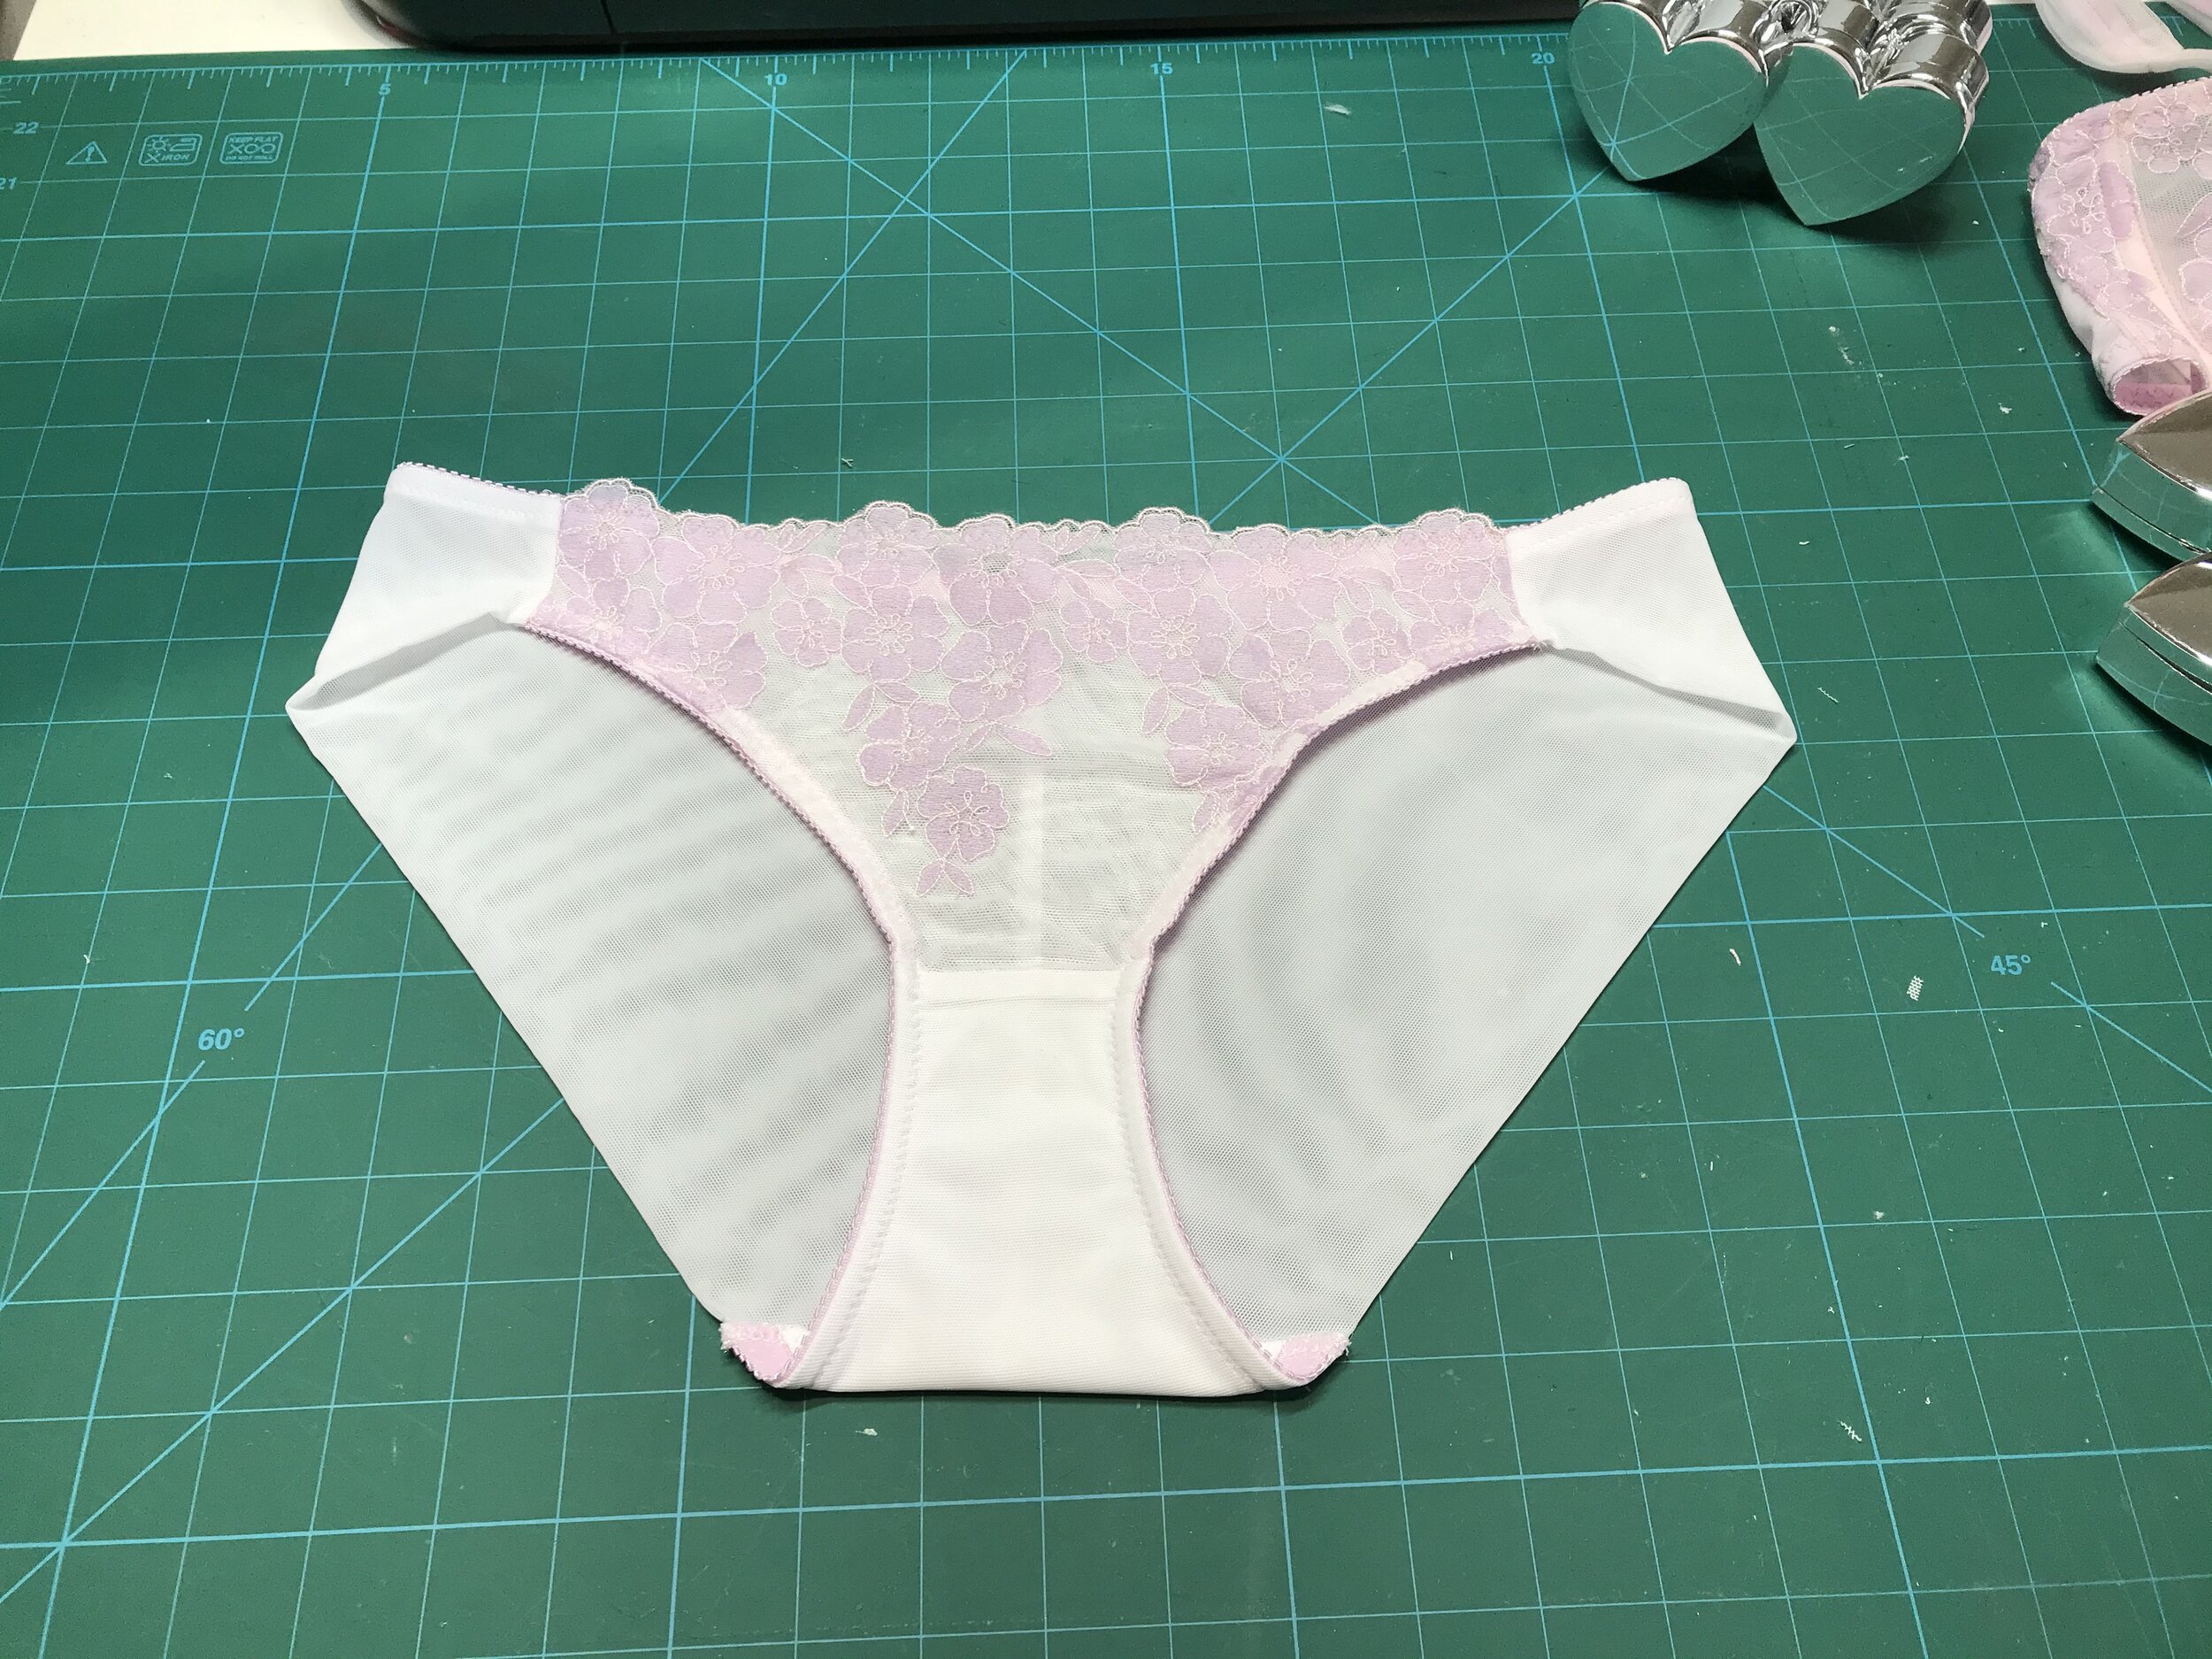
In the design I had a one piece front panel but when I thought through the construction I needed to have a centre front seam to create the V. I applied the fold over elastic to the top edge before I sewed the centre front seam. I pressed open and topstitched to keep flat and trimmed back to the stitching. For the centre mesh panels I added a seam allowance which would be placed under the elastic of the panel once I had added the elastic to the front of the panels. Then I attached the side panels and covered the seam allowance with the elastic.

IMG_7014.jpg

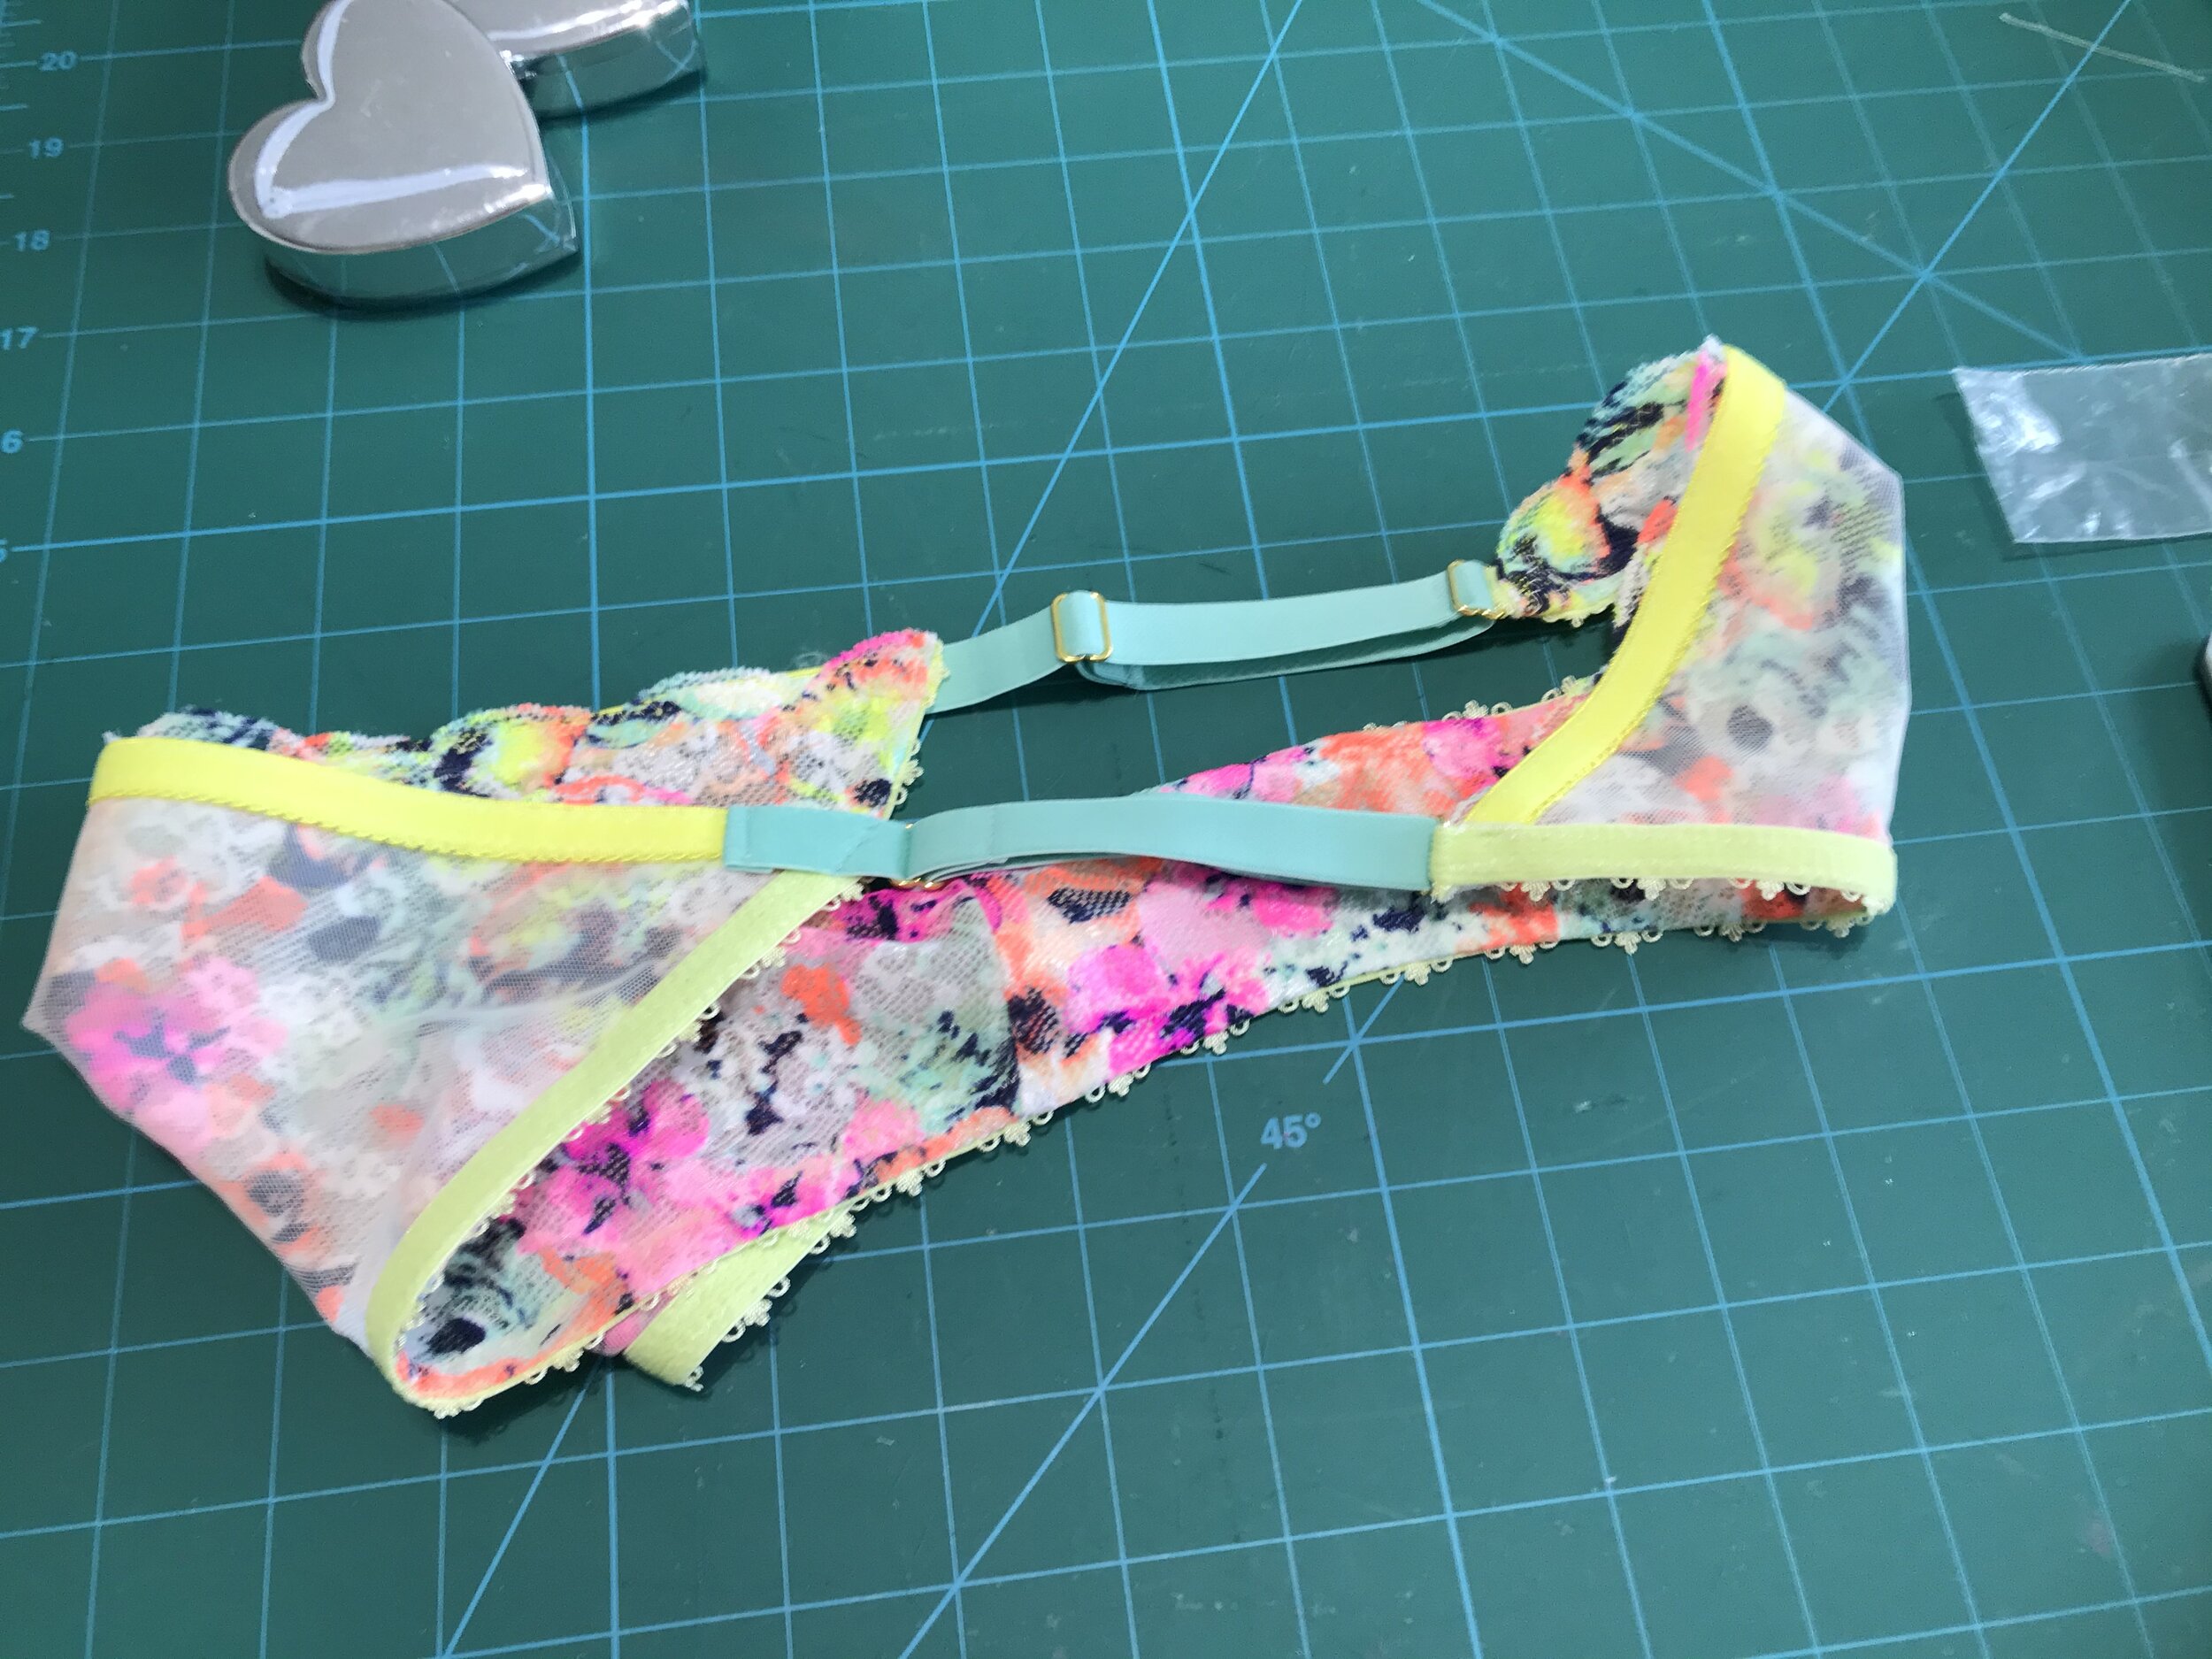
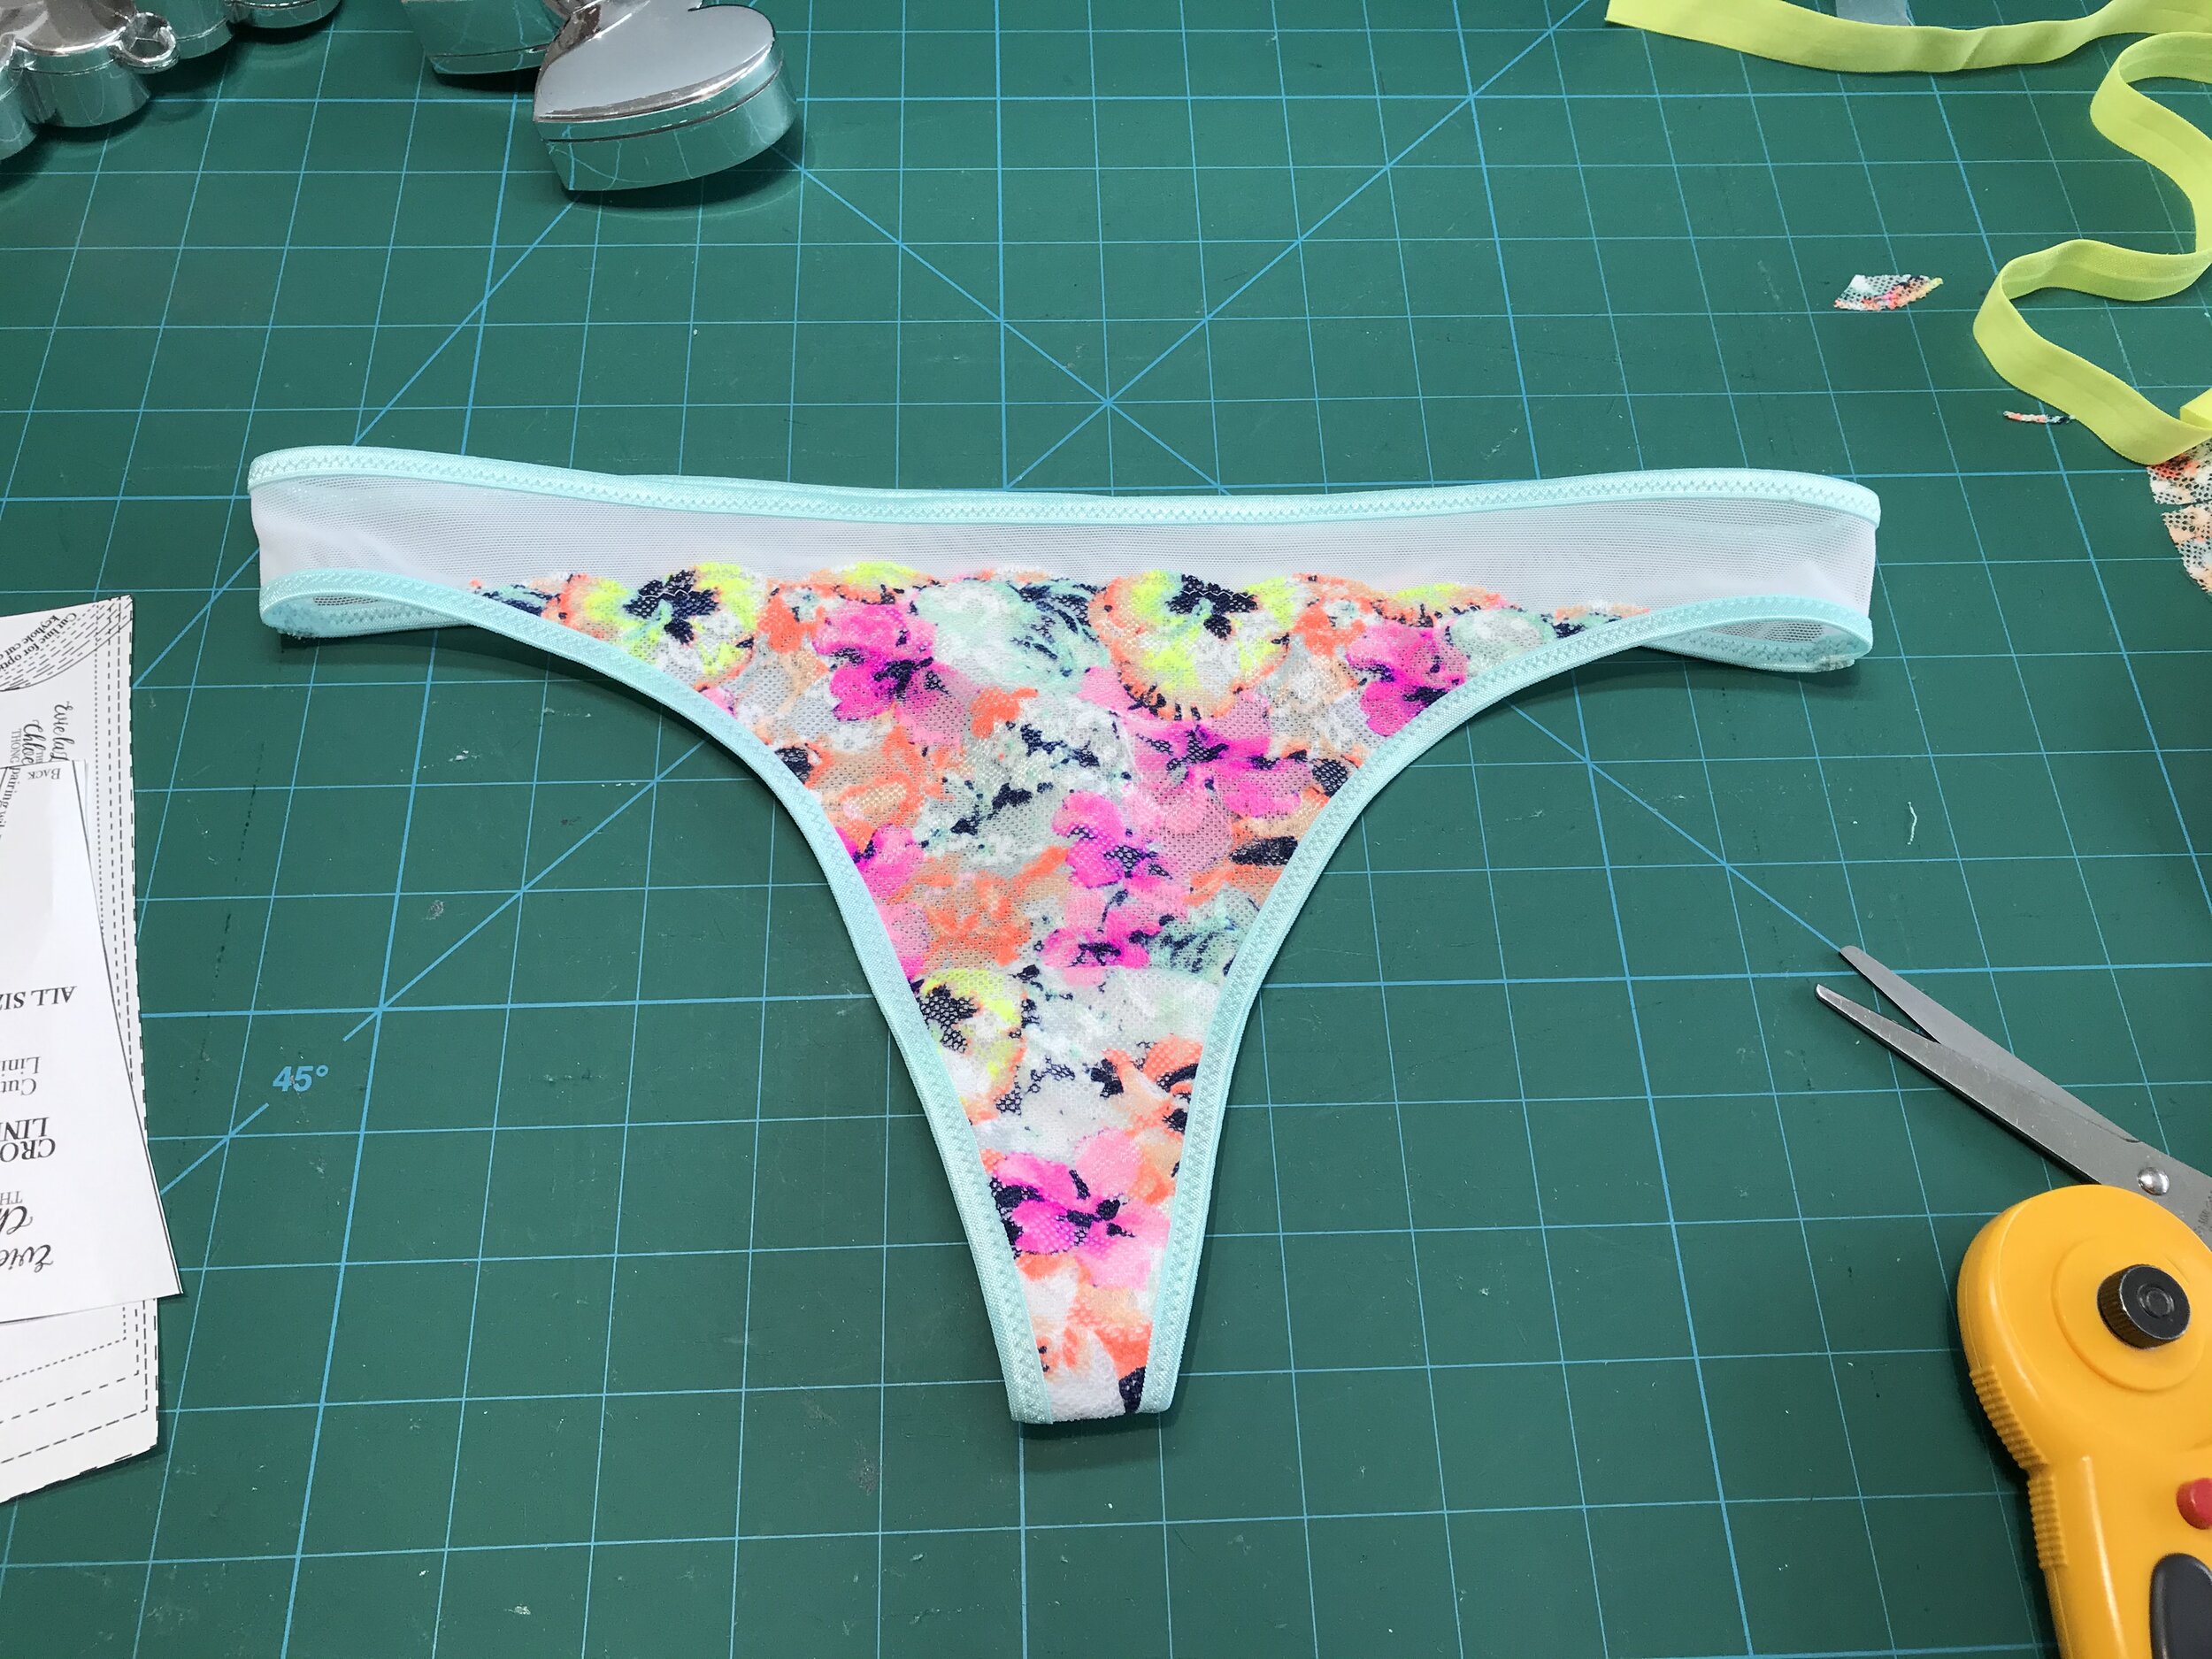
With the front and back pieces completed I finished as normal. The pattern has an enclosed gusset which is done next. To finish I attached the waist and leg elastic in the round. For the leg I had the join at the elastic strip on the back as it is almost undetectable at this point. For the waist I placed at the centre back. My set was now complete.

CEC694A0-1109-4D74-B22A-821AFDFAEF1B.PNG

This has been what I call a labour of love but thankfully it all worked out and I finally might get some sleep.

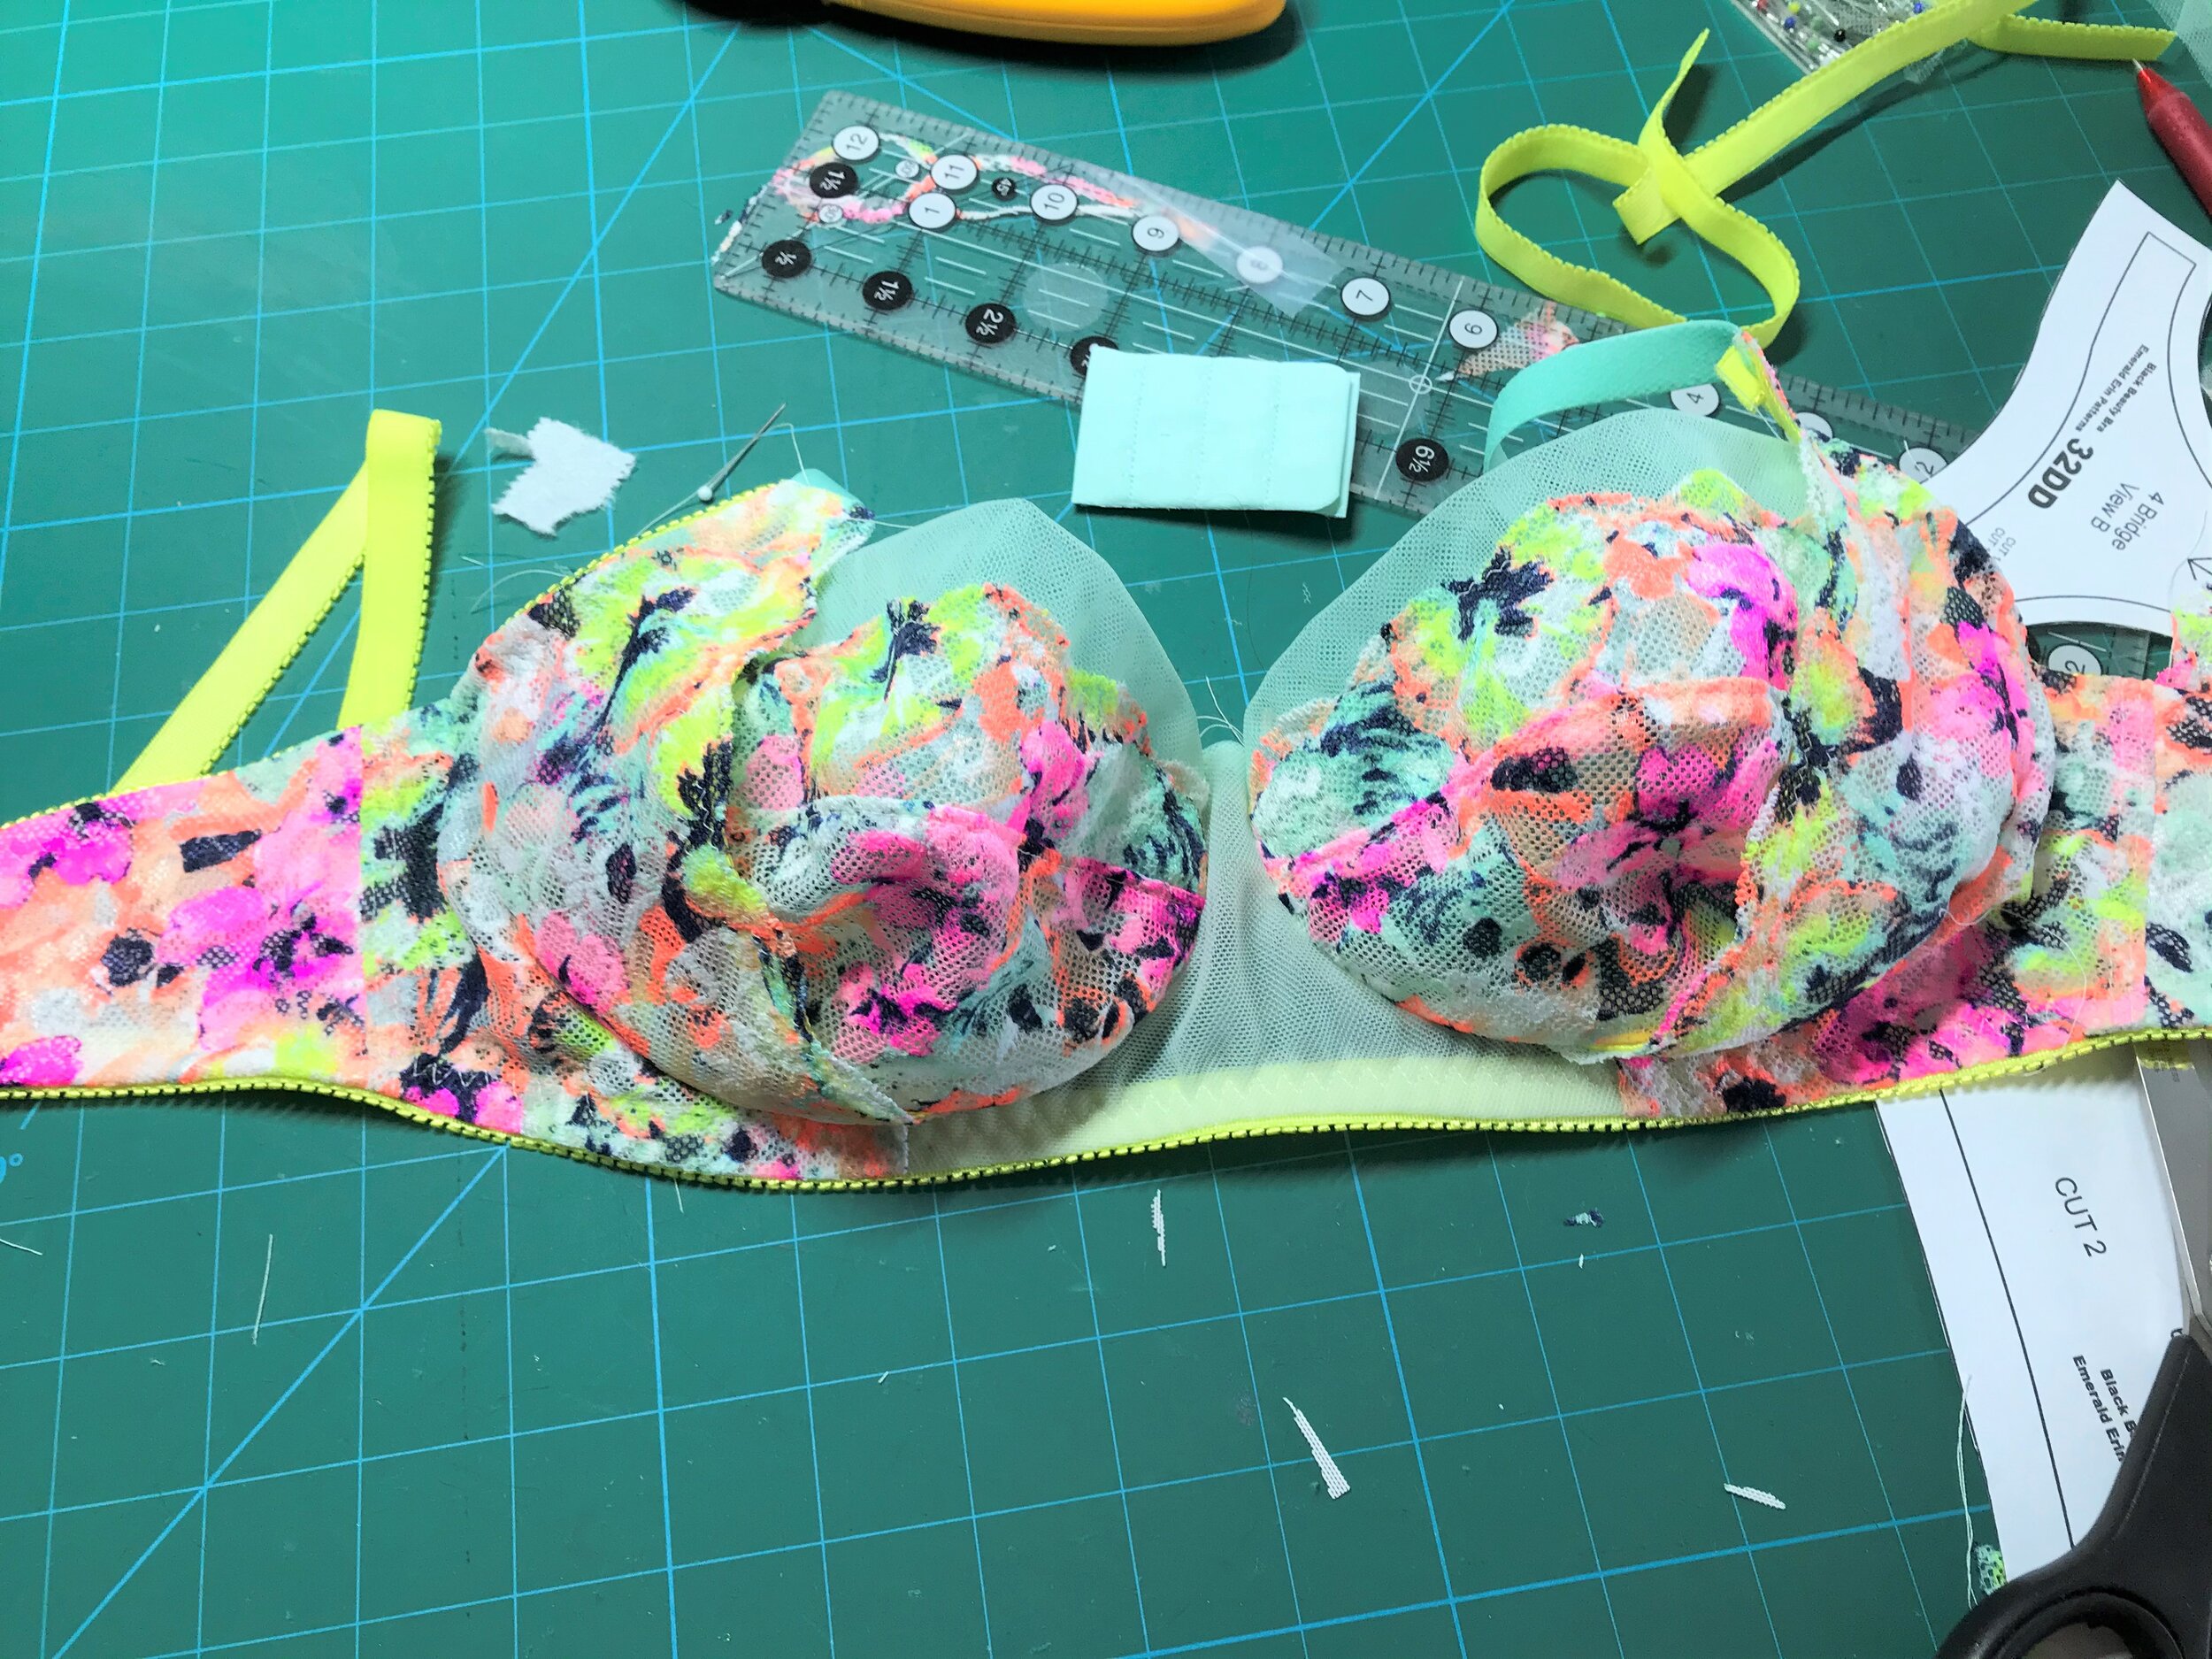
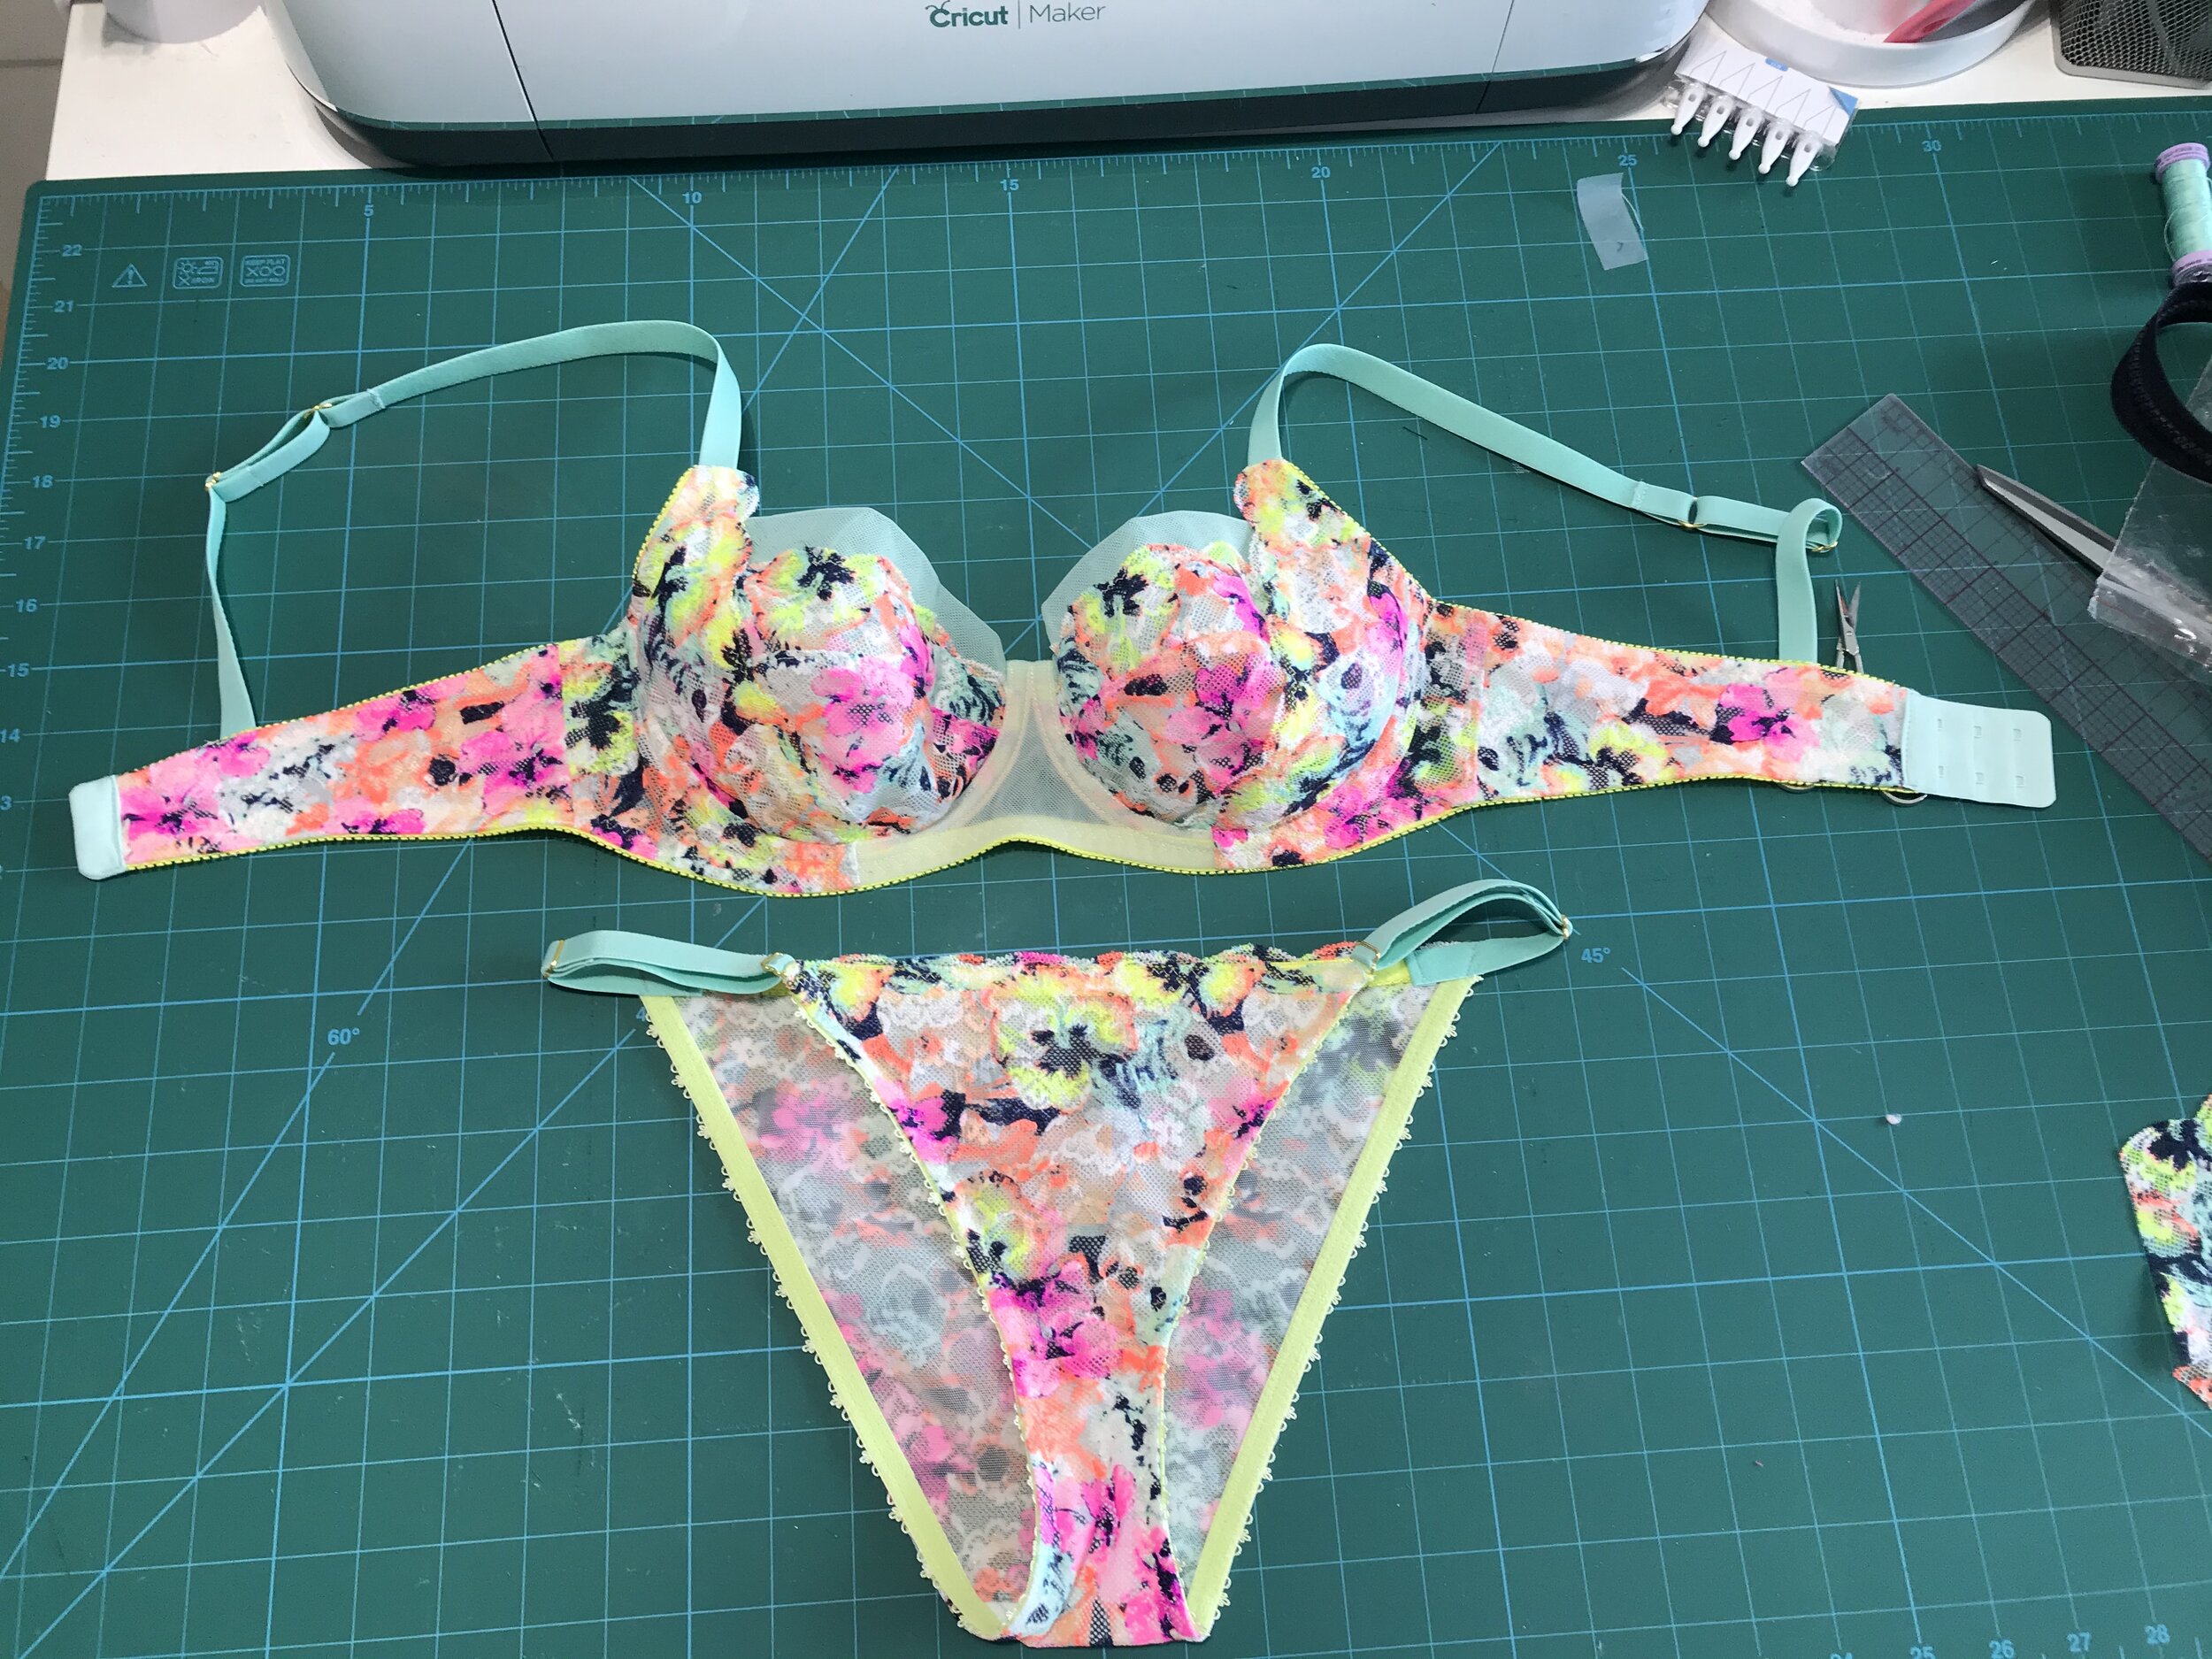
Knowing all the patterns I used fit is a very good starting point so I did expect the bra to fit. The unknown was how the boning at the centre front of the inner cup would work and I am thrilled to say it worked well. The original design had a ring at the centre front and the fold over elastic would be wrapped around. As I got to that point I decided to go straight across the neckline from one cup to the next. I am so glad I did as think it would create too much bulk and not sit flat against my chest.

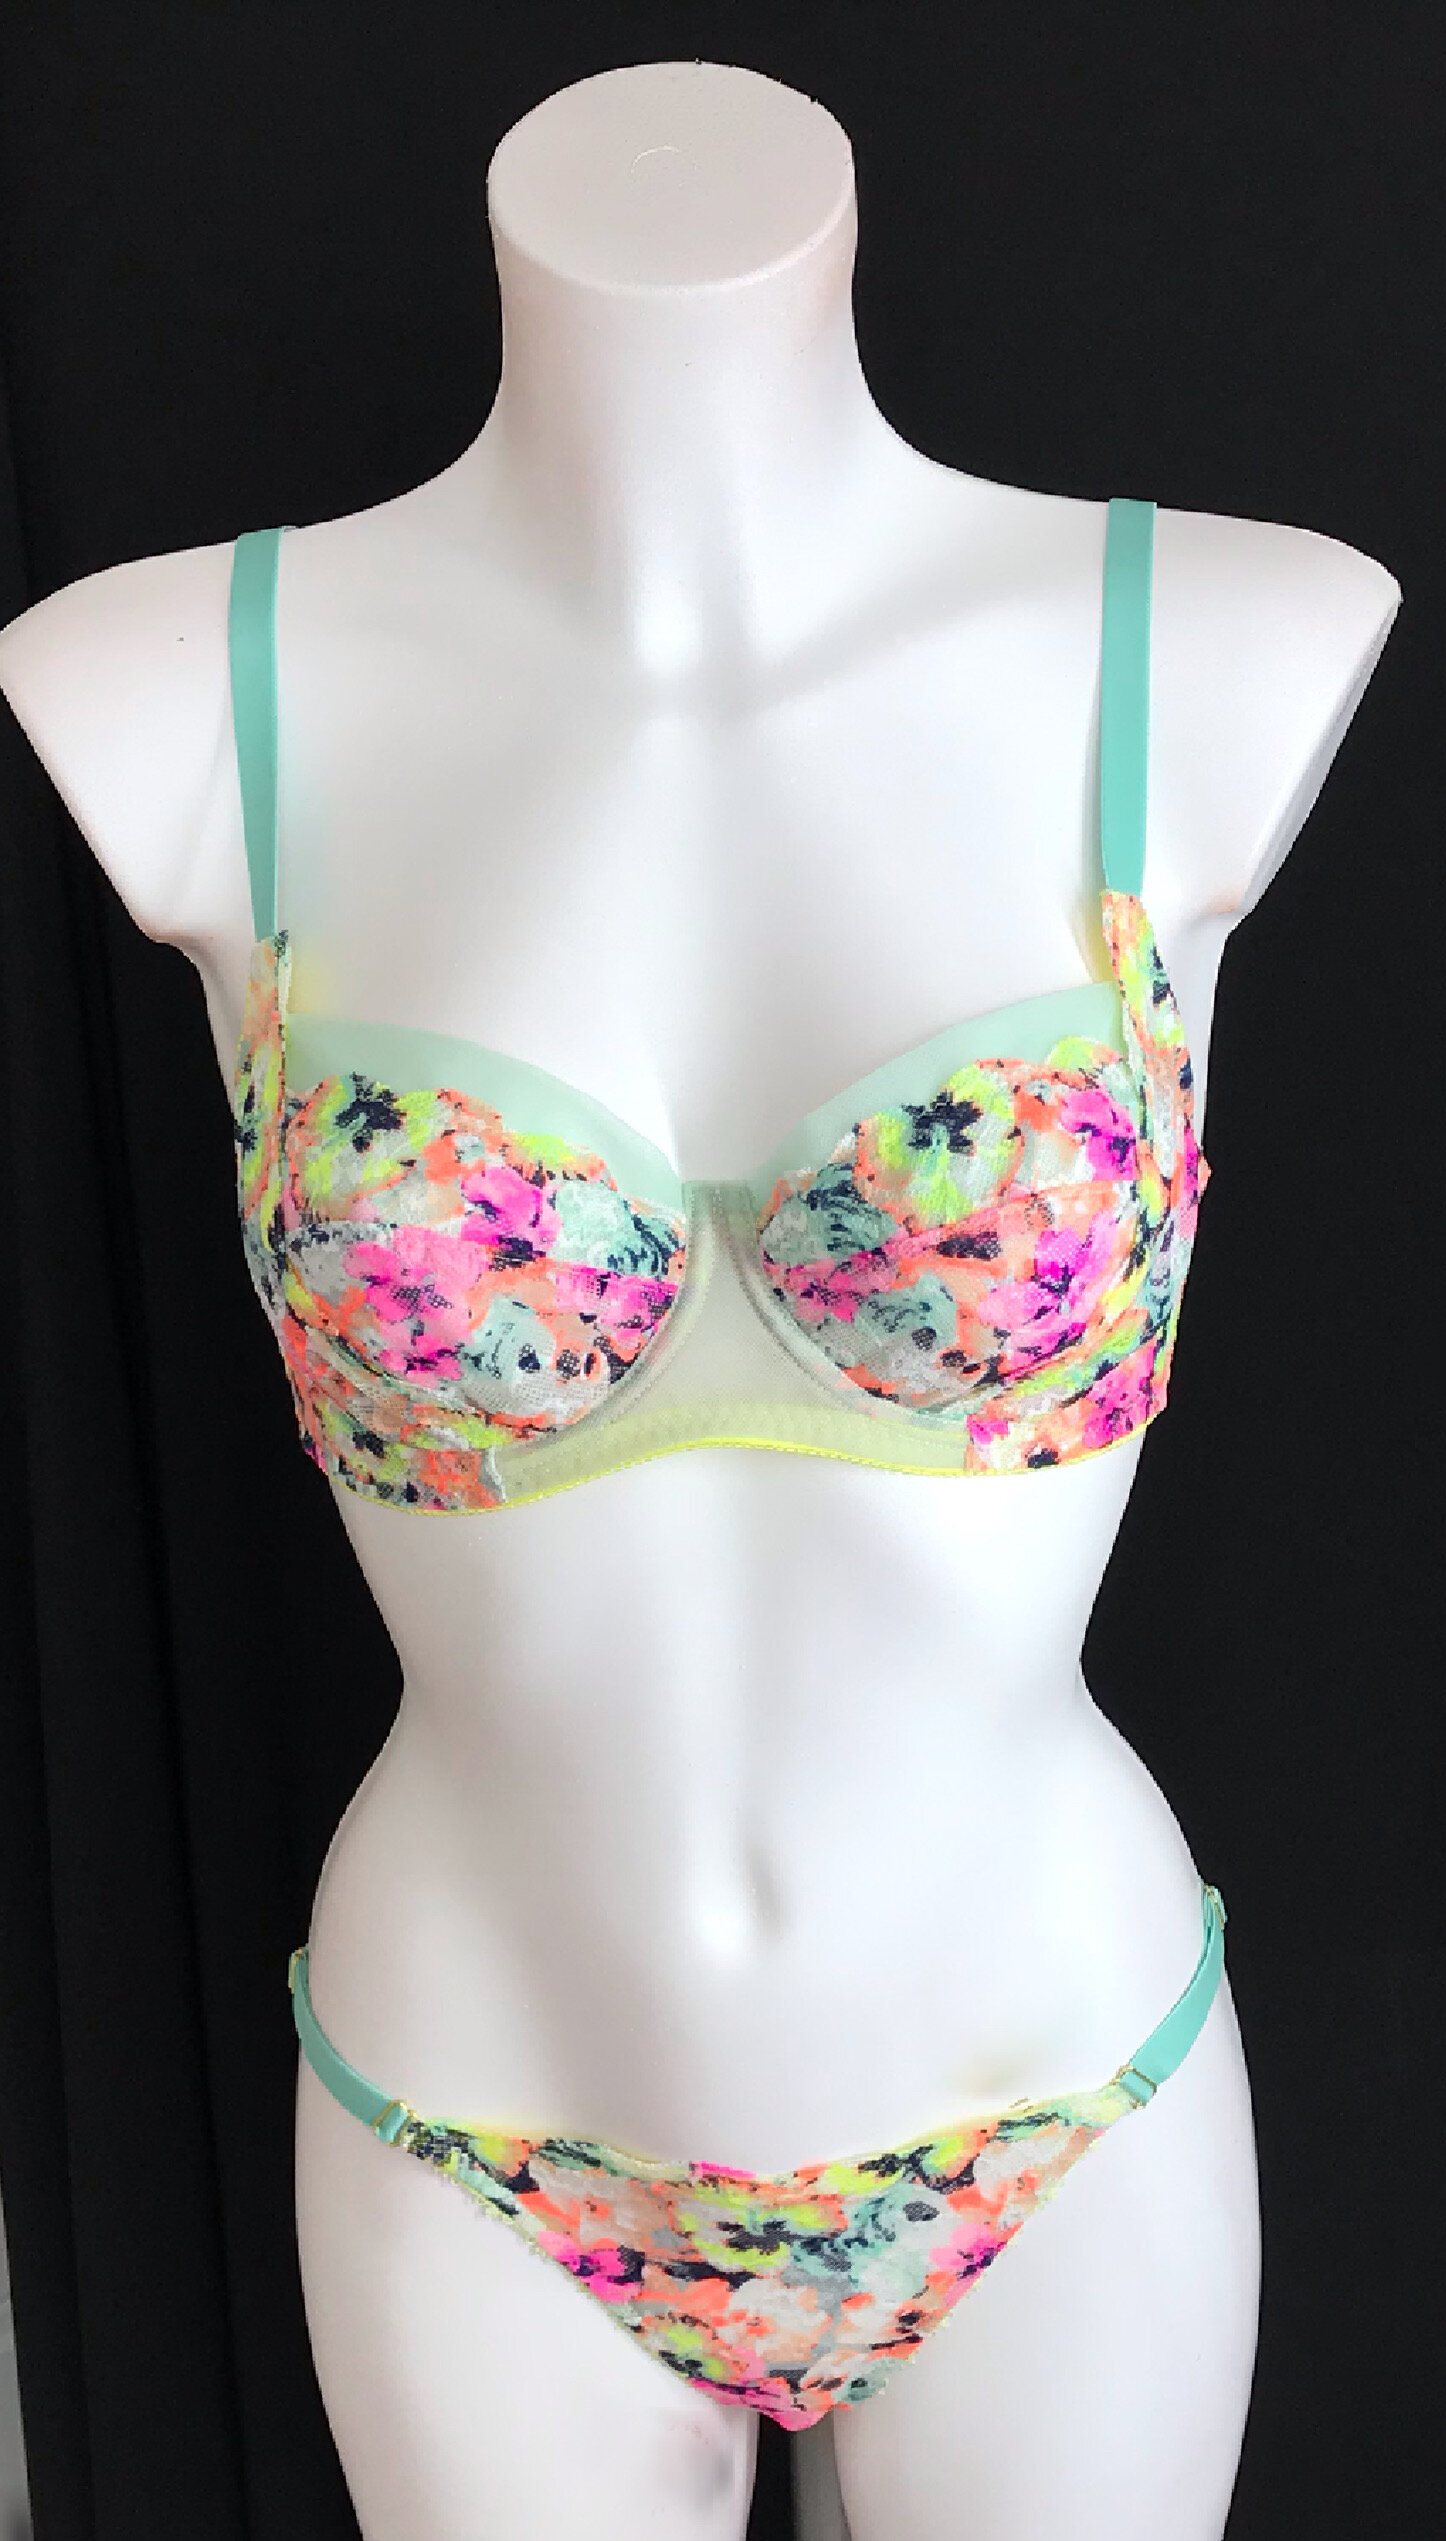
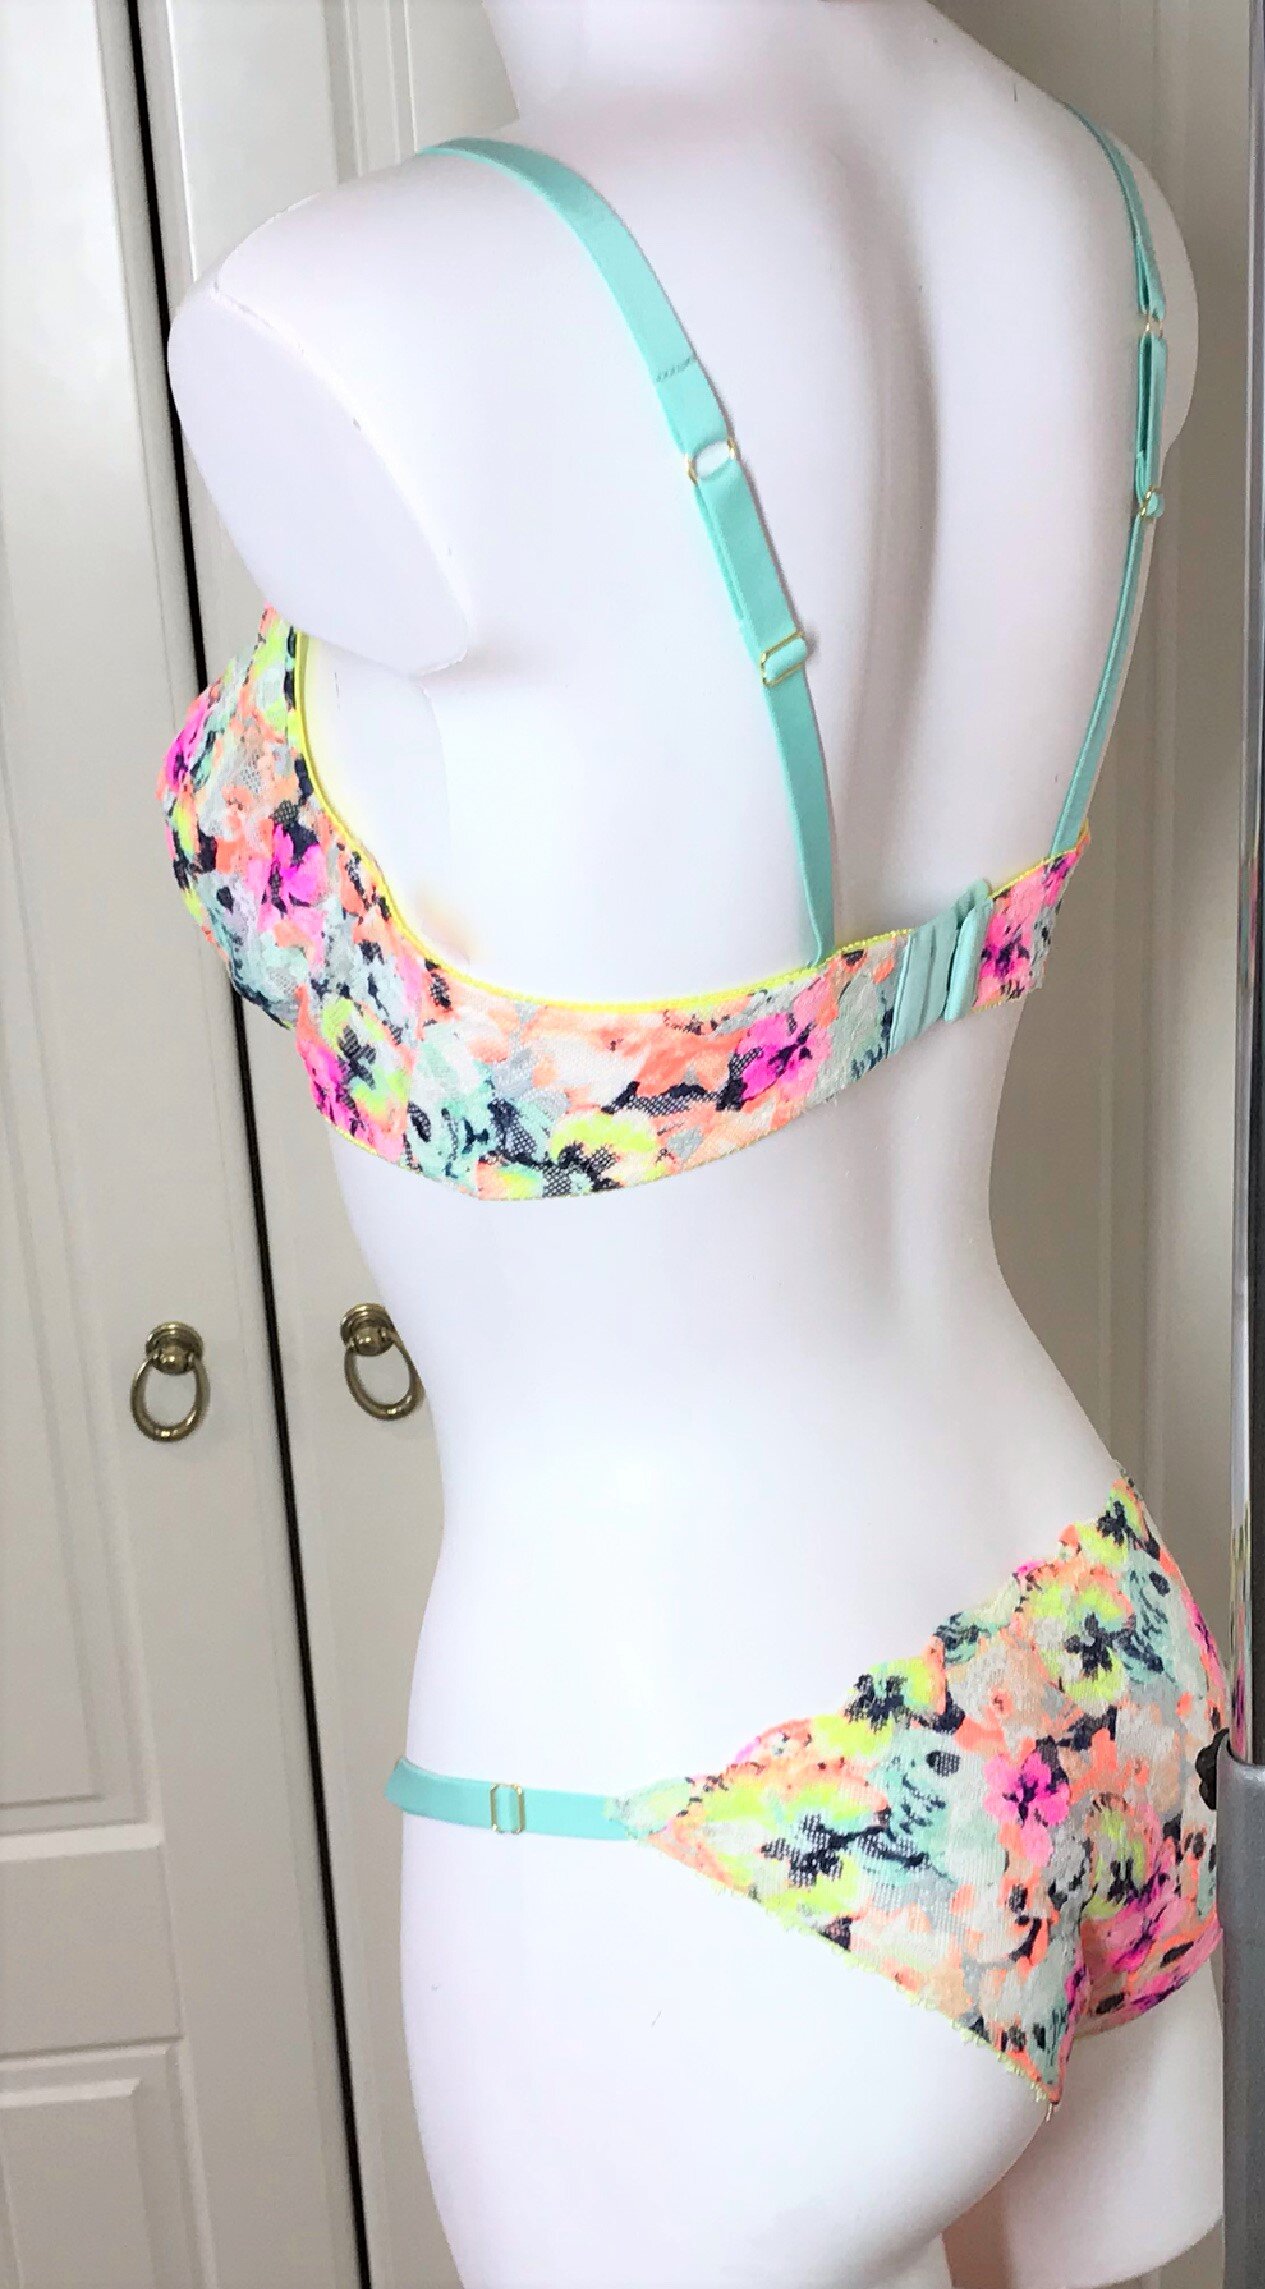
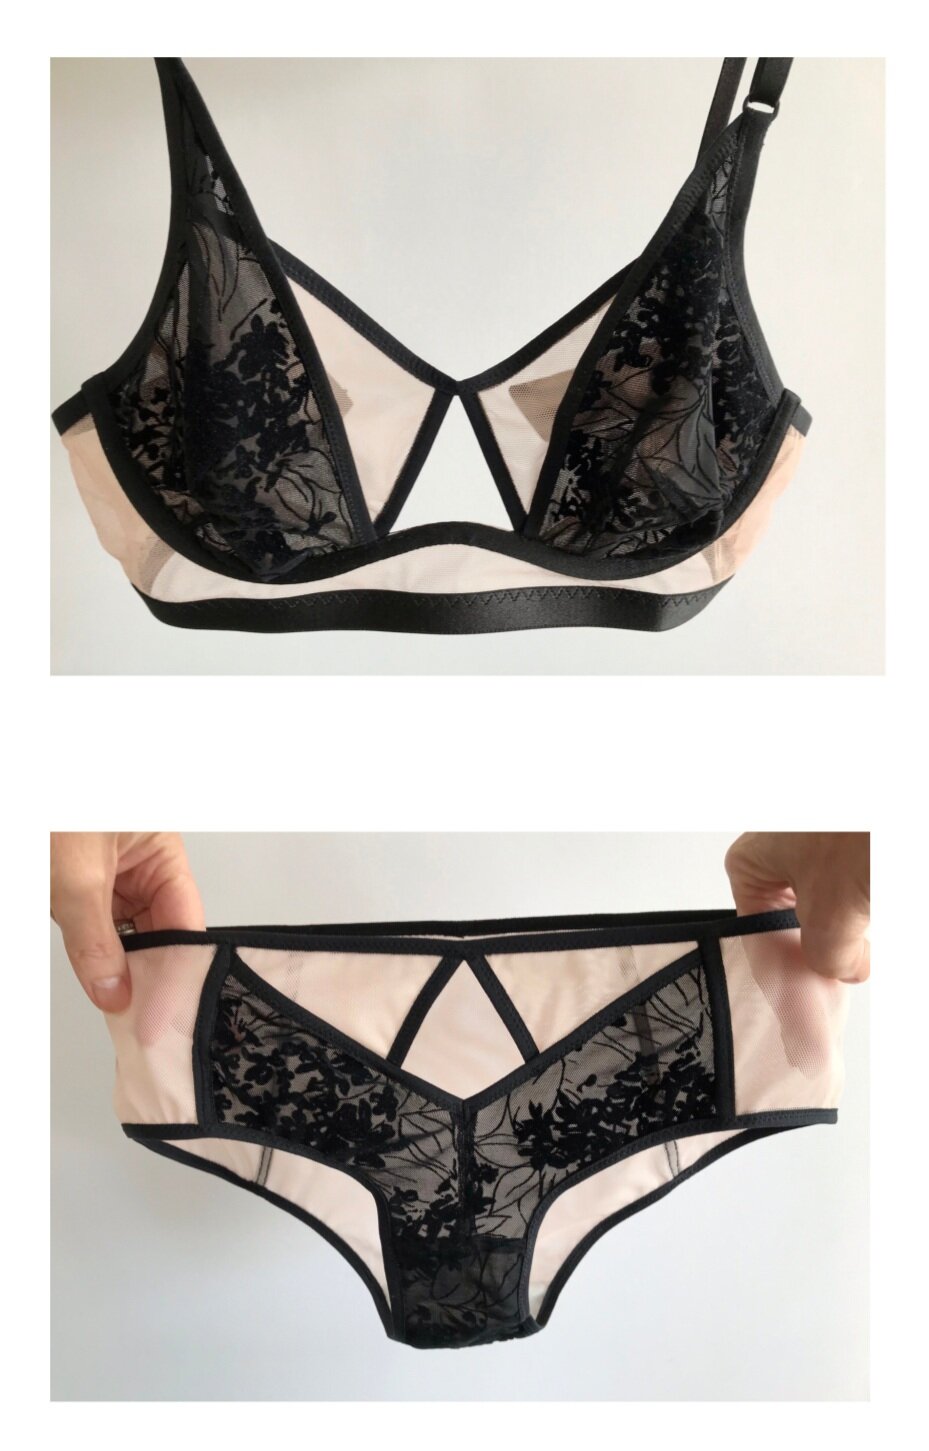
I just had to add these pictures which show just how beautiful it all looks.

Bra-A-Week Challenge - Emerald Erin Black Beauty and Orange Lingerie Devonshire

Confined to the house with a lot of time on my hands and inspired by Emerald Erin I am trying to up my game and play around with patterns for some different looks. So I am proud to present an Emerald Erin Black Beauty with neon stretch lace and Orange Lingerie Devonshire with half cups.

The neon lace from Tailor Made for this week is a stark contrast to the pale lilac of the previous week but the sun was out when I started and just said “please use me”. I had wanted to make a bra with a sheer edge cup and thought the Black Beauty (although it requires stable fabric) would be a good place to start as I could use a mixture of the two versions and tweak for the stretch lace. The first decision was to choose the tulle. I came across the pistachio I had left from a previous Black Beauty and I thought it would look perfect as it picked up the small amount of green in the neon.

I used two layers of folded tulle for each cup. To make sure the tulle folded flat I folded the smooth side over the less smooth side and then they stuck together. I placed the lace over the upper cup piece and cut in place that way up. Using a layer of lace and tulle I encased the upper cup.

I decided to use the lace edge on the power bar so, again, I placed over the pattern piece to get the low point of the scallop in the right place. Then I cut the tulle from this piece. This then influenced which colour elastic to use as the yellow looked better underneath than the pink. With the cups done I moved on to deciding how to make the cradle and bands.

Deciding on the mint fastener I first had to adjust the back band to accommodate the extra height. I decided to use the lace for the back bands together with a layer of soft powernet. Rather than use the lace all over I decided to bring in some more tulle and used this on the bridge. For stability I used two layers as one with sheer cup lining for stability. Again the yellow elastic looked better under the tulle. The beige channeling was chosen as this was the least obtrusive. To keep the front edge clean I closed off, sewing through the channeling and seam allowance only and then hand stitched to the front .

I thought the perfect partner would be the Studio Costura Vera Panties utilising the mint strapping. As the lace does not mirror I redrafted the back piece so I could use elastic and have the scallop edge on the waist. I took off the back seam and added the width of the elastic to the leg on the back pattern piece. I only had four gold sliders and no rings so I also had to adjust how I fit the straps. I used sliders for the front and tucked them in on the second pass of the elastic giving a really clean finish.

For the back I attached wrong side to wrong side and then folded back to stitch in place for another clean finish. Another fabulous combination but still hoping enough for another panty.

Not much left but I managed to squeeze out an Evie la Luve Chloe thong. I must admit to not being a big thong fan but with enough depth to the sides this makes for a pretty comfortable fit. I cut out the mesh first and then fitted what I had left over the front with just enough for the back as well. The mint fold over elastic was perfect.

I just love this set and very different to the set of the previous week.

I had been waiting for the right design to come along for this very beautiful lilac tulle from Tailor Made and as with most of my makes someone releases a new pattern or hack that ticks all the boxes. Orange Lingerie posted a tutorial on how to turn the 3/4 Devonshire into a half cup and my mind was set. The adjustments are quite simple, however, I did make up a paper cup to check there was adequate coverage. Then on to choosing what colours to use with it. So out came white and various shades of pink and lilac.

I made choices as I went along as one affected another. First I decided on a very soft pink tulle which gave a pink hue and I preferred the more pink/lilac elastic over the pure lilac. Then I had some very pale lilac shimmery powernet which looks amazing but it is not showing up well in the pictures. I tried to break up the all over look of the lace by positioning the flower on the side of the frames only. The placing of the cup pieces on the lace is problematic as the lace cannot be mirrored but I think I achieved a good balance. Although I do have a pattern to make a fastener I did a quick makeover of a white fastener. I covered the front of the eye side only so the plush back was still against my skin and covered both sides of the hook side.

Then on to the very glamorous straps which was my attempt to achieve a RTW look I had seen. I used a strip of the lace tulle with one of the lining tulle for colour consistency. The front strap is fabric for this pattern so I ensured the strips were cut with no stretch in the length and used 1/4 seams on both long edges and turned right side out. I still wanted the comfort of plush elastic so I place over a piece of strap elastic and sewed down the middle. Then I marked a line every two inches and stitched across so I could gather to the width of the elastic. Well impressed with the look and still comfortable!

The obvious choice for underwear was another Orange Lingerie pattern, the Montgomery Brief as you can use non stretch fabric for the front panel. I’ve made this numerous times but I think this has to be the prettiest and so comfortable with the super soft mesh I found in my stash. With just a small amount of lace tulle left I managed to use this for an overlay on the Evie la Luve Binky, another favourite of mine using the direction of the stretch across the body. I used the white fold over elastic as I didn’t want it to overwhelm the single layer mesh. Amazingly pretty and feminine as well as comfortable. What more can you ask for when we are all spending so much time in t-shirts and joggers!

Pattern testing the Eloise for Madalynne and all things lingerie

With so much going on this year sewing has been either somewhat manic or non existent. So, I thought it was a good time to sit down and record the new patterns and projects I have been working on.

Read More

Who needs a reason to make more lingerie!

I don’t but I have lost so much weight since I have been back in the gym that nothing really fits so August turned into a bit of a lingerie sewing marathon. Luckily I have a stack of patterns to work with but picked up a few more along the way. So here are a few of my makes.

Read More

Evie la Luve Keyhole Darcey - Another Triumph

Not that I needed an excuse to buy any more Evie la Luve patterns but the Keyhole Darcey Add On was released just in time for Sew My Style November which is featuring all my favourite patterns - the Darcy and Willow Bras accompanied by the Binky and Frankie. Having just finished the very pretty Blossom Add On set I thought I would use up the rest of the very bright fabric from Costura Secret Shop and the fabulous coral strap elastic from Madalynne.

Read More

Darcey and Binky Blossom Add On - Can it get any better?

Having decided on a DIY Christmas I thought I would get on and make a start on the cards but then SewMyStyle announced November would be some of my favourite Evie la Luve patterns. So for the challenge I thought I would make one of the few versions that I had not done before. Even better I had a beautiful floral scuba kit to use. As with all Evie la Luve’s products the quality is amazing. How gorgeous is this?

Read More

No Stopping Me Now - Orange Lingerie Lansdowne and Blossom4Binky

A rather selfish weekend of sewing but I have so many beautiful kits stacked up I just had to use one of them. So as we head into Autumn I thought I would use the strikingly colourful kit from CosturaSecretShop. Then I had to decide what to make with it. Orange Lingerie has just released the new Lansdowne bra pattern so that decision was made. Then Evie la Luve posted a fabulous Blossom set on Instagram and having bought the add on pattern as soon as it came out it was time to give it a try. Feeling quite smug for a number of reasons.

Read More

Summer Lingerie Part 1 - Watson and Binky Perfect Partners

A lot of the designers I follow use Spoonflower designs so I thought I would test some of the fabrics out. My first purchase included some beautiful watercolour cotton spandex jersey designed by Crystal Walen with the lovely title of Mystical Floral. The thought was to make a collection of wireless bras or bralettes for those hot summer days and obviously some coordinating bottoms.

Read More

More Evie La Luve - Darcey and Binky Perfect Partners

Having made one version of the Binky I was eager to try more, especially a mesh version and match with the Darcey Bra. Along came a 20% PDF weekend and whilst I deliberated which patterns I wanted/needed I came across some great lace and fold over elastic. It took such a long time to decide which colour to use. In the end I went with the peach purely down to the fact I didn't think any of my FOE went with the deep coral.

Read More