I've made a Sports Bra - Greenstyle Endurance!
Injuries and medical conditions under control we thought it was a good time to get back to the gym. Disillusioned with our old one, given the cost and location, we decided to join a gym in our village which is relatively new. It maybe be small but has all you need and is so clean. So this got me thinking about trying some activewear. Then by magic, Ying, Tailor Made blog, had a link to a review by Caitlin of Greenstyle’s Power Sports Bra. I ended up with five patterns as not only were some of them on 25% PDF discount but there was also a discount for spending over $50. So first up, as this is what I really needed, is the Endurance Bra. Matched with Sewaholic Pacific Leggings.

Greenstyle’s website description has a lot to live up to, “This is not your ordinary sports bra. It is the comfortable, front zip, no bounce bra you have been waiting for. Step by step directions walk you through making an amazing bra that you can be proud of. There are three different back options including a racerback, criss-cross straps, and also adjustable straps. You will never have to buy a $80 sports bra again.” Well I’m pleased to say that it does!

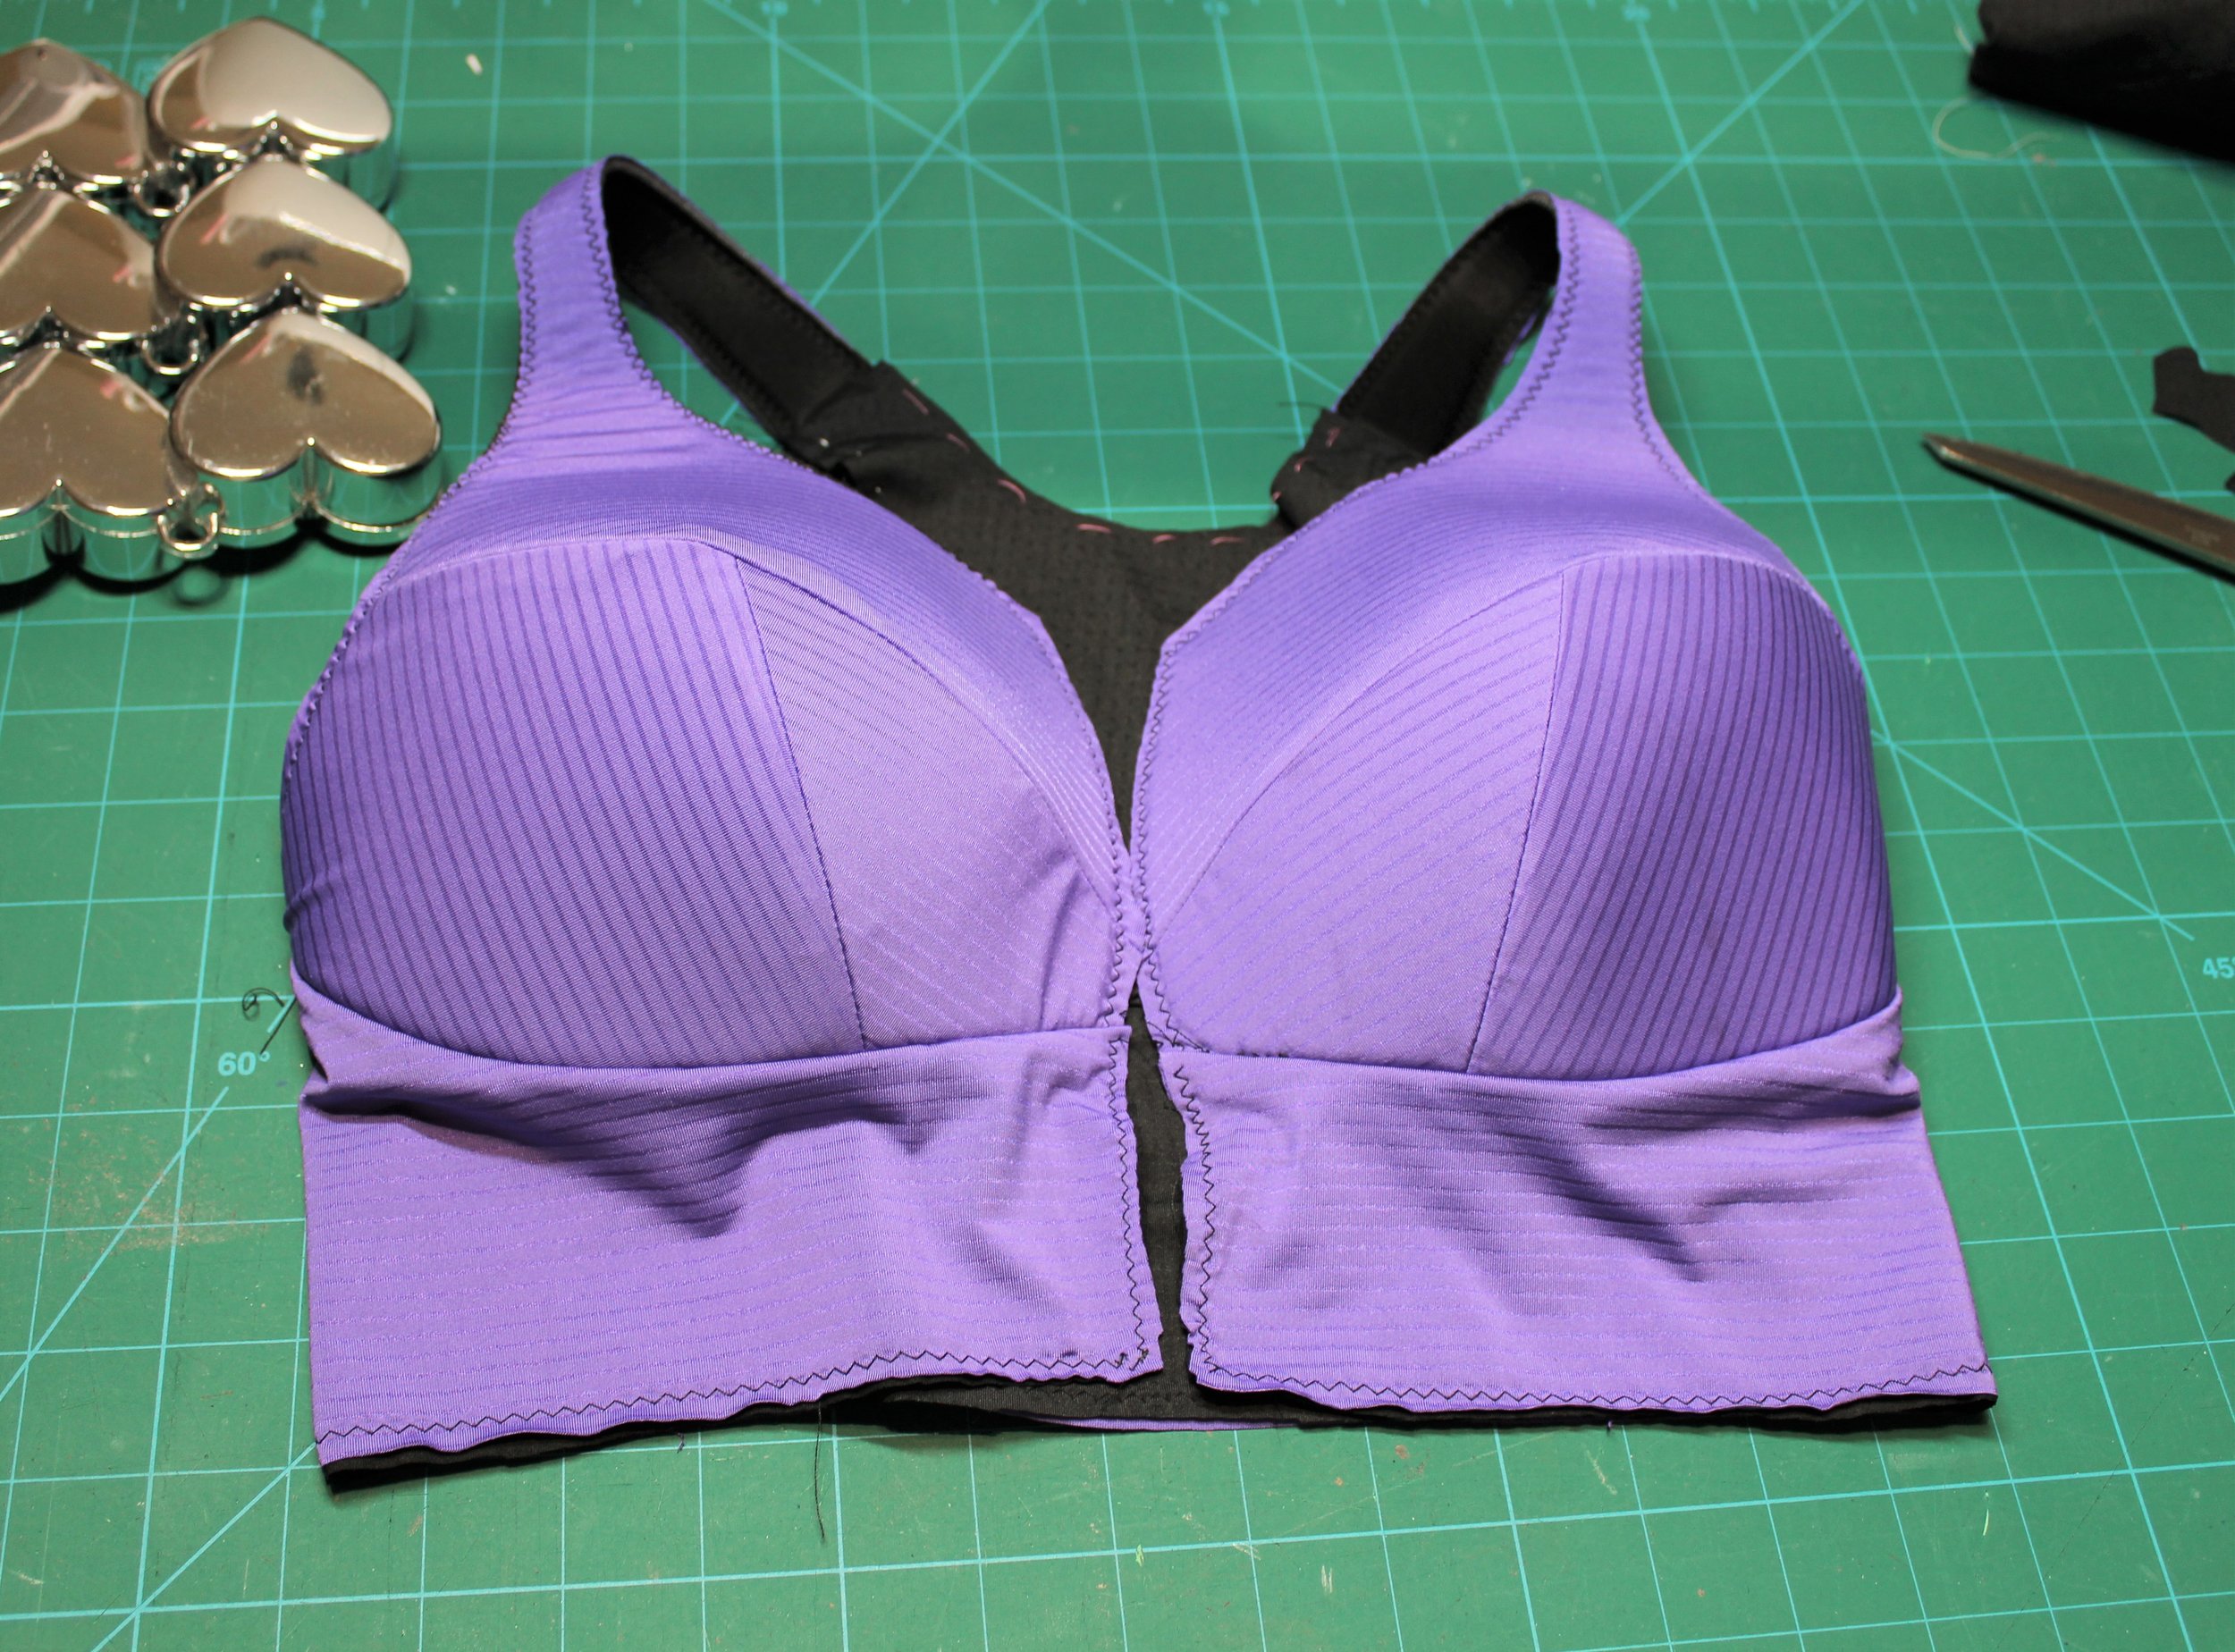
The instructions suggest you make a test version first and although, as always, I was in a rush to make I ended up with a perfectly wearable version. I took my measurements and printed out the corresponding pages. No need to trim the pages just tape them together. The cup sizes are also layered but I printed out the range in my band size so I could check the fit. I was glad I made a paper version using the foam pieces as the indicated size was too big and I went down a size. Then I had to decide which back option, so for simplicity I made the racerback.
The foam cups are made first and they went together smoothly. I always refer back to Beverly Johnson and use a zigzag 4 width and 1.5 length. Then on to the fabric cups. The seam allowance is 3/8”. For the first cup I followed the instructions and just clipped the seams. For the second cup I trimmed down so there was no need to clip and this is a much smoother finish. This is probably the fabric I was using but a thought for the next one I make.


You then stretch the fabric over the cup, pin and then baste in place. I have seen some comments about the foam not being lined but the foam I used has a silky smooth side which is fine next to the skin and the other side clings to the fabric keeping it in place. The option would be to line or use seam tape if this was an issue. I always sew with the foam on top, although pin from the fabric side, making sure my pins can be seen when I sew.
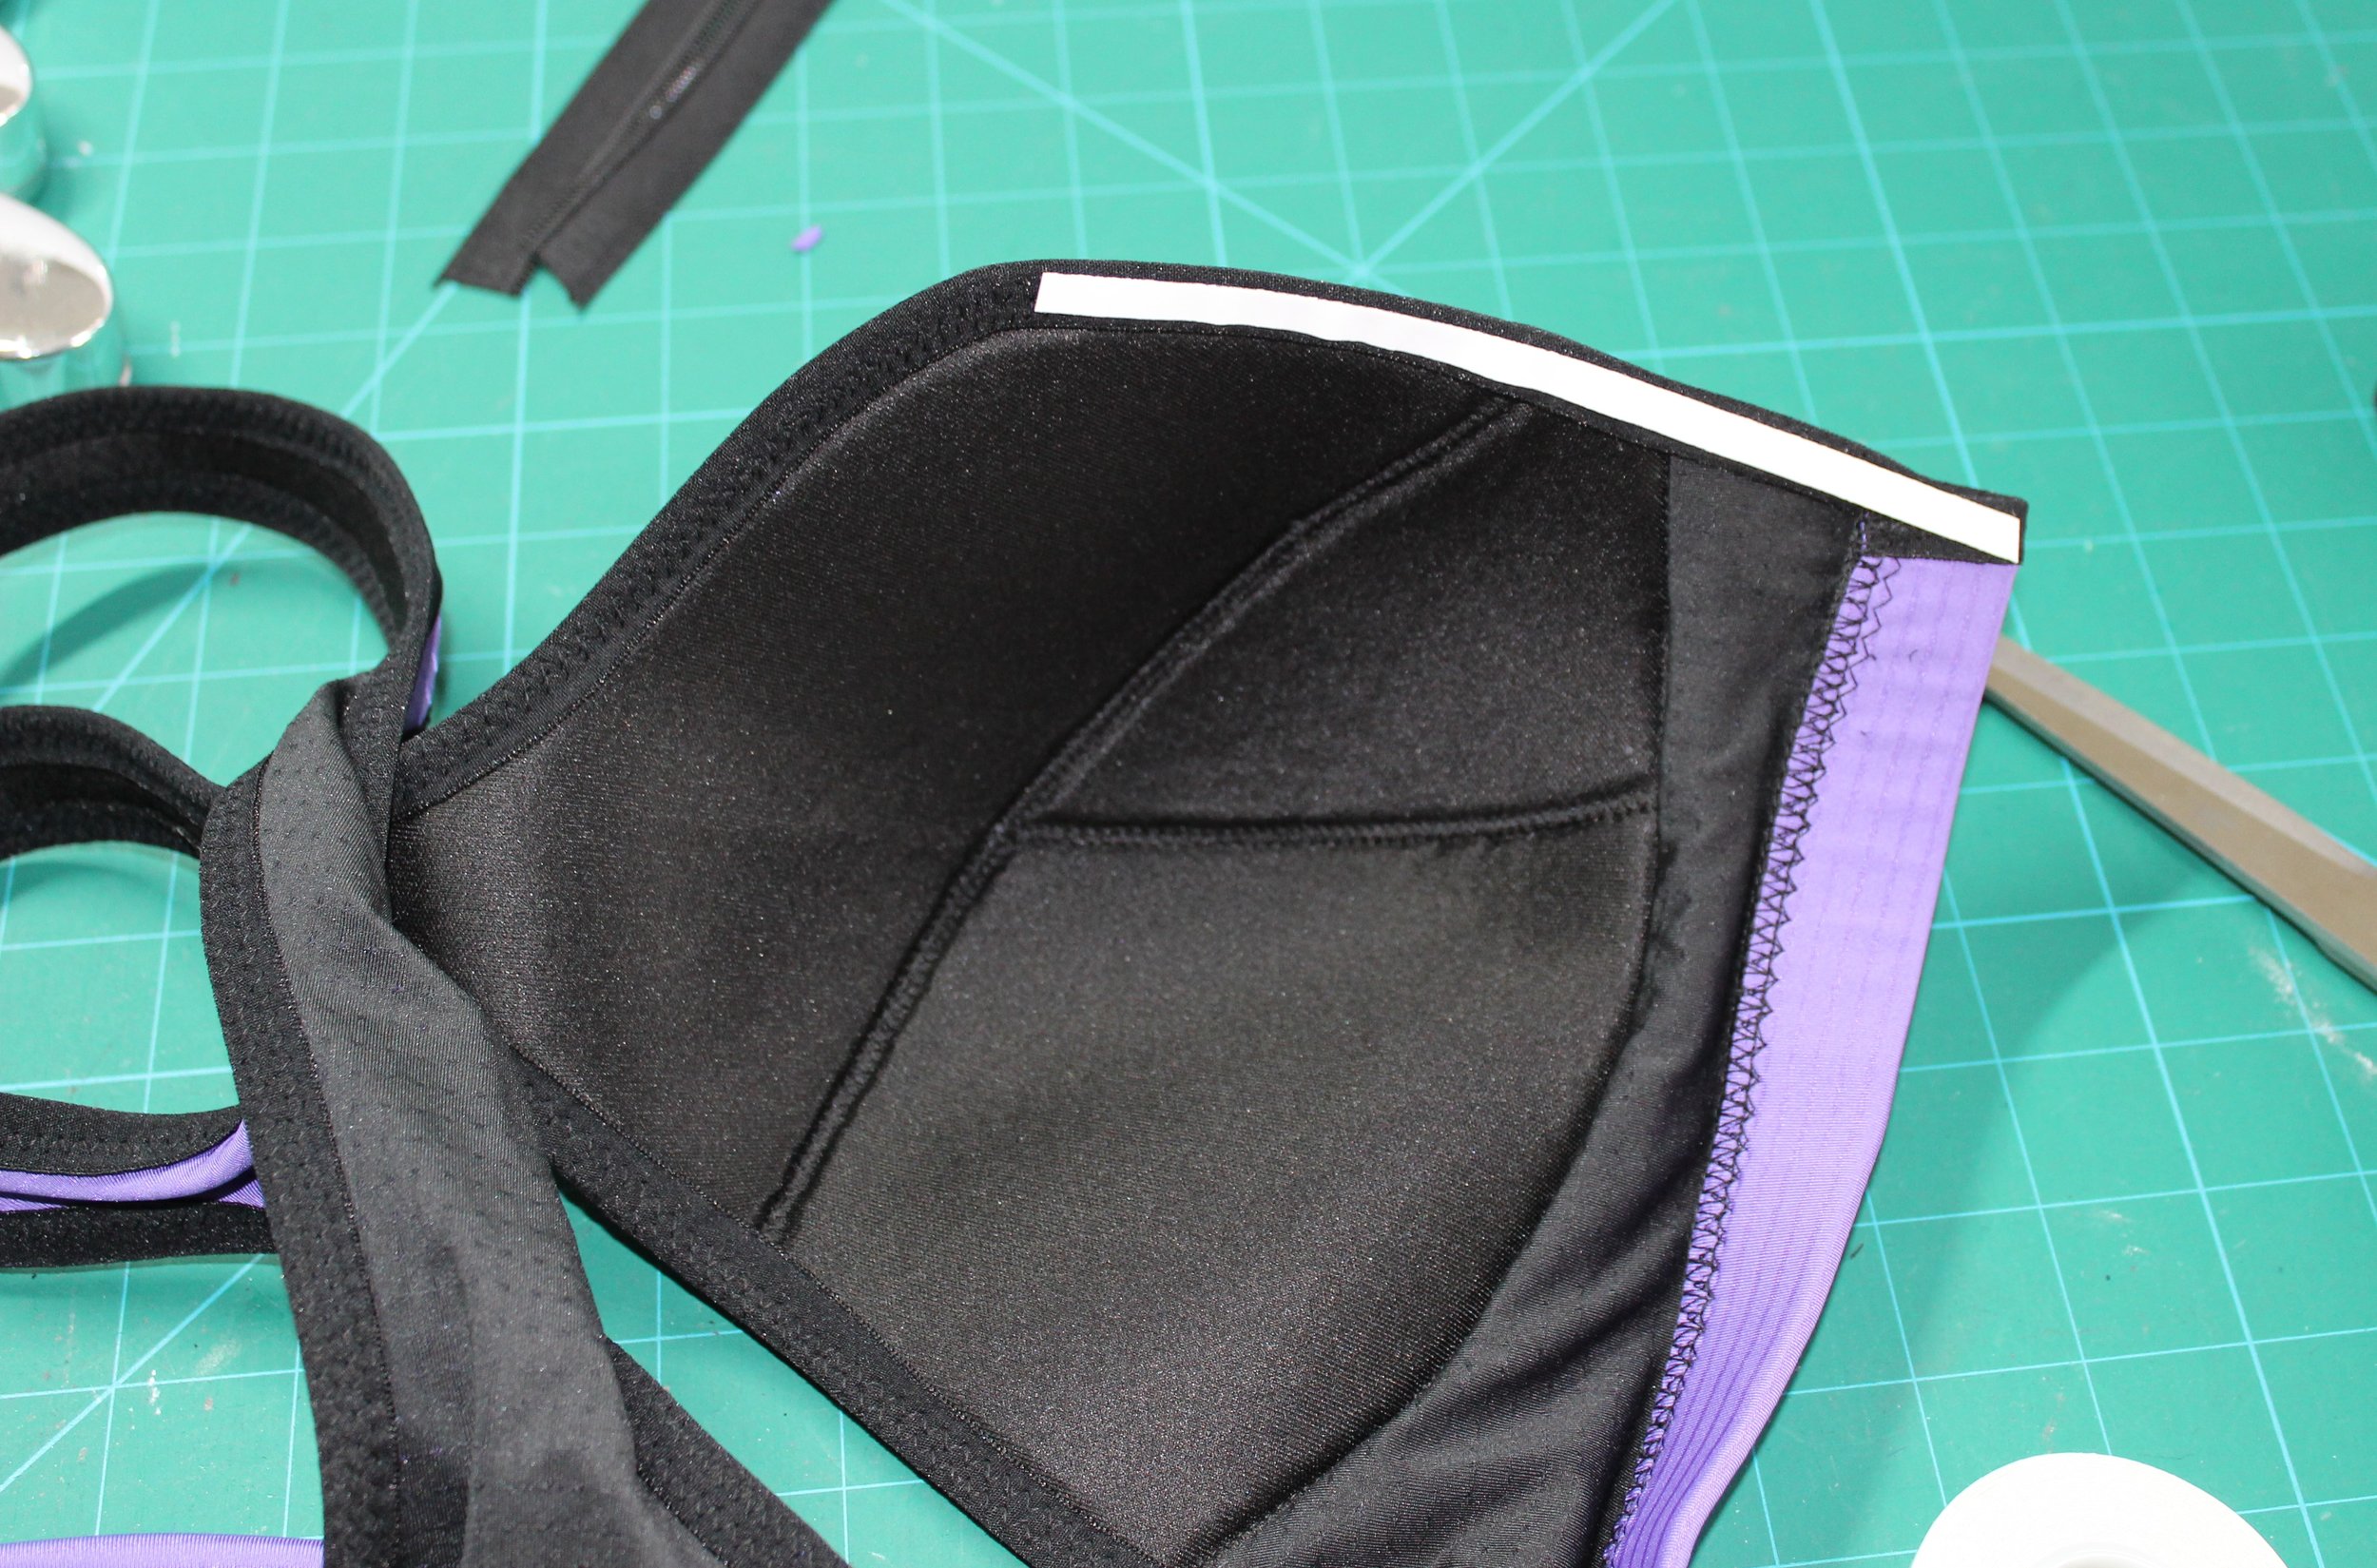
The cups are enclosed between the fabric and lining by first basting the cups to the back, right sides together, and then placing the lining, right side to the foam, and stitching in place. After checking the fit at this point, I then sandwiched the foam strap between the back fabric and lining. There is a link to a video which has you twisting twice but I found it easier just to place the layers.


Then you turn to the right side and there is nothing to irritate the skin. I prefer to hand baste the layers in place so as not to overly stretch the fabric before moving on to the elastic. The pattern calls for 1” fold over elastic. I could not find this width anywhere so I used the widest I had which was 20mm and it worked fine. I did use the matt side rather than the shiny side as it looked more appropriate for activewear.
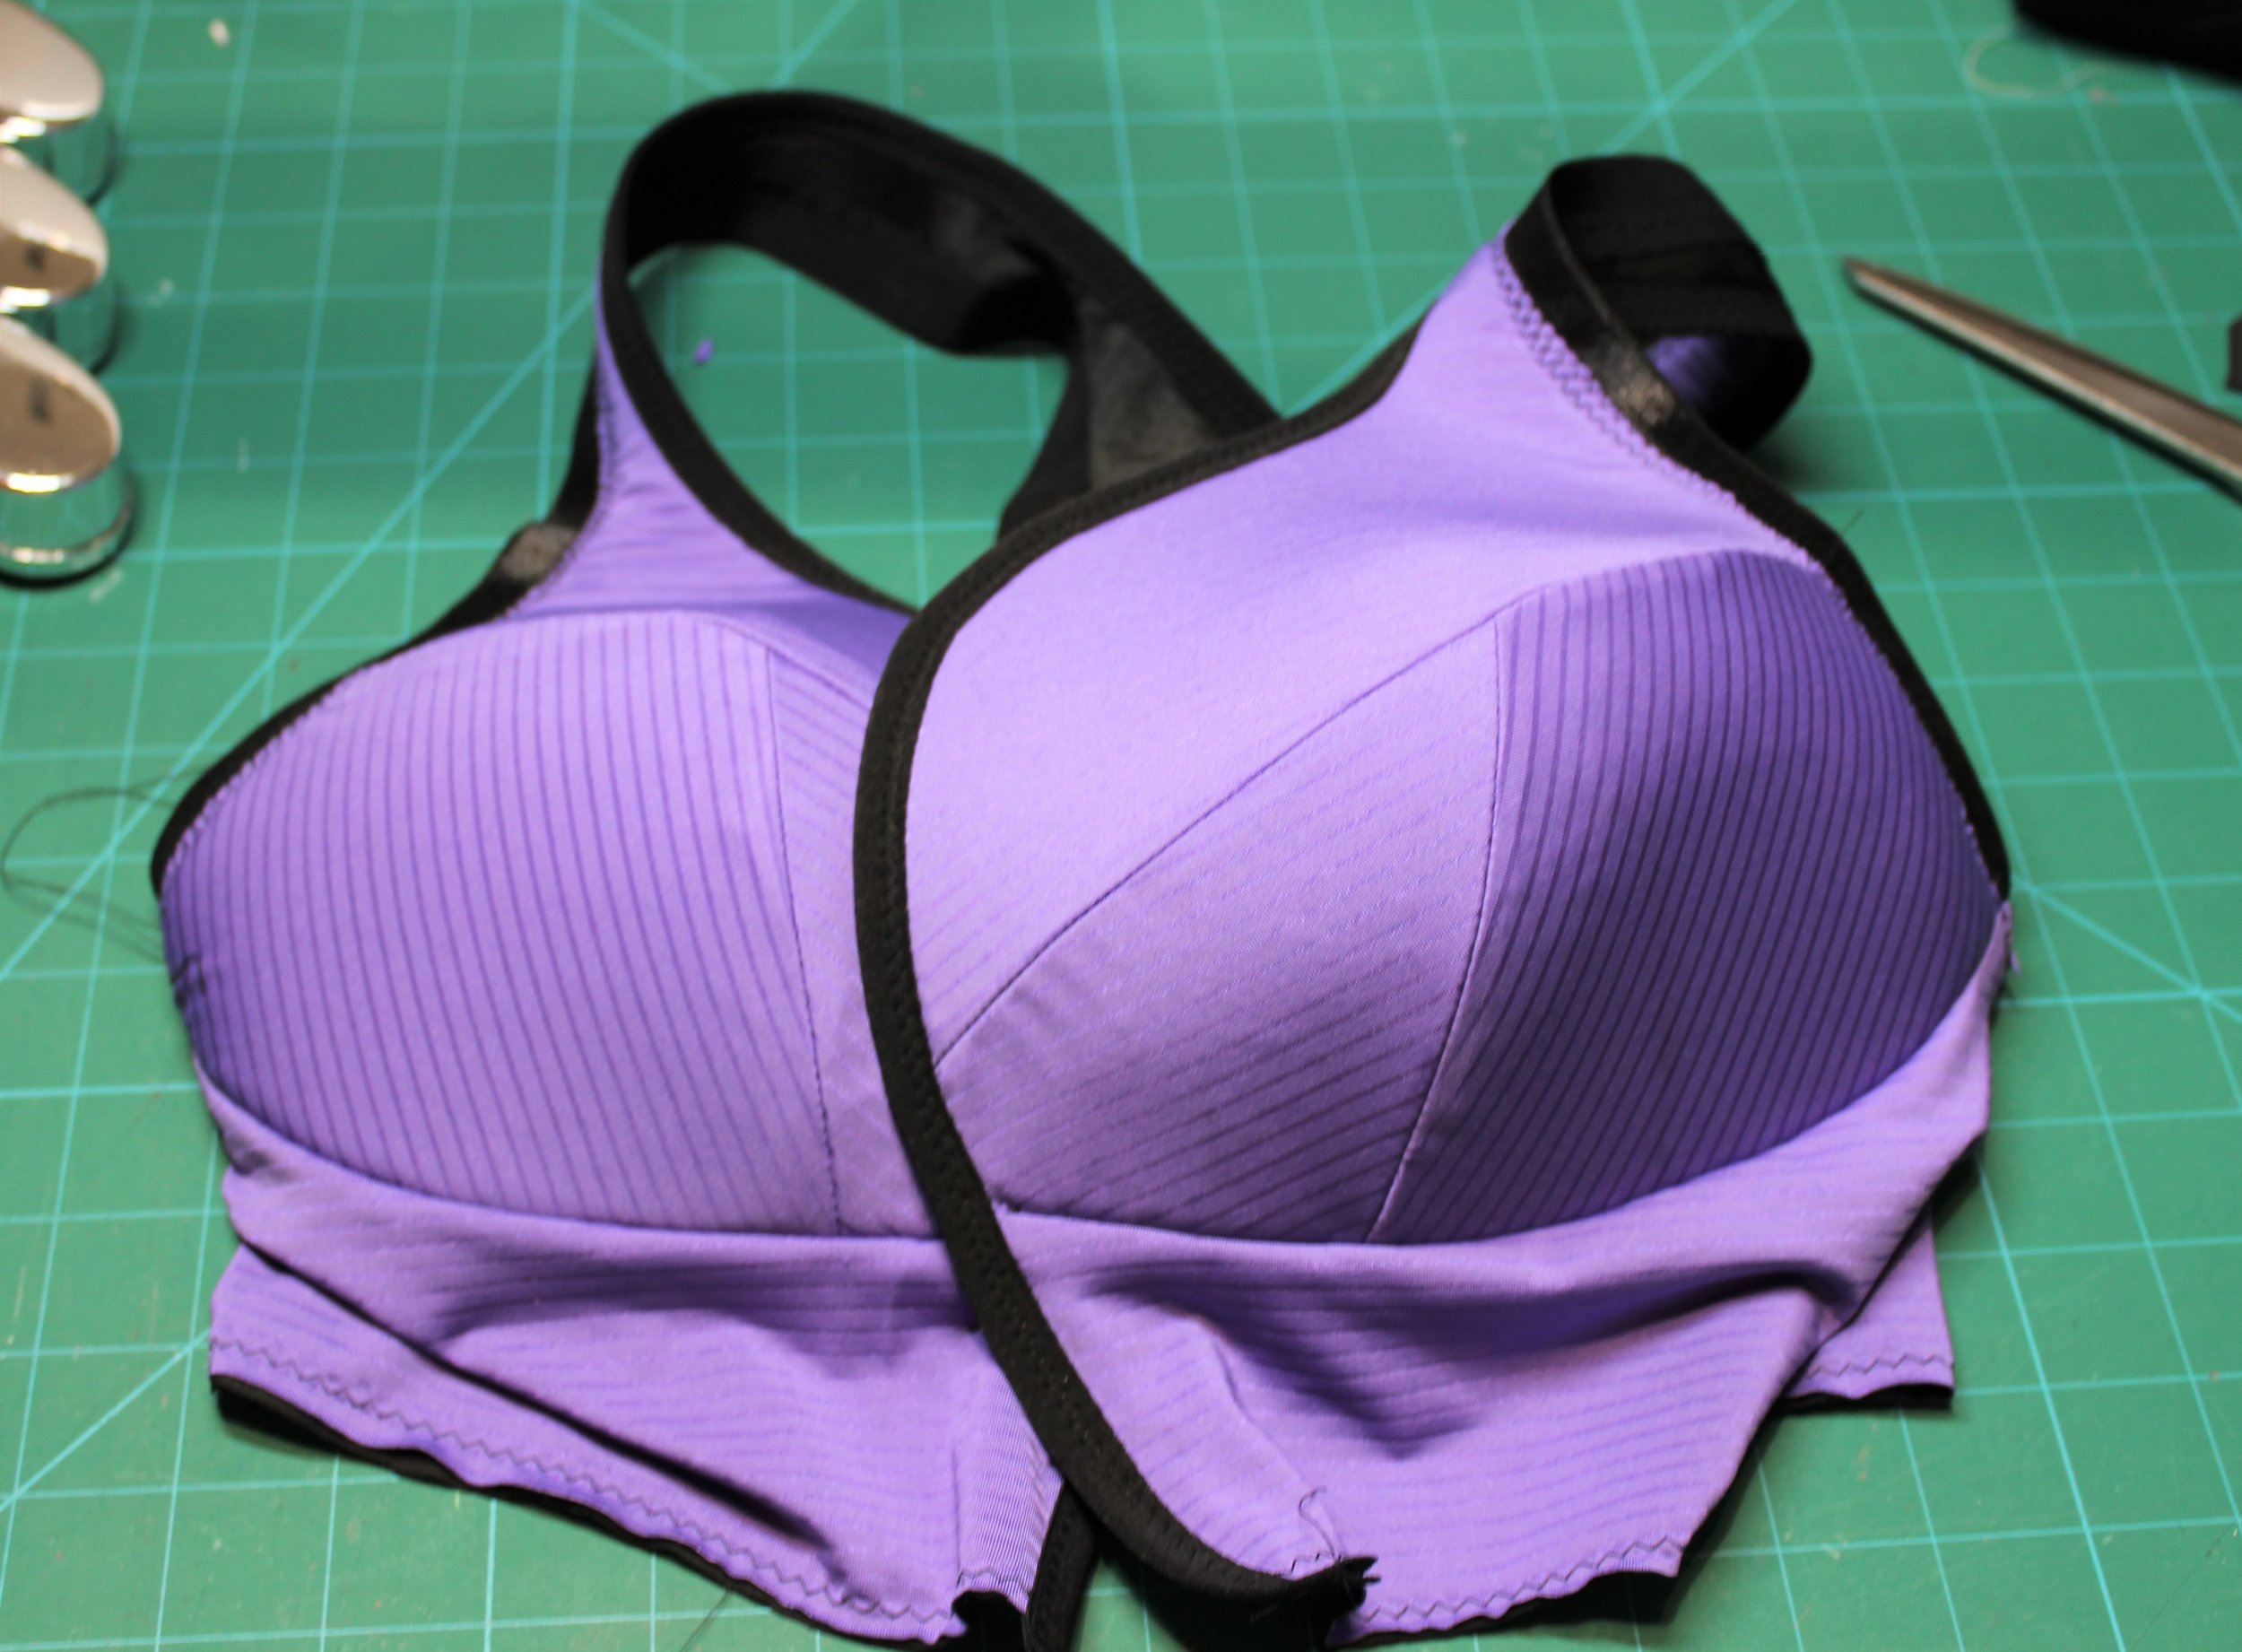
There are no guidelines for how much FOE to use other than stretch gently as you sew. There are also no instructions as how to sew in the round for the armholes. I started at the underarm, leaving a tail and stopped a couple of inches before the start. With a slight stretch I marked where the ends should join and then stitched together with a straight stitch and went back to where I stopped and finished back at the join.

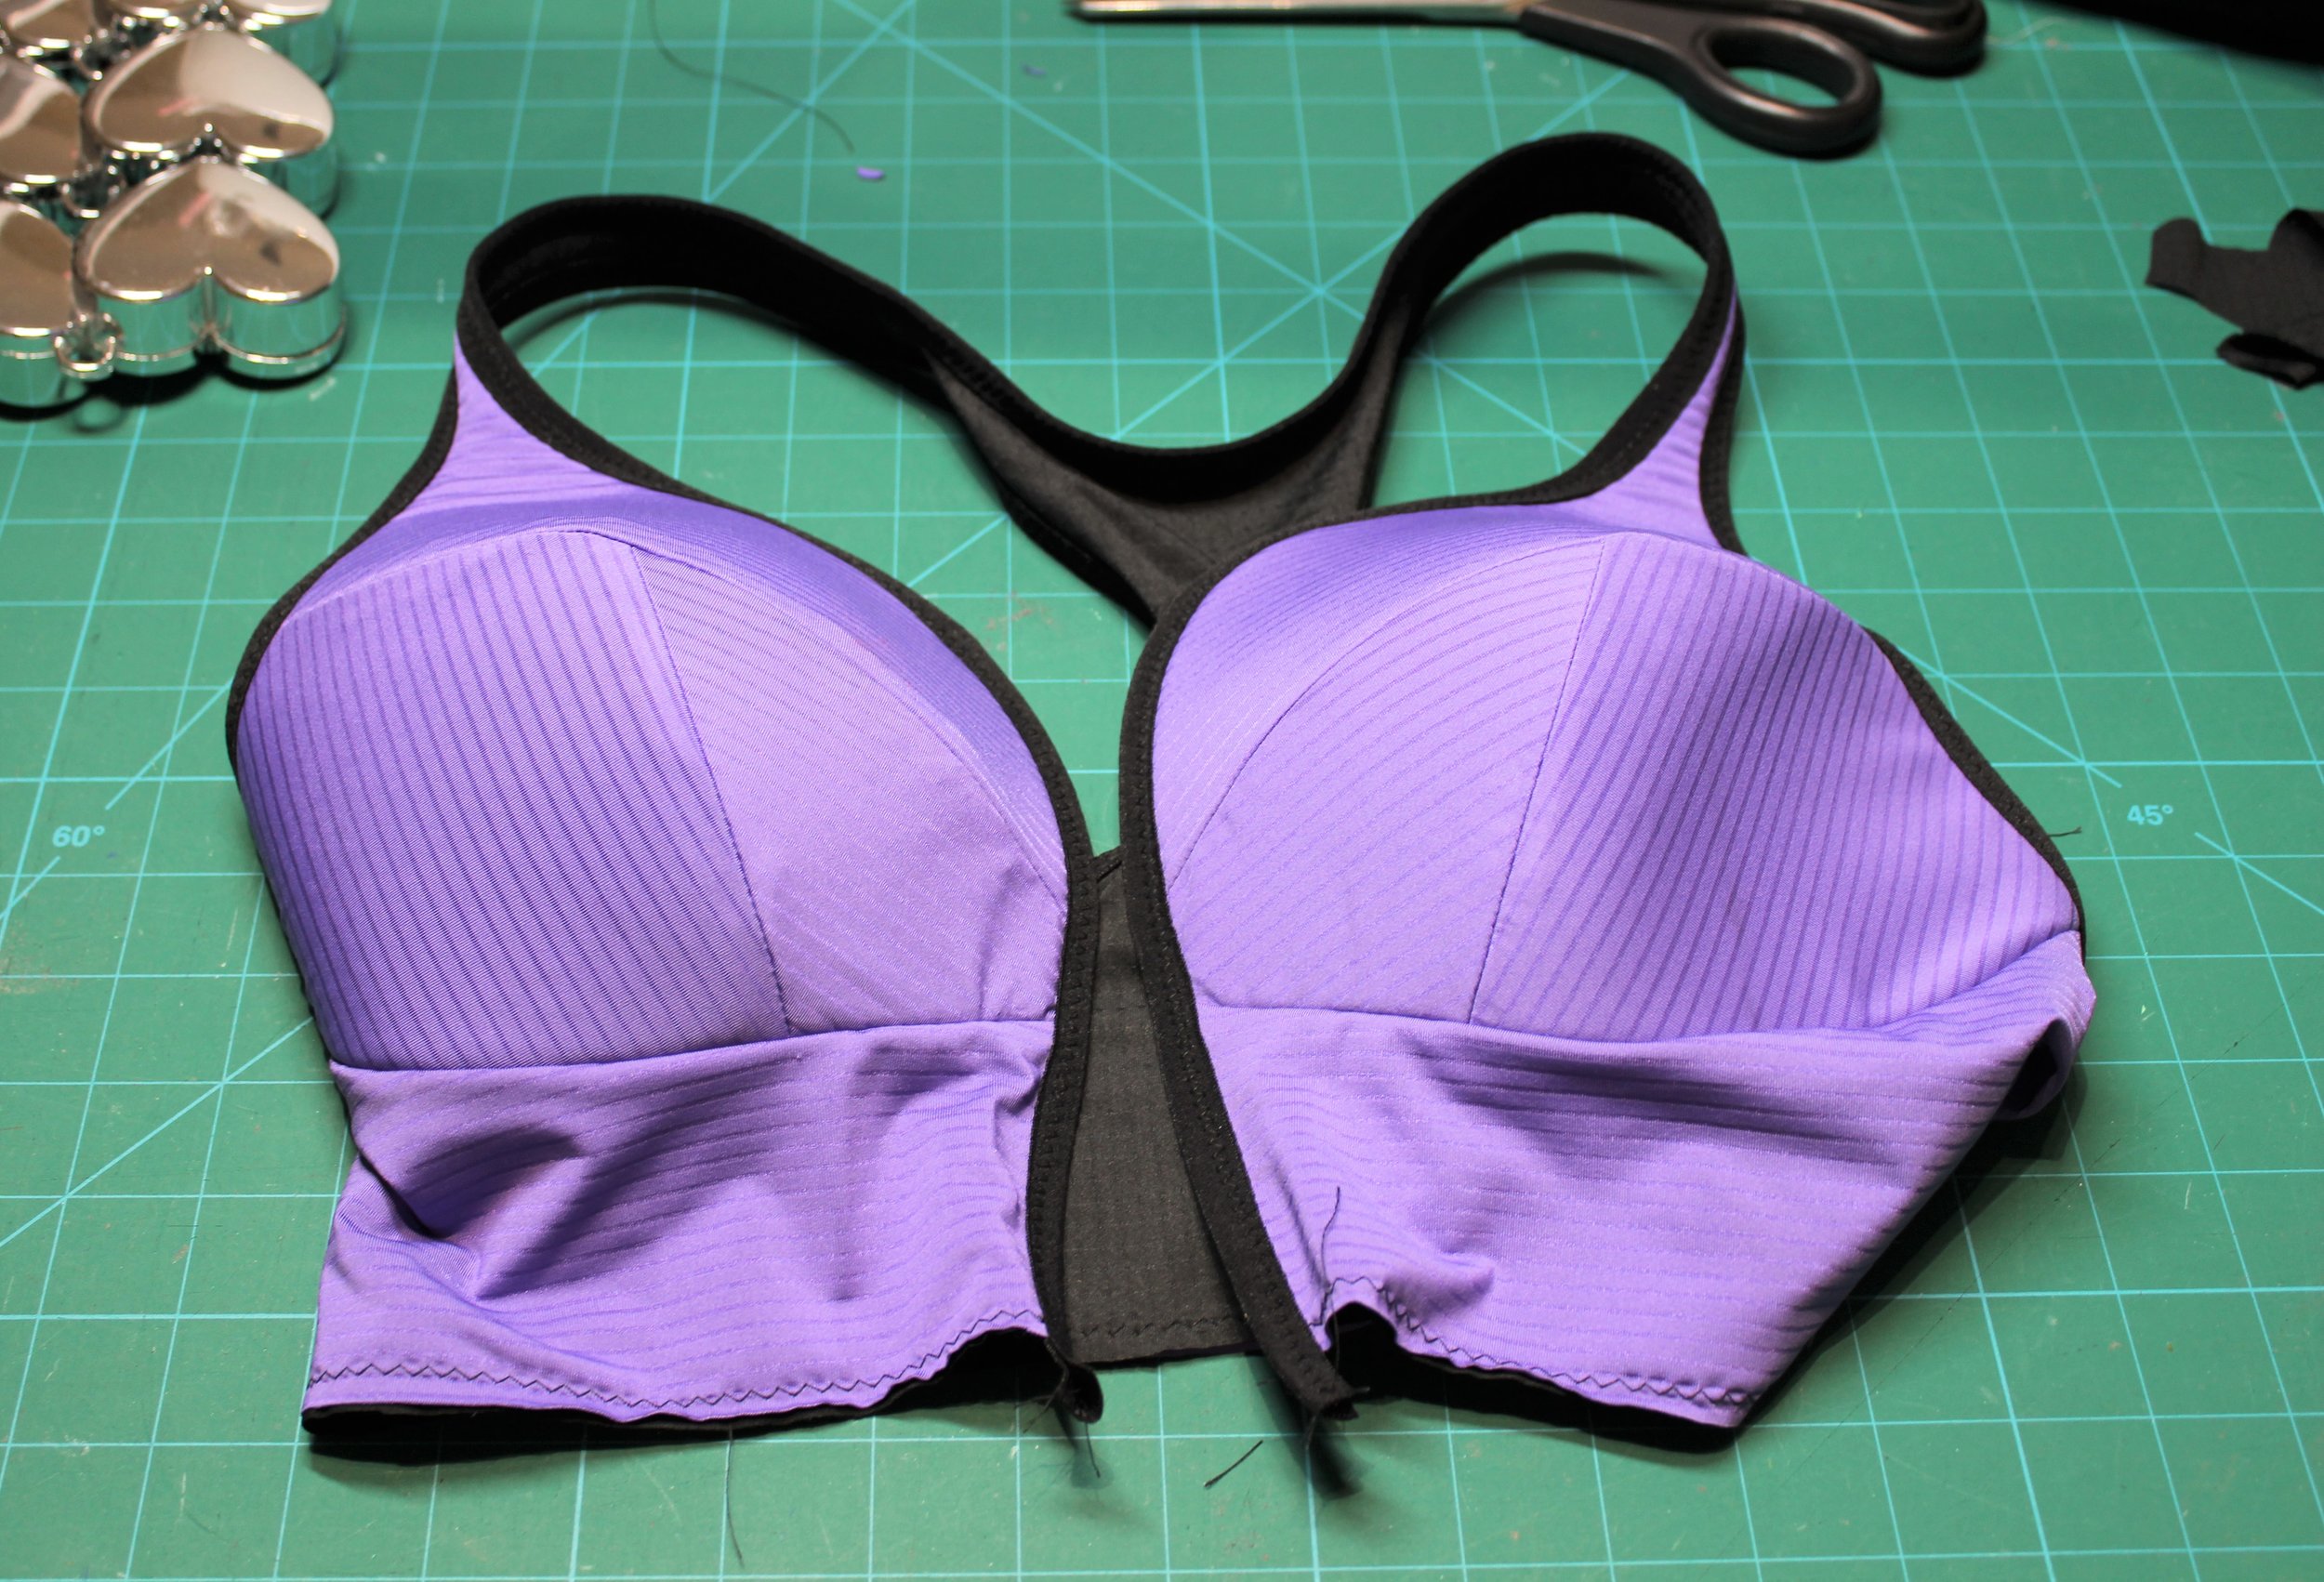
Then you attach elastic to the bottom of the bra band. I used my overlocker so when I folded back I had a neat raw edge. I used a three step zigzag to hold in place and sewed with the wrong side up so that the fabric didn’t twist and sat on the already sewn edge. The patterns uses 1” elastic but it would be easy to adjust for other widths or adapted to use some of the printed elastics I have seen around.
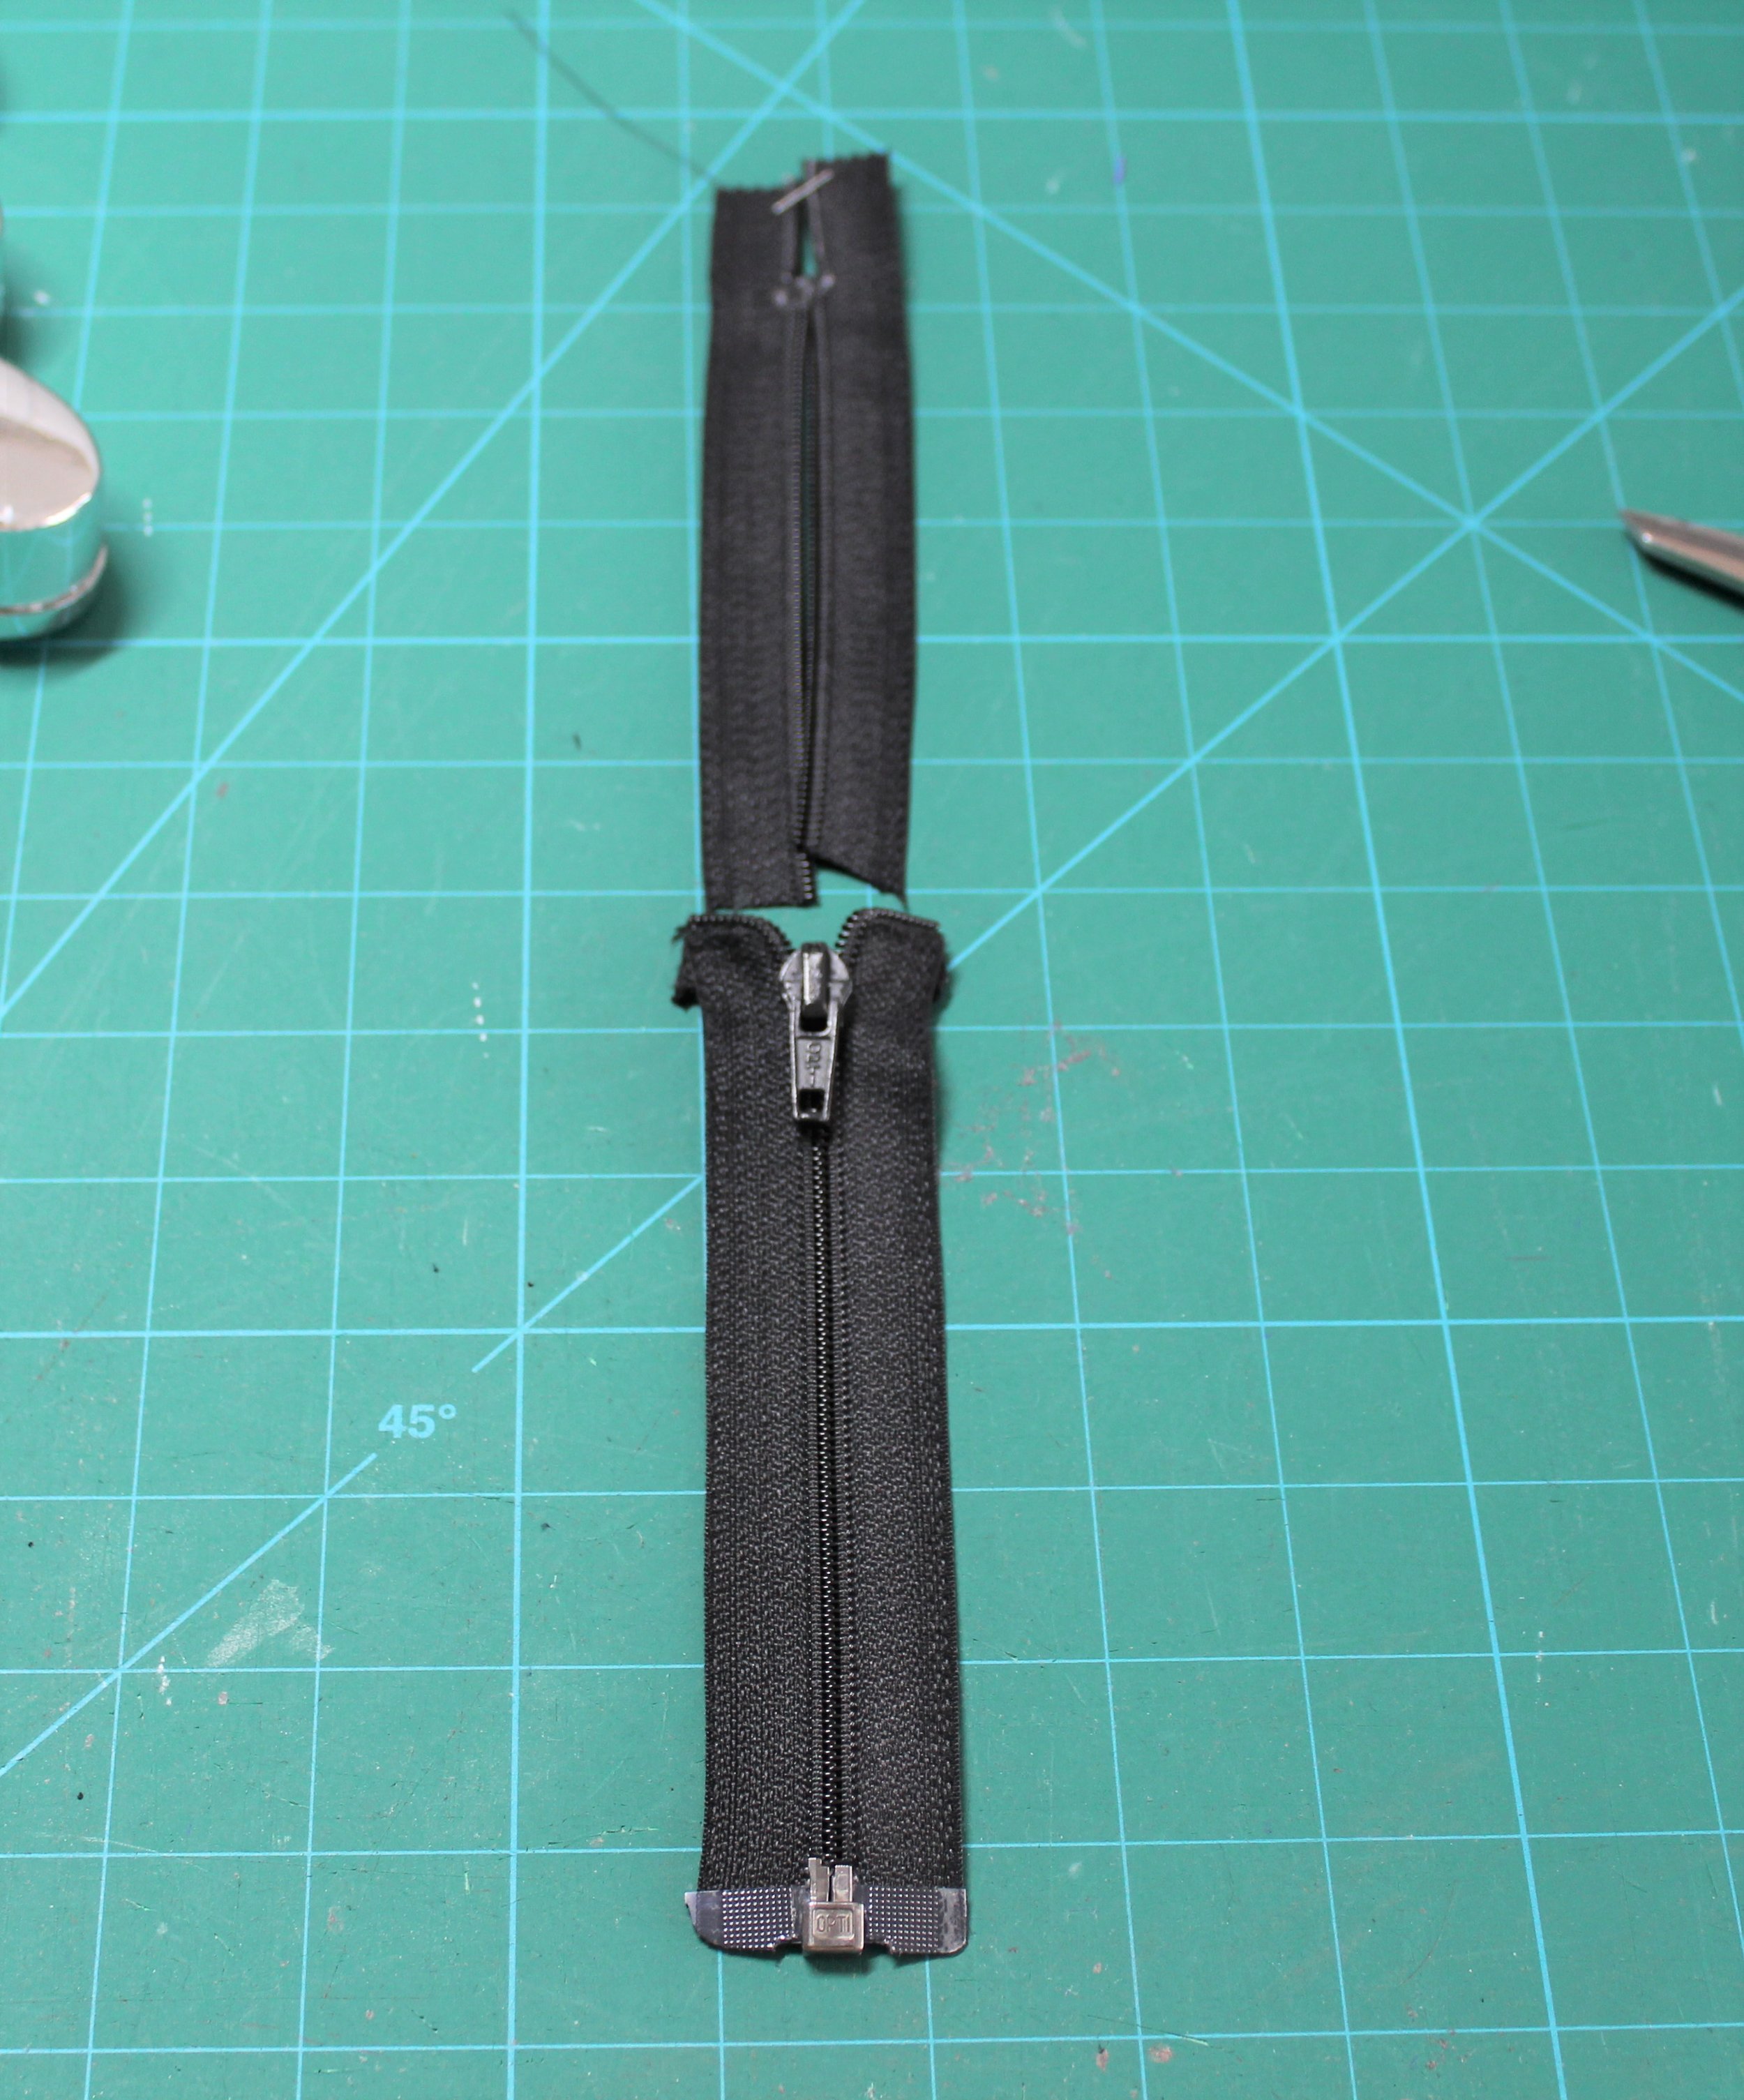
Just the zip to finish! This is why I wanted to do this pattern but also the part I feared most. I had a few separable black zips in my stash but I chose one with plastic teeth as you have to cut to length and sew the top edge in place. I haven’t seen any shorter than 10”.
Then on to the zipper guard. This is meant to be cut from a single layer stable knit. I had nothing suitable and I also didn’t like the idea of a non finished edge. Although this would work with scuba if cut neat enough. So I came up with my own version.


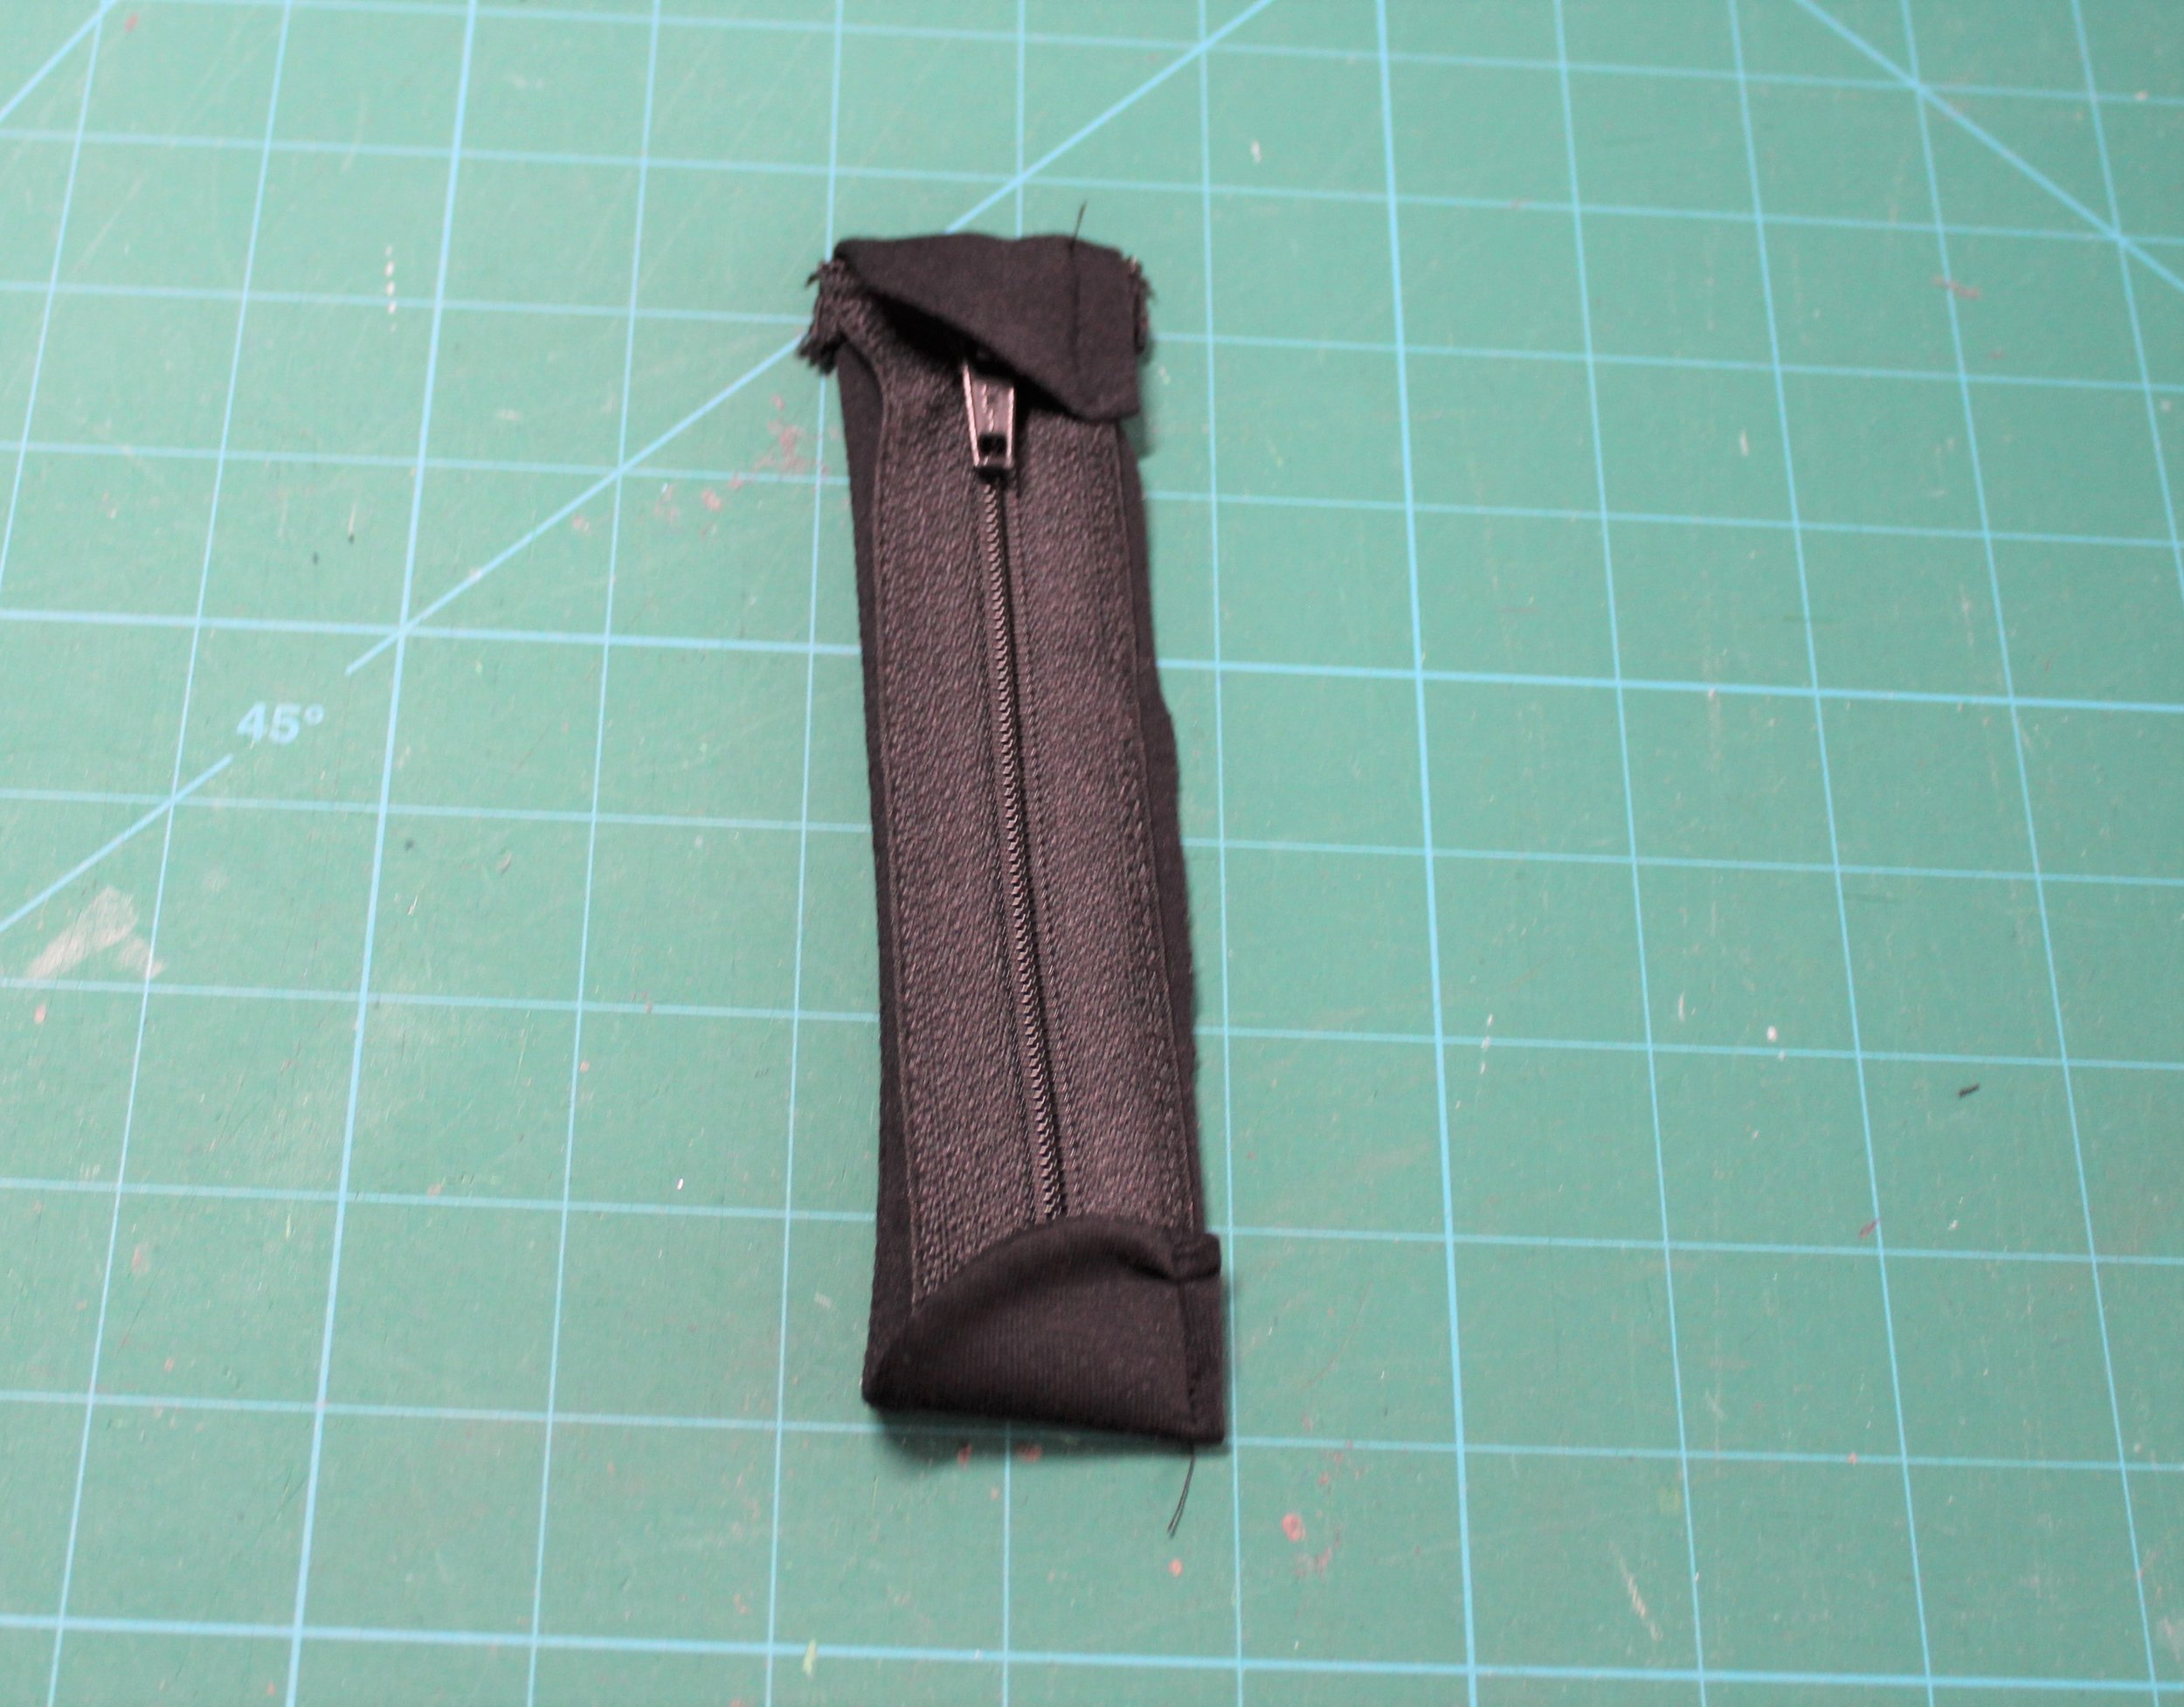
I cut out the pattern piece from some soft interfacing and fused to a piece of bamboo knit. I folded on the long edge and sewed around the curved edge and trimmed close to the stitching. I cut a little slit on the long edge and turned through and pressed. A neat, stable, soft guard.
I don’t put zips in often but a tip I picked up when dealing with bulky bag zips is to use two sided tape to hold in place. This allows for perfect placement. I also used my walking foot having the needle as far to the right as I could.
First side done. Phew! Just the other side to line up.
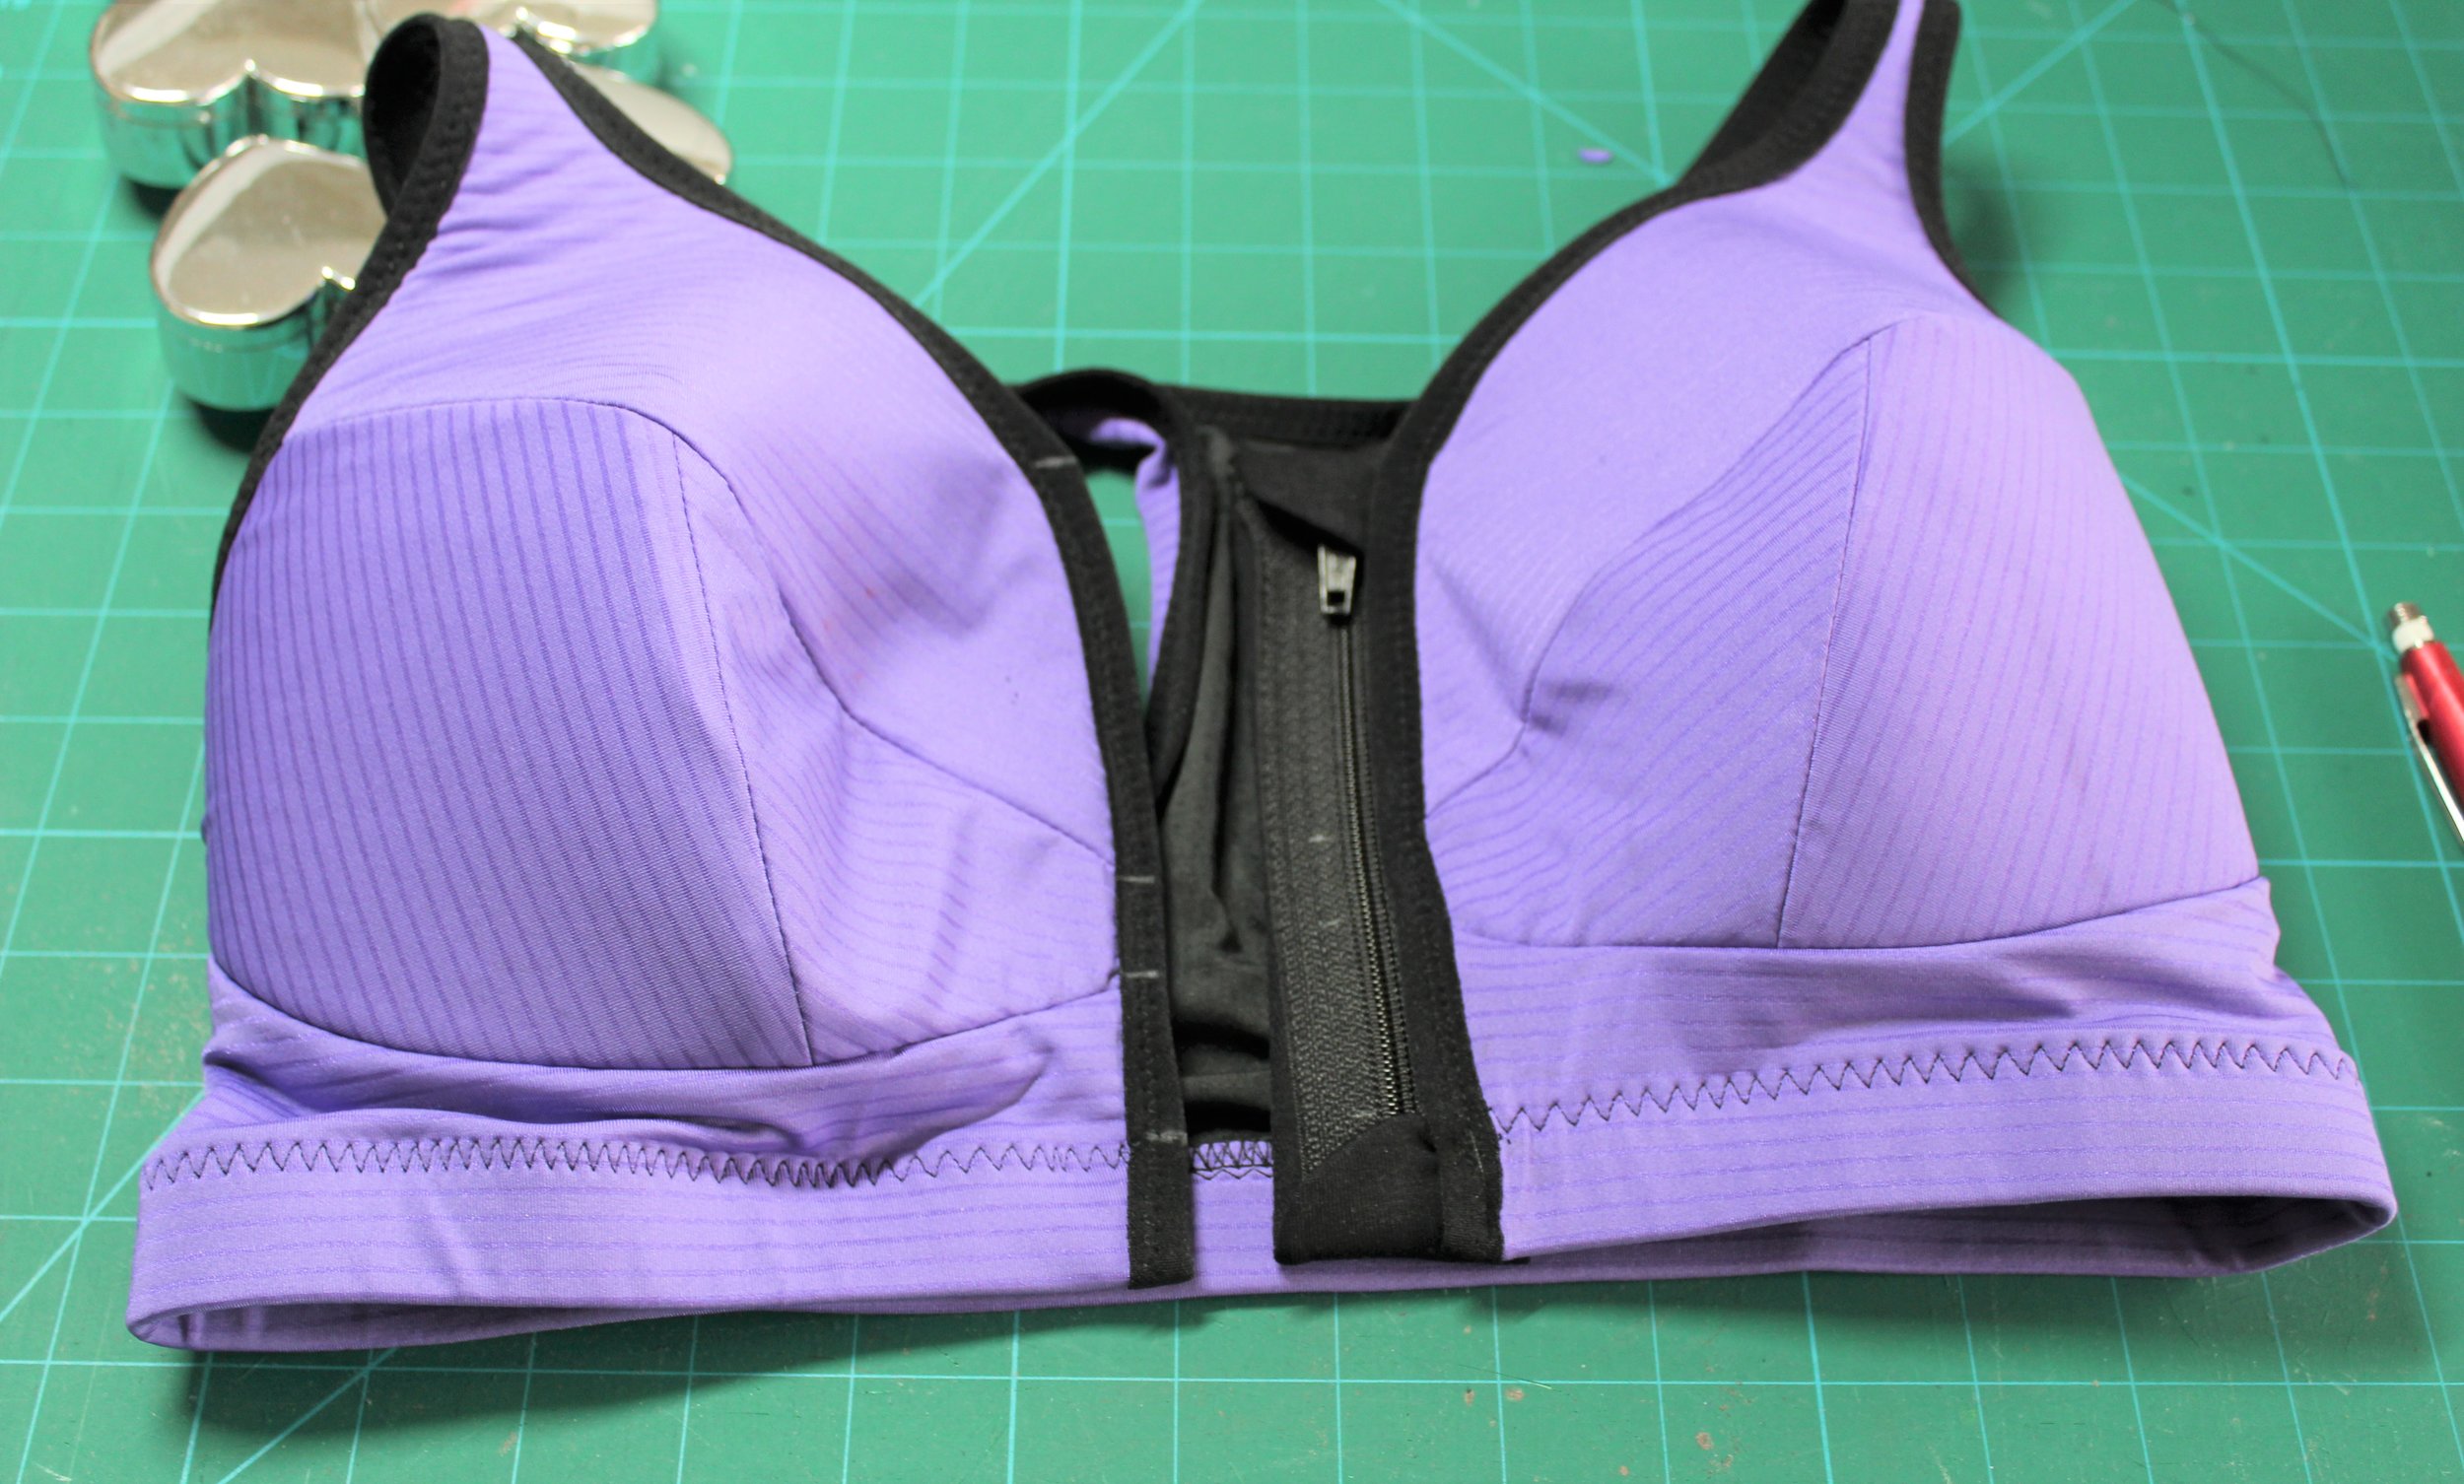
Whilst the zipper was up I placed the left side over the zip and marked both the zip and fabric so the top and various seams lined up. I taped up the left side, undid the zip and placed on the tape so that the marks lined up.
Well that went better than expected and works really well.
So what is the verdict. Although made as a test piece, and hence not my best sewing, it is a resounding success. I could easily do most of my workouts in this one. The fabric was bought by the weight from Abakhan and I have no idea of the composition, great for test versions, but know it is not the best for this purpose. Having recently read Melissa Fehr’s blog I know where I can get some great technical fabrics and can’t wait to make more and try the other back options. Next up as to be the Stride Athletic Tights so I can compare with the Pacifc Leggings.