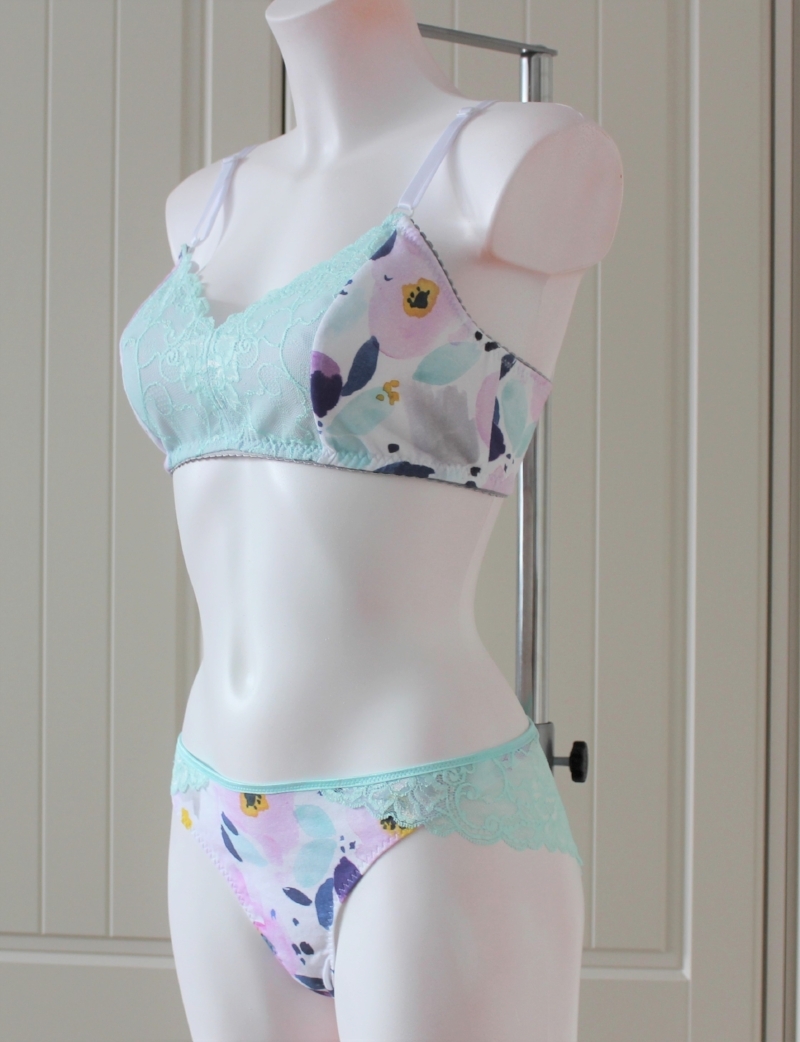
Summer Lingerie Part 3 - Evie la Luve Old Favourites - Rosie and Esme
So for the third make I wanted to use the lace I had in my stash to a make a pretty feminine set. The Esme is a very flattering fit and started my obsession with Evie la Luve patterns. It came in a deal with the Bella and is the first lingerie pattern I bought after taking the Beverly Johnson Craftsy classes. I am capable of drafting my own patterns but I do enjoy testing what is out there. I wanted to team up with a softer lace bralette so I went back to the Rosie which I have only made for my sister and thought would try for myself.


My first task is to mark the seam line for any lace pattern pieces so I can make sure it sits at the low point of lace (lopol) where it needs to match. This pattern has a centre front seam so it is important to be in the right place here. The top edge is less important but actually worked quite well here as well.

Although not called for in the pattern I lined the lace as well. I deliberated between nude and white but then thought about the lilac powernet (fabric piece from Sewing Chest). It looks really pretty underneath but the picture doesn't really pick this up. As usual I used a temporary adhesive spray to hold in place and then used some very narrow soft elastic to cover the edge, all giving extra support.
I fussy cut the side fronts and back to try to find sections with as much as the ice blue as I could as not as dominant as the navy or purple.
The pattern has you attach the band to the side front for both fabric and lining and then enclose the the centre front piece. I thought twice about doing this as I would normal enclose the cup in the band fabric and lining but went along with the pattern. This makes for a flatter side seam rather than having the bulk on one side.


Not only did I trim the seam allowance to 1/4" I also further trimmed the centre front piece as this seam was so bulky with all the lining. I pressed but didn't topstitch with a three step zigzag as in the pattern as I find that this can sometimes distort the fabric. However, sometimes you do need to do this if the layers don't lie flat enough. I hand basted the fabric to lining all around. Not only do the stitches come out easier it stops over stretching the fabric as machine basting can do.


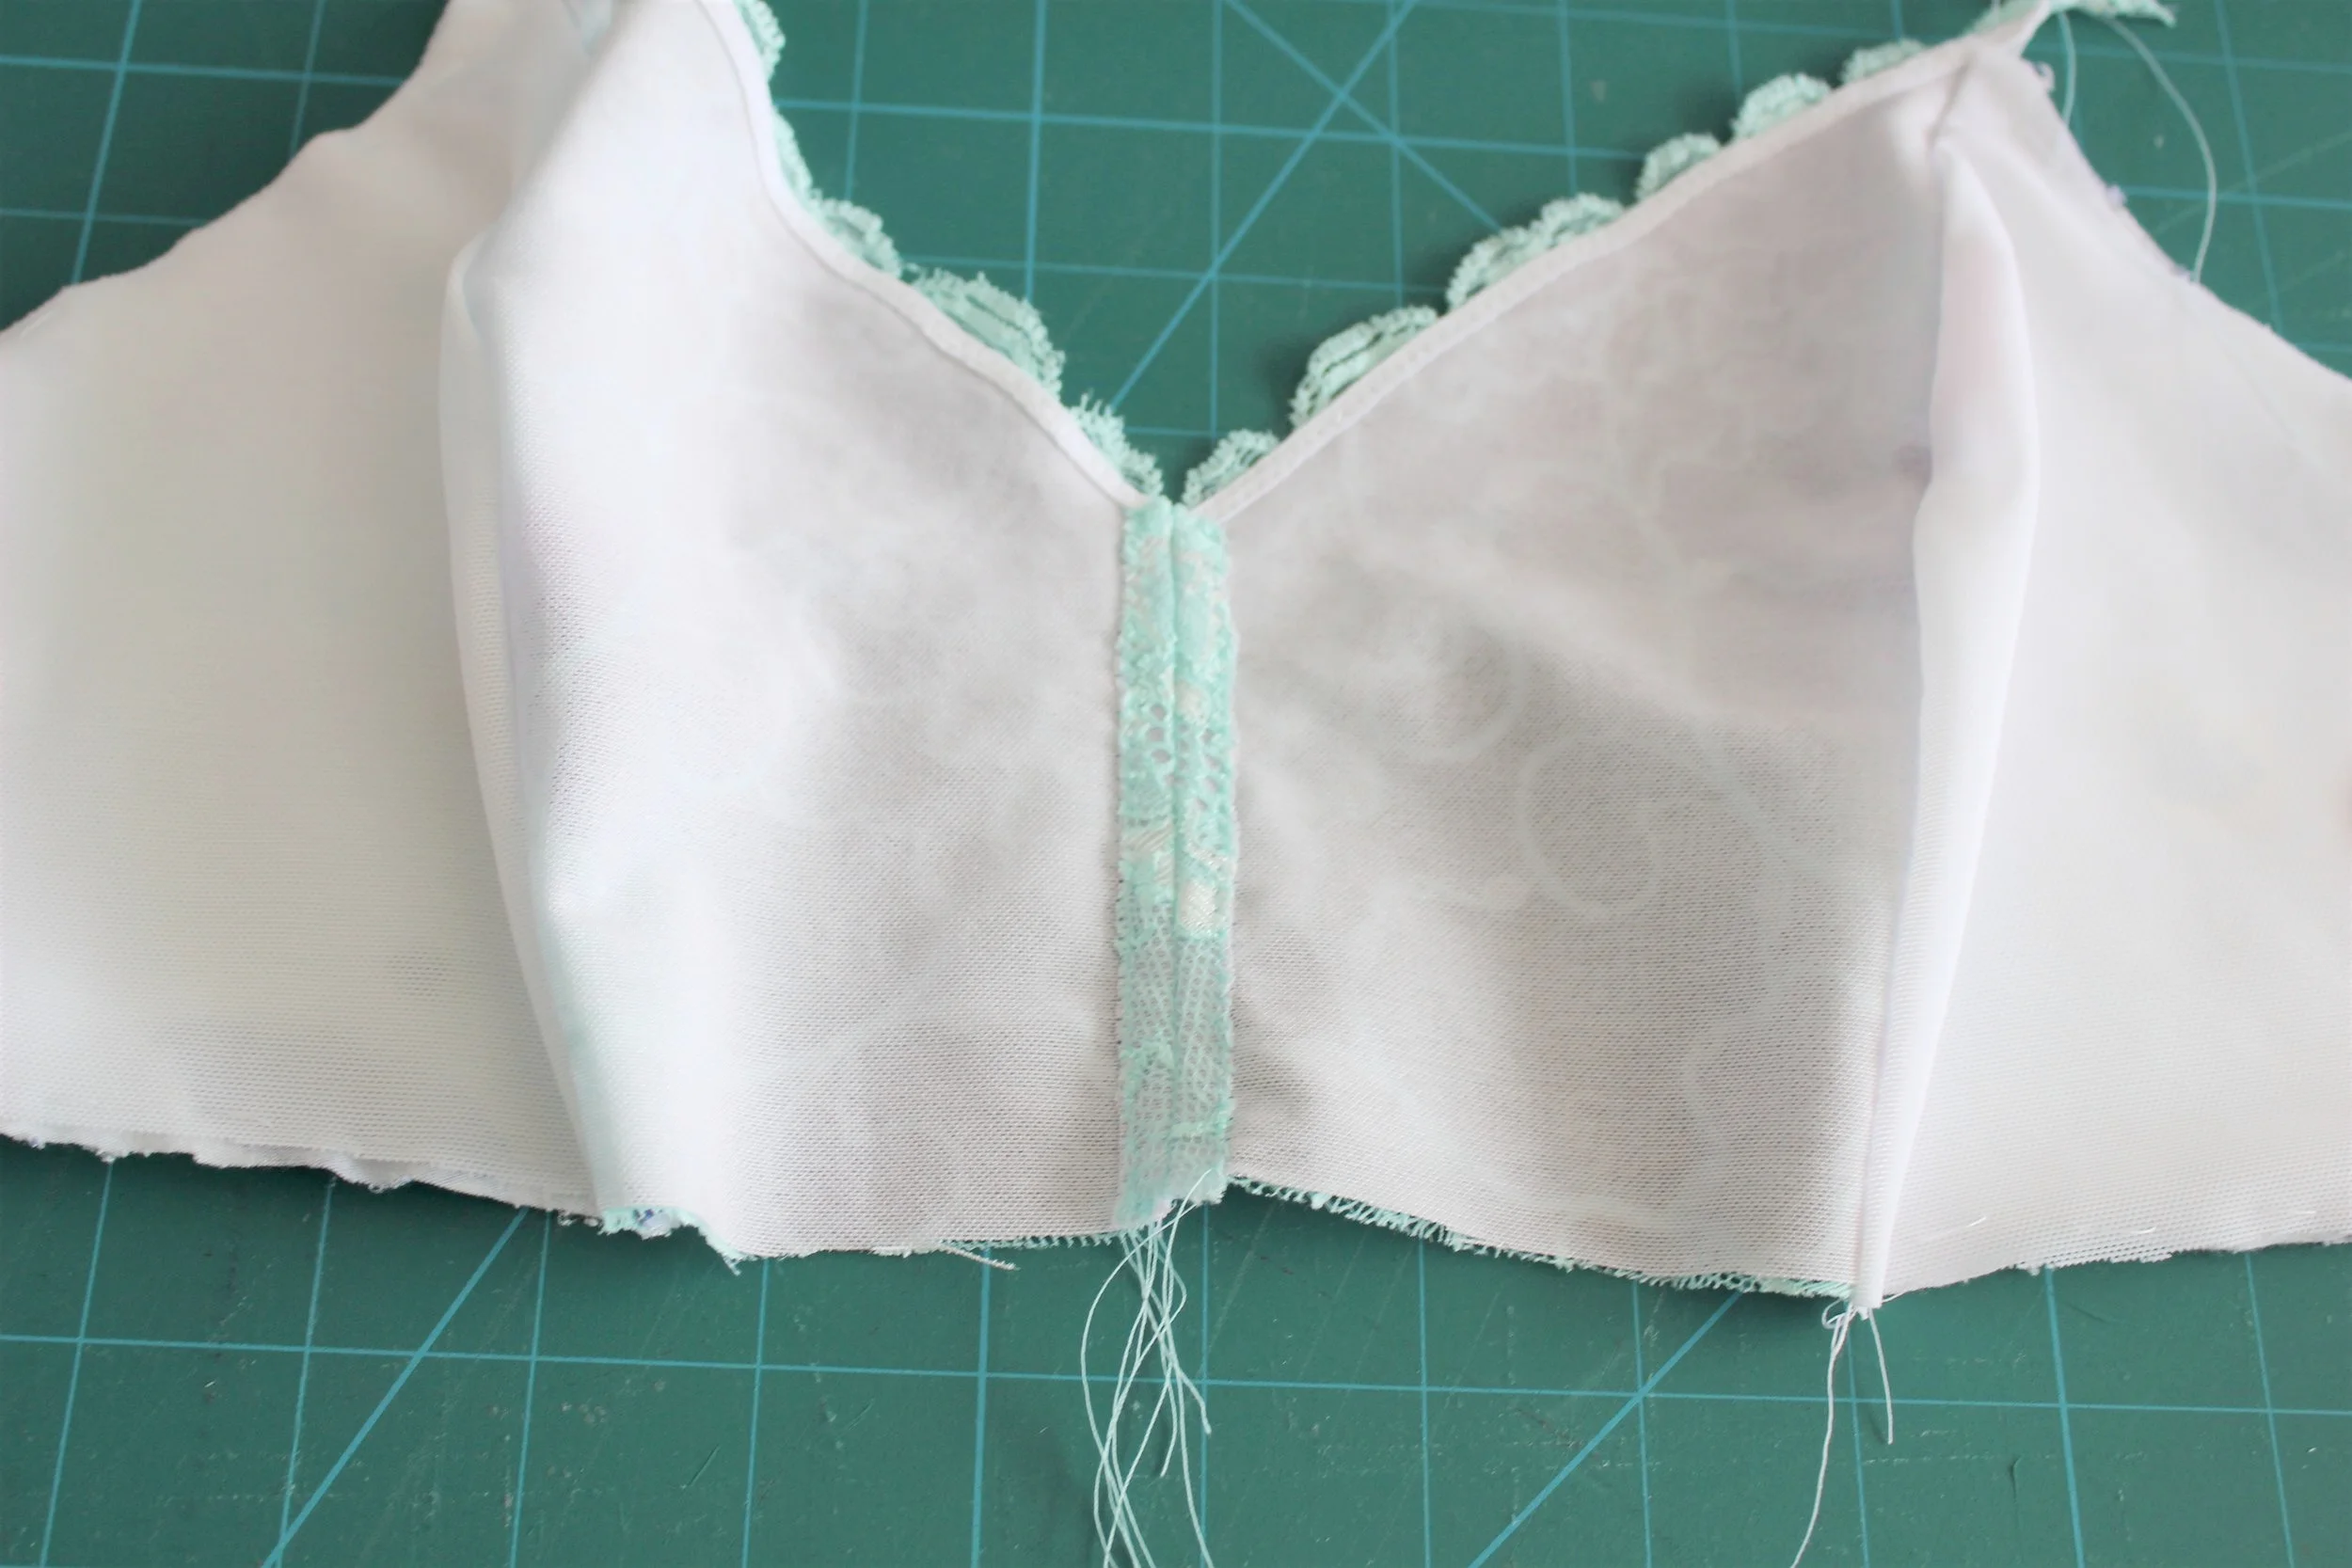
Then on to the centre front. It is so important that the lace matches perfectly. Starting off with Stitch N Tear really helps keep in place. So what to do with the open seam. The patterns says to overlock and press to one side. I have a major issue with this on lace as it often looks wrong from the right side when you can see the seam and doesn't always stay flat. My solution is to trim the seam down to 1/4" very neatly (rotary cutter and ruler) and then I used a small zig zag to catch the seam. You can't see this from the right side of the lace as the thread match is so good.


What colour elastic to use? Didn't want to use white or blue again so went with the grey (from a Fit2Sew findings kit). With just the picot edge showing this did pick up on the grey in the fabric. However, too dark to use for the straps. I did have some matt mint/ice blue strap elastic but didn't look right so went with white for the straps. The straps are made a little different using four rings and into two sections. Luckily I noticed that the pattern requires bigger rings on the front than the back. I assumed this was because there is too much bulk for the smaller rings used for the strap itself. Luckily I has some bigger white rings. I checked the fastener fit before I attached the elastic to the back band. For once no trimming necessary.

Then disaster. I didn't seem to have enough strap width fabric to go over the ring at the front. Just too much bulk. So I found white strap elastic the width of the ring. I cut two small strips and folded in half over the ring. I neatened the edge with a satin stitch, cut back to the stitching and then used fabric glue to attached to the fabric so that the top of the fabric sat just over the ring. Left to dry and did a row of stitching through all the bulk as well! Looks rather neat.
Moving on to the Esme which I have made a number of times in different fabrics. After frequent washes I noticed that leg openings become a little loose with time as there is no elastic applied just hemmed.
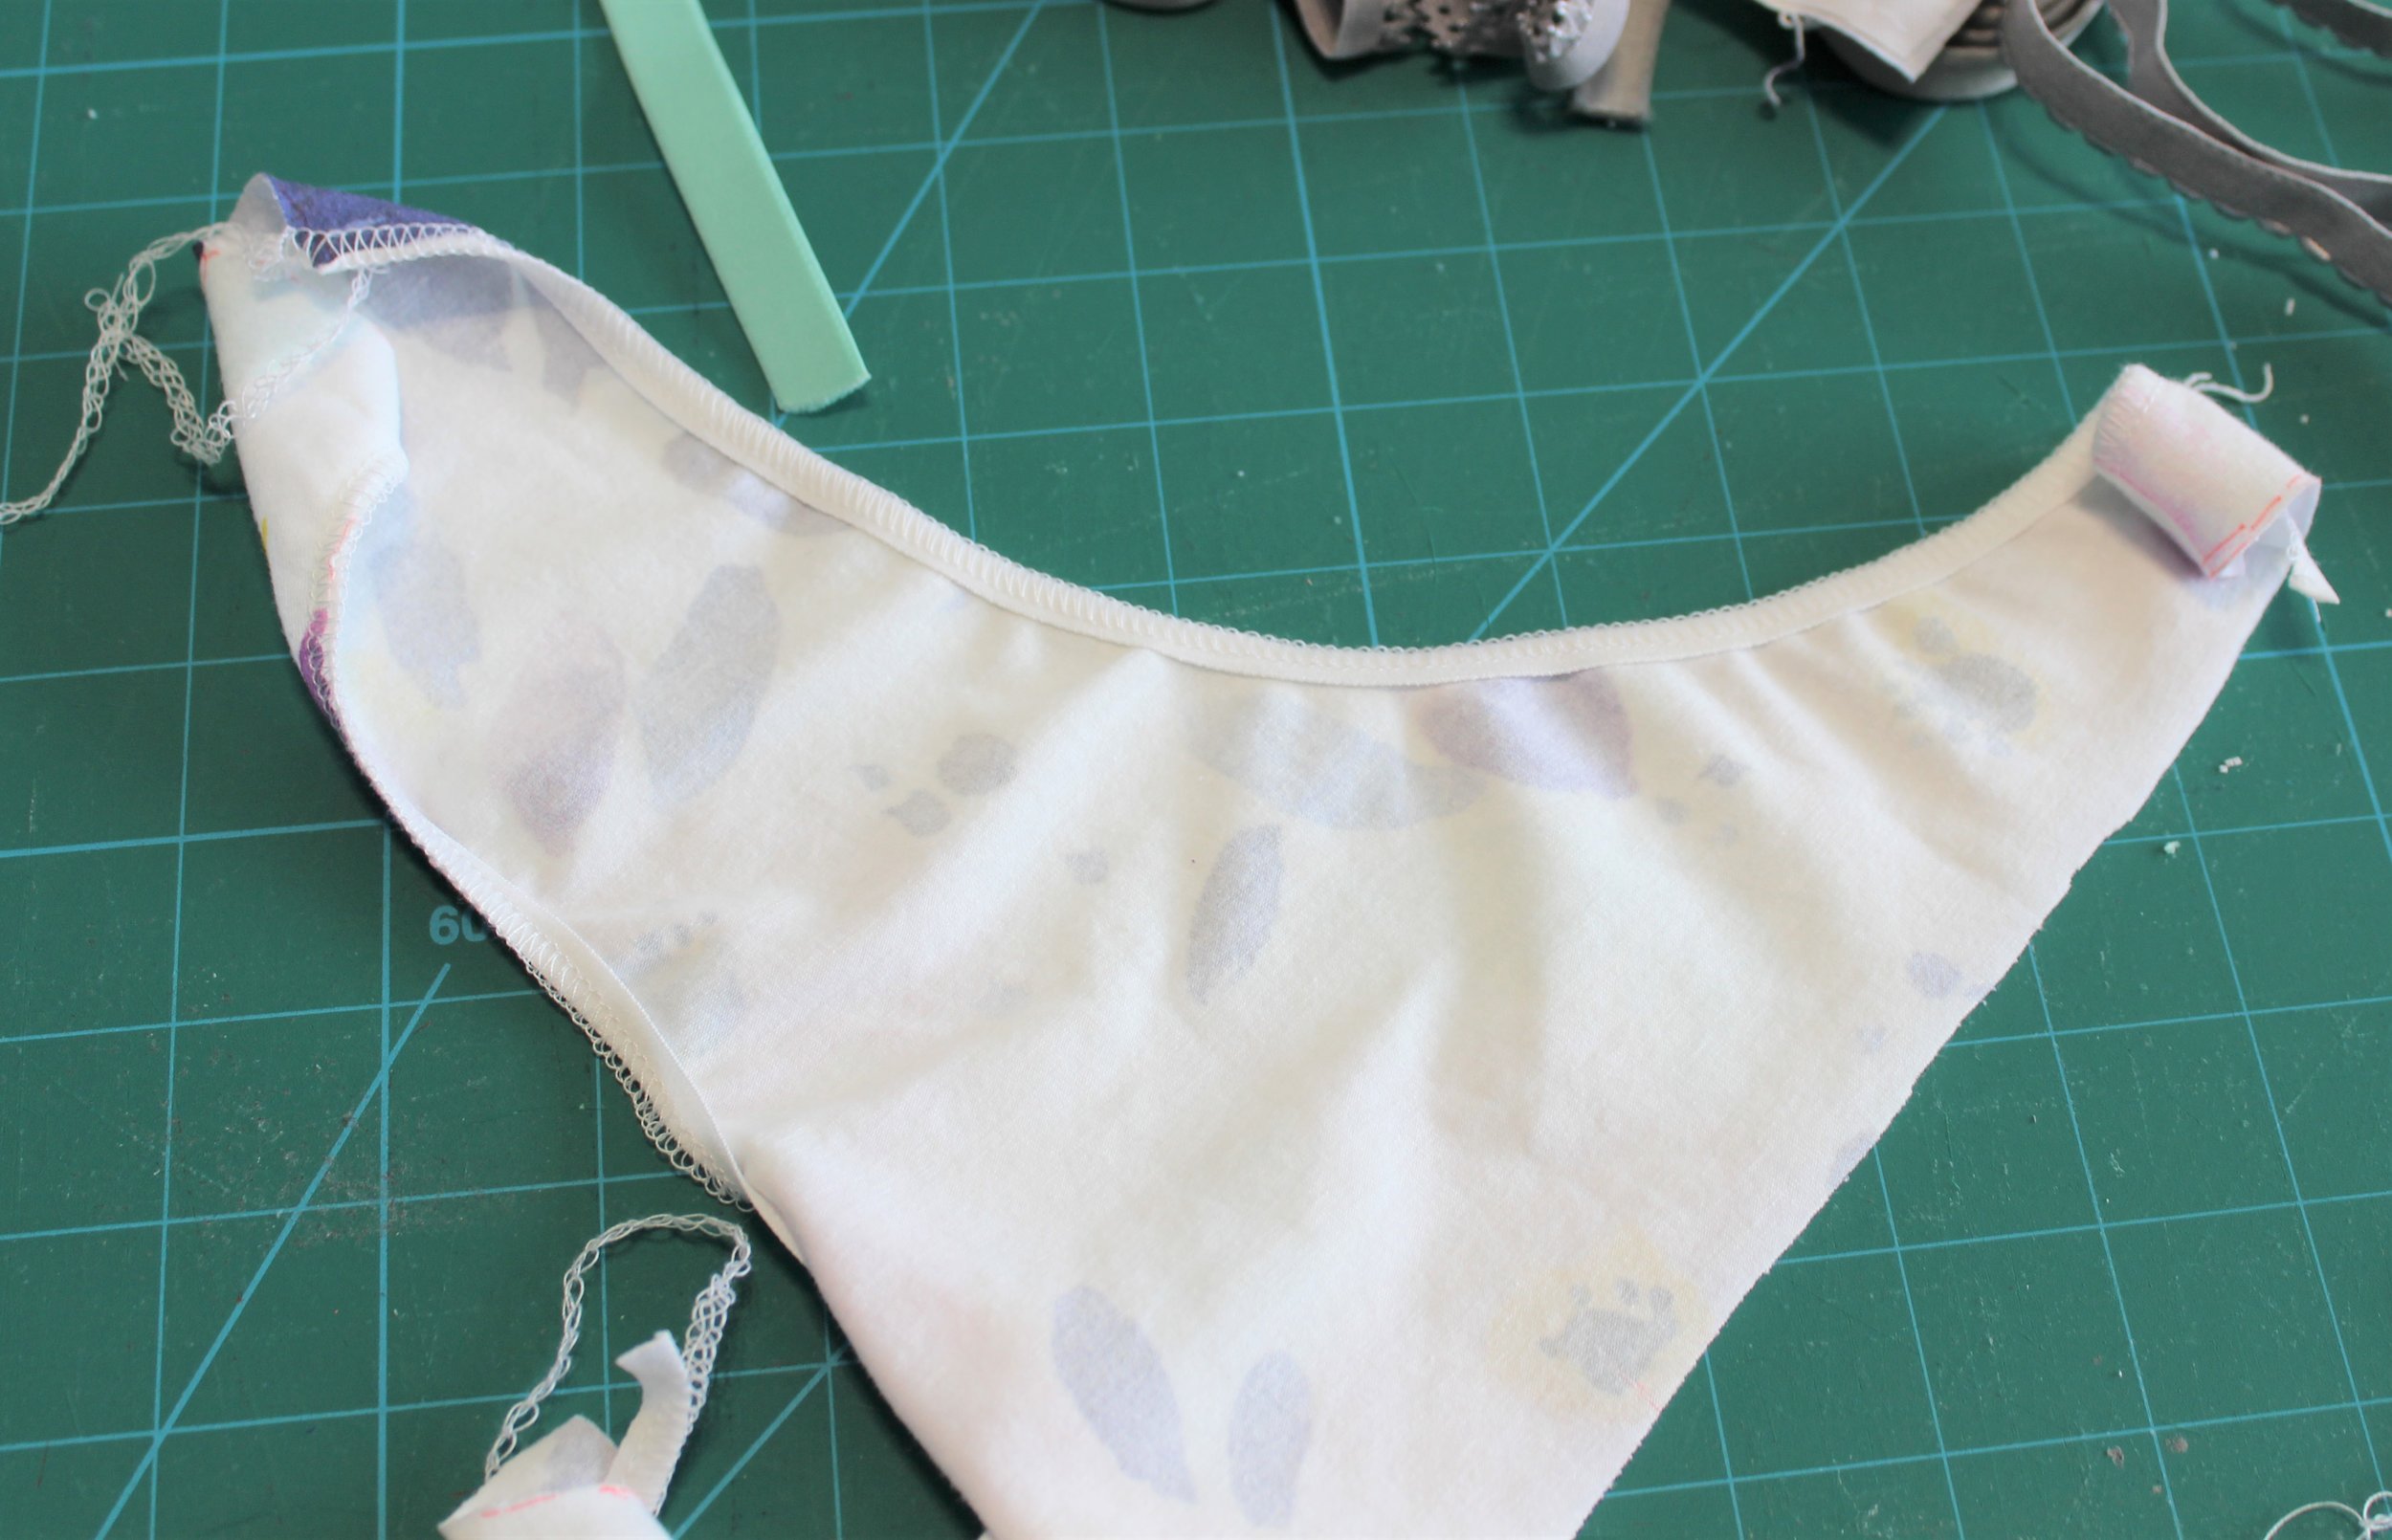
So this time I have used elastic for more prolonged wear. Then, rather than just overlocking the leg opening, I attached 1/4" soft elastic as I did this. Then you have an exact 1/4" to turn over for the hem without needing to pin. After first neatening the front edge with the overlocker I basted the gusset piece in place so you catch this when the hem is folded over. This creates less bulk than if included in the fold over for the hem.
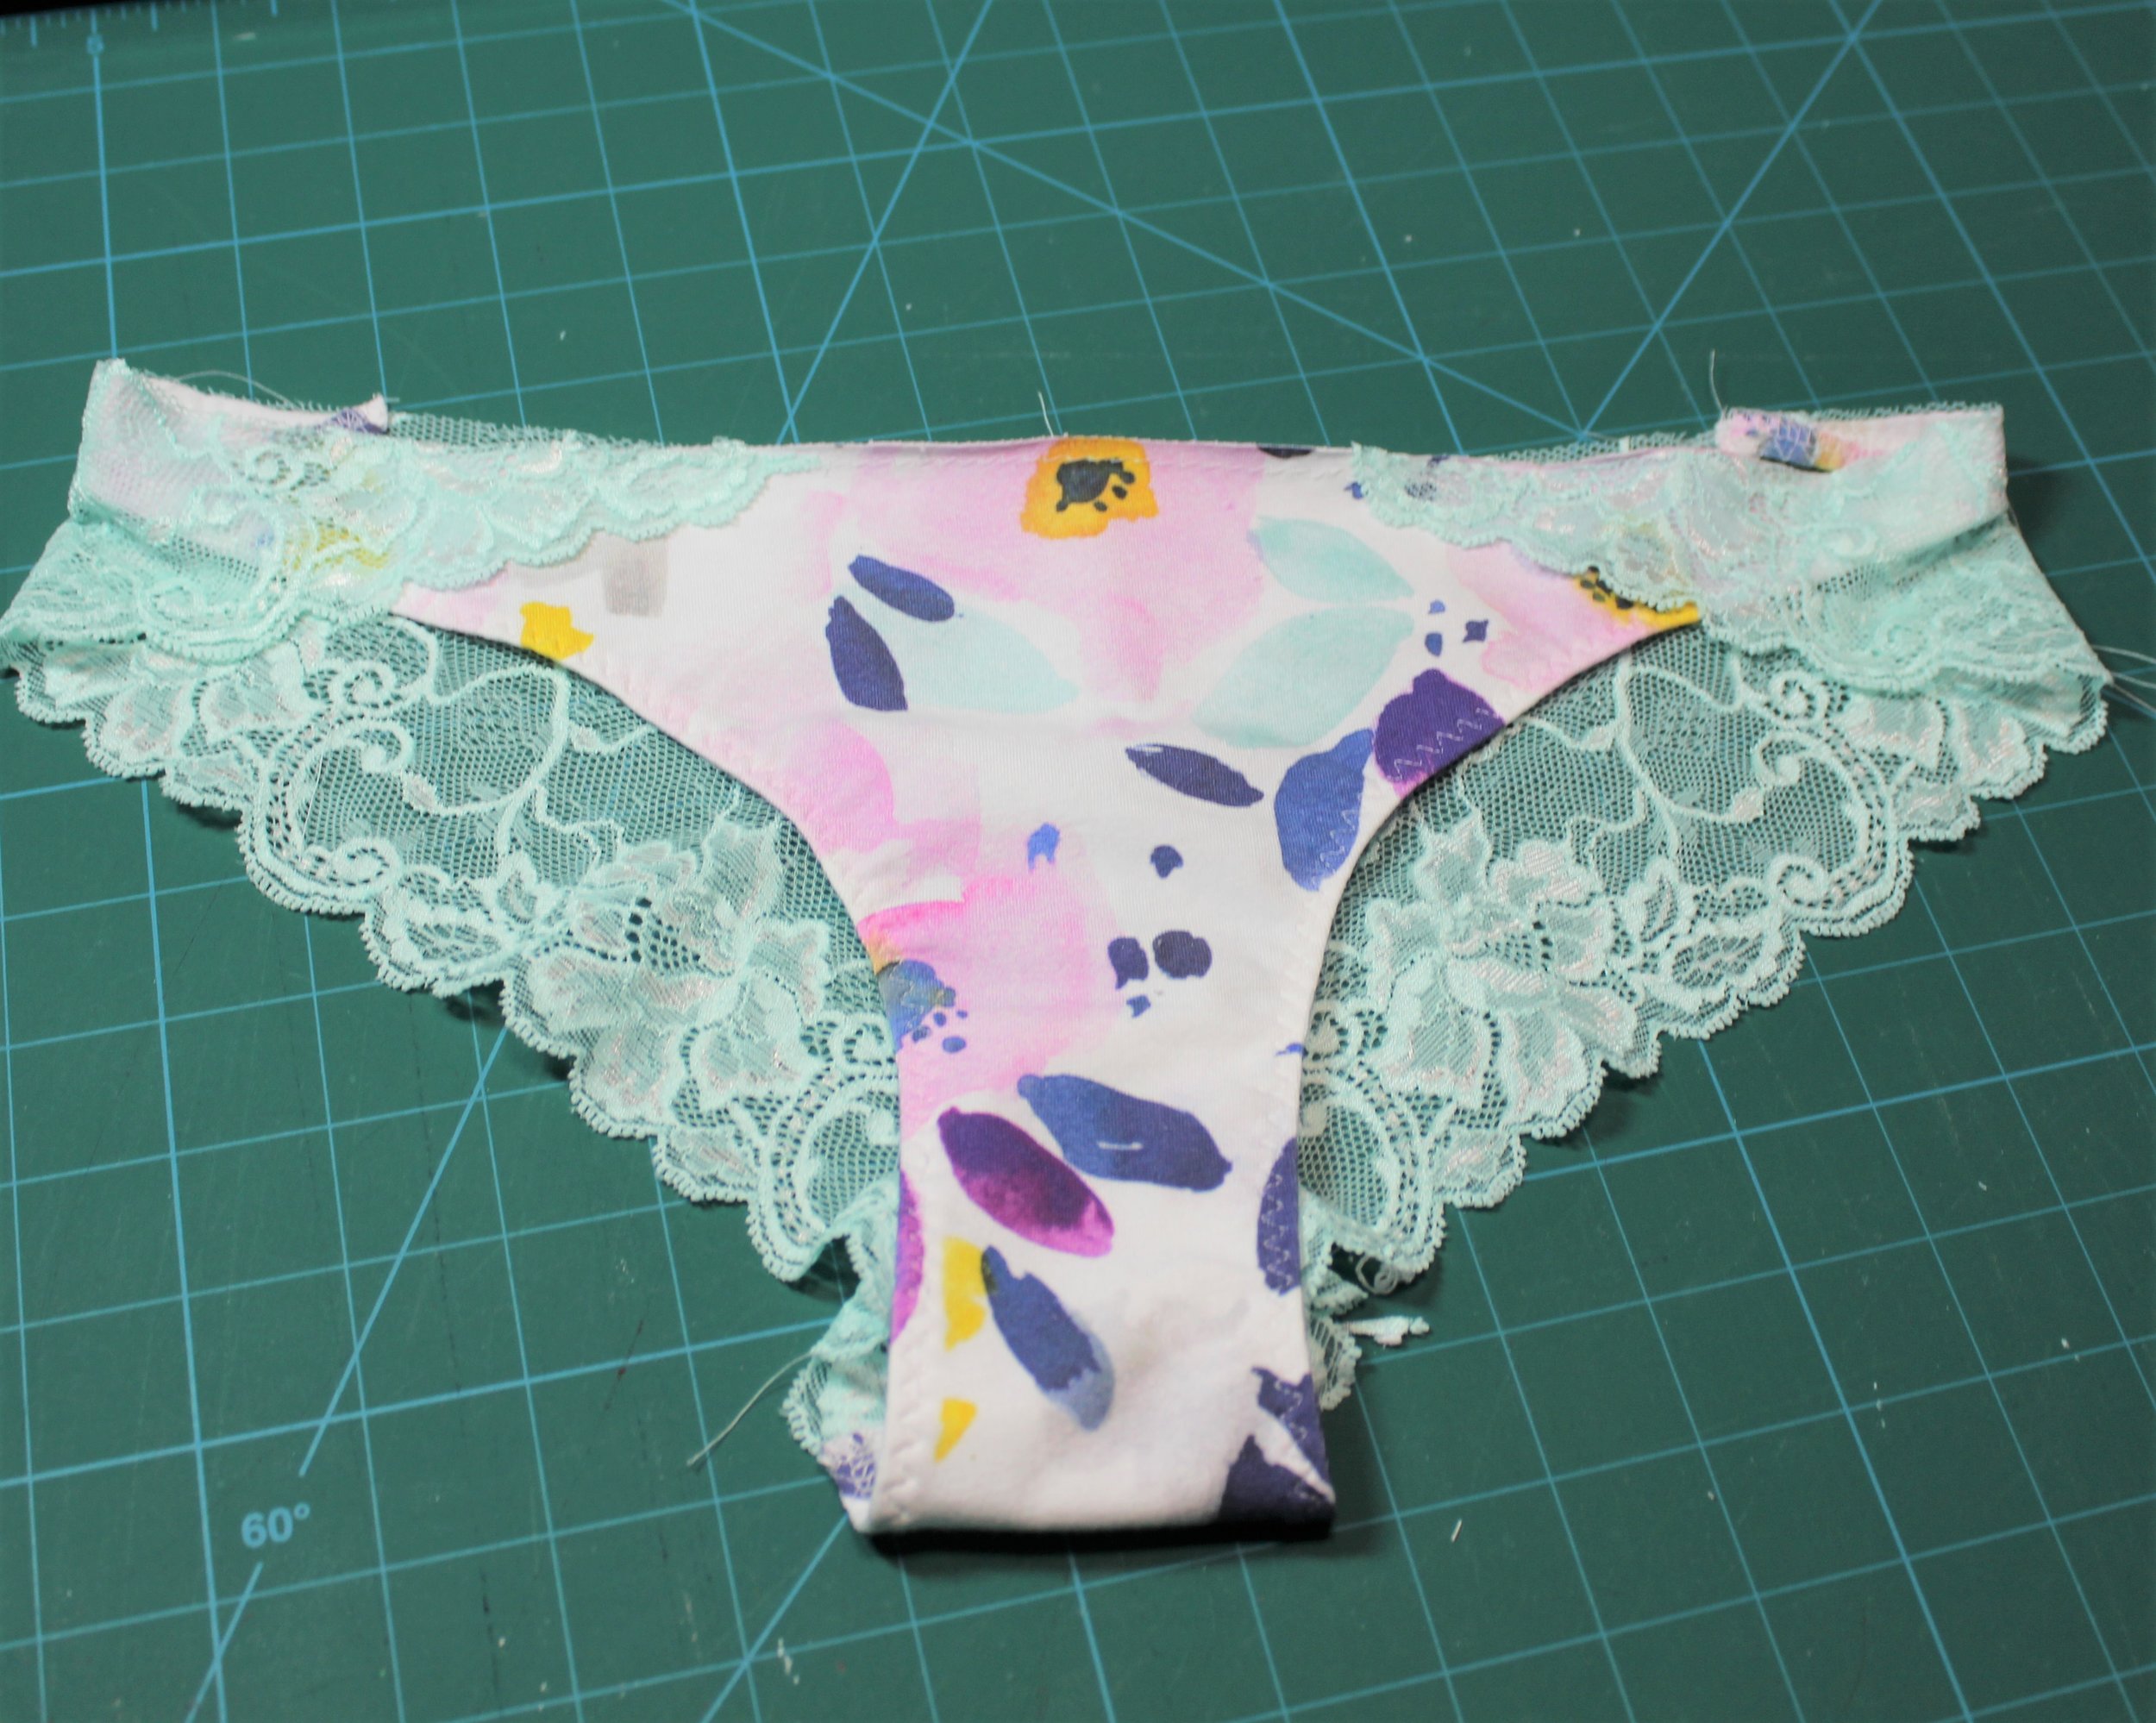
I cut the lace for the back lace pieces so that the low point of the lace was on the gusset seam allowance. Then I joined the lace pieces using a stretch stitch and neatened the edge with the machine double overcast stitch. After attaching the front to the back with the overlocker I did some securing sttches at each edge.
Then, the beauty of this pattern is that you can adjust the amount of overlap of lace over the fabric for the perfect fit. There is a guide point and for me this is just right. Just so pretty front and back.
As expected the Esme fit perfect. The Rosie looks fabulous and is going to be great for those long summer nights! Enough fabric for more?
